• Skip to primary navigation
  • Skip to main content
  • Skip to primary sidebar
  • Skip to footer

 logo

  • Recipes
    • Breakfast
    • Sides
    • Soup
    • Main Meals
    • Healthy
    • Dessert
    • Drinks
  • Eating Out
  • About Me
    • Privacy Policy
  • Resources
    • Must Have Kitchen Tools
  • Nav Social Menu

    • Email
    • Facebook
    • Instagram
    • Pinterest

Orange Blossom Cake

Jan 7, 2021 · Leave a Comment

Jump to Recipe
slice of orange cake on wooden platter with oranges in the background

A delicious moist and fluffy orange blossom cake made with plenty of orange flavor and a hint of orange blossom water, this is one comforting and easy cake!

Why should I make this cake?

It’s DELICIOUS. It’s adapted from a Lebanese food blogger I hugely admire, Mrs. Clueless, and it’s actually a recipe passed down to her from her Teta (grandma) which means you know it’s legit. You could say it’s a Lebanese orange cake and the orange blossom helps enhance that!

The cake is moist but still airy and fluffy due to a very clever use of ingredients, which we’ll discuss further in the ingredient section.

It’s easy to make, and doesn’t required any layering, frostings, or anything too complicated. It’s a simple coffee/loaf style of cake.

There’s plenty of orange flavor that’s enhanced with the orange blossom water. Pairs so well with coffee or tea!

It’s nostalgic and homey and will be popular with adults and kids alike!

whole orange blossom cake with oranges on a wooden board

What is orange blossom water?

Orange blossom water is a very commonly used flavor in Middle Eastern desserts. Orange blossom water is water distilled with the essence of the flowers from orange trees. You can see why it’ll pair so naturally with citrus desserts! It’s similar to rose water in a way, and commonly used alongside rose water, but it has a distinctive floral/citrus flavor.

Where can I find orange blossom water?

Check online or in Middle Eastern supermarkets! Any good one should carry it, and you use so little that a bottle will last you a very long time.

What ingredients do I need to make orange blossom cake?

ingredients needed to make orange blossom cake

Orange zest and orange juice: A method I employed was to rub the orange zest into the sugar, which gives you wonderfully fragrant orange scented sugar and really helps release the oils in the zest for more flavor.

Orange juice is another major moistening and flavor carrying agent in this cake. I highly recommend using fresh squeezed orange juice.

Vanilla Extract

Orange blossom water: you can use 1-2 teaspoons of orange blossom water, the result will be subtle regardless. If you are a little worried baking with it for the first time try adding just 1 tsp.

Vegetable Oil and Butter: This is the best of both worlds! Butter gives that wonderful flavor, and oil gives unbeatable moistness.

Flour All purpose works great.

Baking Powder: to lift the cake and give it some rise

Eggs, separated: This is a great technique where the egg whites are whipped separately and folded into the cake batter giving such beautiful fluffiness to the cake. It’ll make it light and airy!

How do I make this cake?

orange zest scented sugar in white bowl
  1. Rub the orange zest into the sugar. Use your fingertips, and work in the orange zest so that the sugar becomes moist, fragrant and orange scented. Lovely!
  2. In the bowl of a stand mixer, whisk together the egg yolks and this orange sugar, as well as the vanilla extract and orange blossom water. Mix on medium high speed for a few minutes until paler, thick and fluffy.
  3. Add in the oil and butter, making sure the butter is well softened so it incorporates smoothly. Mix until combined.
  4. Add the flour and baking powder, mix until combined.
  5. Mix in the orange juice until combined. The batter will be a little thick.
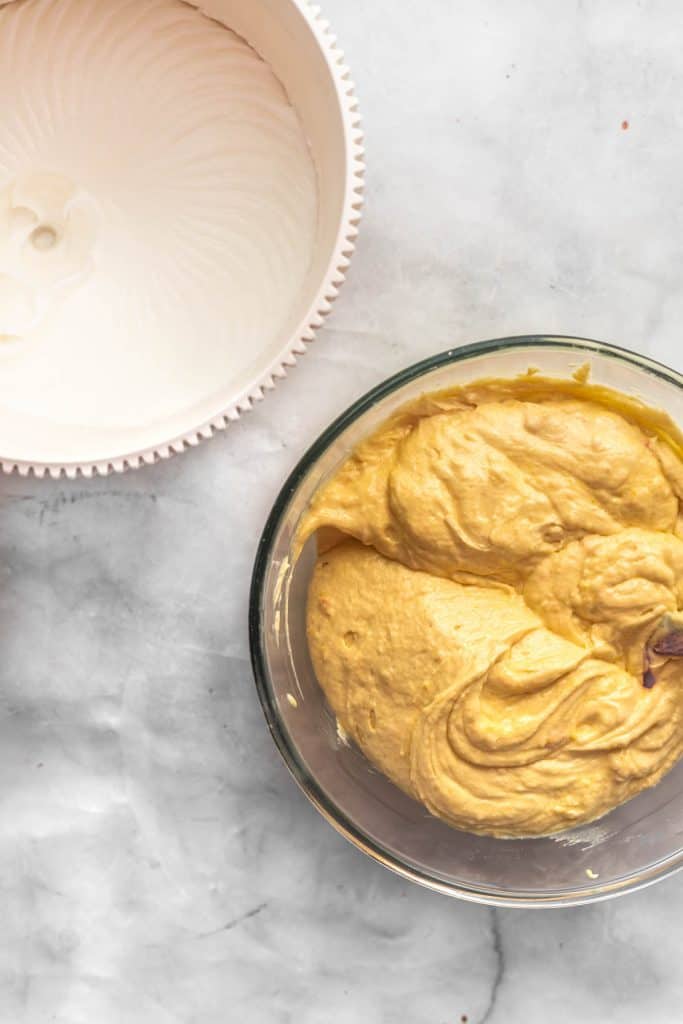
  6. It’s time for the egg whites! Whisk the egg whites until fluffy, thick peaks form. They’ll be sturdy enough to hold their shape if you lift some up with a spatula. This is much easier to do with an electric mixer, so if you have a separate electric hand mixer use that. Otherwise, remove the cake batter from the existing stand mixer bowl into another large bowl, clean it and dry the stand mixer bowl thoroughly, and whip the egg whites with the same stand mixer you were using.
  7. Fold the egg whites into the cake batter gently with a rubber spatula. The aim is to keep the structure of the egg whites, without deflating them so they can lift up the cake. I like to do this in three different additions to make it easier to mix in.
  8. Pour finished cake batter into a prepared pan and bake at 350 F (180C) until done.
orange cake batter being mixed up in a pyrex bowl

How do I know when the cake is done?

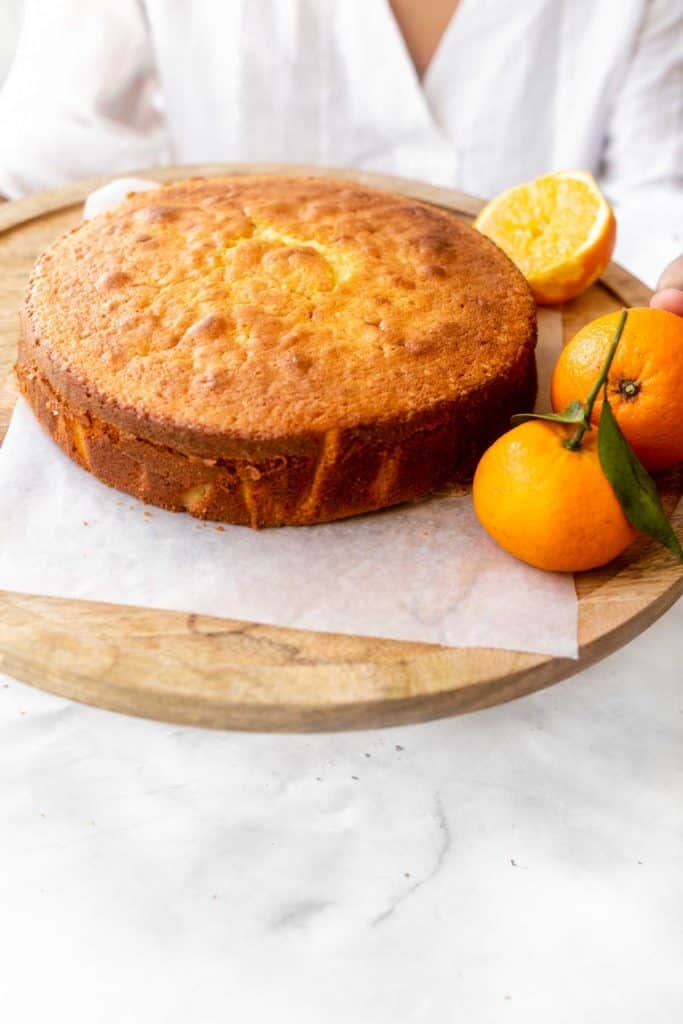
The top will be golden brown, the sides might be pulling away from the cake pan, and the top will be springy to the touch. Most importantly, a toothpick inserted in the center will come out clean without any moist batter.

If the top is browning too quickly while the inside is still raw, loosely tent a sheet of aluminum foil over the top of the cake.

orange blossom cake in springform pan

Tips and tricks for cake success:

person wearing white carrying orange cake on a tray

Make sure the butter is soft. Take it out a good 30 minutes before starting with the recipe. It’ll be hard to incorporate it if it isn’t at room temperature, especially since it isn’t being creamed directly with the sugar.

Don’t over mix once you add the dry ingredients. This will overdevelop the gluten in the flour which could leave to a tougher cake.

To make sure egg whites whip properly, it’s very important to whisk them in a clean, dry bowl. Any grease in the bowl will interfere with the whipping process and they won’t form stiff peaks.

Make sure you are folding in the whipped egg whites very gently. You want to maintain the fluffiness of the egg whites which will in turn lead to a fluffy cake.

What to serve with an orange cake:

top down shot of orange blossom cake with slice being cut

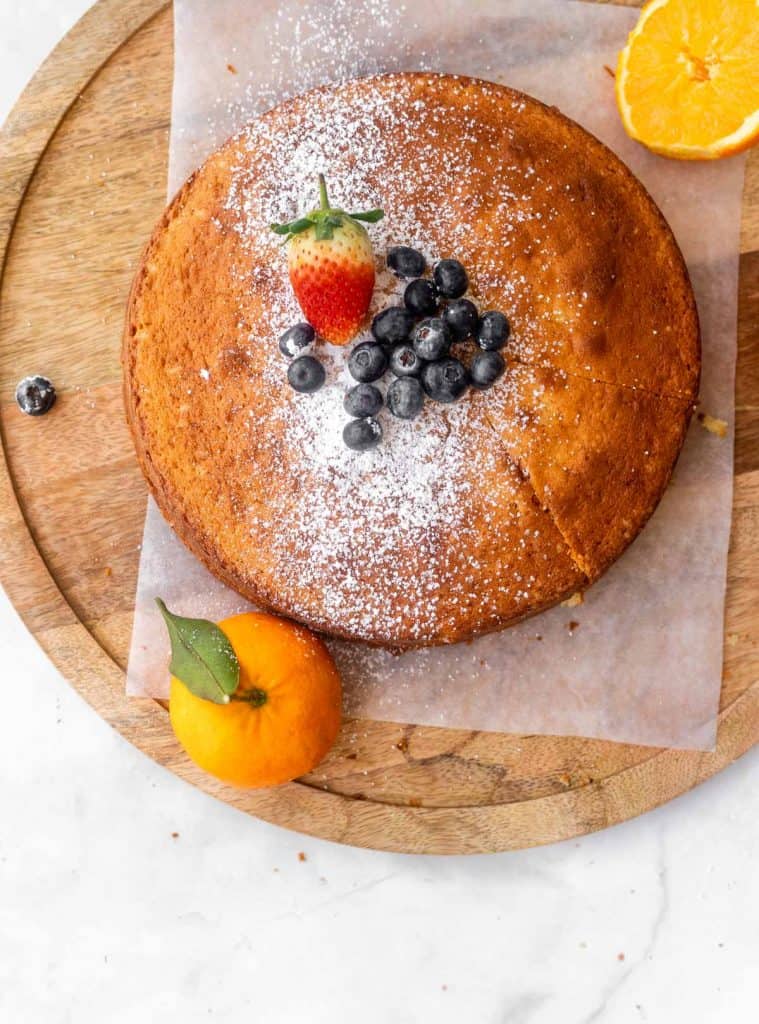
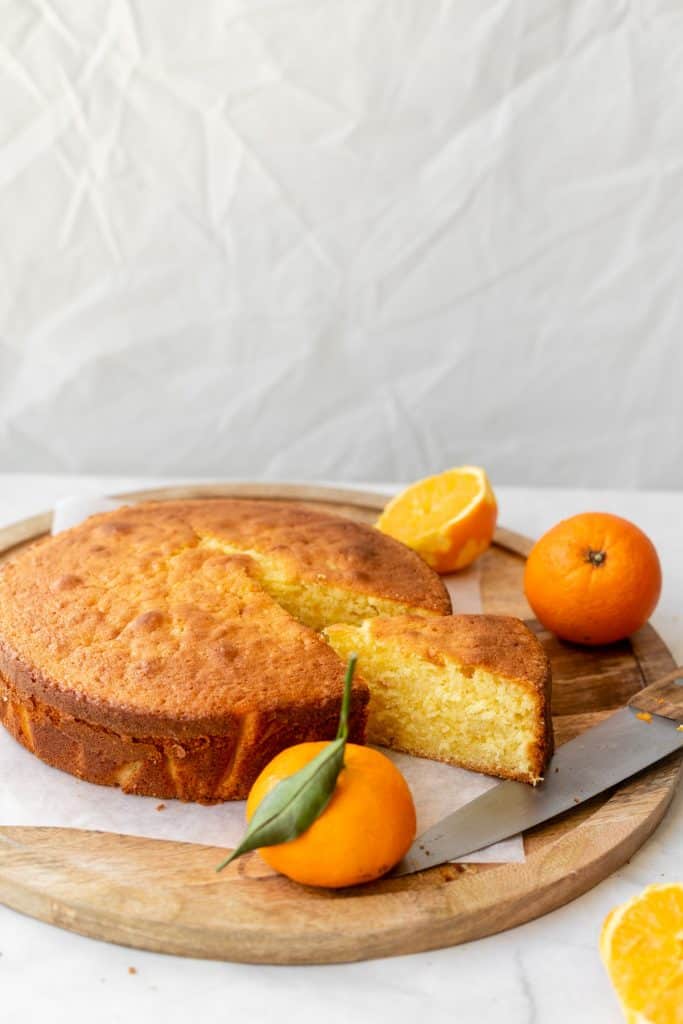
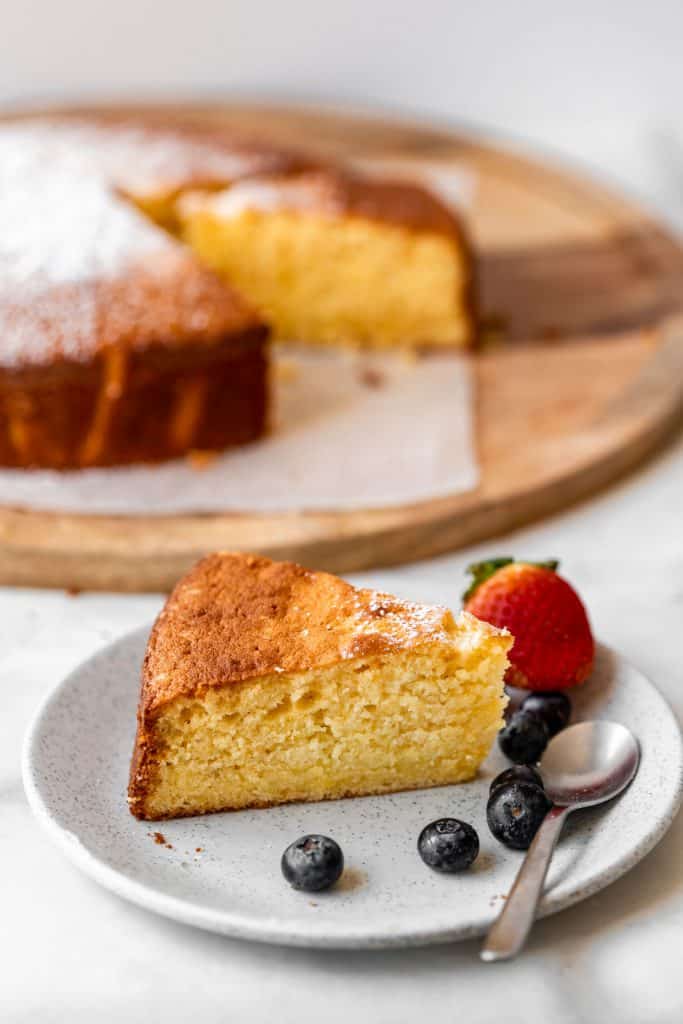
This is beautiful as is, but you could dust some icing sugar on top. You could also serve with berries like I did for even more fruity impact.

Another option is a little sweetened whipped cream on the side. You can also try a thin orange marmalade glaze on top like the one used in this gluten free orange cake, or a chocolate ganache like the one in this chocolate orange cake.

zoomed in photo of orange cake on a plate with berries

Storing leftover orange cake

Leftover cake will last tightly wrapped at room temperature or in the fridge (if it’s too humid or hot) 4-5 days. I prefer letting my slice come to room temperature before eating. This cake would freeze beautifully too for up to 2 months tightly wrapped.

close up photo of slic eof orange cake with a spoon being taken out of it

If you liked this recipe, you might like:

Gluten free orange cake

Chocolate orange cake

Lemon turmeric cake

Strawberry Poke cake

a slice or orange cake with berries on a plate and whole cake in background

Orange Blossom Cake

The perfect simple orange cake with a fluffy moist texture, enhanced with a hint of orange blossom water. This is a delight!
Print Pin
Rate
Course: Dessert
Cuisine: Middle Eastern
Keyword: cake, orange
Prep Time: 10 minutes
Cook Time: 55 minutes
Servings: 9 people
Calories: 429kcal
Author: Farah Abumaizar

Ingredients

  • 4 eggs, room temperature and separated (yolk from white)
  • 1 1/2 cups sugar 300 g
  • 1.5 tsp vanilla extract
  • 1-2 tsp orange blossom water
  • zest of 2 oranges
  • 1/2 cup vegetable or canola oil
  • 1/2 cup room temperature butter 113 g
  • 2.5 cups all purpose flour 312 g
  • 2 tsp baking powder
  • 1 cup fresh orange juice

Instructions

  • Preheat oven to 350 F (180C) and prepare your cake pan by lightly greasing and lining with parchment paper or flouring. I used a 9 inch springform pan, you can also use a bundt cake.
  • Using your fingertips, work the orange zest into the sugar until the sugar has moistened and turned fragrant and changed into a pale yellow/orange color.
  • In the bowl of a mixer fitted with paddle or whisk attachment, mix the egg yolks, orange zest scented sugar, vanilla, and orange blossom water on medium high speed for 2-3 minutes or until pale yellow and fluffy.
  • Add the oil and the butter and mix until well combined.
  • Add the flour and baking powder and mix until just combined, then add the juice and mix until combined.
  • In a separate bowl (either with a handheld mixer, or transfer the cake batter to another bowl and thoroughly wash and dry the mixer bowl) use an electric whisk to whisk the egg whites on medium high speed for 2-4 minutes until they form peaks that hold their shape.
  • Fold the egg whites into the cake batter with a rubber spatula, I like to do this in three additions. Take care not to deflate the egg whites.
  • Pour batter into prepared cake pan and bake for 50-60 minutes or until skewer inserted in the center comes out clean. If the outside of the cake is browning too rapidly and the inside still isn't cook, cover loosely with foil for the remainder of the baking time. Start checking at 40 minutes, every oven is different.
  • Cool before unmolding from the pan and serve plain, dusted with powdered sugar, or with whipped cream and berries. Delicious!

Notes

Recipe adapted from the incredible Mrs. Clueless.
Tried this recipe?Mention @everylittlecrumb or tag #everylittlecrumb!

Nutrition

Calories: 429kcal

Your embed Jumprope code:

Orange Blossom Cake by everylittlecrumb on Jumprope.

Did you make this? Tag @everylittlecrumb or hashtag #everylittlecrumb and I’ll share your images!

Dessert, Recipes

Previous Post: « Arayes
Next Post: Pink Hummus »

Reader Interactions

Leave a Reply Cancel reply

Your email address will not be published. Required fields are marked *

Recipe Rating


Primary Sidebar

Get more stuff

Subscribe to our mailing list and get interesting stuff and updates to your email inbox.

Thank you for subscribing.

Something went wrong.

we respect your privacy and take protecting it seriously

FeedFeed

Featured Recipes

Tamriyeh

Nescafe Cake

Berries and Cream Sara Lee Cake

Kebab Karaz

Eggplant Fatteh

More

Footer

everylittlecrumb

Farah Abu Maizar | Food Lover
You have to know, if I post a chicken recipe it me You have to know, if I post a chicken recipe it means it’s reaaaaaally good. This copy cat Halal guys chicken and rice is unbelievable dish! I got the turmeric rice recipe from @seriouseats and its buttery and perfectly spiced and fluffy and addictive, topped with juicy grilled spiced chicken cubes and a tangy, creamy dressing, tomatoes and parsley. AMAZING! Recipe below and in the @tamimimarkets catalogue❤️.

INGREDIENTS:

For the chicken marinade:
900 g chicken breasts
1/4 cup olive oil
2 tbsp lemon juice
1 tbsp white vinegar
3 garlic cloves, minced
1 tsp salt
1/2 tsp black pepper
1 tsp oregano powder
1 tsp seven spices
1/2 tsp ginger powder
1/2 tsp cumin powder
1/2 tsp paprika powder

For the white sauce:
3/4 cup Greek yogurt 170g (6oz)
1/2 cup mayonnaise 115 g
1 tbsp white vinegar
1 tbsp water
1 tsp lemon juice
1-2 tsp sugar
1/2 tsp salt
1/4 tsp black pepper

For the rice:
2 tbsp unsalted butter
1/2 tsp turmeric powder
1/4 tsp cumin powder
1 1/2 cups basmati rice, soaked for 20 minutes then rinsed
2 1/2 cups chicken stock or 1 stock cube dissolved in 2.5 cups hot water
salt and pepper to taste, a pinch of each

To assemble:
1 chopped tomato
handful chopped parsley
sriracha sauce

INSTRUCTIONS: 
For the chicken:
In a bowl, mix all the ingredients for chicken marinade. Add chicken breast and toss to coat evenly. Cover and marinade for 1-2 hours.

Heat 1 tbsp oil in a large skillet on medium high heat, and cook chicken for 5-6 min each side, or until golden brown and cooked.
Remove chicken to a cutting board, and rest for 10 minutes, before chopping roughly into 2 inch cubes.

For the white sauce:
Mix all ingredients and store in the fridge until ready to serve.

For the rice:
Add butter to a large saucepan over medium heat. Once melted, add the turmeric and cumin, and stir for 1 minutes.
Add the rice, and toast the rice by stirring for 4 minutes. Add chicken stock, salt and pepper to season. Stir and bring to a boil, then reduce heat to a simmer, cover and cook for 15 min, then set aside 15 min and fluff with a fork.

To assemble:
Place the rice in your serving platter, top with the chicken, the white sauce, and chopped tomatoes and parsley. Sriracha too!
This is my go to baked creamy cheesecake. It’s s This is my go to baked creamy cheesecake. It’s so good and rich and easy, topped with a sweet and tangy simple strawberry sauce (sauce recipe from @sallysbakeblog ). I used my new @kenwood_bahrain stand mixer and it was excellent- gave me silky smooth lump free filling. Another winner for my @digitrolley collab- all my new appliances are from them❤️ Check IGTV for recipe video!

For the strawberry topping:
-1 tbsp cornstarch
-3 tbsp water
-450 g strawberries, halved (big pack)
-zest and juice from 1/2 small lemon 
-1/4 cup (50g) sugar

-Whisk together cornstarch and water, then add to a saucepan along with all other ingredients, over medium heat.
-Bring to a simmer, stirring constantly and breaking up strawberries as they cook, 5 minutes or so until thickened. Set aside to cool, can be stored in fridge up to one week.

For the cheesecake:

Ingredients
For the crust:
* 250 g crushed digestive biscuits 2 cups 
* 135 g melted butter 1 stick and 1 tablespoon
* 1/2 tsp cinnamon

For the cheesecake:
* 900 g cream cheese (3 3/4 cup)
* 1 1/2 cup white sugar 300 g
* 3/4 cup milk, room temp
* 4 eggs, room temp
* 1 cup sour cream 240 g
* 1 tbsp vanilla extract
* 1/4 cup all purpose flour 32g

Instructions:

For the crust:
* In a mixing bowl, combine crushed biscuits, the melted butter, and the cinnamon with a fork until crumbs are moistened evenly throughout. Press along the bottom and sides of a lightly greased 9 inch springform pan. Let the crust chill a little in the fridge while you prepare cheesecake.

For the cheesecake:
-Preheat the oven to 180 C
-In  stand mixer, combine the cream cheese with the sugar in a large bowl and mix on medium speed until well combined and fluffy. Blend in the milk, then add the eggs one at a time, mixing briefly after each addition.

-Mix in sour cream, vanilla and flour until smooth. It may be easier to sift in the flour.

-Pour filling into prepared crust. Bake at 180 C for 1 hour, then turn off the oven and leave cheesecake inside for another 5 hours or so until oven has completely cooled. This is to prevent cracking.

* Store cheesecake in fridge after this time period is over until chilled, then top with the strawberry topping.
This, to me, is the sambosa that best embodies Bah This, to me, is the sambosa that best embodies Bahrain- the first- actually the only-place I have these cheesy corn sambosa ❤️. No fancy cheese goes in this, it’s literally the stuff out of a can and take SO melty and cheesy and good. I mix in a little mashed potatoes and it just makes these 💯 times better, creamy and delicious. Posting the full steps on IGTV, it’s so easy you prob won’t need them! Recipe below and tell me- what’s your go to sambosa cheese?

Ingredients
2 small potatoes, peeled and cut into cubes 8 oz total, 235 g
1/2 cup corn kernels, from a can, drained
12 oz American cheese, like Velveeta or Kraft, grated 340 g (2 170g cans of Kraft processed cheese)
pinch salt
pinch black pepper
1/2 pack samosa wrappers each pack is 500 g

Instructions:
-Cover potato cubes with water, and bring to a boil. Reduce heat and simmer until potatoes are completely cooked through. Drain, and mash.

-Let potatoes cool slightly then combine mashed potatoes with the grated cheese, drained corn, salt and pepper. Mix well until the mixture is evenly combined. Taste for and adjust seasoning.

-Fill each samosa wrapper with a tbsp of mixture on the bottom corner, then fold the corner of the samosa up and over the filling to the other side, to make a triangle. Keep folding this triangle over all the way up the top (check the video at the bottom of this recipe card to see how). Mix together the flour and water to form a thick paste, and seal the ends of the samosa to prevent them from opening up while frying.

-Place vegetable oil in a skillet, about 2 inches deep and heat on medium high heat. Once hot enough, add the sambosa and fry for around 2 minutes a side until golden brown. Remove to a paper towel lined plate to absorb some of the excess oil, then enjoy warm.

.
.
.
.
.

#harira #soup #ramadanrecipes #ramadan2021 #ramadan #ramadankareem #vegetablesoup #soupseason #soupsofinstagram #delishkitchen #friedfood #aprilisforarabfood #f52grams #foodfluffer #foodflatlay #foodphotography #foodphotographer #foodstylist #thefeedfeed #middleeasternfood #vegetarian #tasty #tastingtable #tastemade #samosa #sambosa
This is one of my top 5 recipes from this Ramadan’s recipe prep. One of my features does the @tamimimarkets recipe catalogue! Click the link in their bio to access this gorgeous (free!) catalogue.

This harira soup is unbelievable. Hearty and delicious and beautifully spiced- I’ve never been obsessed with harira soup until this one. It’s a simple one because it’s meat free, so it’s perfect to start your iftar with but also hearty enough to totally serve as a meal alongside some sambosas. Recipe below, and IGTV video coming in a bit!

Ingredients
3 tbsp olive oil
1 large onion, diced
3 celery stalks, diced
2 carrots, diced
1 tsp cinnamon powder
1/2 tsp salt
1/2 tsp black pepper
pinch red chili flakes
1/2 cup chopped parsley
1/2 cup chopped coriander(cilantro)
1 can tomato sauce 15 oz (430g)
7 cups vegetable stock or 2 stock cubes dissolved in 7 cups water
1 can drained chickpeas 15 oz (400 g)
1 cup green lentils
1/2 cup vermicelli noodles 50 g
2 lemons, juiced 1/4 cup juice
2 tbsp flour, dissolved in 1/4 cup water* use cornstarch if gluten free

Instructions:
-Start by adding the lentils to a bowl of water and soaking as you prepare the rest of the ingredients, this helps them cook through faster.
-Heat oil in a large saucepan over medium heat, and add the onions, celery and carrots. Saute for 6-8 minutes, until onions soften and turn golden brown.
-Add all the spices, the chopped parsley and chopped coriander, the tomato sauce, and the vegetable stock. Bring the pot to a boil, then add the drained chickpeas and drained lentils. Reduce heat and simmer for 25 minutes or until chickpeas and lentils are tender.
-Add the vermicelli, and let it boil for 3-4 minutes or until tender. Add the lemon juice, and the flour water mixture. Let it simmer another minute or until it thickens, then taste for seasoning and add salt and pepper if necessary.
.
.
.
.
.
#harira #soup #ramadanrecipes #ramadan2021 #ramadan #ramadankareem #vegetablesoup #soupseason #soupsofinstagram #moroccan #moroccanfood #aprilisforarabfood #f52grams #foodfluffer #foodflatlay #foodphotography #foodphotographer #foodstylist #thefeedfeed #veganrecipes #vegan #tasty #tastingtable #tastemade #lentils
Never ever liked vimto until I had it like this 🍧. Vimto smoothies means that the sweetness of vimto is tempered by that cold crunchy shaved ice. Could not stop eating/drinking these vimto slushees! So easy, you just need water, ice, vimto and a high speed blender- my @ninjakitchenme did so well breaking down huge ice chunks👏🏼. Save this for a little twist on your classic iftar drink🥳

Ingredients:
-3/4 cup water
- 3/4 cup vimto 
- 2 cups ice 

Method:
Add the ingredients to your blender in the order listed, and blend on frozen drink mode until slushy like consistency. Add more ice or water if you need to, and enjoy immediately with a spoon/straw. Yum!
.
.
.
.
.

#ramadan #ramadan2021 #ramadanrecipes #iceddrinks #slush #slushy #slushii #berries #syrup #cordial #drinkphotography #damnthatsdelish #foodfluffer #pour #dripshot #foodphotography #foodphotographyandstyling #foodstylist #foodstyling #thefeedfeed #vimto #foodtographyschool #foodtography #beautifulcuisines
A biscuit base topped with a super easy smooth, cr A biscuit base topped with a super easy smooth, creamy pistachio cheesecake and the crowning touch,  @mayadelices ‘s luscious milk chocolate melted and poured over the top. I mean- heavenly! Recipe below, adapted from @savoryandsweetfood ,, IGTV will be uploaded today. I am absolutely loving @mayadelices couverture, great quality baking chocolate thats so fun experimenting with! They have sugar free and vegan options too, and best of all it’s easily available in their shop in Bahrain 🍫👏🏼

Ingredients:

For the crust:
2 cups digestive biscuit crumbs (250 g)
1/2 cup butter melted, 115g
Pinch cinnamon powder

For the pistachio cheesecake filling:

1 cup pistachio powder (140g)
12 Kiri squares or cream cheese (215g)
250 ml thick cream
1/2 of a 400 g tin of sweetened condensed milk, more if you like it sweeter

To top:
1 cup Maya milk chocolate (160g)
pistachios to garnish

Method:
1. Preheat oven to 180C. Grease and line a 8x8 inch pan with parchment paper with extra paper hanging over the sides so you can easily lift out the bars.

2. Mix digestive crumbs with melted butter and cinnamon. Press this firmly into the base of the pan. Refrigerate for 10 minutes.

3. In a food processor, add the pistachio powder, kiri cheese cubes, thick cream, and condensed milk. Blend until well combined and smooth. Pour this mixture into the crust base and bake for 15-20 minutes until set but center is still a little jiggly. Let cool at room temperature for 1 hour then refrigerate for several hours.

4. Melt the milk chocolate gently in the microwave, in 10 second bursts, stirring after each increment. Once smooth and melted, spread over the top of the cheesecake, and refrigerate until set. Enjoy!
.
.
.
.
.
#ramadan #ramadan2021 #ramadanrecipes #cheesecakebars #cheesecakebites #chocolateporn #pistachio #chocolatelover #chocolaterecipes #cheesecakelovers #cheesecakelove #damnthatsdelish #foodfluffer #pour #chocolatedrip #dripshot #foodphotography #foodphotographyandstyling #foodstylist #foodstyling #thefeedfeed #thebakefeed #foodtographyschool #foodtography #beautifulcuisines
Want a Ramadan dessert that takes minutes to make Want a Ramadan dessert that takes minutes to make and tastes amazing? Yeah we all do - I got you! Try this coffee biscuit cake (barely adapted from the wonderful @littlesunnykitchen). Layers of coffee soaked biscuits and a super easy fluffy cream 👌🏼. I used my new @braun_bahrain handheld electric whisk, one of the attachments in the minipimer set-It whips the cream so fast, much faster than my stand mixer and it’s so convenient to be able to use any bowl to prep the cream in. I’ve partnered with @digitrolley to bring you lots of good recipes with their range of kitchen appliances, so keep following along! Recipe below , and IGTV video coming today in my Ramadan series!

Ingredients
2 tbsp nescafe powder dissolved in 1 cup hot water
1 cup heavy whipping cream 250ml
3 tbsp sweetened condensed milk
splash vanilla extract, optional
1 creme caramel sachet, powder only 49g
1 pack tea biscuits or graham crackers 7 oz or 200 g
2 tbsp cocoa powder for topping

Instructions:
-Add the heavy cream, sweetened condensed milk, vanilla and creme caramel powder to a bowl and beat until soft peaks form. Set this cream mixture aside.
-Dip the tea biscuits into the coffee briefly until they soak up the coffee but before they start to break apart. -Layer in a 7×11 or 9×9 inch clear pyrex dish, then top with half the cream mixture.
-Repeat another layer of coffee soaked biscuits on top of the heavy cream, followed by the remaining half of the cream. Sift the cocoa powder on to the top, then refrigerate for several hours until set. This is even better the next day!

.
.
.
.
.
#nescafe #nescafegold #coffeecake #biscuit #biscuitcake #nobake #nobakedessert #nobakecake #tiramisu #damnthatsdelish #tastingtable #beautifulcuisines #foodphotography #foodphotographyandstyling #tastyfood #easydessert #ramadankareem #ramadan2021 #ramadanrecipes #cream
Ramadan Kareem! And the first recipe is for these Ramadan Kareem! And the first recipe is for these unbelievable (and easy!) chicken musakhan sambosa was developed for @tamimimarkets Ramadan catalogue. One of the coolest projects I’ve ever worked on can’t wait to tell you more about it! In the meantime, enjoy this teaser recipe and check IGTV for full video steps coming up. 

Ingredients:
2 chicken breasts, cooked and finely shredded about 1 heaped cup of shredded chicken See notes
1/4 cup olive oil
2 large onions cut in half, then thinly sliced into wedges
1/4 cup toasted almond slivers or pine nuts
3 tbsp sumac
1/2 tsp salt
1/4 tsp black pepper
1/4 tsp cumin powder
1/4 tsp cinnamon powder
To assemble:
1 pack sambosa wrappers 500 g
1 tbsp flour
1/2 tbsp water
For frying:
vegetable oil, about 1/4 cup

Instructions:
-In a deep skillet over medium heat, add the olive oil until it heats up. Add the onions, and cook, stirring frequently until soft and starting to caramelize, 8-10 minutes.

-Add the shredded chicken, the toasted nuts, and all the spices. Stir to combine, then remove from the heat. Let mixture cool slightly 5 minutes or so.

-Fill each sambosa wrapper with a tbsp of mixture on the bottom corner, then fold the corner of the sambosa up and over the filling to the other side, to make a triangle. Keep folding this triangle over all the way up the top 

-Mix together the flour and water to form a thick paste, and seal the ends of the sambosa to prevent them from opening up while frying.

-Place vegetable oil in a skillet, about 2 inches deep and heat on medium high heat. Once hot enough, add the sambosa and fry for around 2 minutes a side until golden brown. Remove to a paper towel lined plate to absorb some of the excess oil, then enjoy warm, optionally with yogurt to dip in.
.
.
.
.
.
#chickensamosa #musakhan #ramadankareem #ramadan2021 #ramadanrecipes #samosa #friedfood #palestinianfood #middleeasternfood #beautifulcuisines #damnthatsdelish #f52community #thefeedfeed #foodgawker #f52grams #buzzfeedfood #tastingtable #tastemade #chickenrecipes #sumac #caramelizedonions #foodblogfeed #foodphotography #foodphotographyandstyling #foodstyling
Load More... Follow on Instagram

Copyright © 2019 on the Seasoned Pro Theme