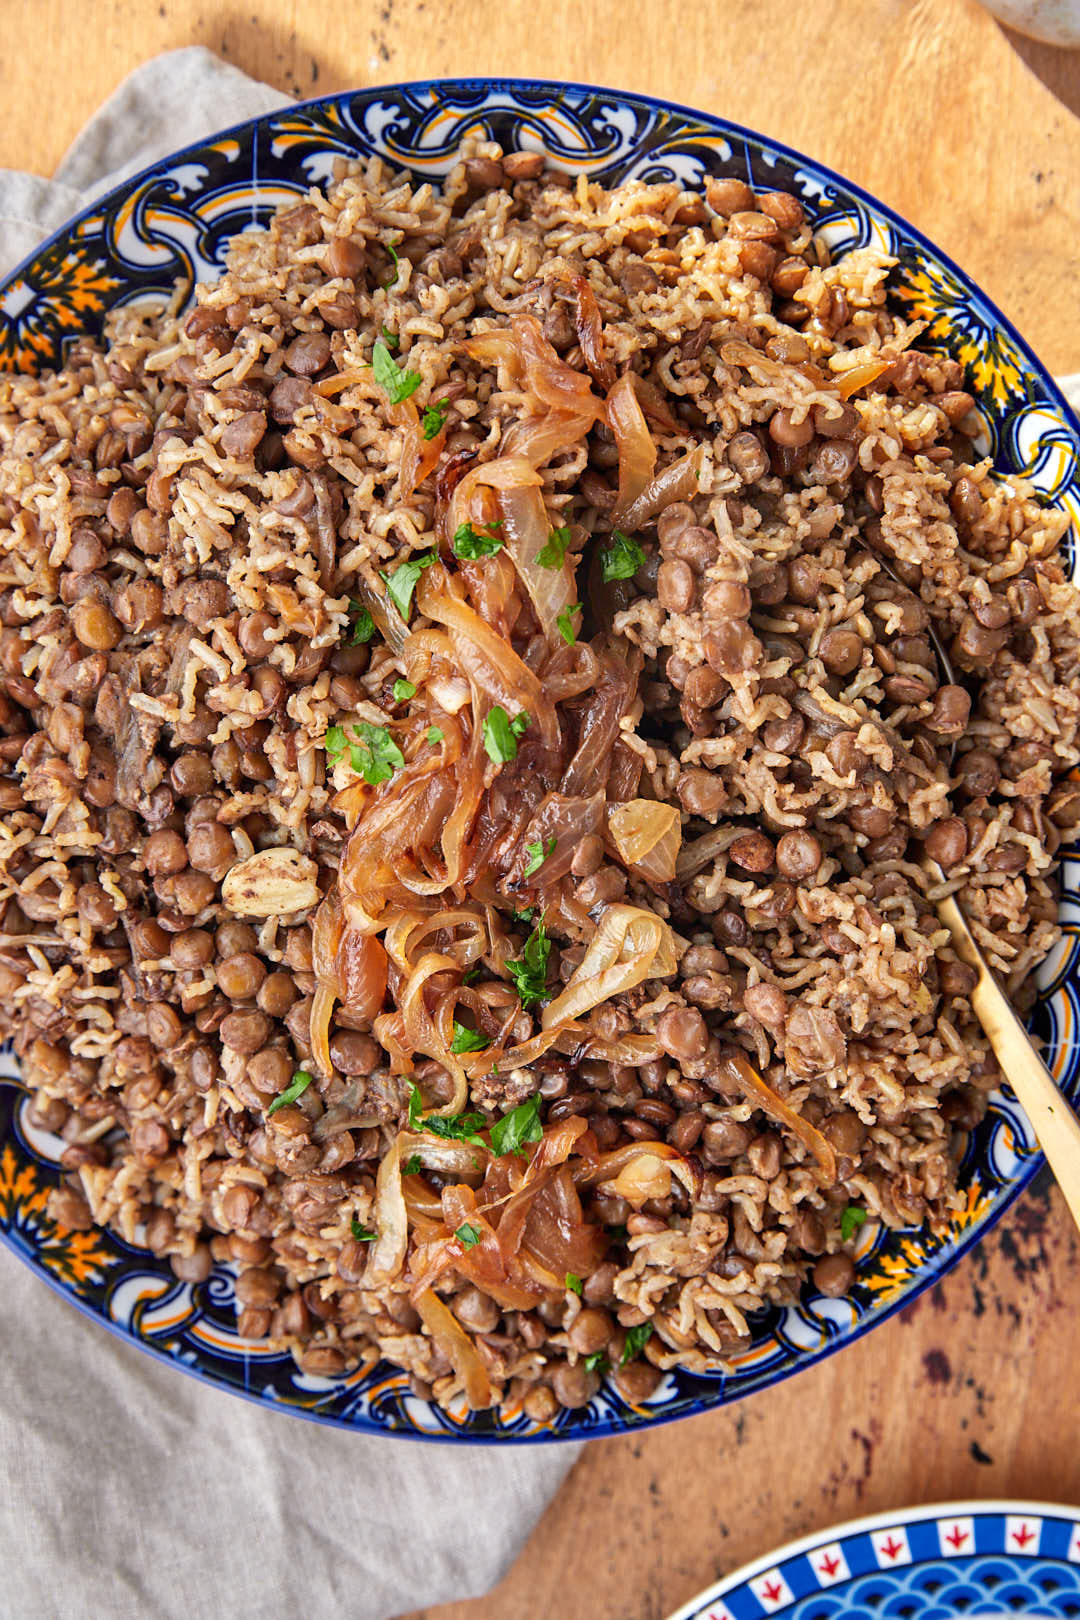
• Skip to primary navigation
  • Skip to main content
  • Skip to primary sidebar
  • Skip to footer

 logo

  • Recipes
    • Breakfast
    • Sides
    • Soup
    • Main Meals
    • Healthy
    • Dessert
    • Drinks
  • Eating Out
  • About Me
    • Privacy Policy
  • Resources
    • Must Have Kitchen Tools
  • Nav Social Menu

    • Email
    • Facebook
    • Instagram
    • Pinterest

Instant Pot Mujaddara

Oct 12, 2020 · 4 Comments

Jump to Recipe

Instant Pot mujaddara (or mujadara) is the best way to enjoy this classic Middle Eastern lentil rice pilaf. The instant pot makes easy work of cooking lentils and brown rice, two things that can take a long time and be easy to get wrong. The whole dish comes together in a flavorsome and perfectly textured bowl of deliciousness.

SO healthy too!

What is mujaddara?

Mujaddara is a delicious classic dish in Middle Eastern cuisine. It consists of rice and lentils that are heavily spiced with cumin, and served with plenty of caramelized onions. Traditionally, this is considered a peasant dish because it’s made with budget grains and without any meat, but it tastes anything but. Mujaddara is full of flavor and texture and is utterly comforting!

Why should I make this Instant Pot mujaddara?

Mujaddara is such a healthy, fuss free meal. It’s vegan, and works great when you feel like going meat free, or need a meal to make with just pantry ingredients.

Mujaddara is rich in complimentary proteins. This is a fancy way of saying the rice and lentils compliment each other to give you essential amino acids that you’d be missing if you just consumed one without the other.

It requires just a handful of ingredients, most of which are staples, and a few simple steps to follow.

Using an Instant Pot makes this even easier, and although you can make this on the stove top with great results, I love the ease that comes with cooking the entire meal in the same pot. The instant pot cooks the lentils and brown rice perfectly in a fraction of the time.

Mujaddara ingredients and substitutions:

Rice: I used brown basmati rice, and I think brown rice is perfect in this. The nuttiness of the brown rice works so well with the lentils.

You can use white basmati rice instead, just reduce the cooking time to 11 minutes and the water to 2.5 cups.

Lentils: Brown lentils. They get a quick soak in hot water while you prepare the rest of the recipe.

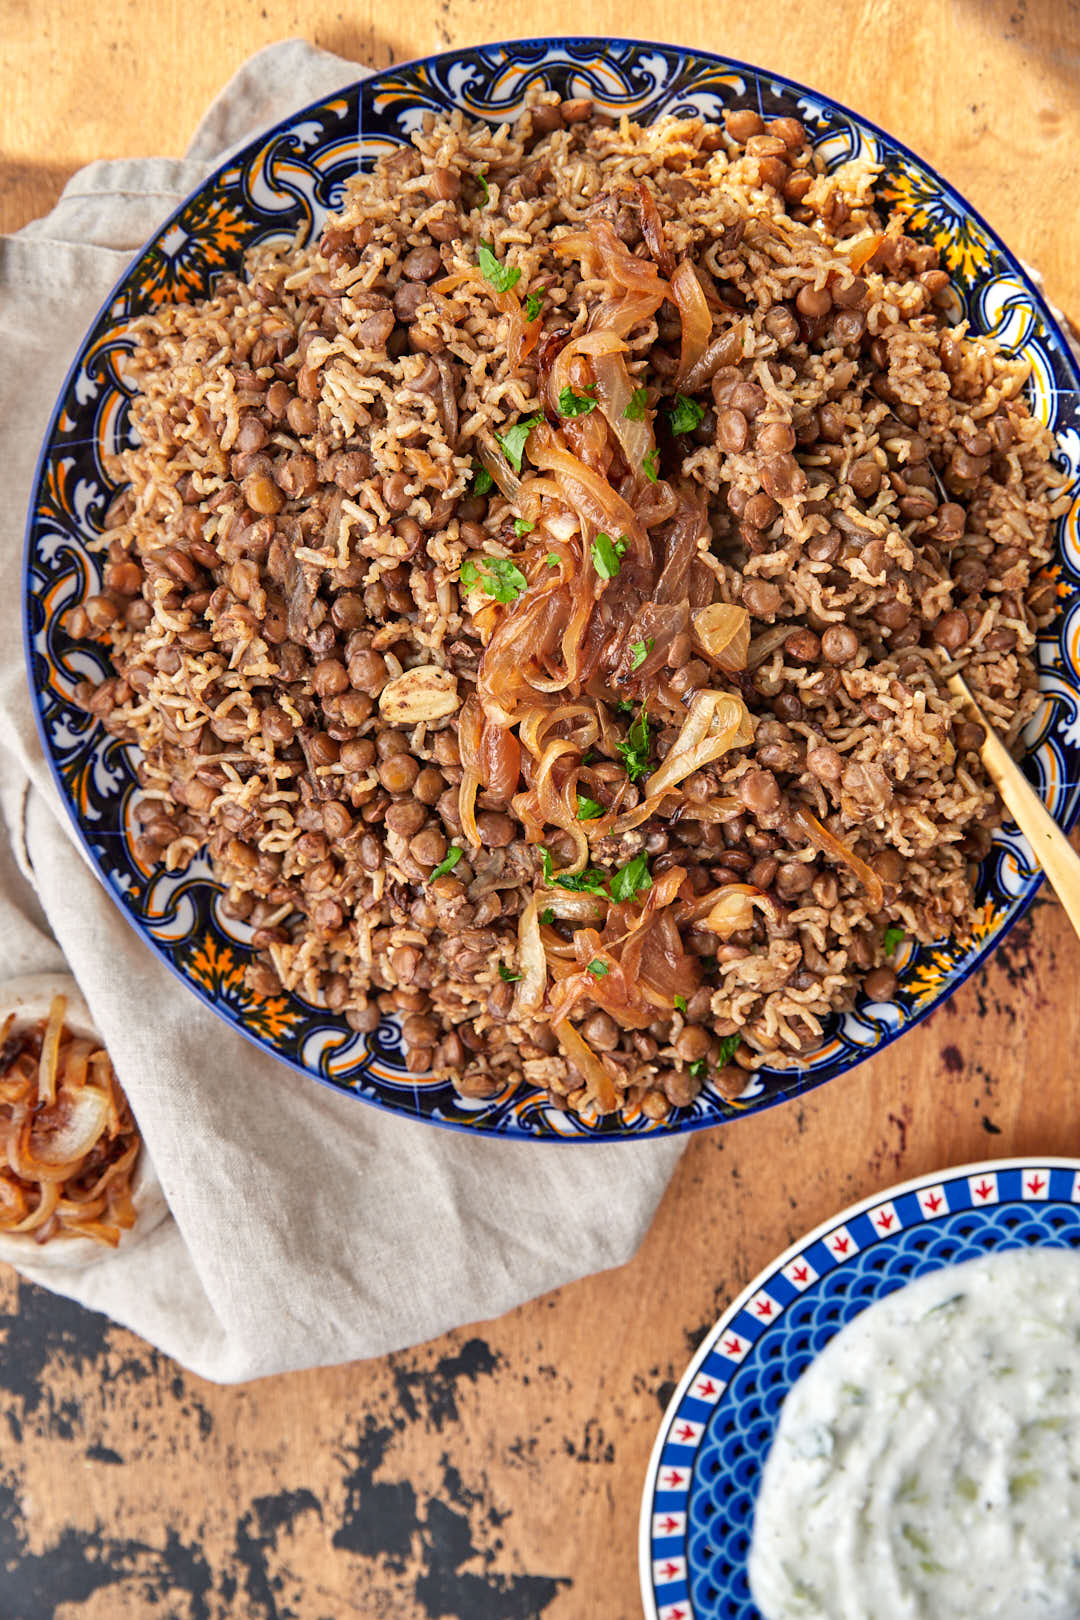
Onions: Probably my favorite part of mujaddara. This is why I use three onions when a lot of recipes will just call for one. I usually use red onions, but I’ll use whatever is on hand. The idea is to deeply caramelize the onions until golden brown and sweet. Half of the caramelized onions are mixed into the mujaddara and the rest are reserved for topping.

Garlic: Another thing I can’t cook without. The recipe calls for some minced garlic, but my favorite part is the whole garlic cloves. I got the idea from an Instagram food account I follow and love, Wicked Wifey. Basically, you add peeled whole garlic cloves scattered in the pot before cooking, then they soften and became a little sweet and mushy, the perfect surprise in a mouthful of rice. My husband and I hunt down these garlic cloves like gold!

Spices and Seasoning: The star of the spices is definitely the cumin. Not only does the flavor wonderfully enhance the lentils, but it’s said cumin helps with digestion, so Middle Eastern cuisine its commonly added to pulses and beans and things that are harder to digest. Lots of cumin is added to this, don’t be scared by the amount, it’ll come out wonderfully. We also add a little seven spices (or mixed spices or all spice), cinnamon, and salt and pepper.

Steps in making Instant Pot Mujaddara:

Prepare all your ingredients. Thinly slice the onions, mince the garlic cloves. Soak the brown rice for 20-30 minutes, then drain and rinse until clear. At the same time, soak the lentils in hot water until it comes time to use them in the recipe.

Sauté the onions and garlic: With your instant pot set to sauté, add the olive oil. Once hot, add the onions and a pinch of salt. Keep cooking, stirring frequently, until the onion turn a deep golden brown and soften. This will probably take around 6-8 minutes.

After the onions have caramelized, set aside half of them onto a paper towel lined plate (to soak up some of the extra oil). add the minced garlic and cook for another one to two minutes until fragrant.

Add the spices: Add the spices, stir, and cook for 30 seconds or so, then add the drained lentils, drained rice and the water. Stir to combine, then set instant pot to High pressure for 11 minutes (make sure the valve is set to seal not vent).

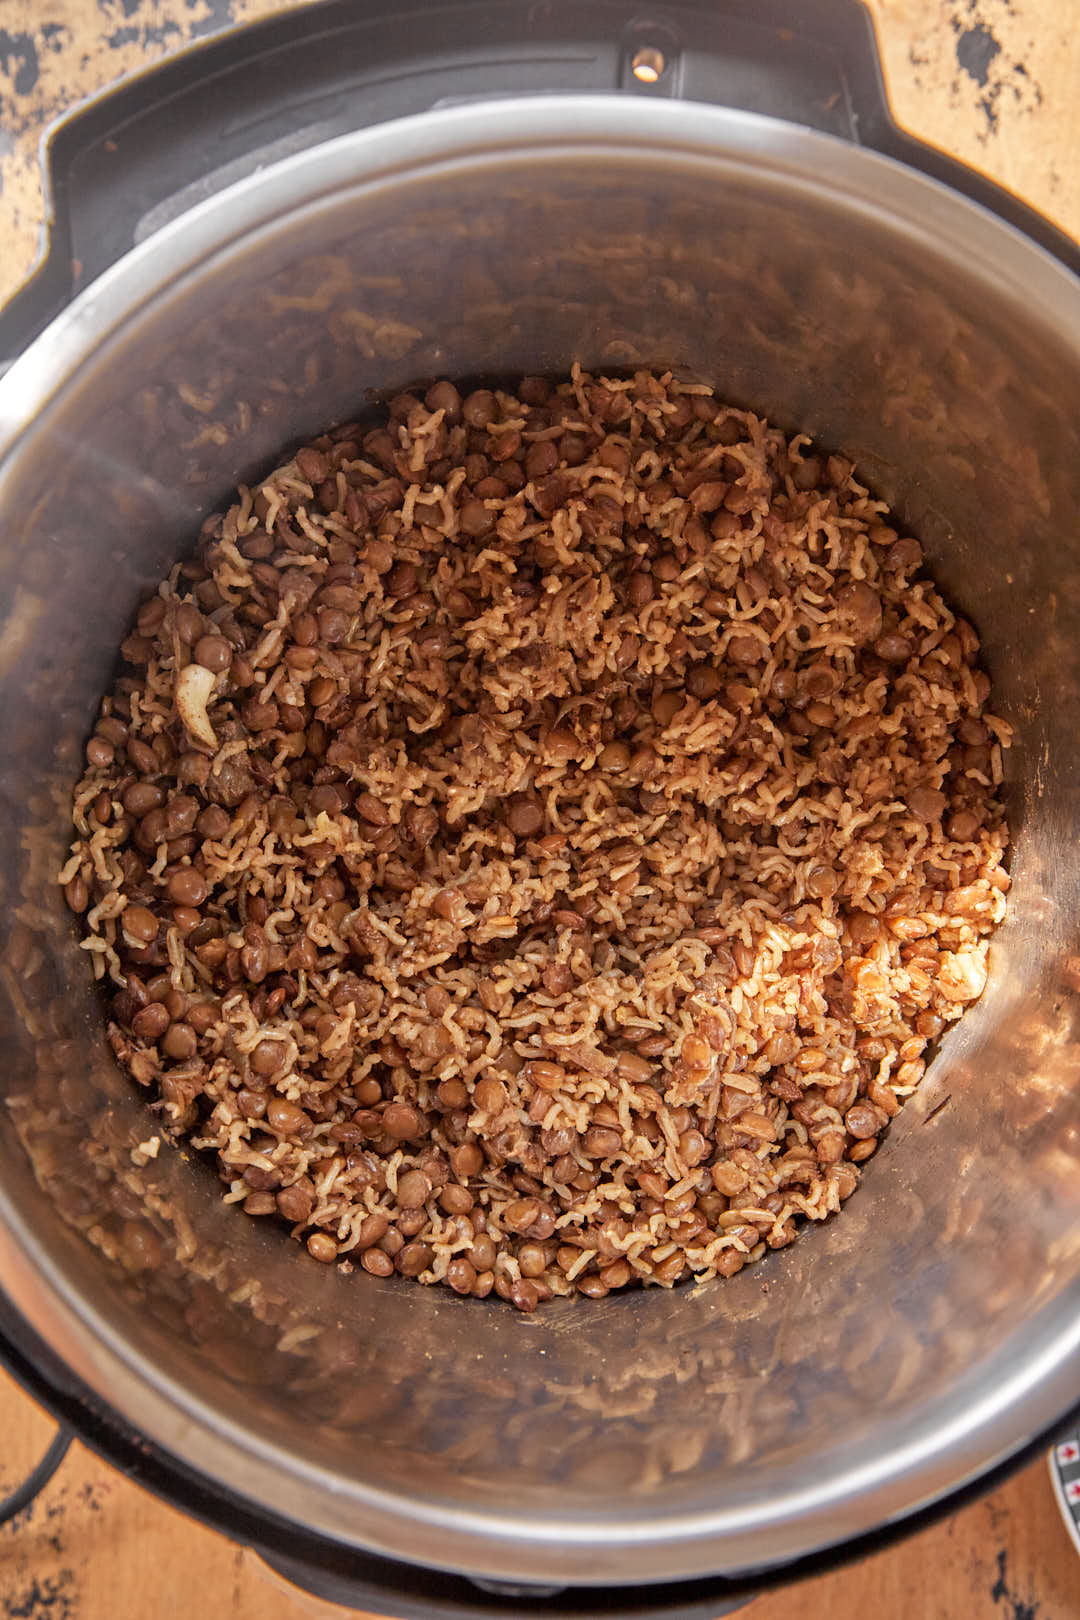
Once the cooking time is finish, let the pressure naturally release for 10-15 minutes, then vent any remaining pressure and open the lid.

Fluff gently with a fork, and serve warm, topping with additional onions.

What to serve with mujaddara:

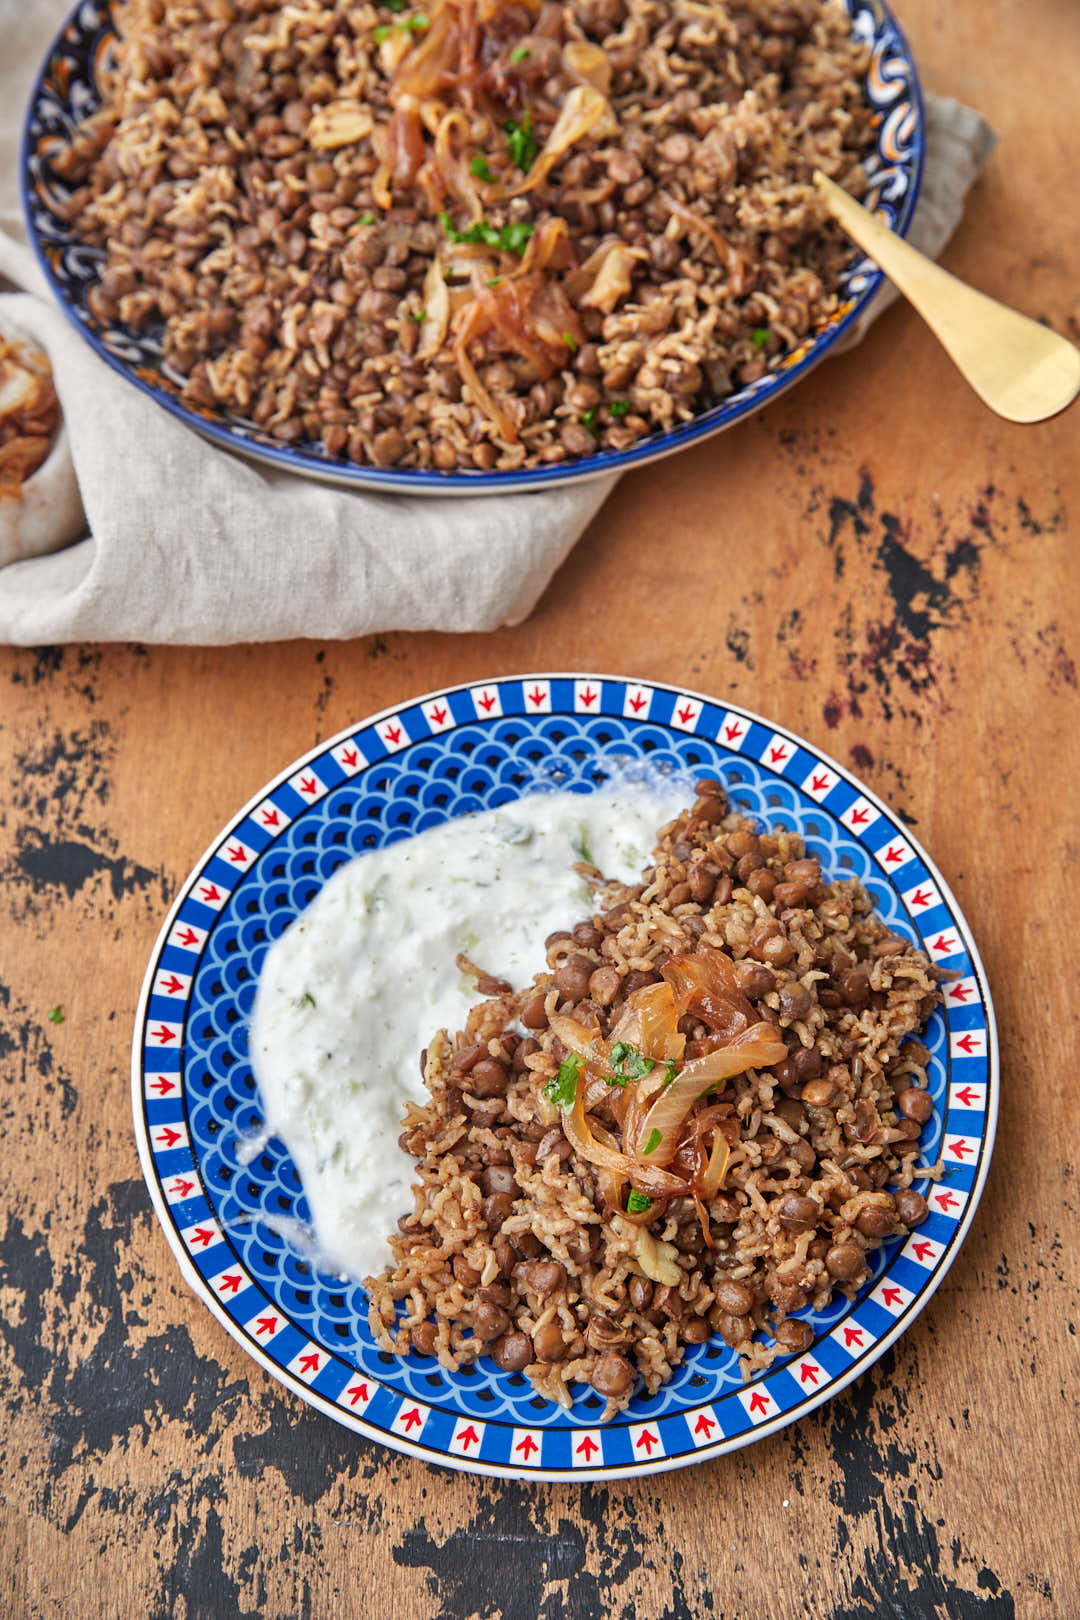
Mujaddara is best served with yogurt, either plain or with some minced garlic and cucumber slices mixed in.

I like to serve it with both yogurt AND a simple green salad. There’s nothing like a bite that has all three components in it. Delicious!

It has such a hearty flavor, that pairing it with something like olives or pickles gives such a great acidity and tang to the dish.

How to make mujaddara without an instant pot:

You can definitely make this in a regular saucepan! What you need to do is:

Boil the lentils in enough water to cover them for 15-20 minutes, until tender but not mushy. Drain the lentils and set aside.

While the lentils are boiling, caramelize the onions in another saucepan. Remove half and set aside, then to the caramelized onions still in the pan, add the crushed garlic for 1-2 min, then add the lentils, rice, water and all the spices, along with the whole garlic cloves. The water should cover the ingredients by an inch or so. Bring to a boil, then reduce heat to a simmer and simmer tightly covered 20 minutes, until water is absorbed and rice and lentils are cooked through.

How to store leftover mujaddara:

Leftover mujaddara can be stored covered tightly for 4-5 days in the fridge, and be frozen for up to three months.

Leftovers taste great, both hot (my preference) or cold (my husbands).

Instant Pot Mujaddara

Mujaddara made so much easier in an Instant Pot. Delicious and so healthy too! A Middle Eastern spiced brown rice and lentil pilaf.
5 from 1 vote
Print Pin
Rate
Course: Main Course
Cuisine: Middle Eastern
Keyword: lentils, vegetarian, instant pot
Prep Time: 10 minutes
Cook Time: 6 minutes
Servings: 6 people
Calories: 182kcal
Author: Farah Abumaizar

Equipment

  • Instant Pot

Ingredients

  • 1 cup brown lentils
  • 1.5 tbsp olive oil
  • 3 onions, sliced thinly
  • 3 garlic cloves, minced or crushed
  • 1 tbsp cumin powder
  • 1/2 tsp cinnamon
  • 1 tsp seven spices or all spice
  • 1 tsp salt, plus an extra pinch for sprinkling on onions
  • 1/4 tsp black pepper
  • 3 cups water
  • 1 cup brown basmati riced, soaked and drained
  • 6-8 whole garlic cloves optional but they cook into these sweet mushy pockets that are delicious!

Instructions

  • Place the lentils in a bowl, and cover with hot water. Allow the lentils to soak until it's time to use them in the recipe.
  • Set Instant Pot to sauté. Add the olive oil, then the sliced onions. Season with a sprinkle of salt, and cook for a good 6-8 minutes until caramelized and deep golden brown.
  • Remove half of the onions to a small plate to reserve for topping. Add the minced garlic and sauté for a minute or so until fragrant. Add the cumin powder, cinnamon powder, seven spices, salt and pepper, plus the water.
  • Drain the lentils, and add them to the instant pot along with the drained rice. Add the whole garlic cloves scattered into the mixture. Stir.
  • Set instant pot to normal pressure on high for 11 minutes. Make sure the valve sealed. Once the cooking time is over, naturally release the pressure for 10-15 minutes, then vent any remaining pressure before opening.
  • Gently fluff the mujaddara with a fork, being very careful because it's soft and might get too mushy if overmixed. Serve garnished with the caramelized onion you set aside, preferably with yogurt or a side salad.

Notes

Cooking times and parts of the recipe adapted from Feasting at Home.
To make this with white rice, reduce water to 2.5 cups and cooking time to 11 minutes.
Check post for instructions on how to make this stovetop
Tried this recipe?Mention @everylittlecrumb or tag #everylittlecrumb!

Nutrition

Calories: 182kcal

If you liked this recipe, you might like:

Mujaddarat Bulgur

Lebanese Rice- Hashweh Rice

Lebanese Spinach Stew

Middle Eastern Lentil Soup

Did you make this? Tag @everylittlecrumb or hashtag #everylittlecrumb and I’ll share your images!

Healthy, Instant Pot, Main Meals, Recipes

Previous Post: « Pecan Honey Sticky Buns
Next Post: Bazella »

Reader Interactions

Comments

  1. Esther Hausman says

    January 26, 2021 at 5:22 am

    You said to reduce the time for the white rice but then said 11 min which is the same as the brown. Can you please clarify.
    Thanks!

    Reply
    • Farah Abumaizar says

      January 27, 2021 at 10:38 am

      So sorry! I’ll fix that , reduce time to 9 minutes and water to 2.5 cups

      Reply
  2. Esther says

    January 27, 2021 at 11:35 pm

    5 stars
    I actually ended up cooking it for 6 min and it was fabulous!
    Thanks!

    Reply
    • Farah Abumaizar says

      January 28, 2021 at 7:08 am

      Oh good to hear it! I’ll put that as a note thanks Esther so glad you enjoyed!

      Reply

Leave a Reply Cancel reply

Your email address will not be published. Required fields are marked *

Recipe Rating


Primary Sidebar

Get more stuff

Subscribe to our mailing list and get interesting stuff and updates to your email inbox.

Thank you for subscribing.

Something went wrong.

we respect your privacy and take protecting it seriously

FeedFeed

Featured Recipes

Tamriyeh

Nescafe Cake

Berries and Cream Sara Lee Cake

Kebab Karaz

Eggplant Fatteh

More

Footer

everylittlecrumb

Farah Abu Maizar | Food Lover
Another recipe from @tamimimarkets ‘s catalogue, Another recipe from @tamimimarkets ‘s catalogue, this easy berry trifle has such a Ramadan vibe, this easy berry uses all the ingredients I associate with quick and easy no-bake Ramadan desserts. Thick cream ✅ Dream whip ✅ Condensed milk ✅ . All the things you need for creamy, light goodness. Layer this with buttery Sara Lee pound cake and lots of fresh berries and this will be a dessert you won’t to be able to stop eating😍 Send this to a someone who’d appreciate a quick and easy dessert and look out for the IGTV coming today!

Ingredients
2 containers thick cream  250 g each
1 sachet dream whip powder  28 g
1 sachet creme caramel, powder only (not syrup)  50 g
1/2 cup heavy whipping cream 120 ml
3 tbsp milk
Sweetened condensed milk 200 g, 1/2 large can
For assembling:
1 pack strawberries, halved 227 g,
1 pack raspberries 170 g
1 pack blueberries 170 g
1 pack blackberries 170 g
1 Sara Lee vanilla pound cake, thawed 300 g)

Instructions
-In an electric mixer, add the thick cream, dream whip, creme caramel, whipping cream, and condensed milk. -Beat until thick and fluffy, with soft peaks, about 3 minutes or so.
-Gently rinse the berries and pat dry, and cut the pound cake into large cubes.
-Cut the pound cake into cubes, and layer a trifle dish like so: 1 layer of pound cake cubes, half the cream, 1/2 the cream, and half the berries (a mix of all the berries). 
-Repeat with the second half of pound cake cubes, the second half of the cream and top with the remaining berries. Add whole strawberries and mint leaves to garnish, optional.
-Let the trifle set for a few hours or overnight before enjoying!
.
.
.
.
.
#berries #trifle #triflecake #poundcake #saralee #layercake #creamy #nobake #nobakedessert  #aprilisforarabfood #f52grams #foodfluffer #foodflatlay #foodphotography #foodphotographer #foodstylist #thefeedfeed #ramadan #ramadanrecipes #ramadan2021 #strawberry #strawberrycake #dessert #cakestagram #dessertpic #dessertphotography
You have to know, if I post a chicken recipe it me You have to know, if I post a chicken recipe it means it’s reaaaaaally good. This copy cat Halal guys chicken and rice is unbelievable dish! I got the turmeric rice recipe from @seriouseats and its buttery and perfectly spiced and fluffy and addictive, topped with juicy grilled spiced chicken cubes and a tangy, creamy dressing, tomatoes and parsley. AMAZING! Recipe below and in the @tamimimarkets catalogue❤️.

INGREDIENTS:

For the chicken marinade:
900 g chicken breasts
1/4 cup olive oil
2 tbsp lemon juice
1 tbsp white vinegar
3 garlic cloves, minced
1 tsp salt
1/2 tsp black pepper
1 tsp oregano powder
1 tsp seven spices
1/2 tsp ginger powder
1/2 tsp cumin powder
1/2 tsp paprika powder

For the white sauce:
3/4 cup Greek yogurt 170g (6oz)
1/2 cup mayonnaise 115 g
1 tbsp white vinegar
1 tbsp water
1 tsp lemon juice
1-2 tsp sugar
1/2 tsp salt
1/4 tsp black pepper

For the rice:
2 tbsp unsalted butter
1/2 tsp turmeric powder
1/4 tsp cumin powder
1 1/2 cups basmati rice, soaked for 20 minutes then rinsed
2 1/2 cups chicken stock or 1 stock cube dissolved in 2.5 cups hot water
salt and pepper to taste, a pinch of each

To assemble:
1 chopped tomato
handful chopped parsley
sriracha sauce

INSTRUCTIONS: 
For the chicken:
In a bowl, mix all the ingredients for chicken marinade. Add chicken breast and toss to coat evenly. Cover and marinade for 1-2 hours.

Heat 1 tbsp oil in a large skillet on medium high heat, and cook chicken for 5-6 min each side, or until golden brown and cooked.
Remove chicken to a cutting board, and rest for 10 minutes, before chopping roughly into 2 inch cubes.

For the white sauce:
Mix all ingredients and store in the fridge until ready to serve.

For the rice:
Add butter to a large saucepan over medium heat. Once melted, add the turmeric and cumin, and stir for 1 minutes.
Add the rice, and toast the rice by stirring for 4 minutes. Add chicken stock, salt and pepper to season. Stir and bring to a boil, then reduce heat to a simmer, cover and cook for 15 min, then set aside 15 min and fluff with a fork.

To assemble:
Place the rice in your serving platter, top with the chicken, the white sauce, and chopped tomatoes and parsley. Sriracha too!
This is my go to baked creamy cheesecake. It’s s This is my go to baked creamy cheesecake. It’s so good and rich and easy, topped with a sweet and tangy simple strawberry sauce (sauce recipe from @sallysbakeblog ). I used my new @kenwood_bahrain stand mixer and it was excellent- gave me silky smooth lump free filling. Another winner for my @digitrolley collab- all my new appliances are from them❤️ Check IGTV for recipe video!

For the strawberry topping:
-1 tbsp cornstarch
-3 tbsp water
-450 g strawberries, halved (big pack)
-zest and juice from 1/2 small lemon 
-1/4 cup (50g) sugar

-Whisk together cornstarch and water, then add to a saucepan along with all other ingredients, over medium heat.
-Bring to a simmer, stirring constantly and breaking up strawberries as they cook, 5 minutes or so until thickened. Set aside to cool, can be stored in fridge up to one week.

For the cheesecake:

Ingredients
For the crust:
* 250 g crushed digestive biscuits 2 cups 
* 135 g melted butter 1 stick and 1 tablespoon
* 1/2 tsp cinnamon

For the cheesecake:
* 900 g cream cheese (3 3/4 cup)
* 1 1/2 cup white sugar 300 g
* 3/4 cup milk, room temp
* 4 eggs, room temp
* 1 cup sour cream 240 g
* 1 tbsp vanilla extract
* 1/4 cup all purpose flour 32g

Instructions:

For the crust:
* In a mixing bowl, combine crushed biscuits, the melted butter, and the cinnamon with a fork until crumbs are moistened evenly throughout. Press along the bottom and sides of a lightly greased 9 inch springform pan. Let the crust chill a little in the fridge while you prepare cheesecake.

For the cheesecake:
-Preheat the oven to 180 C
-In  stand mixer, combine the cream cheese with the sugar in a large bowl and mix on medium speed until well combined and fluffy. Blend in the milk, then add the eggs one at a time, mixing briefly after each addition.

-Mix in sour cream, vanilla and flour until smooth. It may be easier to sift in the flour.

-Pour filling into prepared crust. Bake at 180 C for 1 hour, then turn off the oven and leave cheesecake inside for another 5 hours or so until oven has completely cooled. This is to prevent cracking.

* Store cheesecake in fridge after this time period is over until chilled, then top with the strawberry topping.
This, to me, is the sambosa that best embodies Bah This, to me, is the sambosa that best embodies Bahrain- the first- actually the only-place I have these cheesy corn sambosa ❤️. No fancy cheese goes in this, it’s literally the stuff out of a can and take SO melty and cheesy and good. I mix in a little mashed potatoes and it just makes these 💯 times better, creamy and delicious. Posting the full steps on IGTV, it’s so easy you prob won’t need them! Recipe below and tell me- what’s your go to sambosa cheese?

Ingredients
2 small potatoes, peeled and cut into cubes 8 oz total, 235 g
1/2 cup corn kernels, from a can, drained
12 oz American cheese, like Velveeta or Kraft, grated 340 g (2 170g cans of Kraft processed cheese)
pinch salt
pinch black pepper
1/2 pack samosa wrappers each pack is 500 g

Instructions:
-Cover potato cubes with water, and bring to a boil. Reduce heat and simmer until potatoes are completely cooked through. Drain, and mash.

-Let potatoes cool slightly then combine mashed potatoes with the grated cheese, drained corn, salt and pepper. Mix well until the mixture is evenly combined. Taste for and adjust seasoning.

-Fill each samosa wrapper with a tbsp of mixture on the bottom corner, then fold the corner of the samosa up and over the filling to the other side, to make a triangle. Keep folding this triangle over all the way up the top (check the video at the bottom of this recipe card to see how). Mix together the flour and water to form a thick paste, and seal the ends of the samosa to prevent them from opening up while frying.

-Place vegetable oil in a skillet, about 2 inches deep and heat on medium high heat. Once hot enough, add the sambosa and fry for around 2 minutes a side until golden brown. Remove to a paper towel lined plate to absorb some of the excess oil, then enjoy warm.

.
.
.
.
.

#harira #soup #ramadanrecipes #ramadan2021 #ramadan #ramadankareem #vegetablesoup #soupseason #soupsofinstagram #delishkitchen #friedfood #aprilisforarabfood #f52grams #foodfluffer #foodflatlay #foodphotography #foodphotographer #foodstylist #thefeedfeed #middleeasternfood #vegetarian #tasty #tastingtable #tastemade #samosa #sambosa
This is one of my top 5 recipes from this Ramadan’s recipe prep. One of my features does the @tamimimarkets recipe catalogue! Click the link in their bio to access this gorgeous (free!) catalogue.

This harira soup is unbelievable. Hearty and delicious and beautifully spiced- I’ve never been obsessed with harira soup until this one. It’s a simple one because it’s meat free, so it’s perfect to start your iftar with but also hearty enough to totally serve as a meal alongside some sambosas. Recipe below, and IGTV video coming in a bit!

Ingredients
3 tbsp olive oil
1 large onion, diced
3 celery stalks, diced
2 carrots, diced
1 tsp cinnamon powder
1/2 tsp salt
1/2 tsp black pepper
pinch red chili flakes
1/2 cup chopped parsley
1/2 cup chopped coriander(cilantro)
1 can tomato sauce 15 oz (430g)
7 cups vegetable stock or 2 stock cubes dissolved in 7 cups water
1 can drained chickpeas 15 oz (400 g)
1 cup green lentils
1/2 cup vermicelli noodles 50 g
2 lemons, juiced 1/4 cup juice
2 tbsp flour, dissolved in 1/4 cup water* use cornstarch if gluten free

Instructions:
-Start by adding the lentils to a bowl of water and soaking as you prepare the rest of the ingredients, this helps them cook through faster.
-Heat oil in a large saucepan over medium heat, and add the onions, celery and carrots. Saute for 6-8 minutes, until onions soften and turn golden brown.
-Add all the spices, the chopped parsley and chopped coriander, the tomato sauce, and the vegetable stock. Bring the pot to a boil, then add the drained chickpeas and drained lentils. Reduce heat and simmer for 25 minutes or until chickpeas and lentils are tender.
-Add the vermicelli, and let it boil for 3-4 minutes or until tender. Add the lemon juice, and the flour water mixture. Let it simmer another minute or until it thickens, then taste for seasoning and add salt and pepper if necessary.
.
.
.
.
.
#harira #soup #ramadanrecipes #ramadan2021 #ramadan #ramadankareem #vegetablesoup #soupseason #soupsofinstagram #moroccan #moroccanfood #aprilisforarabfood #f52grams #foodfluffer #foodflatlay #foodphotography #foodphotographer #foodstylist #thefeedfeed #veganrecipes #vegan #tasty #tastingtable #tastemade #lentils
Never ever liked vimto until I had it like this 🍧. Vimto smoothies means that the sweetness of vimto is tempered by that cold crunchy shaved ice. Could not stop eating/drinking these vimto slushees! So easy, you just need water, ice, vimto and a high speed blender- my @ninjakitchenme did so well breaking down huge ice chunks👏🏼. Save this for a little twist on your classic iftar drink🥳

Ingredients:
-3/4 cup water
- 3/4 cup vimto 
- 2 cups ice 

Method:
Add the ingredients to your blender in the order listed, and blend on frozen drink mode until slushy like consistency. Add more ice or water if you need to, and enjoy immediately with a spoon/straw. Yum!
.
.
.
.
.

#ramadan #ramadan2021 #ramadanrecipes #iceddrinks #slush #slushy #slushii #berries #syrup #cordial #drinkphotography #damnthatsdelish #foodfluffer #pour #dripshot #foodphotography #foodphotographyandstyling #foodstylist #foodstyling #thefeedfeed #vimto #foodtographyschool #foodtography #beautifulcuisines
A biscuit base topped with a super easy smooth, cr A biscuit base topped with a super easy smooth, creamy pistachio cheesecake and the crowning touch,  @mayadelices ‘s luscious milk chocolate melted and poured over the top. I mean- heavenly! Recipe below, adapted from @savoryandsweetfood ,, IGTV will be uploaded today. I am absolutely loving @mayadelices couverture, great quality baking chocolate thats so fun experimenting with! They have sugar free and vegan options too, and best of all it’s easily available in their shop in Bahrain 🍫👏🏼

Ingredients:

For the crust:
2 cups digestive biscuit crumbs (250 g)
1/2 cup butter melted, 115g
Pinch cinnamon powder

For the pistachio cheesecake filling:

1 cup pistachio powder (140g)
12 Kiri squares or cream cheese (215g)
250 ml thick cream
1/2 of a 400 g tin of sweetened condensed milk, more if you like it sweeter

To top:
1 cup Maya milk chocolate (160g)
pistachios to garnish

Method:
1. Preheat oven to 180C. Grease and line a 8x8 inch pan with parchment paper with extra paper hanging over the sides so you can easily lift out the bars.

2. Mix digestive crumbs with melted butter and cinnamon. Press this firmly into the base of the pan. Refrigerate for 10 minutes.

3. In a food processor, add the pistachio powder, kiri cheese cubes, thick cream, and condensed milk. Blend until well combined and smooth. Pour this mixture into the crust base and bake for 15-20 minutes until set but center is still a little jiggly. Let cool at room temperature for 1 hour then refrigerate for several hours.

4. Melt the milk chocolate gently in the microwave, in 10 second bursts, stirring after each increment. Once smooth and melted, spread over the top of the cheesecake, and refrigerate until set. Enjoy!
.
.
.
.
.
#ramadan #ramadan2021 #ramadanrecipes #cheesecakebars #cheesecakebites #chocolateporn #pistachio #chocolatelover #chocolaterecipes #cheesecakelovers #cheesecakelove #damnthatsdelish #foodfluffer #pour #chocolatedrip #dripshot #foodphotography #foodphotographyandstyling #foodstylist #foodstyling #thefeedfeed #thebakefeed #foodtographyschool #foodtography #beautifulcuisines
Want a Ramadan dessert that takes minutes to make Want a Ramadan dessert that takes minutes to make and tastes amazing? Yeah we all do - I got you! Try this coffee biscuit cake (barely adapted from the wonderful @littlesunnykitchen). Layers of coffee soaked biscuits and a super easy fluffy cream 👌🏼. I used my new @braun_bahrain handheld electric whisk, one of the attachments in the minipimer set-It whips the cream so fast, much faster than my stand mixer and it’s so convenient to be able to use any bowl to prep the cream in. I’ve partnered with @digitrolley to bring you lots of good recipes with their range of kitchen appliances, so keep following along! Recipe below , and IGTV video coming today in my Ramadan series!

Ingredients
2 tbsp nescafe powder dissolved in 1 cup hot water
1 cup heavy whipping cream 250ml
3 tbsp sweetened condensed milk
splash vanilla extract, optional
1 creme caramel sachet, powder only 49g
1 pack tea biscuits or graham crackers 7 oz or 200 g
2 tbsp cocoa powder for topping

Instructions:
-Add the heavy cream, sweetened condensed milk, vanilla and creme caramel powder to a bowl and beat until soft peaks form. Set this cream mixture aside.
-Dip the tea biscuits into the coffee briefly until they soak up the coffee but before they start to break apart. -Layer in a 7×11 or 9×9 inch clear pyrex dish, then top with half the cream mixture.
-Repeat another layer of coffee soaked biscuits on top of the heavy cream, followed by the remaining half of the cream. Sift the cocoa powder on to the top, then refrigerate for several hours until set. This is even better the next day!

.
.
.
.
.
#nescafe #nescafegold #coffeecake #biscuit #biscuitcake #nobake #nobakedessert #nobakecake #tiramisu #damnthatsdelish #tastingtable #beautifulcuisines #foodphotography #foodphotographyandstyling #tastyfood #easydessert #ramadankareem #ramadan2021 #ramadanrecipes #cream
Load More... Follow on Instagram

Copyright © 2019 on the Seasoned Pro Theme