• Skip to primary navigation
  • Skip to main content
  • Skip to primary sidebar
  • Skip to footer

 logo

  • Recipes
    • Breakfast
    • Sides
    • Soup
    • Main Meals
    • Healthy
    • Dessert
    • Drinks
  • Eating Out
  • About Me
    • Privacy Policy
  • Resources
    • Must Have Kitchen Tools
  • Nav Social Menu

    • Email
    • Facebook
    • Instagram
    • Pinterest

Bazella

Oct 19, 2020 · Leave a Comment

Jump to Recipe

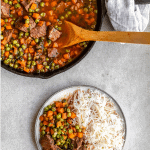
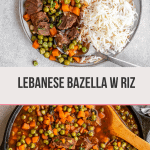
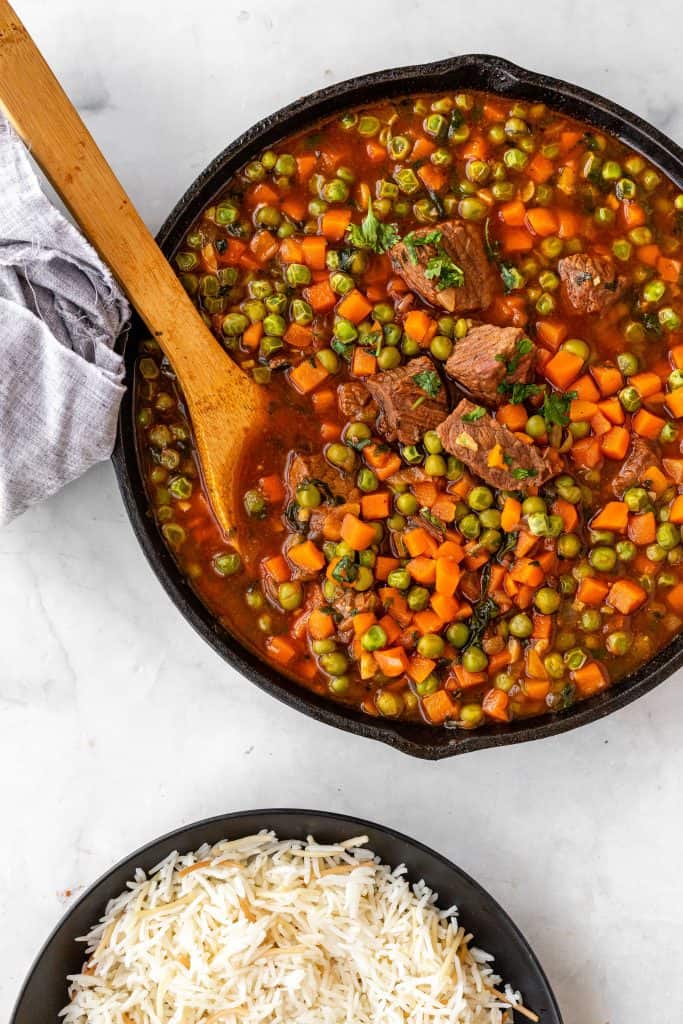
Bazella is a delicious Middle Eastern pea, carrot and meat stew. It’s nutritious, comforting and absolutely delicious. It’s so easy to make too, using frozen peas and carrots. A hit with kids and adults alike!

What is bazella?

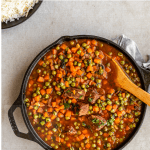
Bazella is the Arabic word for peas. It’s also the simple name for this classic Middle Eastern stew. In this stew, the peas are the star. They are cooked alongside carrots and meat in a tomato broth until they soften. The stew is hearty and comforting and best served with rice.

What is a yakhneh?

Yakhneh is the Arabic word for stew, and it refers to several classic Middle Eastern dishes that are commonly served with rice. Bamia, or Okra stew is a very popular one, Lebanese Spinach Stew another, and Mulukhiyah a very famous green stew. Fasoolia Baida is another delicious stew that combines legumes with meat, this time white beans with beef.

Why you should make this Middle Eastern pea stew:

It’s very easy to make

It’s comforting and full of flavor

Bazella is a hit with kids and adults, and a great way to get your kids to eat more veggies!

It’s very healthy, and full of fiber and protein.

Leftovers taste great, and this freezes so well!

What ingredients do you need to make bazella?

Peas: Frozen are your go to here, and they make the dish exceedingly easy!

Carrots: I like using a bag of frozen peas and carrots, which are already cut into tiny cubes plus an extra bag of peas to make sure the ration is pea heavy. This is much easier than getting fresh carrots and chopping them up.

Beef (or lamb): Boneless meat chunks cut into 1.5-2 inch pieces. You can use tough cut of meat, like chuck, because the meat will be cooked in high pressure if using the instant or pressure cooker, or for a long time if usin ga normal saucepan.

Spices: seven spices or all spice or mixed spice, plus a little cinnamon powder, cumin, salt and pepper. I also add a bay leaf while cooking the meat.

Onion

Tomato Paste: the tomato flavoring that will give depth to our stew. Add as much as you like! I sometimes add more to get the sauce extra thick and tomato-y

Garlic and Coriander: a very commonly added addition to Arabic stews, sauteed garlic and coriander add so much flavor. You crush a good amount of garlic, and fry it until golden brown with fresh coriander in some olive oil. This is typically added to the stew as the final step.

How to make bazella in an Instant Pot:

An instant pot is amazing at quickly cooking beef cubes, and it’s awesome that you can saute the beef in the same pot. To make in an instant pot:

Turn on the saute function on the Instant Pot, add the olive oil, and brown the meat, a few minutes a side until browned and caramelized.

Add the diced onion, water, spices, bay leaf, and tomato paste. Turn the cook function to High pressure for 25 minutes, making sure the vent is sealed.

Once cook time is over, naturally release the pressure for 10-15 minutes, then vent any remaining pressure and open the lid. Switch back to saute function, add the frozen peas and carrots, and cook for 10-15 minutes or so until carrots and peas are tender and cooked through.

Add the sauteed garlic and cilantro (coriander), stir until combined and serve over rice.

How to make bazella on the stove top:

The steps are more or less the same. Brown the meat, then add water and spices. However, DON’T add the tomato paste to the water. This is because the meat won’t cook well in tomato broth.

Allow the meat to cook for an hour or so on a medium high simmer until cooked through and tender, then you add the tomato paste in, stir, and add the frozen peas and carrots. Simmer until cooked through, probably around 20 minutes.

FAQs and tips for making the best bazella:

Can I make this vegetarian?

Absolutely! Feel free to omit the meat, and cook the peas in vegetable stock.

Can I substitute lamb or ground beef?

Yes! Just make sure whatever meat you are using is fully cooked before adding the peas and carrots.

Adjust: Make this to your taste preference. You can add more tomato paste to get a richer tomato flavor, or less for a thinner stew. You can add more or less garlic, and seasoning.

Use tough cuts of meat: The meat is cooked under intense pressure, or for long enough a time that’ll become tender without falling apart. This is the perfect opportunity to use the less fancy cuts of meat.

Cook the peas until done! Just keep tasting until they are the amount of tender you like.

What to serve with bazella:

This is very commonly served with vermicelli rice. I love it with it! You can find an easy recipe for that here.

I like a little spice with mine, so I usually add a few dashes of hot sauces, or eat a spicy green chili pepper on the side!

You can also serve this with plain rice, pita bread, or even have it carb free in a bowl.

How to store leftover bazella:

Leftovers last for 3-4 days tightly covered in the fridge. I think this gets better with time.

This also freezes very well, for up to 3 months.

Other classic Middle Eastern recipes you might like:

Instant Pot Mujaddara

Fasoolia Baida

Mulukhiyah

Dawood Basha

Bamia

Bazella

A Middle Eastern pea, carrot and beef stew that's so easy to make, healthy and utterly comforting.
Print Pin
Rate
Course: Main Course
Cuisine: Middle Eastern
Keyword: peas, stew
Prep Time: 10 minutes
Cook Time: 9 minutes
Servings: 6 people
Calories: 298kcal
Author: Farah Abumaizar

Equipment

  • Instant Pot (optional)

Ingredients

  • 2 tbsp olive oil
  • 1 lb boneless beef cubes (About 1-2 inch cubes) 500 g
  • 4 cups water
  • 1 tsp seven spices
  • 1/4 tsp cinnamon powder
  • 1 tsp salt
  • 1/4-1/2 tsp black pepper powder
  • 1/4 tsp cumin powder
  • 1 small onion, diced
  • 1 bay leaf
  • 4-5 tbsp tomato paste 70g
  • 1 tbsp olive oil
  • 10 garlic cloves, crushed
  • 1 bunch cilantro (coriander) finely chopped
  • 1 bag mixed frozen peas and cubed carrots (1 lb, 450 g)
  • 1 bag frozen peas (1 lb 400g)

Instructions

  • If using Instant Pot, turn it to saute mode, and add the olive oil until hot. If using a regular saucepan, do the same thing on medium high heat. Add the beef cubes, and cook stirring occasionally until browned.
  • Add the water, the seven spices, cinnamon powder, salt, black pepper and cumin powder, then the diced onion and bay leaf. If making in the Instant Pot, add the tomato paste, and stir to combine, then turn pressure to high for 25 minutes. Make sure valve is sealed). After cook time is over, let the pressure naturally release for 10 minutes before venting remaining pressure and opening the Instant Pot.
  • If using a regular saucepan, boil the meat until completely cooked before adding the tomato paste. This will take about 1 hour on a high simmer.
  • While the meat is cooking, prepare the sauteed garlic and coriander. Heat the olive oil in a small skillet on medium high heat, then add the garlic and coriander. Stir and cook until garlic turns golden and coriander wilts, then set aside.
  • Once the meat has cooked through, switch Instant Pot to saute function and add the frozen peas and carrots, and the extra bag of frozen peas. Saute for 10-15 minutes or until peas and carrots are cooked through and tender. Stir in the sauteed coriander and garlic mixture, and serve with vermicelli rice.

Notes

This recipe can easily be made in an Instant Pot or regular Pressure cooker or stove top. The only difference will be how long the meat cooks for, and if doing this in a regular saucepan not a pressure cooker, don’t add the tomato paste until after the meat cubes cook through and are tender. 
For a great recipe for vermicelli rice, check this out.
Tried this recipe?Mention @everylittlecrumb or tag #everylittlecrumb!

Nutrition

Calories: 298kcal

Bazella- Middle Eastern Pea Stew by everylittlecrumb on Jumprope.

Did you make this? Tag @everylittlecrumb or hashtag #everylittlecrumb and I’ll share your images!

Pin for later!

Healthy, Instant Pot, Main Meals, Recipes

Previous Post: « Instant Pot Mujaddara
Next Post: San Sebastian Cheesecake »

Reader Interactions

Leave a Reply Cancel reply

Your email address will not be published. Required fields are marked *

Recipe Rating


Primary Sidebar

Get more stuff

Subscribe to our mailing list and get interesting stuff and updates to your email inbox.

Thank you for subscribing.

Something went wrong.

we respect your privacy and take protecting it seriously

FeedFeed

Featured Recipes

Nana tea

Halal Guys Chicken and Rice

Aish El Saraya

Instant Pot Enchilada Soup

Death By Chocolate Zucchini Bread

More

Footer

everylittlecrumb

Farah Abu Maizar | Food Lover
Good morning! If there’s one thing we like doing Good morning! If there’s one thing we like doing, it’s experimenting with breakfast dishes 🍳.These beauties are froached eggs- poached eggs that are lightly fried and seasoned with breadcrumbs. Best of both worlds! Creamy poached eggs, runny yolk but a little crisp on the white part of the eggs. So good! Inspired by @sveverything , we used our sous vide machine for this but you can do this with regular poached eggs. Recipe can be found linked in bio or at https://everylittlecrumb.com/froached-eggs/ . Team runny yolk anyone? 
.
.
.
.
.
#eggs #poachedeggs #poachedegg #eggsontoast #beautifulcuisines #tasty #delish #foodphotography #foodstyling #foodstylingandphotography #cheeseontoast #foodblogger #foodie #breakfast #brunch #instayum #yum #brunch #tastingtable #f52community #food52 #yolkporn #friday
How I spend a lot of my weekends😂. Nothing like How I spend a lot of my weekends😂. Nothing like a big bowl of cookie dough to say weekend mode on! Are you like me and end up eating more dough than actual cookies? My foolproof recipe I use and post time and time again 👇🏼(and often double the batch so I can store some in the freezer!)

Ingredients:
1 stick butter, softened 113 g
3/4 cup tightly packed brown sugar (I like using 1/2 cup light brown and 1/4 cup dark brown, but you can use either or) 150 g total
1/4 cup white sugar 50 g
1 egg, room temperature
1 tsp vanilla extract
1 3/4 cup all purpose flour 220 g
3/4 tsp baking soda
1/4 tsp salt
1 cup semi-sweet chocolate chips or chunks
flaky salt for topping, optional

Instructions:
-In the bowl of a stand mixer fitted with a paddle attachment, or a handheld mixer, cream together butter, brown sugar, and white sugar for 5 minutes on medium speed until light and fluffy.
-Once five minutes is over, add in egg and vanilla and mix until combined.
In a separate bowl, mix flour, baking soda, and salt, and mix until combined. Add these dry ingredients to the butter mixture on low speed, and mix until just combined.
-Using a wooden spoon or spatula, mix in chocolate chips or chunks until just combined. Place bowl of dough in fridge for at least 30 minutes to chill.
-While dough is chilling, heat oven to 180 C (350F). Portion dough out into heaped 1 tbsp-2 tbsp sized dough pieces on parchment paper lined baking sheets. 
-Bake for 11-12 minutes or until golden brown on the edges but still soft in the center. Cool until cookies firm up, then enjoy, still warm.
.
.
.
.
.

#chocolatecake #cookiemonster #cakestagram #cakephotos #layercake #chocolate #weekendbaking #foodblog #instayum #yummy #bakery #foodporn #foodtographyschool #foodphotography #chocolatechips #delish #foodfluffer #damnthatsdelish #cookiedough #chocatechipcookies #bakes #bakestagram #doughbowl #chocolatechips #hersheys
Bbq salmon bowls with mango avocado salsa- unbelie Bbq salmon bowls with mango avocado salsa- unbelievable! And start to finish, you can be eating these in 15-20 minutes. Save this recipe for your next meal, you don’t want to miss out!

I’ve partnered with @kilosamak to produce a few recipes with their quality seafood- I’ve tried several of their items and genuinely loved them all! They deliver seafood straight to your door for you to enjoy and cook at home. Takes all the guesswork out of trying to choose and clean fish yourself, perfect solution for someone like me who loves seafood but isn’t so great at prepping it! Check out their Instagram page on how to order, or head to the link in my bio.

This salmon has a smoky slightly sweet rub, is baked in the oven for ultimate ease, and gets piled on to rice and topped with an easy, addictive, zingy mango and avocado salsa. Adapted from @pinchofyum , I’ll make this again and again!

Ingredients:
For the salmon:
2 fillets, about 250 g each 
Spice Rub:
2 tbsp brown sugar
1.5 tsp paprika 
1 tsp garlic powder
1 tsp onion powder, optional 
1/2 tsp chili powder
1/2 tsp salt 
2 tbsp olive oil 

Mango avocado salsa:
1 diced mangos 
1 diced avocado
1/4 cup finely diced coriander 
1/4 cup finely diced red onion 
1 inch spicy green chili pepper, finely chopped
1 tsp honey
Juice and zest of one lime
Salt to taste

Method:
- Make the salsa by mixing together all the salsa ingredients and placing bowl in fridge while you make the salmon.
- Heat oven to 240C, and line a baking sheet with parchment paper. 
-Mix together all the ingredients for the salmon rub, and rub thoroughly all over the salmon, both sides.
- Bake for 10-12 minutes until salmon is opaque and cooked all the way through.
-Assemble bowls with rice, flaked pieces of salmon,and plenty of mango avocado salsa. Enjoy 😍

Catch the steps in my story!
Have you tried this pasta yet? Save this for your Have you tried this pasta yet? Save this for your next weeknight meal! Saucy macarona iltaybeen, can’t get much more comforting.  Adapted from @jedir3waish , makes for an easy delicious main that’ll make your family including kids very happy! Can find a step by step linked bio, or at https://everylittlecrumb.com/macarona/ , or in my story!

INGREDIENTS:
 
2 tbsp olive oil, divided
big pinch of salt
3 heaped tbsp tomato paste, divided 2 oz or 70 g
1 pack elbow macaroni 14 oz or 400 g
1 onion, very finely diced
1 zucchini, finely diced
1 carrot, finely diced
4-5 garlic cloves, minced
250 g ground beef
1 tsp seven spices
1 tsp turmeric
1/2 tsp paprika powder
1/4 tsp basil
1/4 tsp cinnamon powder
1/4 tsp garlic powder
1/2 tsp black pepper
1 tsp salt
1 can crushed tomatoes 14.5oz (400g)

NSTRUCTIONS
 
Bring a large pot of water to boil, add 1 tbsp olive oil and the salt, one tbsp of tomato paste, then the pack of pasta. Cook until al dente, then drain the pasta, reserving the pasta water. Set cooked pasta aside.

In a large skillet, heat the remaining tbsp of olive oil. Once hot, add the diced onion, and cook for 4-5 minutes until softened. Add the diced zucchini and carrots, and garlic and cook for a further 4-5 minutes until softened slightly.

Add the ground beef, and cook, smushing with a wooden spoon to break up the meat. Keep cooking until the beef is browned and cooked through, then optionally, drain the fat.
Add in the salt, pepper, and all the spices. Cook for another minute or so. Add the remaining 2 tbsp of tomato paste, and stir.

Add the can of crushed tomatoes and stir to combine. Bring to a simmer, then add a big ladleful of the reserved pasta water and simmer for 2-3 minutes on low heat.

Add the pasta to the sauce (I don't always add all the pasta, maybe 3/4 of the cooked amount until the finished dish is as saucy as I like). Stir to coat, cook for another minute or so until the pasta is warmed through, then enjoy!
This gorgeous tiramisu was so kindly sent to me by This gorgeous tiramisu was so kindly sent to me by @cadysweets.sa on my birthday, and we enjoyed every light fluffy bite of it. Their old account got hacked so follow along and support their new account ! They have a bunch of cakes and sweets for every occasion, so make someone or yourself happy and order one for a treat🤩! Send this to the tiramisu lover in your life 🍰.
.
.
.
.
.

#chocolatecake #magnoliabakery #cakestagram #cakephotos #layercake #chocolate #ganache #foodblog #instayum #yummy #bakery #foodporn #foodtographyschool #foodphotography #slice #delish #foodfluffer #damnthatsdelish #tiramisu #birthdaytreat #dessertbae #dessertoftheday #scoop #foodstyling #foodstylingandphotography
Easiest at home crusty bread with a great open cru Easiest at home crusty bread with a great open crumb texture. It’s the no knead bread from @breadin5 and has yet to fail me. Check my story for the step by step, and swipe for a video reveal.

Ingredients for two small loaves:
1.5 cups lukewarm water 
1/2 tbsp any type of yeast
1/2 tbsp salt
3 1/4 cup plain flour (450g)

Method:
In a large bowl, stir together the water with the yeast and salt. Try to dissolve but it’s fine if you have clumps.
2. Add flour all at once and stir, just until no flour patches remain.
3. Cover loosely with a kitchen cloth and leave it to rest for 2 hours in a warm place until risen and bubbly.
After this rest you can:
- Use dough immediately if impatient, but it’s easier to work with if cold, so maybe pop in fridge briefly
- Or, their recommended method and the one I do, leave in the fridge loosely covered for 12 hours or overnight. 
Refrigerated dough lasts up to two weeks, and flavor depends over time!
4. The next day, the dough might look deflated. That’s fine! When ready to bake, divide dough in half (I got two 400g dough balls)- it might be easier to handle if you sprinkle the dough lightly with flour, and take the half you are going to bake out of the fridge. Let it rest on a parchment paper lined baking sheet 40-90 minutes. The longer the more interior bubbles you should have. Preheat oven to 235C (450F), and after rest, make a few deep slashes in the dough with a sharp knife.
5. Place in the middle rack of the oven, and on the bottom rack place a roasting pan that had about a cup of hot water in it. This will create steam which gives a crustier crust!
6. Bake for 30-35 minutes or until deep golden brown.
7. Let it cool completely before enjoying!
.
.

.
.
.

#damnthatsdelish #foodfluffer #thebakefeed #feedfeed #tastingtable #forthemaking #BHGfood #foodblogfeed #bakedfromscratch #bakinglove #f52grams #foodbloggerpro #bakersofinstagram #TOHfoodie #foodphotography #canonphotos #bread #instayummy #kitchn #huffposttaste #food #dough #foodie #nokneadbread #homemadebread #doughter
Good morning! With dine in still closed in Saudi, Good morning! With dine in still closed in Saudi, Friday pancakes are fast becoming a tradition. And honestly, I don’t think I’ve had better pancakes at any restaurant recently! The easiest, fluffiest diner style pancakes are a huge hit in our family, find the recipe below adapted from @allrecipes . I like to barely warm the oven (110C or so) and keep the finished pancakes in a pan in the oven until I’m done with all the batter so they stay warm and perfect 👌🏼.

Ingredients
3/4 cup milk 170g
1 tbsp white vinegar
1 cup flour 125g
2 tbsp sugar 25g
1 tsp baking powder
1/2 tsp baking soda
1/4 tsp salt
1 egg room temperature
1/2 tsp vanilla
2 tbsp butter, melted 28g

Instructions:
-In a large bowl, combine the milk and vinegar, and let aside to stand for 5 minutes until curdled. Whisk to combine.
-In a separate large bowl, mix together the flour, sugar, baking powder, baking soda and salt.
-Add an egg, the vanilla and the melted butter to the buttermilk and whisk to combine.
-Add the dry ingredients all at once to the wet, and whisk until flour patches disappear. A few lumps are fine, but don't over mix.
-Let the batter rest for 5-10 minutes while you heat a pan on the stove.
lightly grease the pan with nonstick spray or butter, and pour about 1/4 cup of batter on the pan. Cook for 2-3 minutes on each side or until golden brown. (Flip the first time once you see bubbles form and the edges of the pancake dry up).
-Enjoy with toppings of your choice!
.
.
.
.
.
#pancakes #pancakerecipe #blueberrypancakes #maplesyrup #breakfast #morningslikethese #fridaymorning #flatlay #foodfluffer #breakfastrecipes #breakfastfood #breakfastofchampions #pancakelover #food #foodtography #foodtographyschool #foodphotography #delish #foodphotos #weekendbreakfast #eatingathome #recipeoftheday #foodporn #foodflatlay #blueberries #trayoftheday
One of my photos from my shoot @tackle.baks . How One of my photos from my shoot @tackle.baks . How insane does this tom yum soup look? For those who haven’t tried this casual seafood spot yet, you really should! The food is great and priced very reasonably, and they have some menu items I’m obsessed with like their crispy fish burger, the salmon poke salad and the creamy truffle shrimp👌🏼. They currently have a delivery offer going for only 5SAR on HungerStation, so no time like the present! Have I tempted you with this photo of the tom yum soup? I’m hungry just writing this caption🤤.
.
.
.
.
.
#soup #tomyum #tomyumsoup #food #foodphotography #canonphotography #canon #seafood #seafoodlover #shrimp #delish #beautifulcuisines #foodtographyschool #foodtography #foodblogger #instayum #lonelyplanetfood #dametravelerfoodie #soupseason #restaurantphotography #khobar #tastemade #tastingtable #foodfluffer
Load More... Follow on Instagram

Copyright © 2019 on the Seasoned Pro Theme