• Skip to primary navigation
  • Skip to main content
  • Skip to primary sidebar
  • Skip to footer

 logo

  • Recipes
    • Breakfast
    • Sides
    • Soup
    • Main Meals
    • Healthy
    • Dessert
    • Drinks
  • Eating Out
  • About Me
    • Privacy Policy
  • Resources
    • Must Have Kitchen Tools
  • Nav Social Menu

    • Email
    • Facebook
    • Instagram
    • Pinterest

Fasoolia Baida- Middle Eastern White Bean Stew

Feb 24, 2020 · 10 Comments

Jump to Recipe
Cooked fasoolia baida white bean stew in saucepan with vermicelli rice on the side

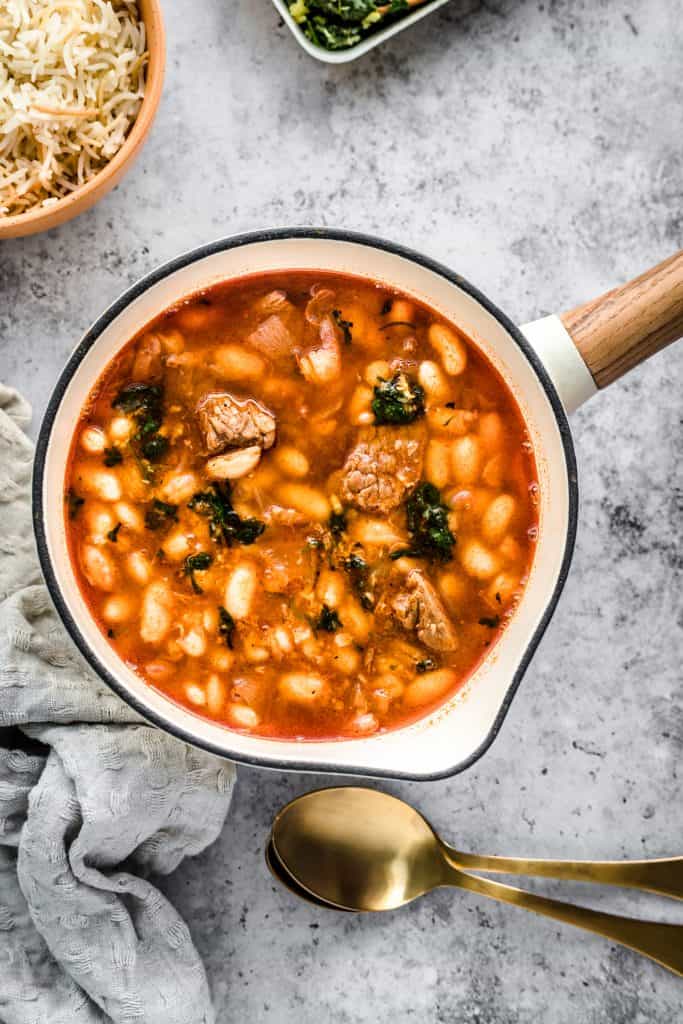
This hearty and rich authentic Middle Eastern stew is made with white beans in a meaty tomato sauce, seasoned with all those good Middle Eastern spices. Fasoolia Baida is a complete comfort food, filling stick to your ribs and just delicious!

What is Fasoolia baida?

Fasoolia Baida translates literally into white beans. It’s prepared in Middle Eastern cuisine with chunks of meat in a tomato sauce, and served with vermicelli rice usually. Fasoolya Baida is a complete comfort food, filling, stick to your ribs and just delicious! Not to mention completely healthy.

We cook two types of Fasoolia in Palestinian cuisine- the white one like this, and green fasoolia (green beans). The green beans can be prepared as a cold mezze with olive oil, lots of garlic, and no meat, or in a similar preparation as this dish, served as a main with meat.

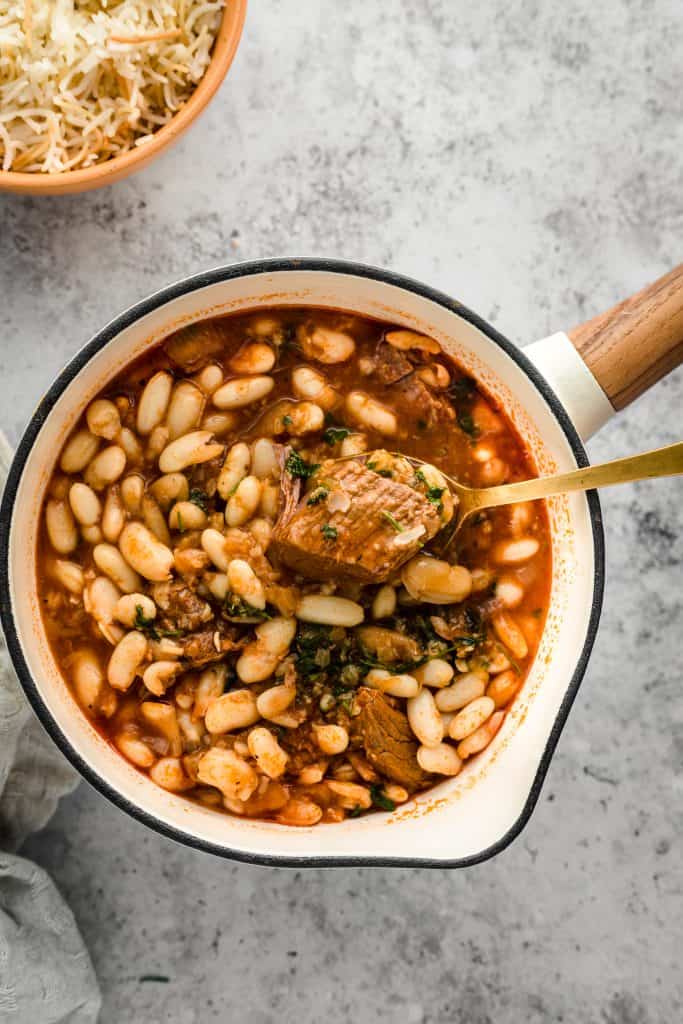
I love both green and white bean dishes, but I do have a fondness for white bean stew. The beans enrich the stew with a velvety texture, and the sauce is so wonderfully thick and comforting and fragrant. It’s such a homey dish that I’ve grown to appreciate more and more as I grow older.

How do I make Fasoolia baida?

The beans:

Let’s start with the most important component- the beans! The white beans are purchased dry, and soaked overnight in a large bowl of water. I add a teaspoon of baking soda, which helps to tenderise the beans further.

Why soak beans overnight?

It helps to reduce cooking time drastically, helps the beans maintain their shape with less split skins, and also helps remove some of indigestible sugars in the beans that cause gassiness.

The beans will be rinsed after an overnight soak, and boiled in a separate sauce pan until completely cooked through, because once they are added to our meat/tomato sauce, they won’t cook any further.

Don’t have time to soak your beans? No problem, they’ll still cook, they’ll just take longer!

Cooked fasoolia baida white bean stew in saucepan with vermicelli rice on the side

The meat:

Making the meat tomato sauce will seem very familiar to you if you’ve made Bamia before. It’s the same base.

Onions are sautéed in the base of the pan, and the meat is browned. I almost always use beef, but lamb is commonly used also. The meat is then covered with enough water to come to about an inch or two above the meat. To this, we add tomato paste, aromatics like bay leaves and cinnamon sticks, and all our spices.


There are two ways to cook this, with a pressure cooker or in a regular pan. I prefer pressure cooker because it makes it so much faster and the meat always comes out tender and perfect.

Cooking the meat cubes without a pressure cooker:

You can follow all the steps to make the meat stew, but instead of using a pressure cooker, let the meat come to a boil in the sauce and cook for 45 minutes to an hour until tender and falls apart when you cut it with a fork.

What makes this an authentic Middle Eastern recipe?

Seven spices are a very commonly use component in Levantine cooking. It’s a blend of black pepper, cinnamon, cloves, ginger, allspice, fenugreek and nutmeg. To make your own seven spices, you can try following this recipe.

What to serve Fasoolia baida with:

It’s traditionally served with vermicelli rice. I have a whole post on how to make the perfect vermicelli rice here. You can also serve with plain white rice or brown rice for a healthier option, or even enjoy this soup-style without any additional carbs.

How to store the bean stew:

This will last tightly covered in the fridge for 3-4 days, or in a freezer safe bag for 4-6 months. Thaw overnight in fridge if freezing, then heat on the stovetop.

Cooked fasoolia baida white bean stew in saucepan with vermicelli rice on the side

Fasoolia Baida – Middle Eastern White Bean Stew

A hearty stew of white beans in a meaty tomato sauce with Middle Eastern spices
5 from 5 votes
Print Pin
Rate
Course: Main Course
Cuisine: Middle Eastern
Keyword: middle eastern, beans
Prep Time: 20 minutes
Cook Time: 1 hour
Soaking Time: 12 hours
Servings: 6 people
Calories: 400kcal
Author: Farah Abumaizar

Equipment

  • Pressure Cooker

Ingredients

  • 2.5 cups dry white beans 500 g
  • 1 tsp baking soda
  • 2 tbsp olive oil
  • 1 onion, diced
  • 500 g boneless meat cubes (beef or lamb)
  • water
  • 1 carton tomato paste 200 g
  • 1 cinnamon stick
  • 2 bay leaves
  • 1 tsp seven spices
  • 1/2 tsp turmeric powder
  • 1/4 tsp cumin
  • salt and pepper to taste

For the topping:

  • 1 tbsp olive oil
  • 8-10 small cloves garlic, crushed
  • 1-2 bunches coriander, finely chopped
  • pinch salt

Instructions

  • In a large bowl, add the white beans and enough water to cover the beans completely. Add the baking soda, and soak overnight.
  • The next day, drain and rinse the beans very thoroughly to get rid of any traces of baking soda. In a large saucepan, place the beans and add water until completely covered. Bring to a boil, and leave to boil on medium heat uncovered for about an hour or until beans are completely tender and cooked through. If the water starts to dry out, top it up.
  • Meanwhile, prepare the meat/tomato sauce. In a pressure cooker on medium high heat, add enough olive oil to coat the bottom of the pan. Once hot, add the onion, and saute for a couple minutes until starting to soften. Add the meat cubes and continue to stir, until the meat has browned.
  • Add enough water to cover the meat by an inch or so, then add the tomato paste, cinnamon stick, bay leaves, seven spices, turmeric powder, cumin, and a generous sprinkling of salt and pepper.
  • Cover pressure cooker, let it come to pressure and once it has, cook for 25-30 minutes, then turn off the heat. When the pressure has released, open the pressure cooker.,* See recipe notes for how to make this without a pressure cooker
  • Once the meat has cooked through and beans are seperately cooked through, drain the beans, and add the cooked beans to the meat and tomato stew. Stir to combine thoroughly. Remove from heat.
  • To make the topping, heat the olive oil in a skillet, then add the crushed garlic, finely chopped coriander and a pinch of salt. Cook over medium high heat, stirring constantly until garlic has started to brown and herbs have wilted. Add this garlic coriander mixture to the stew and stir to combine it evenly throughout.

Notes

Served with vermicelli rice. Recipe can be found here.
 
You can follow all the steps to make the meat stew, but instead of using a pressure cooker, let the meat come to a boil in the sauce and cook for 45 minutes to an hour until tender and falls apart when you cut it with a fork.
Tried this recipe?Mention @everylittlecrumb or tag #everylittlecrumb!

Nutrition

Calories: 400kcal

If you liked this recipe, you might like:

Middle Eastern Okra Stew

Middle Eastern Stuffed Zucchini

Easy Lamb Mandi

Main Meals, Recipes

Previous Post: « Vermicelli Rice
Next Post: Lebanese Spinach Stew »

Reader Interactions

Comments

  1. Tonje says

    February 24, 2020 at 9:33 am

    5 stars
    This is so warming and comforting! Delicious stew perfect for these cold winter evenings.

    Reply
    • Farah Abumaizar says

      February 24, 2020 at 11:00 am

      That is true!!

      Reply
  2. David says

    February 24, 2020 at 2:55 pm

    5 stars
    This looks absolutely delicious! I love a good bean soup so hearty. And interesting to learn about an authentic dish like this too.

    Reply
    • Farah Abumaizar says

      February 24, 2020 at 2:58 pm

      Thanks David!! It is very authentic and a classic in the Middle East 🥰

      Reply
  3. Annie @ Annie's Noms says

    February 24, 2020 at 3:01 pm

    5 stars
    I love any kind of beans/pulses, so this looks so perfect! It also looks perfect for the weather we are having in the UK at the moment, grey, rainy and cold/windy. All I want to do is cosy up on the sofa with a bowl of this hearty stew!

    Reply
    • Farah Abumaizar says

      February 24, 2020 at 3:09 pm

      That’s the perfect stew for that! Thanks Annie!

      Reply
  4. kim says

    February 24, 2020 at 3:09 pm

    5 stars
    Loved this recipe! It turned out so flavorful and was very easy! I will definitely be making again!

    Reply
    • Farah Abumaizar says

      February 24, 2020 at 3:09 pm

      Thank you Kim so glad to hear that!

      Reply
  5. Bintu | Recipes From A Pantry says

    February 24, 2020 at 3:26 pm

    5 stars
    We love a stew so this would definitely go down a treat in my house. It sounds and looks incredible.

    Reply
    • Farah Abumaizar says

      February 24, 2020 at 3:33 pm

      Thanks so much bintu

      Reply

Leave a Reply Cancel reply

Your email address will not be published. Required fields are marked *

Recipe Rating


Primary Sidebar

Get more stuff

Subscribe to our mailing list and get interesting stuff and updates to your email inbox.

Thank you for subscribing.

Something went wrong.

we respect your privacy and take protecting it seriously

FeedFeed

Featured Recipes

Nana tea

Halal Guys Chicken and Rice

Aish El Saraya

Instant Pot Enchilada Soup

Death By Chocolate Zucchini Bread

More

Footer

everylittlecrumb

Farah Abu Maizar | Food Lover
Good morning! If there’s one thing we like doing Good morning! If there’s one thing we like doing, it’s experimenting with breakfast dishes 🍳.These beauties are froached eggs- poached eggs that are lightly fried and seasoned with breadcrumbs. Best of both worlds! Creamy poached eggs, runny yolk but a little crisp on the white part of the eggs. So good! Inspired by @sveverything , we used our sous vide machine for this but you can do this with regular poached eggs. Recipe can be found linked in bio or at https://everylittlecrumb.com/froached-eggs/ . Team runny yolk anyone? 
.
.
.
.
.
#eggs #poachedeggs #poachedegg #eggsontoast #beautifulcuisines #tasty #delish #foodphotography #foodstyling #foodstylingandphotography #cheeseontoast #foodblogger #foodie #breakfast #brunch #instayum #yum #brunch #tastingtable #f52community #food52 #yolkporn #friday
How I spend a lot of my weekends😂. Nothing like How I spend a lot of my weekends😂. Nothing like a big bowl of cookie dough to say weekend mode on! Are you like me and end up eating more dough than actual cookies? My foolproof recipe I use and post time and time again 👇🏼(and often double the batch so I can store some in the freezer!)

Ingredients:
1 stick butter, softened 113 g
3/4 cup tightly packed brown sugar (I like using 1/2 cup light brown and 1/4 cup dark brown, but you can use either or) 150 g total
1/4 cup white sugar 50 g
1 egg, room temperature
1 tsp vanilla extract
1 3/4 cup all purpose flour 220 g
3/4 tsp baking soda
1/4 tsp salt
1 cup semi-sweet chocolate chips or chunks
flaky salt for topping, optional

Instructions:
-In the bowl of a stand mixer fitted with a paddle attachment, or a handheld mixer, cream together butter, brown sugar, and white sugar for 5 minutes on medium speed until light and fluffy.
-Once five minutes is over, add in egg and vanilla and mix until combined.
In a separate bowl, mix flour, baking soda, and salt, and mix until combined. Add these dry ingredients to the butter mixture on low speed, and mix until just combined.
-Using a wooden spoon or spatula, mix in chocolate chips or chunks until just combined. Place bowl of dough in fridge for at least 30 minutes to chill.
-While dough is chilling, heat oven to 180 C (350F). Portion dough out into heaped 1 tbsp-2 tbsp sized dough pieces on parchment paper lined baking sheets. 
-Bake for 11-12 minutes or until golden brown on the edges but still soft in the center. Cool until cookies firm up, then enjoy, still warm.
.
.
.
.
.

#chocolatecake #cookiemonster #cakestagram #cakephotos #layercake #chocolate #weekendbaking #foodblog #instayum #yummy #bakery #foodporn #foodtographyschool #foodphotography #chocolatechips #delish #foodfluffer #damnthatsdelish #cookiedough #chocatechipcookies #bakes #bakestagram #doughbowl #chocolatechips #hersheys
Bbq salmon bowls with mango avocado salsa- unbelie Bbq salmon bowls with mango avocado salsa- unbelievable! And start to finish, you can be eating these in 15-20 minutes. Save this recipe for your next meal, you don’t want to miss out!

I’ve partnered with @kilosamak to produce a few recipes with their quality seafood- I’ve tried several of their items and genuinely loved them all! They deliver seafood straight to your door for you to enjoy and cook at home. Takes all the guesswork out of trying to choose and clean fish yourself, perfect solution for someone like me who loves seafood but isn’t so great at prepping it! Check out their Instagram page on how to order, or head to the link in my bio.

This salmon has a smoky slightly sweet rub, is baked in the oven for ultimate ease, and gets piled on to rice and topped with an easy, addictive, zingy mango and avocado salsa. Adapted from @pinchofyum , I’ll make this again and again!

Ingredients:
For the salmon:
2 fillets, about 250 g each 
Spice Rub:
2 tbsp brown sugar
1.5 tsp paprika 
1 tsp garlic powder
1 tsp onion powder, optional 
1/2 tsp chili powder
1/2 tsp salt 
2 tbsp olive oil 

Mango avocado salsa:
1 diced mangos 
1 diced avocado
1/4 cup finely diced coriander 
1/4 cup finely diced red onion 
1 inch spicy green chili pepper, finely chopped
1 tsp honey
Juice and zest of one lime
Salt to taste

Method:
- Make the salsa by mixing together all the salsa ingredients and placing bowl in fridge while you make the salmon.
- Heat oven to 240C, and line a baking sheet with parchment paper. 
-Mix together all the ingredients for the salmon rub, and rub thoroughly all over the salmon, both sides.
- Bake for 10-12 minutes until salmon is opaque and cooked all the way through.
-Assemble bowls with rice, flaked pieces of salmon,and plenty of mango avocado salsa. Enjoy 😍

Catch the steps in my story!
Have you tried this pasta yet? Save this for your Have you tried this pasta yet? Save this for your next weeknight meal! Saucy macarona iltaybeen, can’t get much more comforting.  Adapted from @jedir3waish , makes for an easy delicious main that’ll make your family including kids very happy! Can find a step by step linked bio, or at https://everylittlecrumb.com/macarona/ , or in my story!

INGREDIENTS:
 
2 tbsp olive oil, divided
big pinch of salt
3 heaped tbsp tomato paste, divided 2 oz or 70 g
1 pack elbow macaroni 14 oz or 400 g
1 onion, very finely diced
1 zucchini, finely diced
1 carrot, finely diced
4-5 garlic cloves, minced
250 g ground beef
1 tsp seven spices
1 tsp turmeric
1/2 tsp paprika powder
1/4 tsp basil
1/4 tsp cinnamon powder
1/4 tsp garlic powder
1/2 tsp black pepper
1 tsp salt
1 can crushed tomatoes 14.5oz (400g)

NSTRUCTIONS
 
Bring a large pot of water to boil, add 1 tbsp olive oil and the salt, one tbsp of tomato paste, then the pack of pasta. Cook until al dente, then drain the pasta, reserving the pasta water. Set cooked pasta aside.

In a large skillet, heat the remaining tbsp of olive oil. Once hot, add the diced onion, and cook for 4-5 minutes until softened. Add the diced zucchini and carrots, and garlic and cook for a further 4-5 minutes until softened slightly.

Add the ground beef, and cook, smushing with a wooden spoon to break up the meat. Keep cooking until the beef is browned and cooked through, then optionally, drain the fat.
Add in the salt, pepper, and all the spices. Cook for another minute or so. Add the remaining 2 tbsp of tomato paste, and stir.

Add the can of crushed tomatoes and stir to combine. Bring to a simmer, then add a big ladleful of the reserved pasta water and simmer for 2-3 minutes on low heat.

Add the pasta to the sauce (I don't always add all the pasta, maybe 3/4 of the cooked amount until the finished dish is as saucy as I like). Stir to coat, cook for another minute or so until the pasta is warmed through, then enjoy!
This gorgeous tiramisu was so kindly sent to me by This gorgeous tiramisu was so kindly sent to me by @cadysweets.sa on my birthday, and we enjoyed every light fluffy bite of it. Their old account got hacked so follow along and support their new account ! They have a bunch of cakes and sweets for every occasion, so make someone or yourself happy and order one for a treat🤩! Send this to the tiramisu lover in your life 🍰.
.
.
.
.
.

#chocolatecake #magnoliabakery #cakestagram #cakephotos #layercake #chocolate #ganache #foodblog #instayum #yummy #bakery #foodporn #foodtographyschool #foodphotography #slice #delish #foodfluffer #damnthatsdelish #tiramisu #birthdaytreat #dessertbae #dessertoftheday #scoop #foodstyling #foodstylingandphotography
Easiest at home crusty bread with a great open cru Easiest at home crusty bread with a great open crumb texture. It’s the no knead bread from @breadin5 and has yet to fail me. Check my story for the step by step, and swipe for a video reveal.

Ingredients for two small loaves:
1.5 cups lukewarm water 
1/2 tbsp any type of yeast
1/2 tbsp salt
3 1/4 cup plain flour (450g)

Method:
In a large bowl, stir together the water with the yeast and salt. Try to dissolve but it’s fine if you have clumps.
2. Add flour all at once and stir, just until no flour patches remain.
3. Cover loosely with a kitchen cloth and leave it to rest for 2 hours in a warm place until risen and bubbly.
After this rest you can:
- Use dough immediately if impatient, but it’s easier to work with if cold, so maybe pop in fridge briefly
- Or, their recommended method and the one I do, leave in the fridge loosely covered for 12 hours or overnight. 
Refrigerated dough lasts up to two weeks, and flavor depends over time!
4. The next day, the dough might look deflated. That’s fine! When ready to bake, divide dough in half (I got two 400g dough balls)- it might be easier to handle if you sprinkle the dough lightly with flour, and take the half you are going to bake out of the fridge. Let it rest on a parchment paper lined baking sheet 40-90 minutes. The longer the more interior bubbles you should have. Preheat oven to 235C (450F), and after rest, make a few deep slashes in the dough with a sharp knife.
5. Place in the middle rack of the oven, and on the bottom rack place a roasting pan that had about a cup of hot water in it. This will create steam which gives a crustier crust!
6. Bake for 30-35 minutes or until deep golden brown.
7. Let it cool completely before enjoying!
.
.

.
.
.

#damnthatsdelish #foodfluffer #thebakefeed #feedfeed #tastingtable #forthemaking #BHGfood #foodblogfeed #bakedfromscratch #bakinglove #f52grams #foodbloggerpro #bakersofinstagram #TOHfoodie #foodphotography #canonphotos #bread #instayummy #kitchn #huffposttaste #food #dough #foodie #nokneadbread #homemadebread #doughter
Good morning! With dine in still closed in Saudi, Good morning! With dine in still closed in Saudi, Friday pancakes are fast becoming a tradition. And honestly, I don’t think I’ve had better pancakes at any restaurant recently! The easiest, fluffiest diner style pancakes are a huge hit in our family, find the recipe below adapted from @allrecipes . I like to barely warm the oven (110C or so) and keep the finished pancakes in a pan in the oven until I’m done with all the batter so they stay warm and perfect 👌🏼.

Ingredients
3/4 cup milk 170g
1 tbsp white vinegar
1 cup flour 125g
2 tbsp sugar 25g
1 tsp baking powder
1/2 tsp baking soda
1/4 tsp salt
1 egg room temperature
1/2 tsp vanilla
2 tbsp butter, melted 28g

Instructions:
-In a large bowl, combine the milk and vinegar, and let aside to stand for 5 minutes until curdled. Whisk to combine.
-In a separate large bowl, mix together the flour, sugar, baking powder, baking soda and salt.
-Add an egg, the vanilla and the melted butter to the buttermilk and whisk to combine.
-Add the dry ingredients all at once to the wet, and whisk until flour patches disappear. A few lumps are fine, but don't over mix.
-Let the batter rest for 5-10 minutes while you heat a pan on the stove.
lightly grease the pan with nonstick spray or butter, and pour about 1/4 cup of batter on the pan. Cook for 2-3 minutes on each side or until golden brown. (Flip the first time once you see bubbles form and the edges of the pancake dry up).
-Enjoy with toppings of your choice!
.
.
.
.
.
#pancakes #pancakerecipe #blueberrypancakes #maplesyrup #breakfast #morningslikethese #fridaymorning #flatlay #foodfluffer #breakfastrecipes #breakfastfood #breakfastofchampions #pancakelover #food #foodtography #foodtographyschool #foodphotography #delish #foodphotos #weekendbreakfast #eatingathome #recipeoftheday #foodporn #foodflatlay #blueberries #trayoftheday
One of my photos from my shoot @tackle.baks . How One of my photos from my shoot @tackle.baks . How insane does this tom yum soup look? For those who haven’t tried this casual seafood spot yet, you really should! The food is great and priced very reasonably, and they have some menu items I’m obsessed with like their crispy fish burger, the salmon poke salad and the creamy truffle shrimp👌🏼. They currently have a delivery offer going for only 5SAR on HungerStation, so no time like the present! Have I tempted you with this photo of the tom yum soup? I’m hungry just writing this caption🤤.
.
.
.
.
.
#soup #tomyum #tomyumsoup #food #foodphotography #canonphotography #canon #seafood #seafoodlover #shrimp #delish #beautifulcuisines #foodtographyschool #foodtography #foodblogger #instayum #lonelyplanetfood #dametravelerfoodie #soupseason #restaurantphotography #khobar #tastemade #tastingtable #foodfluffer
Load More... Follow on Instagram

Copyright © 2019 on the Seasoned Pro Theme