• Skip to primary navigation
  • Skip to main content
  • Skip to primary sidebar
  • Skip to footer

 logo

  • Recipes
    • Breakfast
    • Sides
    • Soup
    • Main Meals
    • Healthy
    • Dessert
    • Drinks
  • Eating Out
  • About Me
    • Privacy Policy
  • Resources
    • Must Have Kitchen Tools
  • Nav Social Menu

    • Email
    • Facebook
    • Instagram
    • Pinterest

Sous Vide Brisket

Feb 17, 2020 · 16 Comments

Jump to Recipe
Sliced cooked sous vide brisket on a tray with bread buns, pickles and barbecue sauce

To have smokehouse style brisket without ever having to turn on a grill, try this recipe using a sous vide machine and your oven to give you seasoned smoky tender sous vide brisket, perfect for sandwiches!

If you love brisket, but you don’t have a sous vide machine, be sure to check out this recipe.

What is sous vide?

Sous-vide means cooking something at a lower temperature for a longer time. The food is sealed in plastic pouches or glass jars and cooked in a water bath, at a temperature that’s precisely regulated throughout. I use the Anova Pressure Cooker. Not an affiliate link, I just genuinely love this tool! It has bluetooth so you can control it from your phone and it’s such a great way to elevate home cooking, giving restaurant style results.

Why should you sous vide meat?

Because of how precisely controlled the temperature of the water is, it cooks the meat so precisely that it’ll be almost impossible to get overcooked meat. You just follow the time/temperature range based on the type of meat you like, and you’re guaranteed good results. One of our favourite things to eat is sous vide steak- truly steakhouse quality meat in the comfort of your own living room.

How to prep a sous vide brisket:

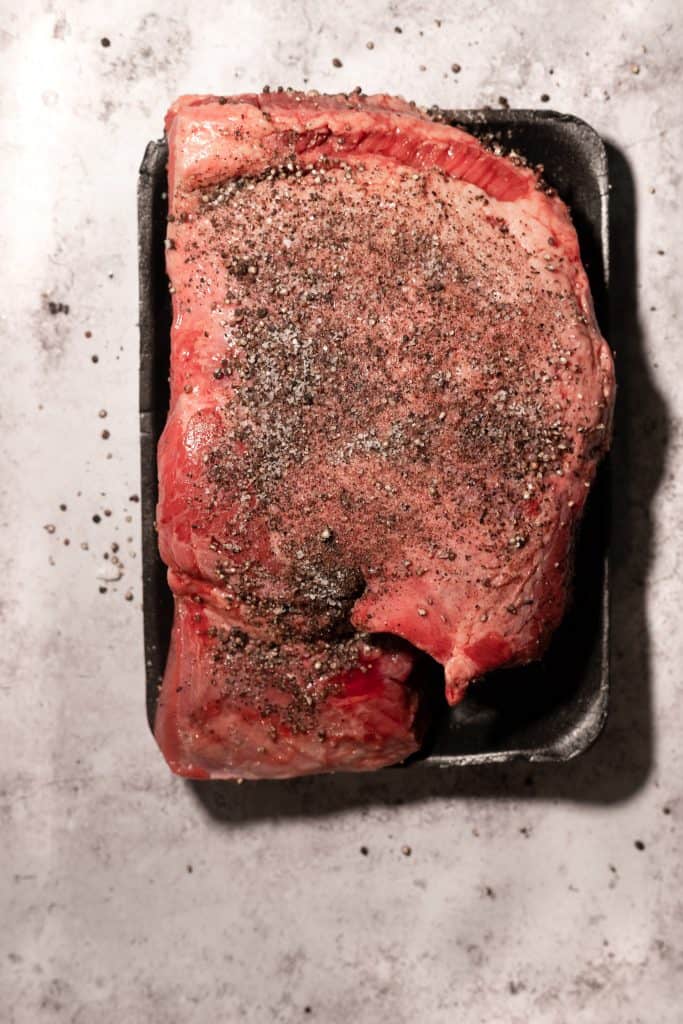
The beauty of this is the prep work is minimal. Even the ingredients are minimal! You need salt and coarse pepper. That’s it. You’ll rub most of the salt/pepper mix over the surface of the raw brisket, reserving some that you’ll rub on once the brisket is out of the sous vide and going into the oven.

raw brisket being seasoned with salt and pepper

How to make the coarse pepper:

I found it easiest to to take whole peppercorns and grind them in a small spice grinder. You can also use a pepper mill but it’ll take some arm work to get the amount of pepper you need. You could also try using a small blender.

Vacuum sealing the brisket:

Vacuum sealing is so convenient because it removes all the air inside the plastic bag that the brisket goes into. This means the brisket will lie nicely in the water bath without floating up to the top. If the whole brisket won’t fit into the size of vacuum seal bags you have, you can cut the brisket in half and use two bags.

raw brisket in sous vide bag

If you don’t have a vacuum sealer, how do you prevent the bags from floating in the water?

There is a great article on this on Anova’s website. There’s a few hacks including getting all the air you can out of the bag, weighing the inside of the bag by adding a few dull butter knives to the bag, and placing weight externally onto the bag.

Temperature settings on sous vide:

I got the recipe and guidelines from Serious Eats, who are experts at technical cooking.

For brisket like that pictured in this post, with a more tender steak like texture: Set at 135°F (57°C) and cook for 36 to 72 hours.

For more traditional shredded brisket: Set at 155°F (68°C) and cook for 24 to 36 hours.

It seems like a long time, and it is, but it’s all completely hands off.

What to do after the brisket has been sous- vided:

Cool the brisket to room temperature. If you want this to happen faster, you can dunk the vacuum bag with the brisket in it in an ice water bath.

After this, you can keep the sous-vide brisket in the fridge for 5-7 days and finish off in the oven whenever you want it. If cooking immediately:

Heat oven to 150 C (300 F) or convection 135 C (275F). Blot brisket dry with paper towels, season with the remaining salt/pepper mix, and cook fat side up on a wire rack lined roasting tray for 1.5-2 hours or until a dark bark has formed.

Rest for 30 minutes before slicing.

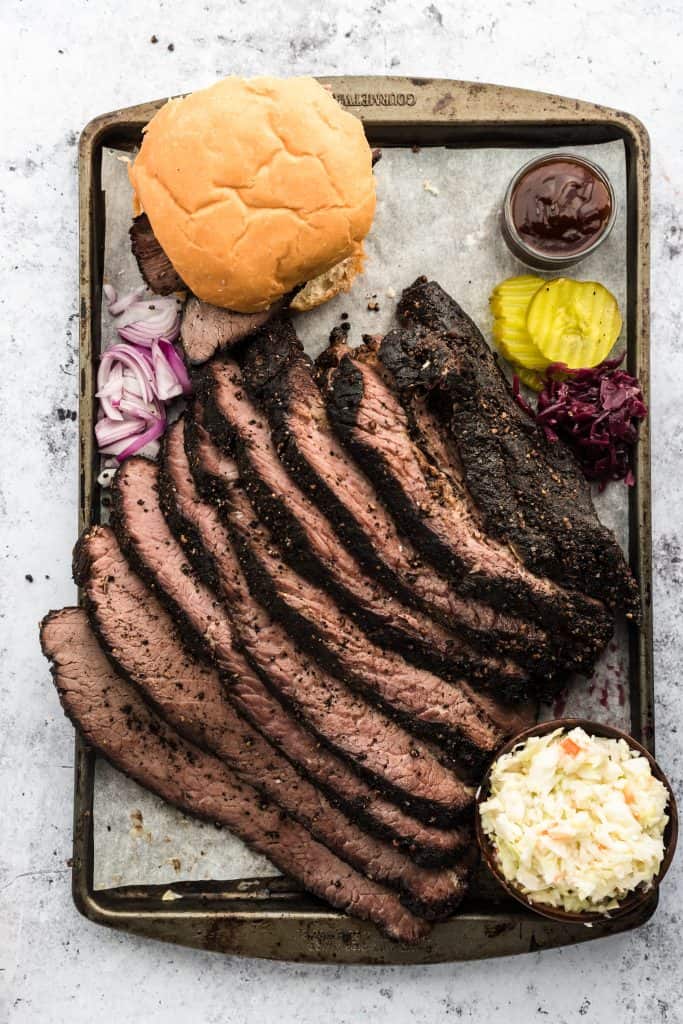
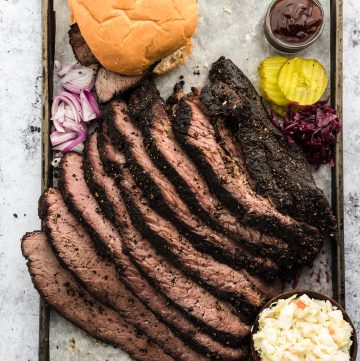
What to serve brisket with:

Bread buns, dill pickles, sliced onion, and barbecue sauce.

Want to make your own pickles? EASY. Try this recipe.

To amp up store-bought barbecue sauce, you can use some of the liquid from inside the sous vide bags, reduce it on the stove, and stir in store-bought bbq sauce until you get the consistency and flavor you like.

For a delicious and healthified homemade version of bbq sauce, check out this recipe.

Storing leftover brisket:

Brisket stored (not in gravy) will last up to four days in the fridge.

Sliced cooked sous vide brisket on a tray with bread buns, pickles and barbecue sauce

Sous Vide Brisket

A smokey, tender brisket made with a handful of ingredients, cooked souse vide then finished off in the oven for an easy way to wow your guests.
5 from 6 votes
Print Pin
Rate
Course: Main Course
Cuisine: American
Keyword: sous vide, brisket
Prep Time: 5 minutes
Cook Time: 1 day 12 hours
Servings: 6 people
Calories: 743kcal
Author: Farah Abumaizar

Equipment

  • Anova Sous Vide

Ingredients

  • 1/4 cup coarse black peppercorns* see note 1 oz, 28 grams
  • scant 1/4 cup kosher salt 50 g
  • 1 brisket, 2.25 kg or 5 lb
  • Buns, pickles, barbeque sauce for serving

Instructions

  • Combine pepper and salt in a small bowl. Rub 2/3rds of the salt/pepper mix over surface of brisket. Reserve remaining one-third of mixture.
  • Place brisket in a vacuum seal bag, if you need to cut it in 1/2 and place in two bags. We managed to stuff ours in one large bag. Seal bags with vacuum sealer and place in fridge for 2 hours to rest.
  • Set your precision cooker to 135°F (57°C) for brisket with a tender, steak-like texture that you'll be able to slice, or 155°F (68°C) for shredded type brisket
  • Add brisket to a large water bath ( we used a plastic storage container) and cover container with either aluminum foil, lid, or weight the brisket down with something heavy like a wire rack or stainless steel steamer baskets. See post for more info.
  • Cook for 24 to 36 hours at 155°F or 36 to 72 hours at 135°F. I know it sounds like a lot, but you basically ignore it on the kitchen counter till its ready! Totally hands off.
  • Allow cooked brisket to cool to room temperature before proceeding (you can place it in an ice cold water bath to speed the process up) Brisket at this point can be stored in the refrigerator at this stage for 5-7 days before finishing.
  • Adjust oven rack to lower-middle position and preheat oven to 150 C (300F), or you can use your ovens convection setting and heat to 135°C/ 275°F instead.)
  • Remove brisket from bag and blot dry with paper towels.  Reserve some of the liquid from the bag to make amped up barbeque sauce if desired (See post for details)
  • Rub the remaining salt-and-pepper mixture into surface of brisket. Place brisket on a wire rack set in a rimmed baking sheet, fatty side up, and place in oven. Roast until a deep, dark exterior has formed, about 1.5-2 hours. 
  • Transfer brisket to a cutting board and cover loosely with foil. Allow to rest until the temperature drops to between 63 and 74°C (145 and 165°F ), about 30 minutes. Slice against the grain into thin strips and serve with bread rolls, dill pickles, and sliced onion, and any other condiments you like.

Notes

To make coarsely ground peppercorn, you can either use the pepper mill, or a small blender and blend briefly until you get the coarse peppercorn pictured.
 
Recipe barely adapted from Serious Eats
Tried this recipe?Mention @everylittlecrumb or tag #everylittlecrumb!

Nutrition

Calories: 743kcal
 

If you liked this recipe, you might like:

Slow Cooker BBQ Brisket

Easy Overnight Dill Pickles

Slow Cooker Pulled BBQ Beef

Sous Vide Eggs

Did you make this? Tag @everylittlecrumb or hashtag #everylittlecrumb and I’ll share your images!

Main Meals, Recipes

Previous Post: « One Pot Chicken with Cauliflower Rice
Next Post: Vermicelli Rice »

Reader Interactions

Comments

  1. Emmeline says

    March 21, 2020 at 6:38 pm

    5 stars
    Oooh I never ever thought about making a sous vide brisket! Such a great idea! I will definitely be trying this out.

    Reply
    • Farah Abumaizar says

      March 21, 2020 at 6:51 pm

      The best way for tender meat!

      Reply
  2. Amy says

    March 21, 2020 at 7:27 pm

    5 stars
    Wow this brisket looks incredible!! I really need to try this

    Reply
    • Farah Abumaizar says

      March 21, 2020 at 8:08 pm

      It’s one of my faves!

      Reply
  3. stephanie says

    March 21, 2020 at 7:56 pm

    5 stars
    This meat was so tender and full of flavor. Thank you for sharing!

    Reply
    • Farah Abumaizar says

      March 21, 2020 at 8:08 pm

      So glad to hear it!!

      Reply
  4. Jacqueline Debono says

    March 21, 2020 at 8:10 pm

    5 stars
    This brisket looks fabulous! I have yet to try sous vide but it’s top of my to do list!

    Reply
    • Farah Abumaizar says

      March 21, 2020 at 8:11 pm

      It’s game changing when it comes to the tenderness of the meat

      Reply
      • Dave says

        December 20, 2020 at 9:48 pm

        Also game changing for gatherings and bbq, you can prep something days in advance and finished it as required. Bring an already cooked leg of lamb to a bbq. All your timings and issues of how well done something is all pre resolved.

        Reply
        • Farah Abumaizar says

          December 20, 2020 at 9:56 pm

          So true!! I love the ease of advance cooking that comes with sous vide , you don’t spend an entire gathering nervously checking the oven!

          Reply
  5. Priya Lakshminarayan says

    March 21, 2020 at 9:19 pm

    5 stars
    That looks like comfort food! Nice flavors.

    Reply
    • Farah Abumaizar says

      March 21, 2020 at 9:19 pm

      It truly is !!

      Reply
  6. Jon says

    December 17, 2020 at 9:48 pm

    5 stars
    Looks good, haven’t tried it yet, but I was wondering – is the second stage (roasting in the oven 1.5-2hrs) really necessary? When I make sous vide pot roast, I love how tender and juicy it is – I would worry the oven roasting would dry it out some…

    Reply
    • Farah Abumaizar says

      December 20, 2020 at 9:53 pm

      Hi there! That shouldn’t dry it out Jon, especially at a low temperature of 300F, it’ll just kind of caramelize the exterior to give it that signature dark bark . All sous vide meats bead that final touch, that final sear to get a grilled taste so don’t be scared off! Keep an eye on it while it’s in the oven, and as soon as it looks dark enough for your taste you can take it out to rest. Truly hope you try and love this!

      Reply
  7. Sam says

    December 18, 2020 at 12:43 am

    For the cut off meat was it just the flat or the whole brisket, flat and point?

    Reply
    • Farah Abumaizar says

      December 20, 2020 at 9:55 pm

      I used just the flat, because the flat and point were too hard to source, but if you can get both you’ll have even juicer moister brisket 😍😍

      Reply

Leave a Reply Cancel reply

Your email address will not be published. Required fields are marked *

Recipe Rating


Primary Sidebar

Get more stuff

Subscribe to our mailing list and get interesting stuff and updates to your email inbox.

Thank you for subscribing.

Something went wrong.

we respect your privacy and take protecting it seriously

FeedFeed

Featured Recipes

Tamriyeh

Nescafe Cake

Berries and Cream Sara Lee Cake

Kebab Karaz

Eggplant Fatteh

More

Footer

everylittlecrumb

Farah Abu Maizar | Food Lover
You have to know, if I post a chicken recipe it me You have to know, if I post a chicken recipe it means it’s reaaaaaally good. This copy cat Halal guys chicken and rice is unbelievable dish! I got the turmeric rice recipe from @seriouseats and its buttery and perfectly spiced and fluffy and addictive, topped with juicy grilled spiced chicken cubes and a tangy, creamy dressing, tomatoes and parsley. AMAZING! Recipe below and in the @tamimimarkets catalogue❤️.

INGREDIENTS:

For the chicken marinade:
900 g chicken breasts
1/4 cup olive oil
2 tbsp lemon juice
1 tbsp white vinegar
3 garlic cloves, minced
1 tsp salt
1/2 tsp black pepper
1 tsp oregano powder
1 tsp seven spices
1/2 tsp ginger powder
1/2 tsp cumin powder
1/2 tsp paprika powder

For the white sauce:
3/4 cup Greek yogurt 170g (6oz)
1/2 cup mayonnaise 115 g
1 tbsp white vinegar
1 tbsp water
1 tsp lemon juice
1-2 tsp sugar
1/2 tsp salt
1/4 tsp black pepper

For the rice:
2 tbsp unsalted butter
1/2 tsp turmeric powder
1/4 tsp cumin powder
1 1/2 cups basmati rice, soaked for 20 minutes then rinsed
2 1/2 cups chicken stock or 1 stock cube dissolved in 2.5 cups hot water
salt and pepper to taste, a pinch of each

To assemble:
1 chopped tomato
handful chopped parsley
sriracha sauce

INSTRUCTIONS: 
For the chicken:
In a bowl, mix all the ingredients for chicken marinade. Add chicken breast and toss to coat evenly. Cover and marinade for 1-2 hours.

Heat 1 tbsp oil in a large skillet on medium high heat, and cook chicken for 5-6 min each side, or until golden brown and cooked.
Remove chicken to a cutting board, and rest for 10 minutes, before chopping roughly into 2 inch cubes.

For the white sauce:
Mix all ingredients and store in the fridge until ready to serve.

For the rice:
Add butter to a large saucepan over medium heat. Once melted, add the turmeric and cumin, and stir for 1 minutes.
Add the rice, and toast the rice by stirring for 4 minutes. Add chicken stock, salt and pepper to season. Stir and bring to a boil, then reduce heat to a simmer, cover and cook for 15 min, then set aside 15 min and fluff with a fork.

To assemble:
Place the rice in your serving platter, top with the chicken, the white sauce, and chopped tomatoes and parsley. Sriracha too!
This is my go to baked creamy cheesecake. It’s s This is my go to baked creamy cheesecake. It’s so good and rich and easy, topped with a sweet and tangy simple strawberry sauce (sauce recipe from @sallysbakeblog ). I used my new @kenwood_bahrain stand mixer and it was excellent- gave me silky smooth lump free filling. Another winner for my @digitrolley collab- all my new appliances are from them❤️ Check IGTV for recipe video!

For the strawberry topping:
-1 tbsp cornstarch
-3 tbsp water
-450 g strawberries, halved (big pack)
-zest and juice from 1/2 small lemon 
-1/4 cup (50g) sugar

-Whisk together cornstarch and water, then add to a saucepan along with all other ingredients, over medium heat.
-Bring to a simmer, stirring constantly and breaking up strawberries as they cook, 5 minutes or so until thickened. Set aside to cool, can be stored in fridge up to one week.

For the cheesecake:

Ingredients
For the crust:
* 250 g crushed digestive biscuits 2 cups 
* 135 g melted butter 1 stick and 1 tablespoon
* 1/2 tsp cinnamon

For the cheesecake:
* 900 g cream cheese (3 3/4 cup)
* 1 1/2 cup white sugar 300 g
* 3/4 cup milk, room temp
* 4 eggs, room temp
* 1 cup sour cream 240 g
* 1 tbsp vanilla extract
* 1/4 cup all purpose flour 32g

Instructions:

For the crust:
* In a mixing bowl, combine crushed biscuits, the melted butter, and the cinnamon with a fork until crumbs are moistened evenly throughout. Press along the bottom and sides of a lightly greased 9 inch springform pan. Let the crust chill a little in the fridge while you prepare cheesecake.

For the cheesecake:
-Preheat the oven to 180 C
-In  stand mixer, combine the cream cheese with the sugar in a large bowl and mix on medium speed until well combined and fluffy. Blend in the milk, then add the eggs one at a time, mixing briefly after each addition.

-Mix in sour cream, vanilla and flour until smooth. It may be easier to sift in the flour.

-Pour filling into prepared crust. Bake at 180 C for 1 hour, then turn off the oven and leave cheesecake inside for another 5 hours or so until oven has completely cooled. This is to prevent cracking.

* Store cheesecake in fridge after this time period is over until chilled, then top with the strawberry topping.
This, to me, is the sambosa that best embodies Bah This, to me, is the sambosa that best embodies Bahrain- the first- actually the only-place I have these cheesy corn sambosa ❤️. No fancy cheese goes in this, it’s literally the stuff out of a can and take SO melty and cheesy and good. I mix in a little mashed potatoes and it just makes these 💯 times better, creamy and delicious. Posting the full steps on IGTV, it’s so easy you prob won’t need them! Recipe below and tell me- what’s your go to sambosa cheese?

Ingredients
2 small potatoes, peeled and cut into cubes 8 oz total, 235 g
1/2 cup corn kernels, from a can, drained
12 oz American cheese, like Velveeta or Kraft, grated 340 g (2 170g cans of Kraft processed cheese)
pinch salt
pinch black pepper
1/2 pack samosa wrappers each pack is 500 g

Instructions:
-Cover potato cubes with water, and bring to a boil. Reduce heat and simmer until potatoes are completely cooked through. Drain, and mash.

-Let potatoes cool slightly then combine mashed potatoes with the grated cheese, drained corn, salt and pepper. Mix well until the mixture is evenly combined. Taste for and adjust seasoning.

-Fill each samosa wrapper with a tbsp of mixture on the bottom corner, then fold the corner of the samosa up and over the filling to the other side, to make a triangle. Keep folding this triangle over all the way up the top (check the video at the bottom of this recipe card to see how). Mix together the flour and water to form a thick paste, and seal the ends of the samosa to prevent them from opening up while frying.

-Place vegetable oil in a skillet, about 2 inches deep and heat on medium high heat. Once hot enough, add the sambosa and fry for around 2 minutes a side until golden brown. Remove to a paper towel lined plate to absorb some of the excess oil, then enjoy warm.

.
.
.
.
.

#harira #soup #ramadanrecipes #ramadan2021 #ramadan #ramadankareem #vegetablesoup #soupseason #soupsofinstagram #delishkitchen #friedfood #aprilisforarabfood #f52grams #foodfluffer #foodflatlay #foodphotography #foodphotographer #foodstylist #thefeedfeed #middleeasternfood #vegetarian #tasty #tastingtable #tastemade #samosa #sambosa
This is one of my top 5 recipes from this Ramadan’s recipe prep. One of my features does the @tamimimarkets recipe catalogue! Click the link in their bio to access this gorgeous (free!) catalogue.

This harira soup is unbelievable. Hearty and delicious and beautifully spiced- I’ve never been obsessed with harira soup until this one. It’s a simple one because it’s meat free, so it’s perfect to start your iftar with but also hearty enough to totally serve as a meal alongside some sambosas. Recipe below, and IGTV video coming in a bit!

Ingredients
3 tbsp olive oil
1 large onion, diced
3 celery stalks, diced
2 carrots, diced
1 tsp cinnamon powder
1/2 tsp salt
1/2 tsp black pepper
pinch red chili flakes
1/2 cup chopped parsley
1/2 cup chopped coriander(cilantro)
1 can tomato sauce 15 oz (430g)
7 cups vegetable stock or 2 stock cubes dissolved in 7 cups water
1 can drained chickpeas 15 oz (400 g)
1 cup green lentils
1/2 cup vermicelli noodles 50 g
2 lemons, juiced 1/4 cup juice
2 tbsp flour, dissolved in 1/4 cup water* use cornstarch if gluten free

Instructions:
-Start by adding the lentils to a bowl of water and soaking as you prepare the rest of the ingredients, this helps them cook through faster.
-Heat oil in a large saucepan over medium heat, and add the onions, celery and carrots. Saute for 6-8 minutes, until onions soften and turn golden brown.
-Add all the spices, the chopped parsley and chopped coriander, the tomato sauce, and the vegetable stock. Bring the pot to a boil, then add the drained chickpeas and drained lentils. Reduce heat and simmer for 25 minutes or until chickpeas and lentils are tender.
-Add the vermicelli, and let it boil for 3-4 minutes or until tender. Add the lemon juice, and the flour water mixture. Let it simmer another minute or until it thickens, then taste for seasoning and add salt and pepper if necessary.
.
.
.
.
.
#harira #soup #ramadanrecipes #ramadan2021 #ramadan #ramadankareem #vegetablesoup #soupseason #soupsofinstagram #moroccan #moroccanfood #aprilisforarabfood #f52grams #foodfluffer #foodflatlay #foodphotography #foodphotographer #foodstylist #thefeedfeed #veganrecipes #vegan #tasty #tastingtable #tastemade #lentils
Never ever liked vimto until I had it like this 🍧. Vimto smoothies means that the sweetness of vimto is tempered by that cold crunchy shaved ice. Could not stop eating/drinking these vimto slushees! So easy, you just need water, ice, vimto and a high speed blender- my @ninjakitchenme did so well breaking down huge ice chunks👏🏼. Save this for a little twist on your classic iftar drink🥳

Ingredients:
-3/4 cup water
- 3/4 cup vimto 
- 2 cups ice 

Method:
Add the ingredients to your blender in the order listed, and blend on frozen drink mode until slushy like consistency. Add more ice or water if you need to, and enjoy immediately with a spoon/straw. Yum!
.
.
.
.
.

#ramadan #ramadan2021 #ramadanrecipes #iceddrinks #slush #slushy #slushii #berries #syrup #cordial #drinkphotography #damnthatsdelish #foodfluffer #pour #dripshot #foodphotography #foodphotographyandstyling #foodstylist #foodstyling #thefeedfeed #vimto #foodtographyschool #foodtography #beautifulcuisines
A biscuit base topped with a super easy smooth, cr A biscuit base topped with a super easy smooth, creamy pistachio cheesecake and the crowning touch,  @mayadelices ‘s luscious milk chocolate melted and poured over the top. I mean- heavenly! Recipe below, adapted from @savoryandsweetfood ,, IGTV will be uploaded today. I am absolutely loving @mayadelices couverture, great quality baking chocolate thats so fun experimenting with! They have sugar free and vegan options too, and best of all it’s easily available in their shop in Bahrain 🍫👏🏼

Ingredients:

For the crust:
2 cups digestive biscuit crumbs (250 g)
1/2 cup butter melted, 115g
Pinch cinnamon powder

For the pistachio cheesecake filling:

1 cup pistachio powder (140g)
12 Kiri squares or cream cheese (215g)
250 ml thick cream
1/2 of a 400 g tin of sweetened condensed milk, more if you like it sweeter

To top:
1 cup Maya milk chocolate (160g)
pistachios to garnish

Method:
1. Preheat oven to 180C. Grease and line a 8x8 inch pan with parchment paper with extra paper hanging over the sides so you can easily lift out the bars.

2. Mix digestive crumbs with melted butter and cinnamon. Press this firmly into the base of the pan. Refrigerate for 10 minutes.

3. In a food processor, add the pistachio powder, kiri cheese cubes, thick cream, and condensed milk. Blend until well combined and smooth. Pour this mixture into the crust base and bake for 15-20 minutes until set but center is still a little jiggly. Let cool at room temperature for 1 hour then refrigerate for several hours.

4. Melt the milk chocolate gently in the microwave, in 10 second bursts, stirring after each increment. Once smooth and melted, spread over the top of the cheesecake, and refrigerate until set. Enjoy!
.
.
.
.
.
#ramadan #ramadan2021 #ramadanrecipes #cheesecakebars #cheesecakebites #chocolateporn #pistachio #chocolatelover #chocolaterecipes #cheesecakelovers #cheesecakelove #damnthatsdelish #foodfluffer #pour #chocolatedrip #dripshot #foodphotography #foodphotographyandstyling #foodstylist #foodstyling #thefeedfeed #thebakefeed #foodtographyschool #foodtography #beautifulcuisines
Want a Ramadan dessert that takes minutes to make Want a Ramadan dessert that takes minutes to make and tastes amazing? Yeah we all do - I got you! Try this coffee biscuit cake (barely adapted from the wonderful @littlesunnykitchen). Layers of coffee soaked biscuits and a super easy fluffy cream 👌🏼. I used my new @braun_bahrain handheld electric whisk, one of the attachments in the minipimer set-It whips the cream so fast, much faster than my stand mixer and it’s so convenient to be able to use any bowl to prep the cream in. I’ve partnered with @digitrolley to bring you lots of good recipes with their range of kitchen appliances, so keep following along! Recipe below , and IGTV video coming today in my Ramadan series!

Ingredients
2 tbsp nescafe powder dissolved in 1 cup hot water
1 cup heavy whipping cream 250ml
3 tbsp sweetened condensed milk
splash vanilla extract, optional
1 creme caramel sachet, powder only 49g
1 pack tea biscuits or graham crackers 7 oz or 200 g
2 tbsp cocoa powder for topping

Instructions:
-Add the heavy cream, sweetened condensed milk, vanilla and creme caramel powder to a bowl and beat until soft peaks form. Set this cream mixture aside.
-Dip the tea biscuits into the coffee briefly until they soak up the coffee but before they start to break apart. -Layer in a 7×11 or 9×9 inch clear pyrex dish, then top with half the cream mixture.
-Repeat another layer of coffee soaked biscuits on top of the heavy cream, followed by the remaining half of the cream. Sift the cocoa powder on to the top, then refrigerate for several hours until set. This is even better the next day!

.
.
.
.
.
#nescafe #nescafegold #coffeecake #biscuit #biscuitcake #nobake #nobakedessert #nobakecake #tiramisu #damnthatsdelish #tastingtable #beautifulcuisines #foodphotography #foodphotographyandstyling #tastyfood #easydessert #ramadankareem #ramadan2021 #ramadanrecipes #cream
Ramadan Kareem! And the first recipe is for these Ramadan Kareem! And the first recipe is for these unbelievable (and easy!) chicken musakhan sambosa was developed for @tamimimarkets Ramadan catalogue. One of the coolest projects I’ve ever worked on can’t wait to tell you more about it! In the meantime, enjoy this teaser recipe and check IGTV for full video steps coming up. 

Ingredients:
2 chicken breasts, cooked and finely shredded about 1 heaped cup of shredded chicken See notes
1/4 cup olive oil
2 large onions cut in half, then thinly sliced into wedges
1/4 cup toasted almond slivers or pine nuts
3 tbsp sumac
1/2 tsp salt
1/4 tsp black pepper
1/4 tsp cumin powder
1/4 tsp cinnamon powder
To assemble:
1 pack sambosa wrappers 500 g
1 tbsp flour
1/2 tbsp water
For frying:
vegetable oil, about 1/4 cup

Instructions:
-In a deep skillet over medium heat, add the olive oil until it heats up. Add the onions, and cook, stirring frequently until soft and starting to caramelize, 8-10 minutes.

-Add the shredded chicken, the toasted nuts, and all the spices. Stir to combine, then remove from the heat. Let mixture cool slightly 5 minutes or so.

-Fill each sambosa wrapper with a tbsp of mixture on the bottom corner, then fold the corner of the sambosa up and over the filling to the other side, to make a triangle. Keep folding this triangle over all the way up the top 

-Mix together the flour and water to form a thick paste, and seal the ends of the sambosa to prevent them from opening up while frying.

-Place vegetable oil in a skillet, about 2 inches deep and heat on medium high heat. Once hot enough, add the sambosa and fry for around 2 minutes a side until golden brown. Remove to a paper towel lined plate to absorb some of the excess oil, then enjoy warm, optionally with yogurt to dip in.
.
.
.
.
.
#chickensamosa #musakhan #ramadankareem #ramadan2021 #ramadanrecipes #samosa #friedfood #palestinianfood #middleeasternfood #beautifulcuisines #damnthatsdelish #f52community #thefeedfeed #foodgawker #f52grams #buzzfeedfood #tastingtable #tastemade #chickenrecipes #sumac #caramelizedonions #foodblogfeed #foodphotography #foodphotographyandstyling #foodstyling
Load More... Follow on Instagram

Copyright © 2019 on the Seasoned Pro Theme