• Skip to primary navigation
  • Skip to main content
  • Skip to primary sidebar
  • Skip to footer

 logo

  • Recipes
    • Breakfast
    • Sides
    • Soup
    • Main Meals
    • Healthy
    • Dessert
    • Drinks
  • Eating Out
  • About Me
    • Privacy Policy
  • Resources
    • Must Have Kitchen Tools
  • Nav Social Menu

    • Email
    • Facebook
    • Instagram
    • Pinterest

Pecan Honey Sticky Buns

Oct 5, 2020 · Leave a Comment

Jump to Recipe

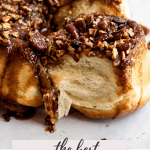
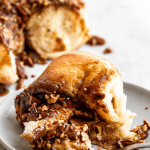
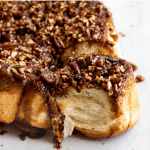
These pecan honey sticky buns are incredible. Think cinnamon rolls topped with a honey caramel glaze and lots of toasted pecans. They are made with a tangzhong method, giving the softest fluffiest bread that’s ooey and gooey and stuffed with goodness.

What’s the difference between sticky buns and cinnamon rolls?

I barely adapted this recipe from Joshua Weissman, and one of the comments on the video made me laugh. It referred to sticky buns a cinnamon buns hotter cousin. I totally get why!

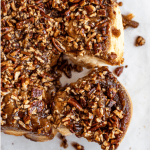
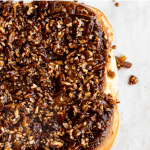
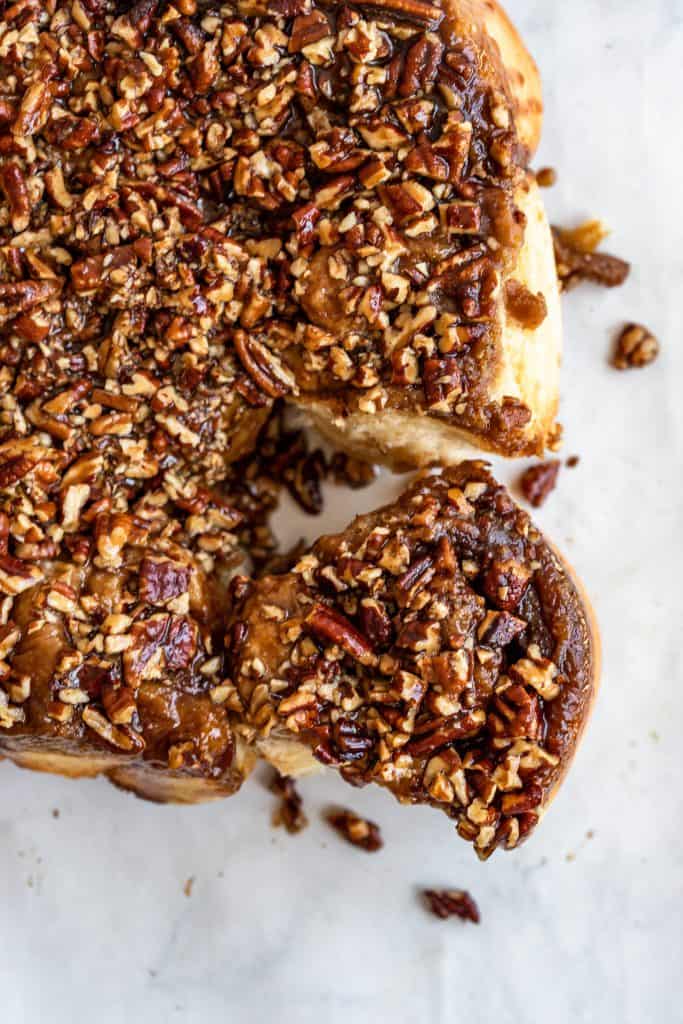
Sticky buns are like cinnamon rolls brought to another level. Instead of a typical cream cheese frosting, the buns are baked onto a honey caramel sticky glaze that’s topped with pecans. Once baked, you flip the pan, and the sticky pecan side is now on top. So in summary, sticky buns are extra sticky with a caramel and nut topping.

Why should you make these pecan honey sticky buns?

Flavor

They are gooey and delicious and messy. If I had to choose between cinnamon rolls (as unbelievable as these are) and sticky buns, the toasted nuts and caramel win out.

The honey in the caramel really enhances the flavor and depth of the caramel glaze.

Toasting the pecans gives them so much extra flavor and oomph. Nothing like toasted nuts!

Seasonality

Pecans are such a celebratory nut, making these the perfect thing to bake during autumn, winter, and any holiday season.

Texture

The easy tangzhong method used (more on this later) gives such a beautifully soft and fluffy dough. Truly makes a difference, and with not much extra effort at all!

Sticky buns- the ingredients:

The ingredients to make these buns can be divided into several categories:

The tangzhong

The gelatinized flour is made with a small amount of equal parts of flour, milk and water.

The dough:

Instant dry yeast

Lukewarm milk:(around 98F or 37C), warm enough that it isn’t room temperature, but not too hot that it’s uncomfortable to stick your finger in. Kind of like a tepid bath. The temperature is important in activating the yeast.

All purpose flour– love that you don’t need any speciality flours for this!

Salt

Sugar

Water About 3 tbsp, but if you feel the dough is dry and not coming together you can add another tbsp.

Eggs make sure these are room temperature so they don’t clump up in the dough!

Softened butter

The filling:

Butter, melted and slightly cooled

Dark brown sugar (can use light brown, but the dark brown has a little more molasses in it giving a lovely toffee flavor

Cinnamon powder

Joshua also used fresh nutmeg and all spice, but I didn’t have any so I didn’t. Turned out amazing anyway!

The glaze:

The thing that forms all that awesome stickiness.

Butter

Dark brown sugar

Honey

Toasted pecans– you can easily toast them by scattering pecans in a single layer on a baking sheet and placing in a 350F hot oven for 7-8 minutes. Once out the oven, immediately move to a chopping board so they don’t over toast, and once cool enough to handle, chop them.

How to make sticky buns:

As you can probably guess from the ingredient list, several steps are involved. They are all simple, and don’t take too much time (except for passive time like the dough resting) so don’t be intimidated!

To make the dough:

Make the dough by blooming the yeast in lukewarm milk (by mixing it slightly then setting aside for 10 minutes)

While the yeast is blooming, prepare the tangzhong by whisking together the flour, milk and water in a small pan over medium heat.

What is tangzhong?

Tangzhong is a Japanese method of gelatinizing a small amount of flour, and adding it to the remainder of the bread dough ingredients. This helps make bread fluffy and light and improves shelf life. It’s a very simple step to take and gives great results!

All you need to do is keep whisking the flour, milk, and water until they become sticky and clump together. That’s it! Set aside until it’s time to add to the dough.

Whisk together the flour, salt, and sugar in the bowl of a stand mixer. Then attach the bowl to the mixer, with dough hooks, and turn it onto medium low speed. Add the yeast milk mix, the tangzhong, the water, and the room temperature eggs.

Continue mixing for six minutes at which point the dough will smooth out and become a ball.

After six minutes, add the softened butter, piece by piece, and waiting until the first piece is incorporated before adding the next. When all the butter is added, mix for an additional five minutes.

The dough rise:

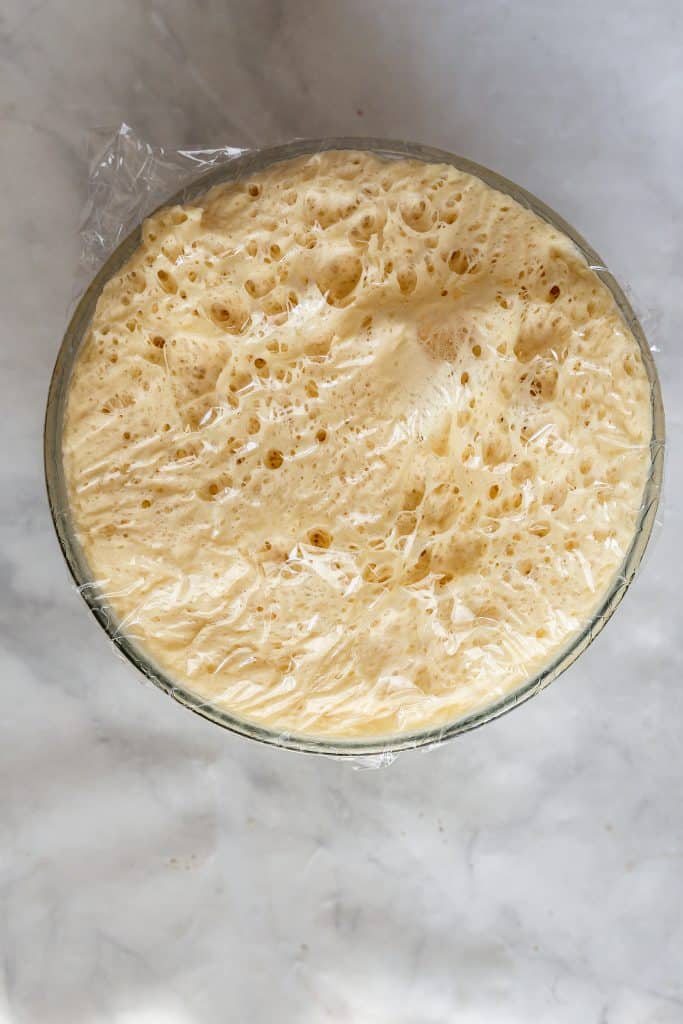
Remove the dough from the stand mixer and shape into a smooth ball, transferring to a lightly greased bowl. Let it rise in a warm place for 1.5 hours or until dough doubles. I like placing it in the laundry room, or in a turned off oven, somewhere warm and compact!

After this initial rise, you punch down the dough, and spread it out onto a lightly floured surface, allowing it to rest for another 10 minutes.

Then, it gets rolled out into a 20 inch long, about 10 inch wide and 1/4 inch thick rectangle with a floured rolling pin.

Filling the rolls:

The filling goes on top of this rectangle. To make the filling, just melt the butter gently and allow to cool slightly so it isn’t so hot it scalds the yeast in the dough, then brush it all over the dough rectangle.

Mix together the brown sugar and cinnamon, then sprinkle all over the rectangle, leaving just a 1/4 inch border free of sugar on all sides.

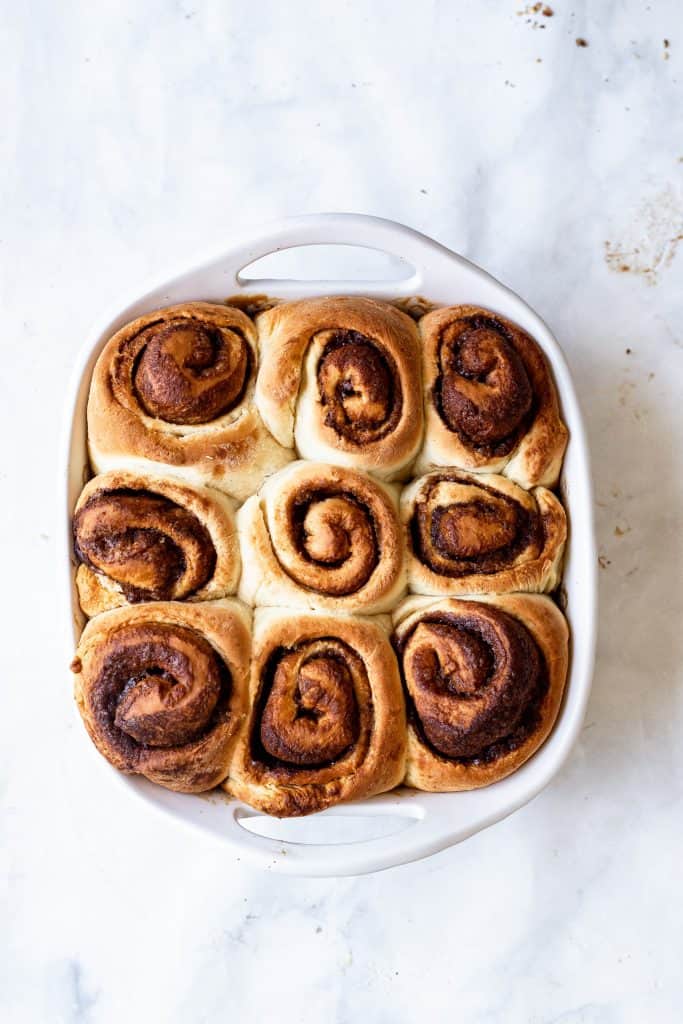
Roll the rectangle up tightly, starting from the long part of the dough, and seal into a log, that you then cut into 9 equal pieces using a serrated knife. Some people swear by using dentil floss, but a knife always works fine for me!

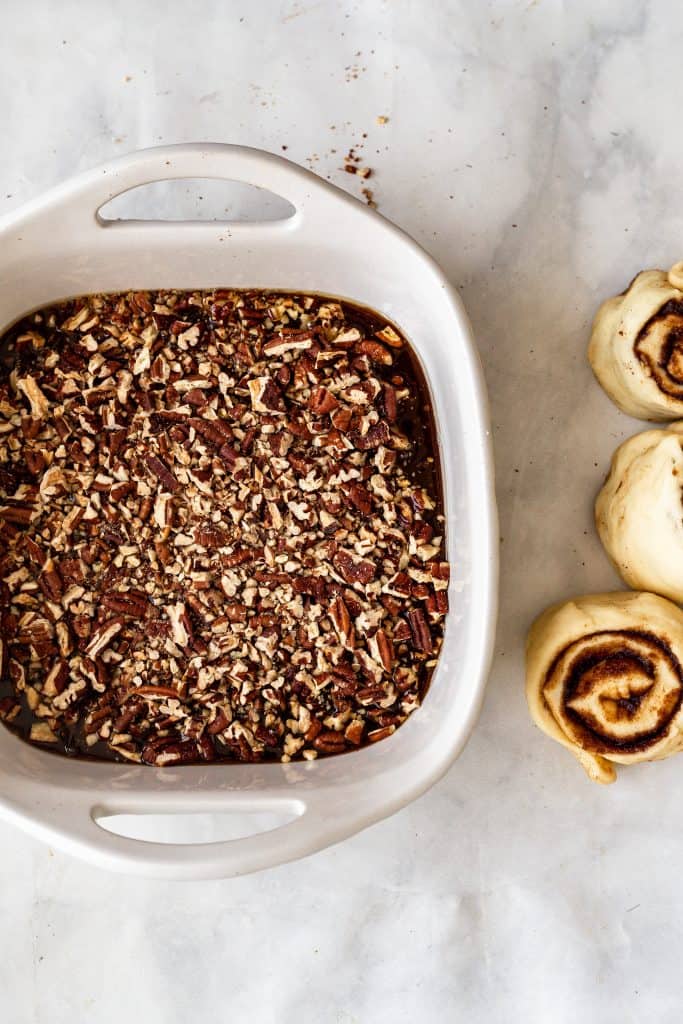
These dough pieces are placed onto the glaze which you’ll have poured into a lightly greased 9×9 inch pan and topped with chopped pecans.

To make the glaze, simply combine the brown sugar, honey and butter in a small pan or skillet, and stir until the sugar melts and the mixture is smooth. Cool slightly before pouring onto pan bottom.
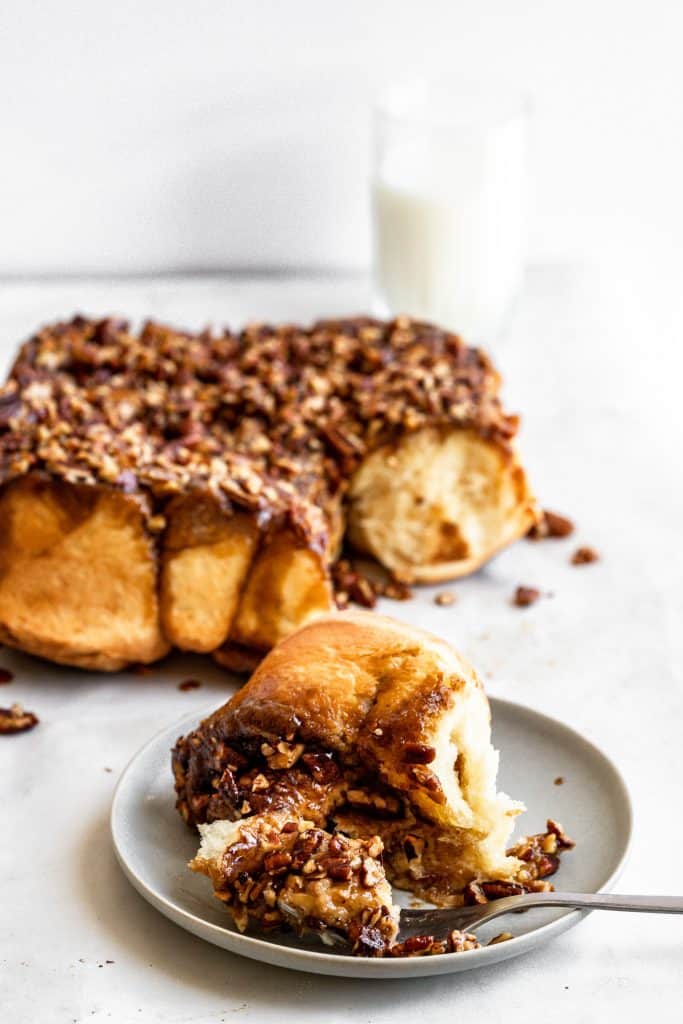
Baking the rolls:

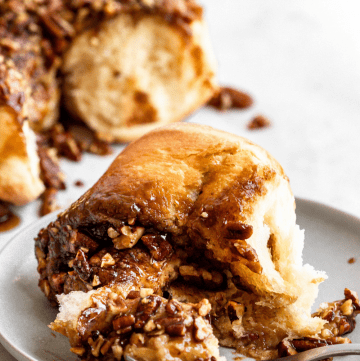
Bake the rolls at 350 F in the middle rack of the oven for 30-35 minutes or until golden brown and puffy, and the filling is bubbling nicely. Once it’s out of the oven, let the pan cool for 5-7 minutes, then loosen the edges of the buns slightly with a spatula, and flip the pan onto a serving plate so that the pecan topping is now up. Enjoy warm! Nothing like them.

Pecan honey sticky buns substitutions:

You can substitute the honey for maple syrup to make maple sticky buns

Light brown sugar can be substitued for the dark.

You can use bread flour instead of all purpose if you want chewier buns.

Try adding more spices like nutmeg, all spice, even ginger.

You can add walnuts instead of pecans, or omit the nuts altogether for allergy reasons.

How to store pecan sticky buns:

These pecan honey sticky buns are most delicious fresh out the oven, but still so good leftover. I think it’s the tangzhong method that ensured I enjoyed these even a few days later reheated.

Store at room temperature, very tightly covered, and either reheat in the fridge or microwave.

Alternately, these will freeze very well (both baked and unbaked). If freezing the unbaked dough, freeze tightly wrapped for up to a month.

If freezing after baking, let the rolls cool, then freeze tightly wrapped for 2 months. Thaw for 30 minutes or so, then heat in the microwave or oven.

Overnight pecan sticky buns:

To make these in advance, prepare the buns all the way through to placing on top of the glaze, but instead of their second rise, cover them with foil and place in the fridge overnight.

The next morning, take them out of the fridge to lose some of their chill one hour before baking, then bake as directed.

Pecan Honey Sticky Buns

These sticky buns are incredible. So delicious they are worth every calorie. And they come together so easily too! Recipe by the amazing Joshua Weissman
Print Pin
Rate
Course: Breakfast
Cuisine: American
Keyword: cinnamon rolls,dough,pecans
Prep Time: 20 minutes
Cook Time: 30 minutes
Resting Time: 2 hours
Servings: 9 people
Calories: 619kcal
Author: Farah Abumaizar

Ingredients

For the tang zhong

  • 1.5 tbsp flour 15g
  • 1.5 tbsp milk 20g
  • 1.5 tbsp water 20g

For the dough:

  • 2.5 tsp instant dry yeast 9g
  • 1/2 cup lukewarm milk 120ml around 98F, 37C
  • 3 cups all purpose flour 443g
  • 3/4 tsp salt 2g
  • 3 tbsp granulated sugar 44
  • 3 tbsp water 55g
  • 2 eggs room temperature
  • 3.5 tbsp butter, softened 50g

For the filling:

  • 5 tbsp butter, melted and cooled slightly 70g
  • 1/2 cup dark brown sugar 115g
  • 2.5 tsp cinnamon powder 5g

For the glaze:

  • 1/2 cup unsalted butter 115g
  • 1/2 cup packed dark brown sugar 115g
  • 3 tbsp honey 51g
  • 1 cup toasted pecans, chopped 140g

Instructions

For the tang zhong:

  • Combine the equal amounts flour, milk and water for the tang zhong into a small pan and whisk over medium heat till it comes together like clay. Set aside.

For the dough:

  • While you are making your tang zhong, whisk the yeast into the lukewarm milk with a fork and let stand for 10 minutes.
  • In a stand mixer bowl whisk together the flour, salt, and sugar, then attach the dough hook and add the yeast and milk mixture, plus the water, the tangzhong, and the eggs. Mix for 6 minutes on medium low speed, the mixture will be smooth.
  • Add the softened butter, a tablespoon at a time, waiting for each tablespoon to incorporate before adding the next. Once the butter has mixed in, continue to mix for 5 minutes.
  • Remove dough from mixer, shape into a ball and allow to rise in lightly greased bowl for 1.5 hrs or until doubled.
  • After this resting period, punch down dough, then spread slightly on a lightly floured surface, covered with damp towel, for 10 minutes. Meanwhile, make the glaze (next set of instructions)

For the glaze:

  • Combine the butter, brown sugar, and honey in a small pan over medium heat until sugar has melted. Set aside to cool slightly, then into a lightly greased 9”x9” pan, pour the glaze, and sprinkle pecans on top of it.
  • After the 10 min dough rest, roll dough to rectangle measuring around 20 “ long, 10“ wide and 1/4” thick, brush the surface of the dough with the melted cool butter and prepare the filling.

For the filling and assembling:

  • Mix brown sugar with cinnamon, then sprinkle onto buttered dough rectangle, leaving 1/4” border on all sides.
  • Tightly roll dough from bottom up, sealing lightly to form a tight tube. Use a serrated knife to cut into 9 even pieces, each about two inches long, and arrange in 3 rows of 3 on top of the pecan glaze.
  • Cover with damp towel and allow to rise at room temperature for 45-60 minutes or until doubled, or overnight in the fridge. If baking straight away, preheat oven to 350F (180C).
  • Bake for 30-35 minutes or until tops are golden brown and filling is bubbling.
  • Remove from oven and allow to cool for 5-7 minutes, then loosen buns around edges, and invert pan onto serving tray, so that the pecan glaze is now on top. Enjoy warm!

Notes

See post for details on making ahead, storage, and substitutions.
 
Recipe adapted from Joshua Weissman.
Tried this recipe?Mention @everylittlecrumb or tag #everylittlecrumb!

Nutrition

Calories: 619kcal

If you liked this recipe, you might like:

Cinnamon Sugar Pull Apart Bread

Brown Butter Cinnamon Rolls

Fluffy Homemade Dinner Rolls

No Knead Brioche

Creme Brulee Brioche Bread Pudding

Did you make this? Tag @everylittlecrumb or hashtag #everylittlecrumb and I’ll share your images!

Breads, Breakfast, Dessert, Recipes

Previous Post: « Kafta Bil Sanieh
Next Post: Instant Pot Mujaddara »

Reader Interactions

Leave a Reply Cancel reply

Your email address will not be published. Required fields are marked *

Recipe Rating


Primary Sidebar

Get more stuff

Subscribe to our mailing list and get interesting stuff and updates to your email inbox.

Thank you for subscribing.

Something went wrong.

we respect your privacy and take protecting it seriously

FeedFeed

Featured Recipes

Tamriyeh

Nescafe Cake

Berries and Cream Sara Lee Cake

Kebab Karaz

Eggplant Fatteh

More

Footer

everylittlecrumb

Farah Abu Maizar | Food Lover
You have to know, if I post a chicken recipe it me You have to know, if I post a chicken recipe it means it’s reaaaaaally good. This copy cat Halal guys chicken and rice is unbelievable dish! I got the turmeric rice recipe from @seriouseats and its buttery and perfectly spiced and fluffy and addictive, topped with juicy grilled spiced chicken cubes and a tangy, creamy dressing, tomatoes and parsley. AMAZING! Recipe below and in the @tamimimarkets catalogue❤️.

INGREDIENTS:

For the chicken marinade:
900 g chicken breasts
1/4 cup olive oil
2 tbsp lemon juice
1 tbsp white vinegar
3 garlic cloves, minced
1 tsp salt
1/2 tsp black pepper
1 tsp oregano powder
1 tsp seven spices
1/2 tsp ginger powder
1/2 tsp cumin powder
1/2 tsp paprika powder

For the white sauce:
3/4 cup Greek yogurt 170g (6oz)
1/2 cup mayonnaise 115 g
1 tbsp white vinegar
1 tbsp water
1 tsp lemon juice
1-2 tsp sugar
1/2 tsp salt
1/4 tsp black pepper

For the rice:
2 tbsp unsalted butter
1/2 tsp turmeric powder
1/4 tsp cumin powder
1 1/2 cups basmati rice, soaked for 20 minutes then rinsed
2 1/2 cups chicken stock or 1 stock cube dissolved in 2.5 cups hot water
salt and pepper to taste, a pinch of each

To assemble:
1 chopped tomato
handful chopped parsley
sriracha sauce

INSTRUCTIONS: 
For the chicken:
In a bowl, mix all the ingredients for chicken marinade. Add chicken breast and toss to coat evenly. Cover and marinade for 1-2 hours.

Heat 1 tbsp oil in a large skillet on medium high heat, and cook chicken for 5-6 min each side, or until golden brown and cooked.
Remove chicken to a cutting board, and rest for 10 minutes, before chopping roughly into 2 inch cubes.

For the white sauce:
Mix all ingredients and store in the fridge until ready to serve.

For the rice:
Add butter to a large saucepan over medium heat. Once melted, add the turmeric and cumin, and stir for 1 minutes.
Add the rice, and toast the rice by stirring for 4 minutes. Add chicken stock, salt and pepper to season. Stir and bring to a boil, then reduce heat to a simmer, cover and cook for 15 min, then set aside 15 min and fluff with a fork.

To assemble:
Place the rice in your serving platter, top with the chicken, the white sauce, and chopped tomatoes and parsley. Sriracha too!
This is my go to baked creamy cheesecake. It’s s This is my go to baked creamy cheesecake. It’s so good and rich and easy, topped with a sweet and tangy simple strawberry sauce (sauce recipe from @sallysbakeblog ). I used my new @kenwood_bahrain stand mixer and it was excellent- gave me silky smooth lump free filling. Another winner for my @digitrolley collab- all my new appliances are from them❤️ Check IGTV for recipe video!

For the strawberry topping:
-1 tbsp cornstarch
-3 tbsp water
-450 g strawberries, halved (big pack)
-zest and juice from 1/2 small lemon 
-1/4 cup (50g) sugar

-Whisk together cornstarch and water, then add to a saucepan along with all other ingredients, over medium heat.
-Bring to a simmer, stirring constantly and breaking up strawberries as they cook, 5 minutes or so until thickened. Set aside to cool, can be stored in fridge up to one week.

For the cheesecake:

Ingredients
For the crust:
* 250 g crushed digestive biscuits 2 cups 
* 135 g melted butter 1 stick and 1 tablespoon
* 1/2 tsp cinnamon

For the cheesecake:
* 900 g cream cheese (3 3/4 cup)
* 1 1/2 cup white sugar 300 g
* 3/4 cup milk, room temp
* 4 eggs, room temp
* 1 cup sour cream 240 g
* 1 tbsp vanilla extract
* 1/4 cup all purpose flour 32g

Instructions:

For the crust:
* In a mixing bowl, combine crushed biscuits, the melted butter, and the cinnamon with a fork until crumbs are moistened evenly throughout. Press along the bottom and sides of a lightly greased 9 inch springform pan. Let the crust chill a little in the fridge while you prepare cheesecake.

For the cheesecake:
-Preheat the oven to 180 C
-In  stand mixer, combine the cream cheese with the sugar in a large bowl and mix on medium speed until well combined and fluffy. Blend in the milk, then add the eggs one at a time, mixing briefly after each addition.

-Mix in sour cream, vanilla and flour until smooth. It may be easier to sift in the flour.

-Pour filling into prepared crust. Bake at 180 C for 1 hour, then turn off the oven and leave cheesecake inside for another 5 hours or so until oven has completely cooled. This is to prevent cracking.

* Store cheesecake in fridge after this time period is over until chilled, then top with the strawberry topping.
This, to me, is the sambosa that best embodies Bah This, to me, is the sambosa that best embodies Bahrain- the first- actually the only-place I have these cheesy corn sambosa ❤️. No fancy cheese goes in this, it’s literally the stuff out of a can and take SO melty and cheesy and good. I mix in a little mashed potatoes and it just makes these 💯 times better, creamy and delicious. Posting the full steps on IGTV, it’s so easy you prob won’t need them! Recipe below and tell me- what’s your go to sambosa cheese?

Ingredients
2 small potatoes, peeled and cut into cubes 8 oz total, 235 g
1/2 cup corn kernels, from a can, drained
12 oz American cheese, like Velveeta or Kraft, grated 340 g (2 170g cans of Kraft processed cheese)
pinch salt
pinch black pepper
1/2 pack samosa wrappers each pack is 500 g

Instructions:
-Cover potato cubes with water, and bring to a boil. Reduce heat and simmer until potatoes are completely cooked through. Drain, and mash.

-Let potatoes cool slightly then combine mashed potatoes with the grated cheese, drained corn, salt and pepper. Mix well until the mixture is evenly combined. Taste for and adjust seasoning.

-Fill each samosa wrapper with a tbsp of mixture on the bottom corner, then fold the corner of the samosa up and over the filling to the other side, to make a triangle. Keep folding this triangle over all the way up the top (check the video at the bottom of this recipe card to see how). Mix together the flour and water to form a thick paste, and seal the ends of the samosa to prevent them from opening up while frying.

-Place vegetable oil in a skillet, about 2 inches deep and heat on medium high heat. Once hot enough, add the sambosa and fry for around 2 minutes a side until golden brown. Remove to a paper towel lined plate to absorb some of the excess oil, then enjoy warm.

.
.
.
.
.

#harira #soup #ramadanrecipes #ramadan2021 #ramadan #ramadankareem #vegetablesoup #soupseason #soupsofinstagram #delishkitchen #friedfood #aprilisforarabfood #f52grams #foodfluffer #foodflatlay #foodphotography #foodphotographer #foodstylist #thefeedfeed #middleeasternfood #vegetarian #tasty #tastingtable #tastemade #samosa #sambosa
This is one of my top 5 recipes from this Ramadan’s recipe prep. One of my features does the @tamimimarkets recipe catalogue! Click the link in their bio to access this gorgeous (free!) catalogue.

This harira soup is unbelievable. Hearty and delicious and beautifully spiced- I’ve never been obsessed with harira soup until this one. It’s a simple one because it’s meat free, so it’s perfect to start your iftar with but also hearty enough to totally serve as a meal alongside some sambosas. Recipe below, and IGTV video coming in a bit!

Ingredients
3 tbsp olive oil
1 large onion, diced
3 celery stalks, diced
2 carrots, diced
1 tsp cinnamon powder
1/2 tsp salt
1/2 tsp black pepper
pinch red chili flakes
1/2 cup chopped parsley
1/2 cup chopped coriander(cilantro)
1 can tomato sauce 15 oz (430g)
7 cups vegetable stock or 2 stock cubes dissolved in 7 cups water
1 can drained chickpeas 15 oz (400 g)
1 cup green lentils
1/2 cup vermicelli noodles 50 g
2 lemons, juiced 1/4 cup juice
2 tbsp flour, dissolved in 1/4 cup water* use cornstarch if gluten free

Instructions:
-Start by adding the lentils to a bowl of water and soaking as you prepare the rest of the ingredients, this helps them cook through faster.
-Heat oil in a large saucepan over medium heat, and add the onions, celery and carrots. Saute for 6-8 minutes, until onions soften and turn golden brown.
-Add all the spices, the chopped parsley and chopped coriander, the tomato sauce, and the vegetable stock. Bring the pot to a boil, then add the drained chickpeas and drained lentils. Reduce heat and simmer for 25 minutes or until chickpeas and lentils are tender.
-Add the vermicelli, and let it boil for 3-4 minutes or until tender. Add the lemon juice, and the flour water mixture. Let it simmer another minute or until it thickens, then taste for seasoning and add salt and pepper if necessary.
.
.
.
.
.
#harira #soup #ramadanrecipes #ramadan2021 #ramadan #ramadankareem #vegetablesoup #soupseason #soupsofinstagram #moroccan #moroccanfood #aprilisforarabfood #f52grams #foodfluffer #foodflatlay #foodphotography #foodphotographer #foodstylist #thefeedfeed #veganrecipes #vegan #tasty #tastingtable #tastemade #lentils
Never ever liked vimto until I had it like this 🍧. Vimto smoothies means that the sweetness of vimto is tempered by that cold crunchy shaved ice. Could not stop eating/drinking these vimto slushees! So easy, you just need water, ice, vimto and a high speed blender- my @ninjakitchenme did so well breaking down huge ice chunks👏🏼. Save this for a little twist on your classic iftar drink🥳

Ingredients:
-3/4 cup water
- 3/4 cup vimto 
- 2 cups ice 

Method:
Add the ingredients to your blender in the order listed, and blend on frozen drink mode until slushy like consistency. Add more ice or water if you need to, and enjoy immediately with a spoon/straw. Yum!
.
.
.
.
.

#ramadan #ramadan2021 #ramadanrecipes #iceddrinks #slush #slushy #slushii #berries #syrup #cordial #drinkphotography #damnthatsdelish #foodfluffer #pour #dripshot #foodphotography #foodphotographyandstyling #foodstylist #foodstyling #thefeedfeed #vimto #foodtographyschool #foodtography #beautifulcuisines
A biscuit base topped with a super easy smooth, cr A biscuit base topped with a super easy smooth, creamy pistachio cheesecake and the crowning touch,  @mayadelices ‘s luscious milk chocolate melted and poured over the top. I mean- heavenly! Recipe below, adapted from @savoryandsweetfood ,, IGTV will be uploaded today. I am absolutely loving @mayadelices couverture, great quality baking chocolate thats so fun experimenting with! They have sugar free and vegan options too, and best of all it’s easily available in their shop in Bahrain 🍫👏🏼

Ingredients:

For the crust:
2 cups digestive biscuit crumbs (250 g)
1/2 cup butter melted, 115g
Pinch cinnamon powder

For the pistachio cheesecake filling:

1 cup pistachio powder (140g)
12 Kiri squares or cream cheese (215g)
250 ml thick cream
1/2 of a 400 g tin of sweetened condensed milk, more if you like it sweeter

To top:
1 cup Maya milk chocolate (160g)
pistachios to garnish

Method:
1. Preheat oven to 180C. Grease and line a 8x8 inch pan with parchment paper with extra paper hanging over the sides so you can easily lift out the bars.

2. Mix digestive crumbs with melted butter and cinnamon. Press this firmly into the base of the pan. Refrigerate for 10 minutes.

3. In a food processor, add the pistachio powder, kiri cheese cubes, thick cream, and condensed milk. Blend until well combined and smooth. Pour this mixture into the crust base and bake for 15-20 minutes until set but center is still a little jiggly. Let cool at room temperature for 1 hour then refrigerate for several hours.

4. Melt the milk chocolate gently in the microwave, in 10 second bursts, stirring after each increment. Once smooth and melted, spread over the top of the cheesecake, and refrigerate until set. Enjoy!
.
.
.
.
.
#ramadan #ramadan2021 #ramadanrecipes #cheesecakebars #cheesecakebites #chocolateporn #pistachio #chocolatelover #chocolaterecipes #cheesecakelovers #cheesecakelove #damnthatsdelish #foodfluffer #pour #chocolatedrip #dripshot #foodphotography #foodphotographyandstyling #foodstylist #foodstyling #thefeedfeed #thebakefeed #foodtographyschool #foodtography #beautifulcuisines
Want a Ramadan dessert that takes minutes to make Want a Ramadan dessert that takes minutes to make and tastes amazing? Yeah we all do - I got you! Try this coffee biscuit cake (barely adapted from the wonderful @littlesunnykitchen). Layers of coffee soaked biscuits and a super easy fluffy cream 👌🏼. I used my new @braun_bahrain handheld electric whisk, one of the attachments in the minipimer set-It whips the cream so fast, much faster than my stand mixer and it’s so convenient to be able to use any bowl to prep the cream in. I’ve partnered with @digitrolley to bring you lots of good recipes with their range of kitchen appliances, so keep following along! Recipe below , and IGTV video coming today in my Ramadan series!

Ingredients
2 tbsp nescafe powder dissolved in 1 cup hot water
1 cup heavy whipping cream 250ml
3 tbsp sweetened condensed milk
splash vanilla extract, optional
1 creme caramel sachet, powder only 49g
1 pack tea biscuits or graham crackers 7 oz or 200 g
2 tbsp cocoa powder for topping

Instructions:
-Add the heavy cream, sweetened condensed milk, vanilla and creme caramel powder to a bowl and beat until soft peaks form. Set this cream mixture aside.
-Dip the tea biscuits into the coffee briefly until they soak up the coffee but before they start to break apart. -Layer in a 7×11 or 9×9 inch clear pyrex dish, then top with half the cream mixture.
-Repeat another layer of coffee soaked biscuits on top of the heavy cream, followed by the remaining half of the cream. Sift the cocoa powder on to the top, then refrigerate for several hours until set. This is even better the next day!

.
.
.
.
.
#nescafe #nescafegold #coffeecake #biscuit #biscuitcake #nobake #nobakedessert #nobakecake #tiramisu #damnthatsdelish #tastingtable #beautifulcuisines #foodphotography #foodphotographyandstyling #tastyfood #easydessert #ramadankareem #ramadan2021 #ramadanrecipes #cream
Ramadan Kareem! And the first recipe is for these Ramadan Kareem! And the first recipe is for these unbelievable (and easy!) chicken musakhan sambosa was developed for @tamimimarkets Ramadan catalogue. One of the coolest projects I’ve ever worked on can’t wait to tell you more about it! In the meantime, enjoy this teaser recipe and check IGTV for full video steps coming up. 

Ingredients:
2 chicken breasts, cooked and finely shredded about 1 heaped cup of shredded chicken See notes
1/4 cup olive oil
2 large onions cut in half, then thinly sliced into wedges
1/4 cup toasted almond slivers or pine nuts
3 tbsp sumac
1/2 tsp salt
1/4 tsp black pepper
1/4 tsp cumin powder
1/4 tsp cinnamon powder
To assemble:
1 pack sambosa wrappers 500 g
1 tbsp flour
1/2 tbsp water
For frying:
vegetable oil, about 1/4 cup

Instructions:
-In a deep skillet over medium heat, add the olive oil until it heats up. Add the onions, and cook, stirring frequently until soft and starting to caramelize, 8-10 minutes.

-Add the shredded chicken, the toasted nuts, and all the spices. Stir to combine, then remove from the heat. Let mixture cool slightly 5 minutes or so.

-Fill each sambosa wrapper with a tbsp of mixture on the bottom corner, then fold the corner of the sambosa up and over the filling to the other side, to make a triangle. Keep folding this triangle over all the way up the top 

-Mix together the flour and water to form a thick paste, and seal the ends of the sambosa to prevent them from opening up while frying.

-Place vegetable oil in a skillet, about 2 inches deep and heat on medium high heat. Once hot enough, add the sambosa and fry for around 2 minutes a side until golden brown. Remove to a paper towel lined plate to absorb some of the excess oil, then enjoy warm, optionally with yogurt to dip in.
.
.
.
.
.
#chickensamosa #musakhan #ramadankareem #ramadan2021 #ramadanrecipes #samosa #friedfood #palestinianfood #middleeasternfood #beautifulcuisines #damnthatsdelish #f52community #thefeedfeed #foodgawker #f52grams #buzzfeedfood #tastingtable #tastemade #chickenrecipes #sumac #caramelizedonions #foodblogfeed #foodphotography #foodphotographyandstyling #foodstyling
Load More... Follow on Instagram

Copyright © 2019 on the Seasoned Pro Theme