


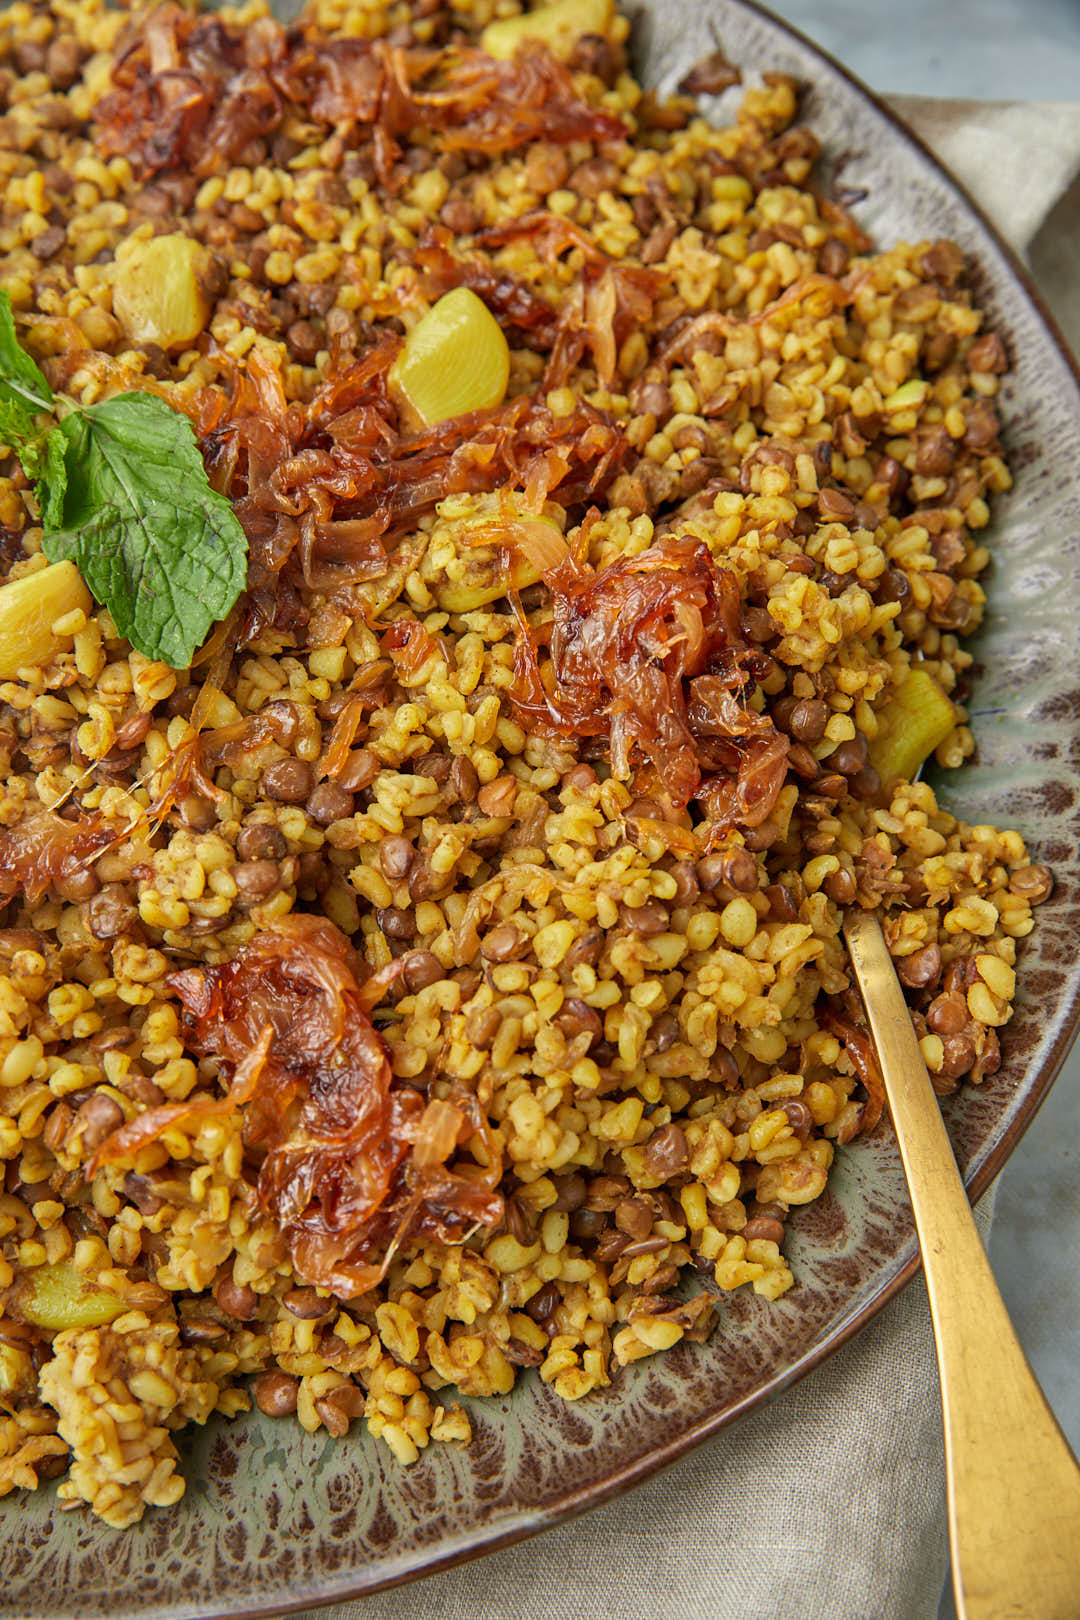
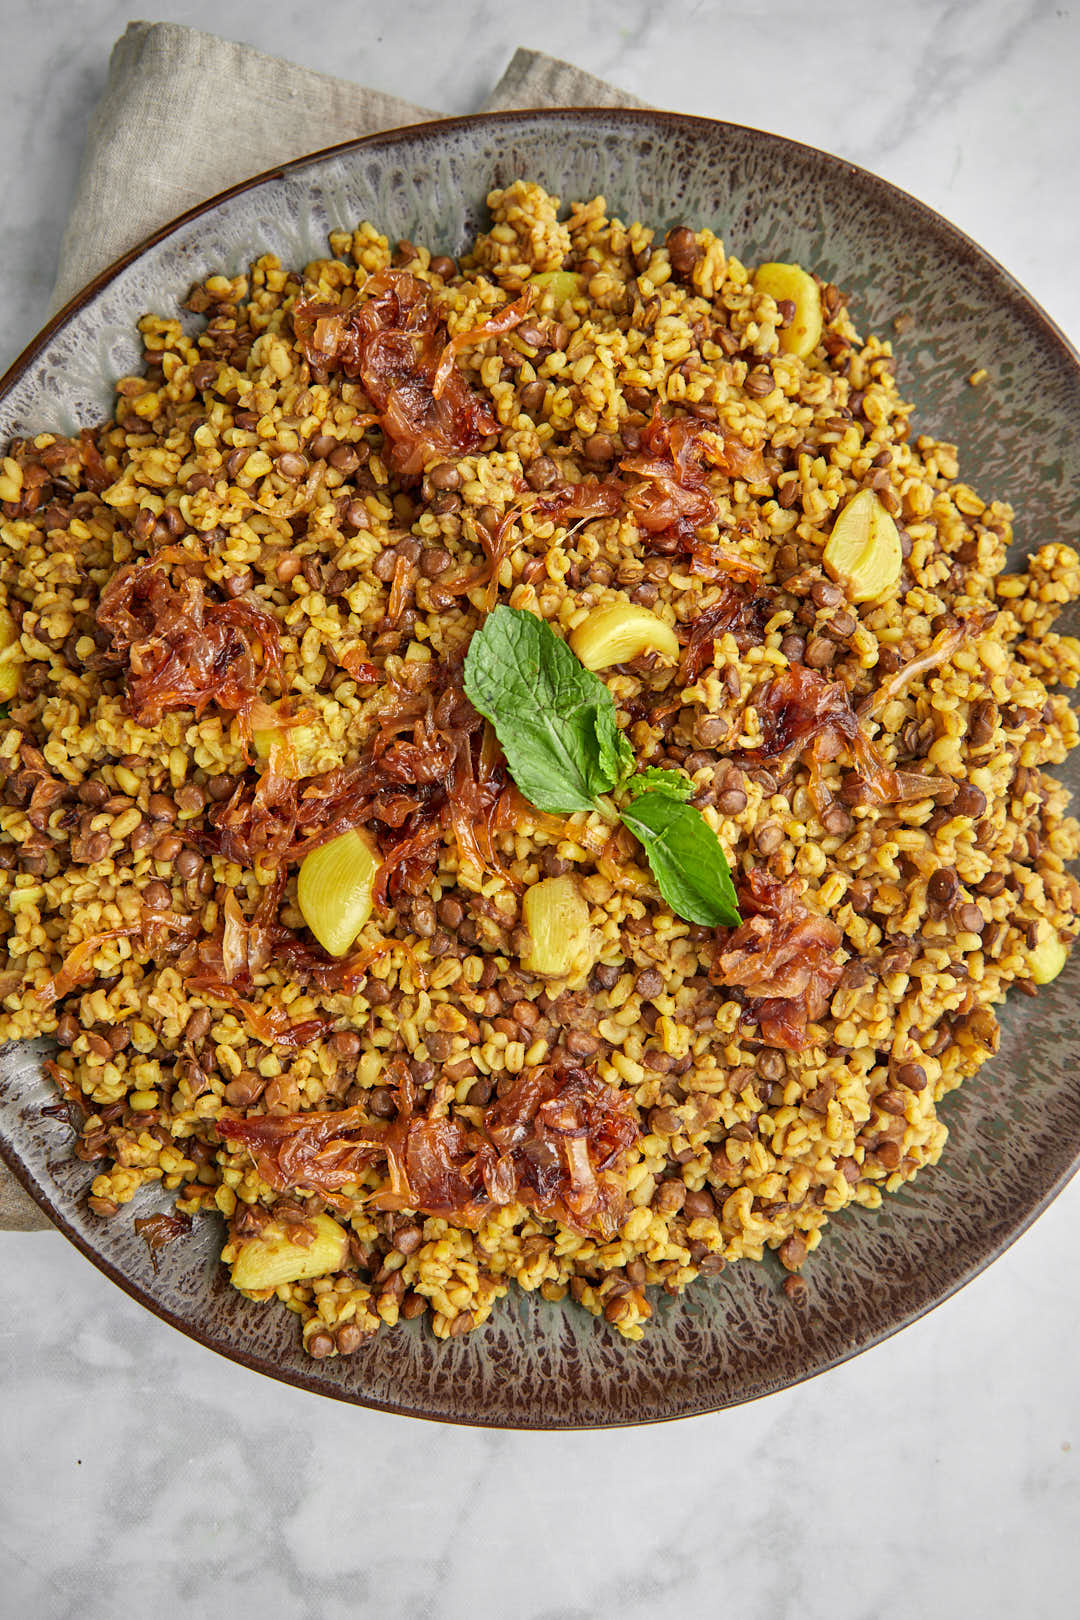
Mujadara bulgur, also known as mujadara hamra, is a fragrant, spiced vegan lentil and bulgur pilaf topped with caramelized onions. It’s extremely healthy and packed with flavor! It’s great served hot, room temp or even cold, and leftovers taste great too. This is one of my kids favorite dishes, and something I like making to take a break from meat.

Jump to:
What is bulgur?
Bulgur is a whole grain that is commonly used in Middle Eastern and Mediterranean cuisines. It is made from whole wheat kernels that have been parboiled and dried. It has a slightly nutty flavor.
The par cooking process involved in making bulgur allows it to cook more quickly than whole wheat, while still retaining many of the nutritional benefits.
It’s super healthy! A good source of fiber, proteins, vitamins and minerals.
We also make mujadara with brown rice, another delicious alternative.
What makes this bulgur mujadar so good?
- It’s healthy: The lentils and bulgur are excellent sources of plant-based protein and dietary fiber. They also provide essential vitamins and minerals, making this dish a healthy choice.
- Texture: The lentils cook into creamy little bites, and the whole garlic cloves also become soft and creamy. Meanwhile, the bulgur has a pleasant nuttiness and chewiness. This gives great contrast in texture.
- Flavor: Mujadara bulgur is seasoned with aromatic spices such as cumin, cinnamon, turmeric, and coriander. These spices infuse the dish with a warm and earthy flavor that add depth to the lentils and grains.
- Caramelized Onions: One of the most important parts of this dish! elements that The onions are sautéed slowly until golden brown. The onions become sweet and develop a rich flavor. I love these so much, and my version has plenty. We have some caramelized onions cooked through with the bulgur and lentils, and extra for topping.
- Versatility: Mujadara bulgur is a versatile dish that can be enjoyed as a main dish or as a side dish. Tastes great with a simple side of plain yogurt, a yogurt cucumber salad, or a simple green salad.
- Leftovers taste great: I like eating this straight out of the fridge, or at room temperature or heated up. Each way tastes great!
Ingredients you need to make bulgur mujadara:
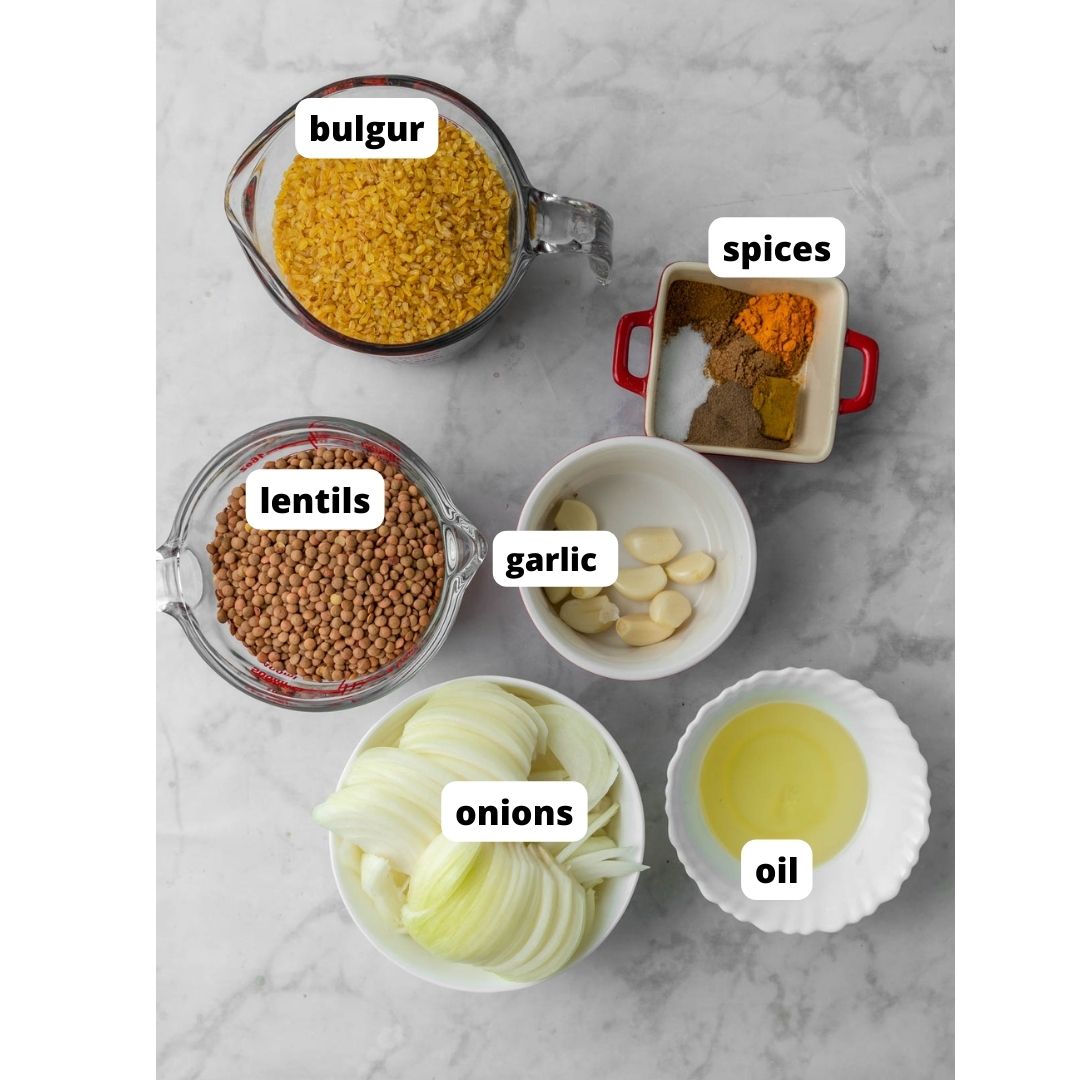
Brown lentils: Avoid using the orange/red lentils for this recipe, they’ll become too mushy as they cook.
Bulgur: Coarse bulgur- not the fine bulgur you’d use to make tabbouleh
Both the lentils and the bulgur can be gritty and have little stones in them, so make sure you pick through them and rinse them thoroughly.
Stock cube: Vegetarian or chicken, if you don’t need to keep this recipe vegetarian.
Spices: Cumin is the most classic flavor you’ll find in mujadara, so we add a BUNCH. It’s also great for helping ease digestion, so in the Middle East you’ll almost always find it added to lentil dishes. You’ll also need salt and pepper, and I recommend ground coriander, cinnamon and turmeric for extra flavor.
Oil: It’s best to use vegetable oil since you’ll cook the onions at quite a high heat
Onions: I find that yellow onions are the best for caramelizing, but you can use white or red if you prefer
How to make mujadarat bulgur:
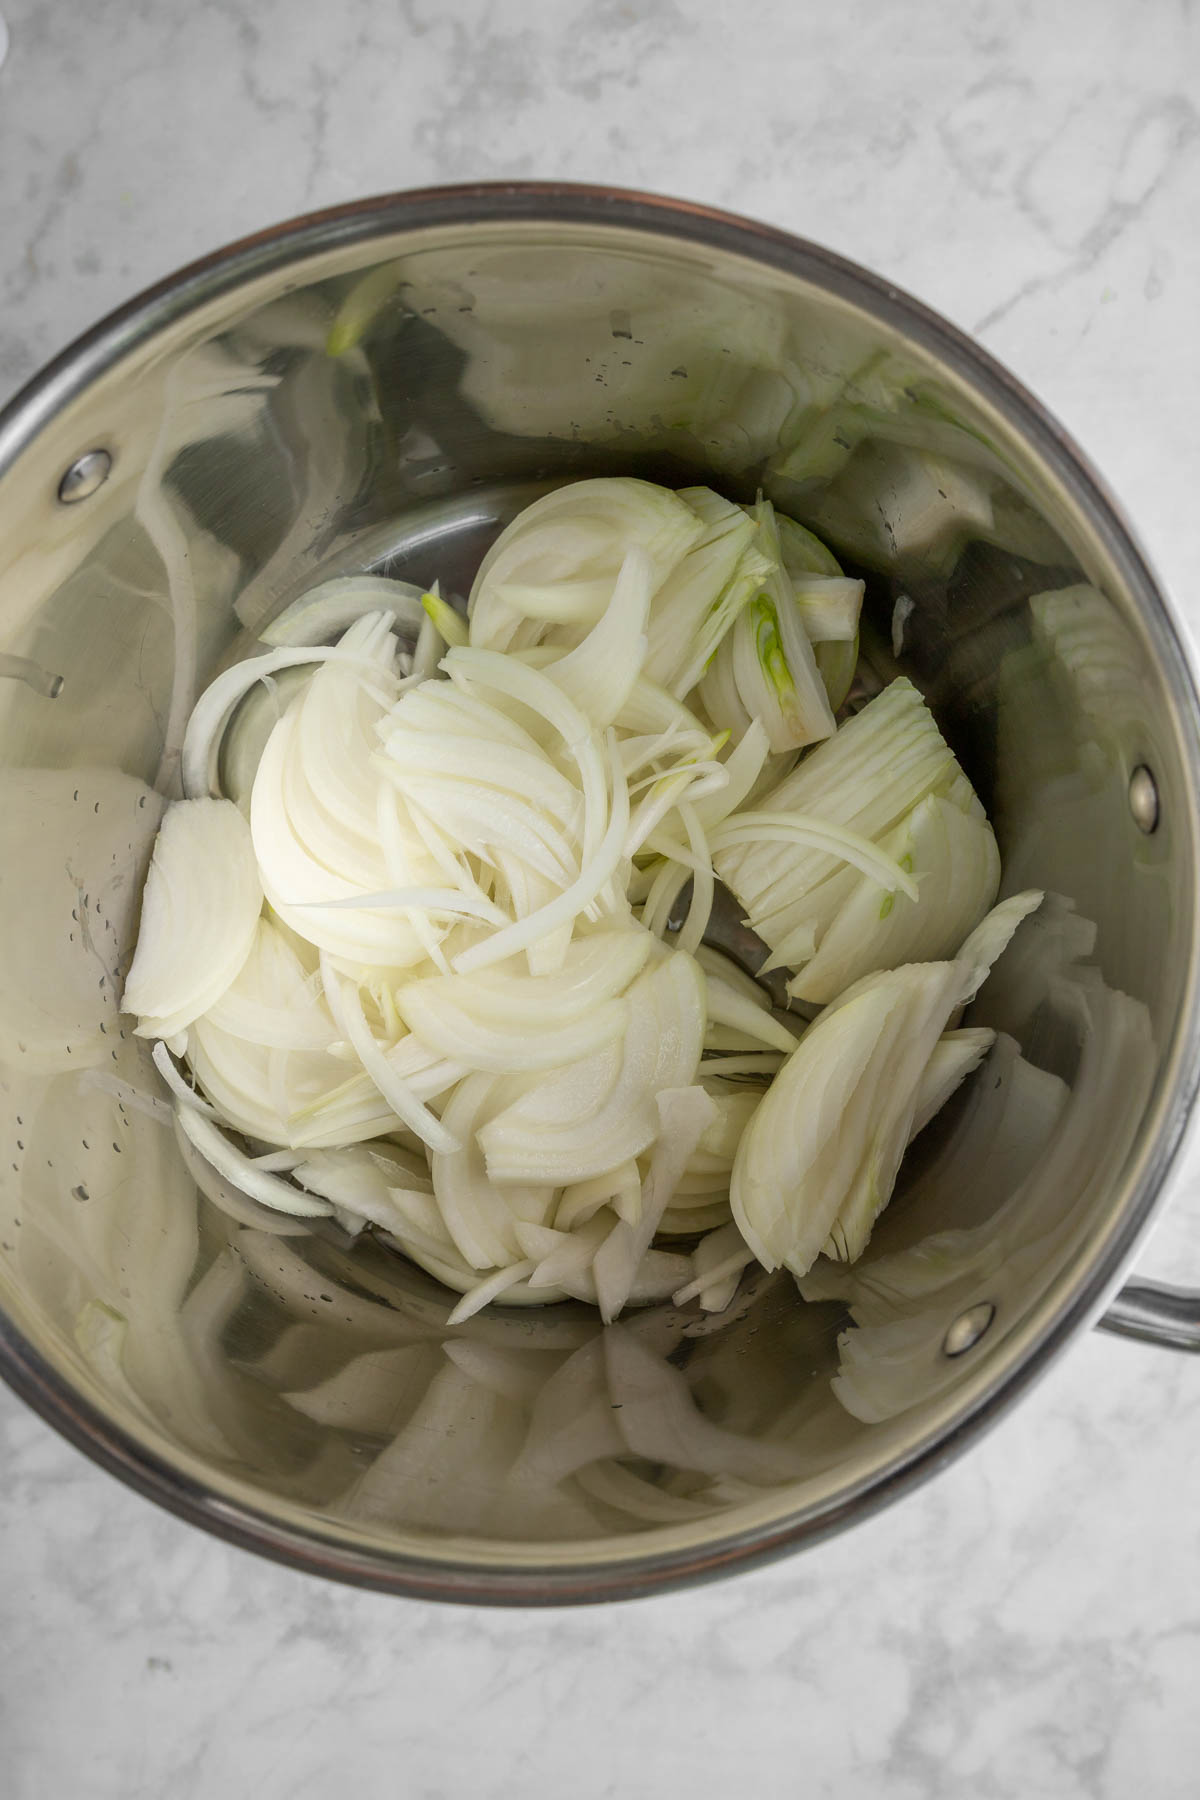


- Heat the vegetable and olive oil together in a large skillet over medium high heat. Once hot, add the sliced onions. Stir every few minutes until onions are deeply brown and evenly caramelized about 10 minutes. Reduce heat slightly if onions are turning too dark before becoming soft. After this time reduce heat to low and let them cook for a further 10 minutes or so, then remove half of the onions to a paper towel lined plate.
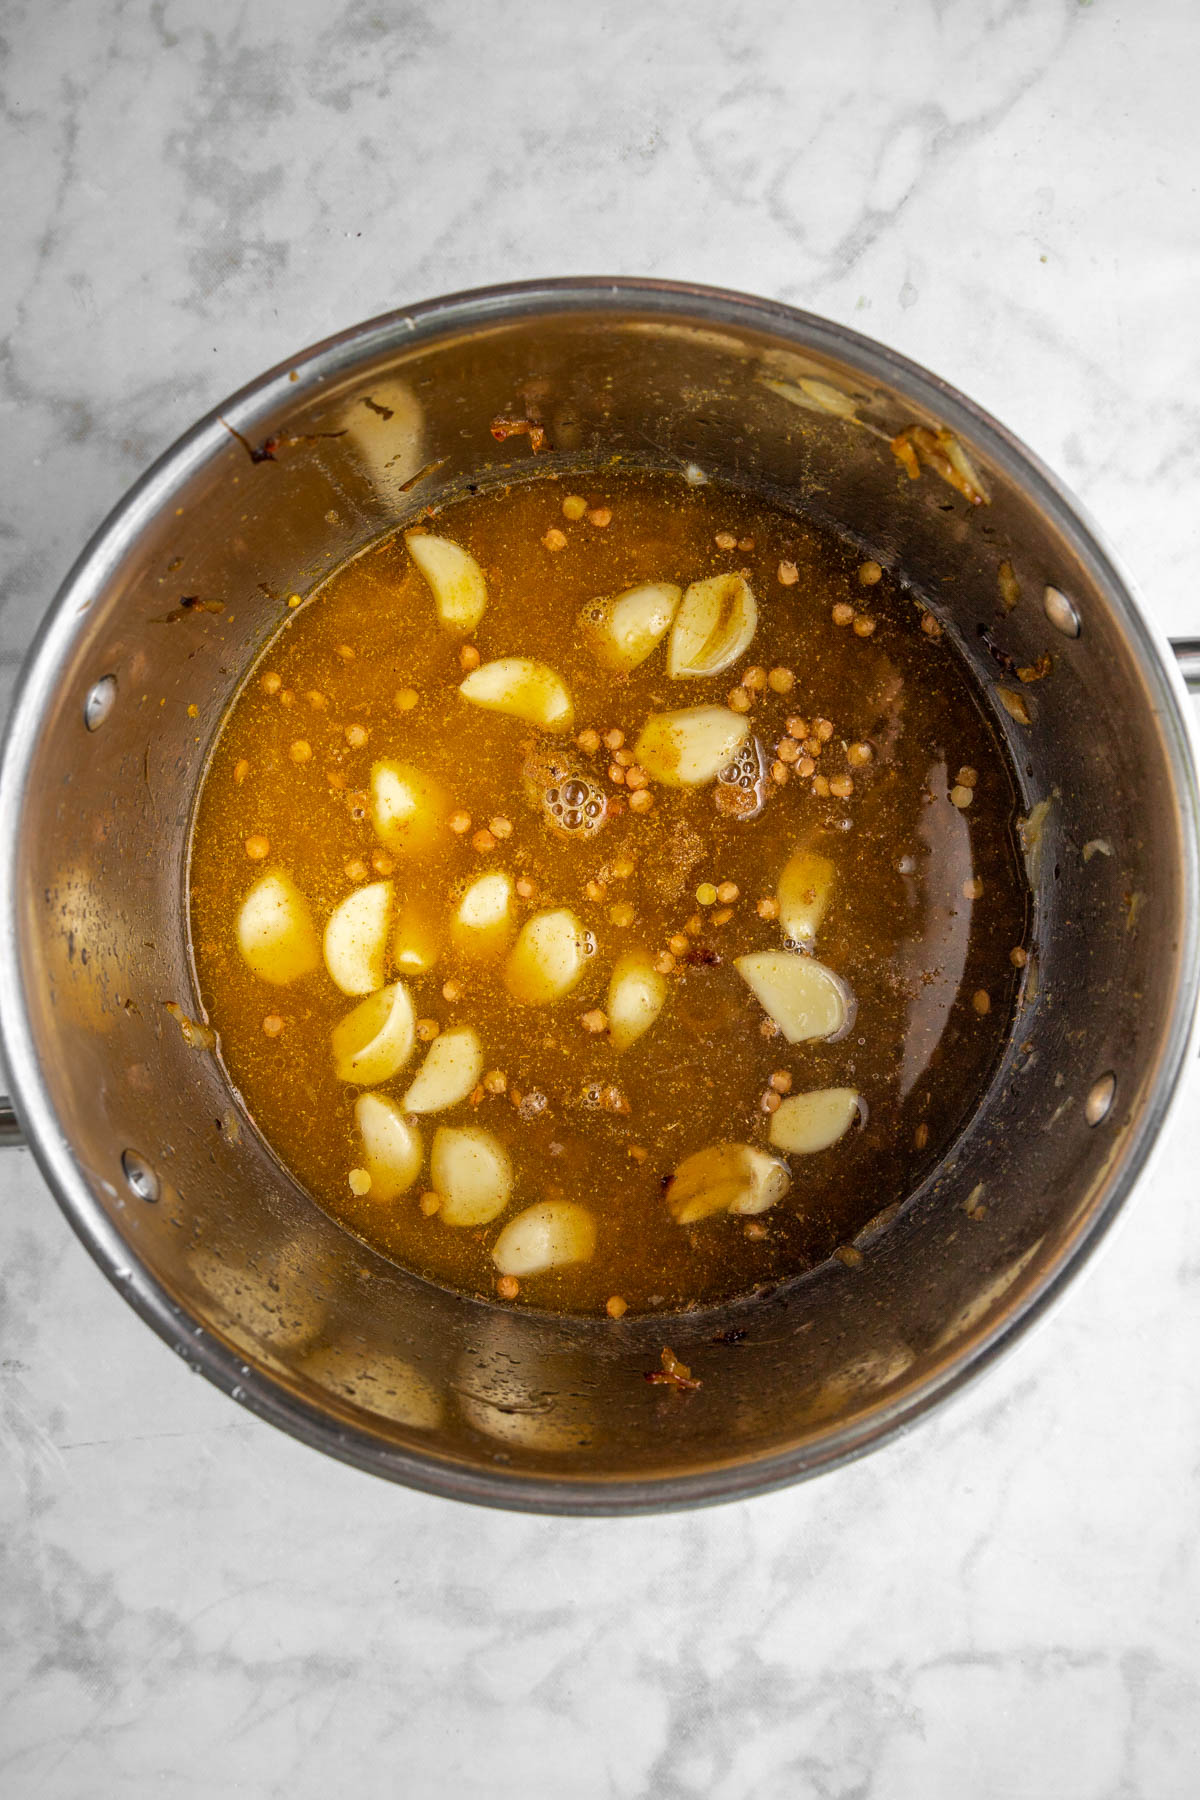
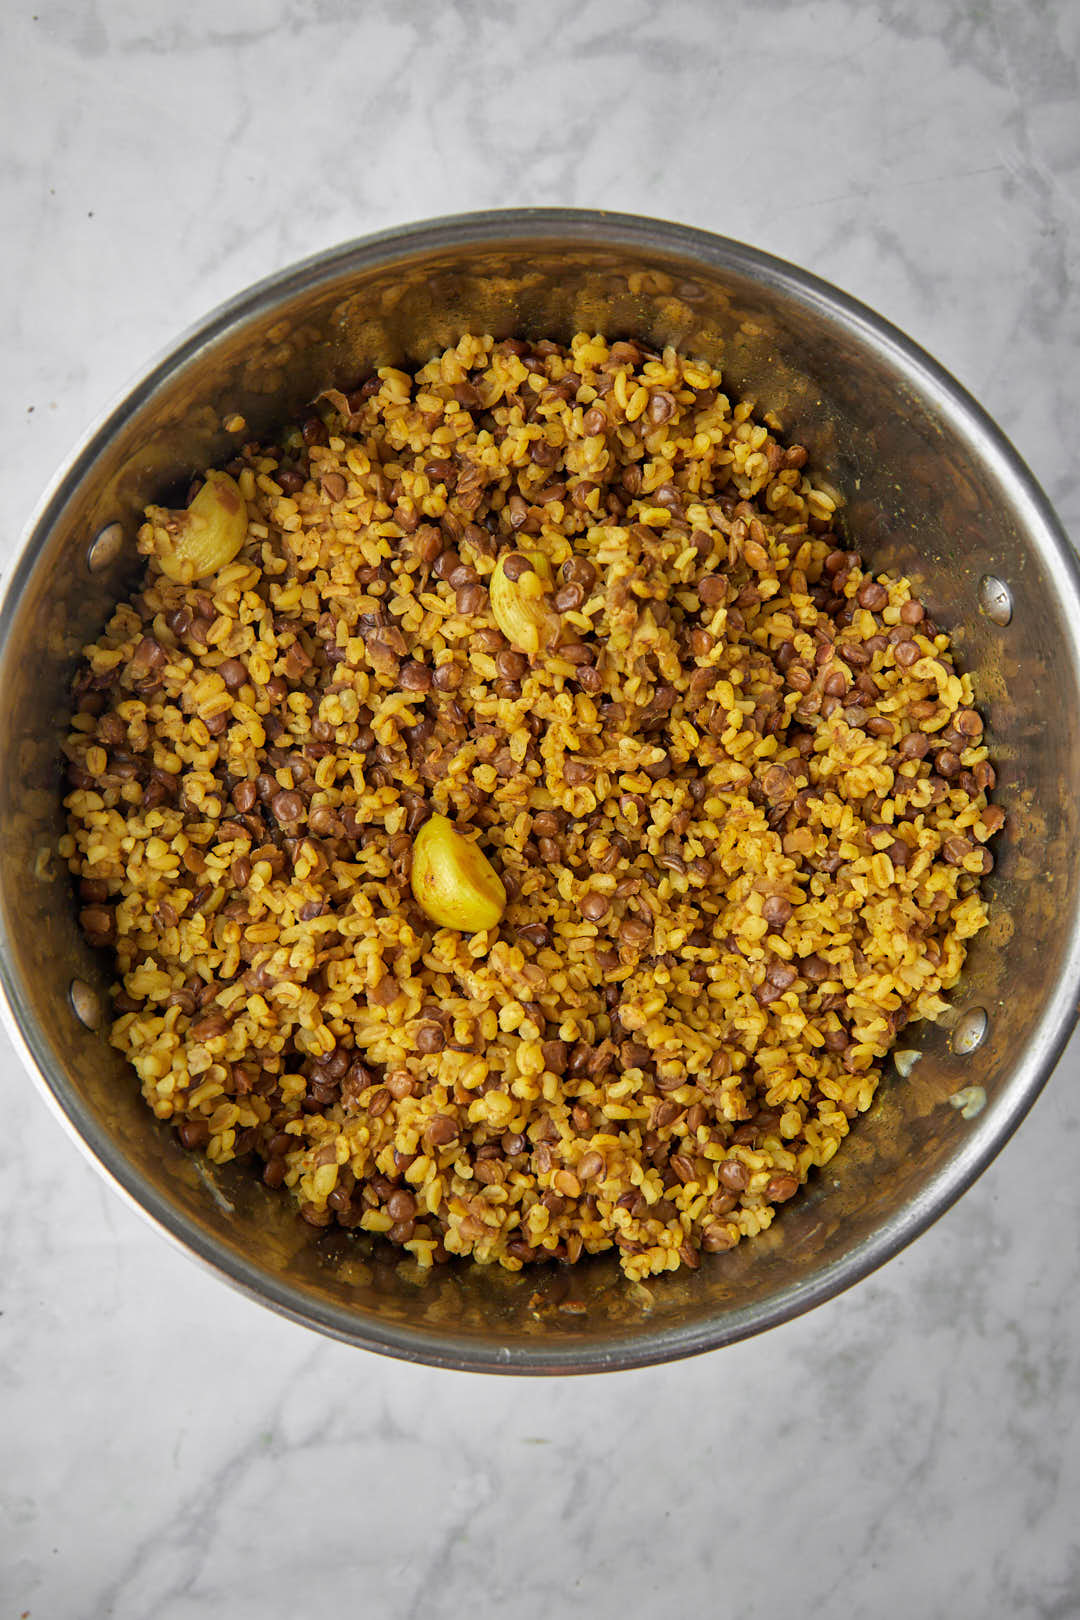
- Add the rinsed lentils to the saucepan, and cover with 2.5 cups of water or until lentils are covered.
- Add the bouillon cube, spices and a little salt. Toss in the peeled garlic cloves.
- Bring to a boil, then cover and reduce heat to medium low, simmering for 25- 30 minutes until lentils are tender with just a little bit of a bite to them. Halfway through simmering time, check the pot and if the water has dried out add a splash more water.
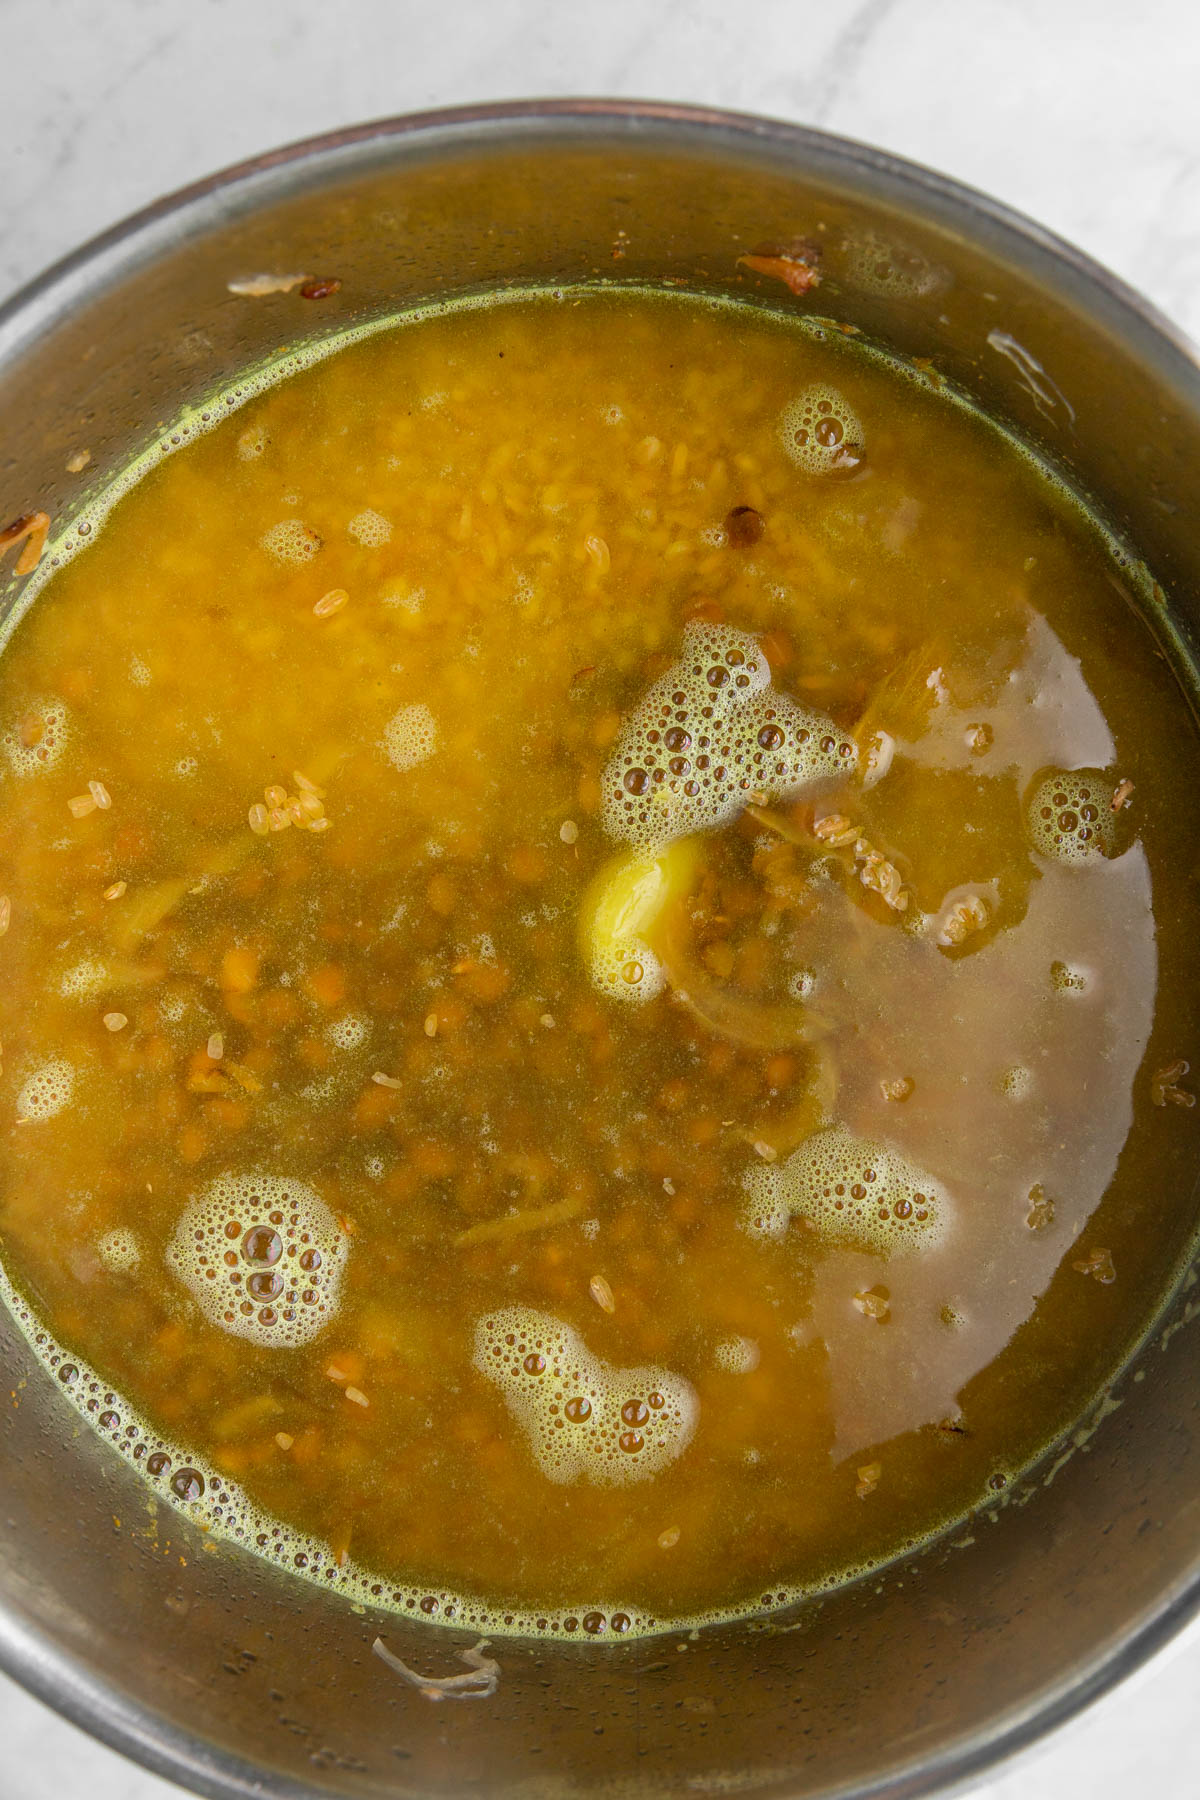
- When lentils are done cooking, add in the rinsed bulgur to the lentil water mixture. Add the extra water. Bring to a boil, then cover and cook on low heat for 20 minutes or until bulgur is cooked and water has evaporated.
How to caramelize onions:
The onions are essential to this dish. They are smoky and sweet and packed with flavor. This makes for my favorite part to this dish and I always put as many as I can on my plate. The way to caramelize them is to cook them steadily for a long period of time. Keep stirring occasionally, and keep going until onions change color to a golden brown.
What to serve mujadara bulgur with?

You can do a simple green salad, but my choice is always a cucumber yogurt dressing. It is creamy and cold and the perfect contrast to the heartiness of the mujaddara. Also, it’s so simple to put together. You can follow this recipe here.
You can also serve with a big scoop of plain yogurt or Greek yogurt. Alternately, this is also great with a side green salad.
Storing leftover mujadra hamra:
You can store leftovers for up to 4 days in a tightly covered container in the fridge. I usually have some extra caramelized onions I store too so that I can top leftovers with more onions.
I haven’t personally tried this, but some people freeze mujadara for up to 3 months in an airtight container. Reheat on medium low heat on the stove with a splash of water.
Recipe tips and tricks:
- If you want the lentils to cook faster, soak the lentils in some hot water for about 30 minutes.
- Take the time to really caramelized the onions until they turn a deep golden brown. This will bring out their natural sweetness which is so essential to the flavor.
- Make sure you choose coarse bulgur to give you that chewy texture, instead of fine bulgur which will become mushy.
Recipe FAQs:
No, bulgur is a wheat product. For a gluten free mujadra, try this one.
Although it may become slightly mushy, you can freeze it for up to 3 months. You can then gently reheat on the stove with a splash of water.
You can make this with green lentils. I wouldn’t recommend red lentils as much, but it’s still doable. You may need to adjust the lentil cooking time.
For more vegan Middle Eastern recipes:


Love this recipe? Please leave a 5-star 🌟🌟🌟🌟🌟rating in the recipe card and a comment!
Mujaddarat Bulgur (Vegan Lentil Pilaf)
Ingredients
- 1/3 cup vegetable oil
- 2 large yellow onions, thinly sliced
- 1 cup rinsed and cleaned brown lentils
- 4.5 cups water, divided
- 1 vegetable stock cube (or chicken if not vegetarian)
- 1.5 tablespoon cumin powder
- 1.5 teaspoon salt, plus a little extra pinch for onions
- 1/2 teaspoon black pepper
- 1/2 teaspoon ground coriander
- 1/2 teaspoon turmeric
- 8-10 peeled whole garlic cloves
- 1 cup rinsed coarse bulgur
Instructions
- Heat the vegetable oil together in a large pot over medium high heat. Once hot, add the sliced onions. Add a pinch of salt. Stir every few minutes until onions are deeply brown and evenly caramelized about 10 minutes. Reduce heat slightly if onions are turning too dark before becoming soft. After this time reduce heat to low and let them cook for a further 10 minutes or so, then remove half of the onions to a paper towel lined plate.
- Place the rinsed lentils in the saucepan with the remaining half of the onions, and cover with 2.5 cups of water or until lentils are covered.
- Add the bouillon cube, cumin, salt, black pepper, ground coriander, and turmeric. Add the peeled garlic cloves, and stir to combine.
- Bring to a boil, then cover and reduce heat to medium low, simmering for 25- 30 minutes until lentils are tender with just a little bit of a bite to them. Halfway through simmering time, check the pot and if the water has dried out add a splash more water.
- When lentils are done cooking, add in the rinsed bulgur to the lentil water mixture. Add the extra 2 cups of water. Bring to a boil, then cover and cook on low heat for 20 minutes or until bulgur is cooked and water has evaporated.
Video
Notes
- If you want the lentils to cook faster, soak the lentils in some hot water for about 30 minutes.
- Take the time to really caramelized the onions until they turn a deep golden brown.
- This recipe is NOT gluten free, as bulgur is a wheat product. It is vegan however!
Jess says
Loving this healthy option!
Farah Abumaizar says
Thanks so much!
Kushigalu says
Healthy and delicious pilaf recipe. Love the flavor combination here. Thanks for sharing.
Farah Abumaizar says
It’s my pleasure!
Beth says
I really love the simple flavors in this recipe with the great texture of the bulgar and the lentils. The cucumber mint really pairs well with it, too. So good!
Farah Abumaizar says
Thanks so much Beth!
Justine says
Such a delicious and healthy meal, we loved everything about it!
Farah Abumaizar says
So glad to hear it Justine!
raida jarrar says
Great recipe….a sincere comment from a mom to her daughter..Made it yesterday….yummmmmmm
Farah Abumaizar says
Nothing like my amazing moms approval!
Heidy L. McCallum says
I made this the other day and my family loved the flavors, I loved it because it was so healthy. Saving the recipe to make again.
Farah Abumaizar says
So glad to hear that! Thanks for letting me know👏🏼👏🏼
Demeter says
This sounds so full of flavor! I’ve been looking for a new dish to try and this looks perfect! Thank you so much!
Farah Abumaizar says
Thanks for your kind comment Demeter !
Cliona says
I’m always looking for new and exotic recipes like this and LOVE bulgur wheat so this is ideal. Thanks!
Farah Abumaizar says
I hope you try and like it!!
Annie @ Annie's Noms says
Oh my gosh, this looks delicious! I love the cucumber mint yoghurt, what an amazing addition to this tasty dish. I am a huge fan of beans and pulses and always have lentils etc. in the kitchen. I need to try this!
Farah Abumaizar says
Lentils are so easily transformed! This is a flavor bomb – hope you try it!
Danielle says
I am just loving the flavors in this. It sounds just incredible! Plus the fact that it’s healthy is an added bonus 🙂
Farah Abumaizar says
So healthy and so hearty! It’s a good one!