• Skip to primary navigation
  • Skip to main content
  • Skip to primary sidebar
  • Skip to footer

 logo

  • Recipes
    • Breakfast
    • Sides
    • Soup
    • Main Meals
    • Healthy
    • Dessert
    • Drinks
  • Eating Out
  • About Me
    • Privacy Policy
  • Resources
    • Must Have Kitchen Tools
  • Nav Social Menu

    • Email
    • Facebook
    • Instagram
    • Pinterest

Ginger Garlic Paste

Aug 17, 2020 · Leave a Comment

Jump to Recipe
Ginger garlic paste with some whole garlic in the corner

This extremely easy, three ingredient ginger garlic paste will add so much flavor to your Asian or Indian inspired dishes. Homemade is so much better than storebought!

When it comes to adding lots of flavor to a curry or a stir fry dish, ginger garlic paste is often a key component. Ready made ginger garlic paste can usually be found in the exotic food section of most supermarkets. You shouldn’t buy it though! Why?

Why is homemade ginger garlic paste so much better?

Let’s face it, everything homemade is so much better, and this is no exception.

The paste is just so easy to make, and requires only three ingredients so you have no excuse!

It’ll keep for at least a couple weeks in the fridge, and for up to six months in the freezer.

The flavor is much more intense and tastes fresher than the jarred stuff.

There’s also a minimal amount of oil in this, and the storebought version will most likely have much more oil in it.

What do you need to make this paste?

whole ginger and whole garlic and oil in a small bowl

Fresh ginger, peeled and sliced for easier blending

Peeled garlic cloves. Want a hack to easily peel garlic cloves? My husband swears by this shaking a head of garlic in a jar trick.

Equal amount in weight of ginger and garlic, so this makes for an easy ratio to tweak.

1-2 tbsp of vegetable oil.

How to make the paste?

peeled garlic cloves and ginger

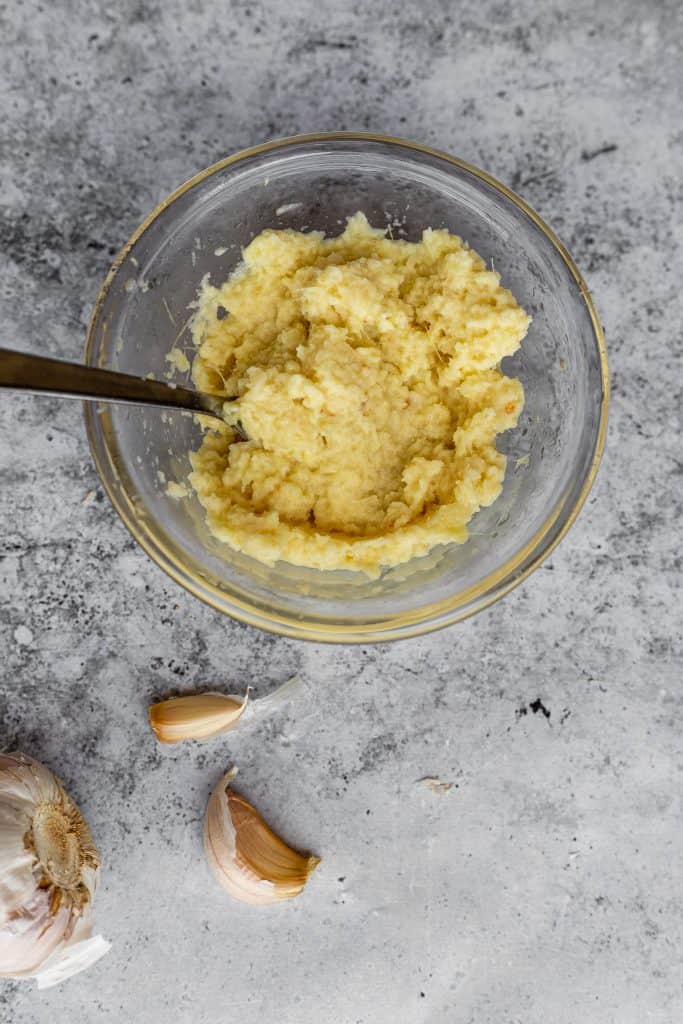
All you need to do is blend the ingredients together with a food processor or blender, while drizzling the oil in until combined. I’d start with one tablespoon of oil, but if you feel the texture of the paste is still a little dry and not smooth enough, add the second tablespoon. That’s all you need to do!

Feel free to use the paste immediately in the recipe of your choice, or store for later.

How to store leftover ginger garlic paste:

Store tightly covered in a jar in the fridge for up to two weeks. Use a clean spoon to remove any ginger garlic paste so you don’t contaminate the jar.

You can also freeze in handy individual cubes, keep the cubes in a sandwich bag, and store in the freezer for up to six months. This is a great trick to have some on hand whenever a good recipe comes along.

What to use ginger garlic paste in:

I think the flavor lends itself perfectly to most Asian, Southeast Asian or Indian dishes.

You might try adding a spoonful to the sauces in the following dishes:

Prawn Biryani

Vegan Cauliflower Curry

Thai Green Chicken Curry

Garlic Honey Prawns

Instant Pot Beef and Broccoli

Instant Pot Orange Chicken

ready ginger garlic paste in a small bowl

Ginger Garlic Paste

Farah Abumaizar
An easy homemade ginger garlic paste that you can use in a multitude of recipese
Print Recipe Pin Recipe
Prep Time 5 mins
Course Side Dish
Cuisine Asian
Servings 4 people
Calories 31 kcal

Equipment

  • Food processor or blender

Ingredients
  

  • 4 oz ginger, peeled and slice 112g
  • 4 oz garlic, peeled 112g
  • 1-2 tbsp vegetable oil as needed

Instructions
 

  • Place the ginger and garlic in the bowl of a blender or food processor. Pulse to combine, drizzling in 1 tbsp of oil to help it turn into a smooth paste. Add the second tablespoon if needed to get more of a smooth consistency.

Did you make this? Tag @everylittlecrumb or hashtag #everylittlecrumb and I’ll share your images!

Pin for later!

Recipes, Sauces

Reader Interactions

Leave a Reply Cancel reply

Your email address will not be published. Required fields are marked *

Recipe Rating


Primary Sidebar

Get more stuff

Subscribe to our mailing list and get interesting stuff and updates to your email inbox.

Thank you for subscribing.

Something went wrong.

we respect your privacy and take protecting it seriously

FeedFeed

Featured Recipes

Egyptian Goulash

Pink Hummus

Orange Blossom Cake

Arayes

Sahleb

More

Footer

everylittlecrumb

Farah Abu Maizar | Food Lover
Magic bars. Addictive! And so easy to make- a dige Magic bars. Addictive! And so easy to make- a digestive biscuit crust topped with chocolate chips and butterscotch chips, walnuts or pecans, sweetened coconut and condensed milk and baked until golden brown and bubbly. I dare you to stop at one! This weeks recipe for @tamimimarkets is a keeper- they have the best range of chocolate chips!

Ingredients:

2 cups digestive biscuit crumbs (200g)
1/2 cup butter, melted (113g)
1 cup semi sweet chocolate chips (150g)
1 cup butterscotch chips (150g)
3/4 cup chopped walnuts or pecans (100g)
1 cup sweetened shredded coconut (signature select)
1/2-2/3 container sweetened condensed milk (400g container)

Method:
1. Preheat oven to 180C. Mix the biscuit crumbs and melted butter until well combined, then press into a parchment paper lined 9x13 inch pan.
2. Layer by scattering the chocolate chips on top of the biscuits, followed by the butterscotch chips, the walnuts, then the shredded coconut. Evenly drizzle the condensed milk on top.
3. Bake for 25-38 minutes or until edges are golden brown and the condensed milk is bubbling. Cool completely before slicing.
I know that the weekend is over, but you can keep I know that the weekend is over, but you can keep the party going with easy sheet pan nachos. For a recent game night, we actually made our nacho chips from scratch and it was so easy (and yum!), I’ll probably never buy store bought tortilla chips again. To make homemade tortilla chips:

Ingredients:
As many corn tortillas as you want, we used 12 small corn tortillas 
Some salt for sprinkling.

Method: 
-Heat the oven to 190C (375F). Cut the tortillas into wedges, each tortilla will give you six wedges. 
- Lay in a single layer on a baking sheet. Bake for 6-7 minutes until starting to turn golden brown, then sprinkle with salt and turn over for another 6-7 minutes until golden brown and crunchy.
- Make nachos by sprinkling the tortilla chips with shredded cheddar cheese, and adding optionally refried beans and cooked ground beef. Bake until cheese is melted then remove from oven and top with anything you like:
- We used diced tomatoes, diced avocados, jalapeños, sliced black olives and chopped coriander. Serve with sour cream and salsa on the side 😍🥳 
.
.
.
.
.

#cakephotos #layercake #chocolate #ganache #foodblog #instayum #yummy #bakery #foodporn #foodtographyschool #foodphotography #slice #delish #foodfluffer #damnthatsdelish #nachos #tortilla #tortillachips #partyfood #chipsandsalsa #mexicanfood #gamenight #sheetpan
We celebrated my husbands birthday with lots of tr We celebrated my husbands birthday with lots of treats, but this cake from home business @littlecakecompanyy really stood out! The talented young woman behind this home business made him a gorgeously decorated cake we devoured. Moist and fluffy chocolate cake layered with Oreo cheesecake filling. Dreamy! I loved the alternative to a regular buttercream filling and the cake itself is so soft and moist. Definitely check out her page fir her flavors and range- like the Nutella cake pops that my kids fought over lol. Swipe to see the inside, would definitely order a cake from her again! Save this to remind you for your next occasion 🎂🥳.
.
.
.
.
.

#chocolatecake #magnoliabakery #cakestagram #cakephotos #layercake #chocolate #ganache #foodblog #instayum #yummy #bakery #foodporn #foodtographyschool #foodphotography #slice #delish #foodfluffer #damnthatsdelish
I’m totally living the bbq life here. It’s bec I’m totally living the bbq life here. It’s become my mission to grill as many times as possible until it gets too hot to be outdoors. Lots of places in Khobar make it easy! We got these mini slider patties, potato buns, burger sauce and all the prepped and ready cut up veggies from @redmarblesa a newly opened premium butchery. Making hamburgers at home has never been this simple and convenient. I really like that it’s a one stop shot for your complete burger. Their burger sauce is really good too! Save this post for next time a burger craving hits!
.
.
.
.
.

#delish #shishtaouk #cakestagram #skewers #bbqporn #chocolate #bbqseason #foodblog #instayum #yummy #winter #foodporn #foodtographyschool #foodphotography #grill #delish #foodfluffer #damnthatsdelish #coleslaw #kebab #fries #grills #bbq #lebanesefood #middleeasternfood #lamb #sliders #burgers
Definitely one of my favorite ways to start the da Definitely one of my favorite ways to start the day. A cup of black coffee and a slice of cake 😍. Thank you @espresso_bh for always spoiling me with goodies and testing out your baked goods on me. I also have to shout out @azulmarblewll for their gorgeous marble trays. Wishing you all a happy Wednesday!
.
.
.
.
.

#chocolatecake #magnoliabakery #cakestagram #cakephotos #layercake #chocolate #ganache #foodblog #instayum #yummy #bakery #foodporn #foodtographyschool #foodphotography #slice #delish #foodfluffer #damnthatsdelish #espresso #blackcoffee
La Gondola is a classic Italian restaurant in Khob La Gondola is a classic Italian restaurant in Khobar. Every khobari I know has been going to @lagondolaksa since their childhood. The best thing about this restaurant is that it stands the test of time! It’s still as good as it’s been, with excellent service, a varied menu and delicious food. I really love it and always leave happy! Their salads were perfect (caprese and roasted eggplant with yogurt dressing). They have a comforting pumpkin soup in a bread bowl, amazing flatbreads served complimentary as a starter, and great pasta dishes. We had the seafood pasta which was light and tasty (could have used a tad more sauce though), and an off menu penne rose I ask them to make when I’m craving pasta. Excellent meal! My only tip is try hard not to fill up on the starter bread, I always do 😂.
.
.
.
.
.

#carbs #pastalover #pastapasta #linguine #hummus #italianfood #shrimp #penne #veggies #seafoodpasta #pasta #instayum #yummy #bakery #foodporn #foodtographyschool #foodphotography #slice #delish #foodfluffer #damnthatsdelish #foodie #foodies #foodofinstagram
Two of my favorite easy dips, recipes below! I got Two of my favorite easy dips, recipes below! I got you sorted with the ultimate chips and dip platter for all your BBQs and gatherings. @tamimimarkets #brandpartner has the best selection of chips, crackers and pretzels so you can mix and match with healthy and more indulgent types. Could not stop snacking, and the three ingredient labneh dip and creamy beetroot hummus were stars! I also got the ready made Signature salsa👌🏼 and Save this post and send it to your snack loving friends. Which would you go for the labneh or the beetroot?

Beetroot Hummus:
1 roasted beetroot (ready roasted, or roast a whole beetroot in a 200 C oven wrapped in foil for 1 hour or until tender) You can also get the ready cooked ones to save time!
1 can chickpeas, rinsed and drained
2 garlic cloves minced
Juice and zest of one lemon
1/4 cup olive oil
2-3 tbsp of tahini
big pinch salt and pepper
1/4 tsp ground cumin

Blend all ingredients in a blender until well mixed and creamy. If you want it looser, add a little more olive oil at a time. Store in fridge until ready to use.

Labneh Dip:
250 g Labneh
2 170g containers of Laban (yogurt)
1 pack dry vegetable soup mix, no noodles.

Mix all ingredients together until creamy and smooth. Store in fridge until ready to use.

Assemble your platter with the chips, crackers and veggies of your choice. Enjoy!! 
.
.
.
.
.
#chips #dip #chip #beetroot #hummus #hummusrecipe #labneh #healthysnack #veggies #snacks #snackplatter #instayum #yummy #bakery #foodporn #foodtographyschool #foodphotography #slice #delish #foodfluffer #damnthatsdelish #foodie #foodies #foodofinstagram
Arayes make the best lunch. You can grill them (pe Arayes make the best lunch. You can grill them (perfect for bbq season) or oven bake them like I did here. They are basically kafta(Lebanese meat mix) stuffed pita bread baked until crunchy and golden and served with extra pomegranate molasses. Yum! I always dip mine in yogurt 👌🏼

For the kafta:
1/2 lb ground beef 250g
1/2 lb ground lamb 250g
1/2 onion grated or pulsed in food processor
1 handful parsley, finely chopped
1 tbsp pomegranate molasses
1 tsp salt
1.5 tsp seven spices or all spice
1/2 tsp cinnamon powder
1/4 tsp cumin powder
1/4 tsp black pepper
pinch red chili flakes
To assemble:
4-5 large pita breads
olive oil
tomato paste optional
salt for sprinkling

INSTRUCTIONS
 
-Preheat oven to 200C. Prepare baking sheet by lining with parchment paper.
-Add all the ingredients into a large bowl and mix well until combined. You can use a spoon, or gloved hands to mix.
-Cut each pita bread in half, and fill each pita pocket with about 1/4 cup of meat mixture. Cut each half into quarter ( I like using kitchen scissors for this). You can also peel open a pita bread to separate the two halves, spread the meat filling all over evenly, top with the other half then cut into quarters.
-Place all stuffed pita quarters evenly spaced onto the baking sheet, and drizzle both sides with olive oil (you can brush the oil on if you want). I like to rub a little tomato paste on some of the outside of the pita breads, it gives a little color and flavor. -Sprinkle salt onto the pita bread. Bake for 18-20 minutes, flipping over halfway through until both sides are crisp and golden brown.
-Serve warm, preferably drizzled with pomegranate molasses, with a side of yogurt or a simple salad.

#delish #lebanese #kafta #skewers #bbqporn #chocolate #chickenrecipes #foodblog #instayum #yummy #winter #foodporn #foodtographyschool #foodphotography #grill #delish #foodfluffer #damnthatsdelish #foodie #kebab #hummus #grills #bbq #lebanesefood #middleeasternfood #lamb #redmeat #pitabread  #pita
Load More... Follow on Instagram

Copyright © 2019 on the Seasoned Pro Theme