• Skip to primary navigation
  • Skip to main content
  • Skip to primary sidebar
  • Skip to footer

 logo

  • Recipes
    • Breakfast
    • Sides
    • Soup
    • Main Meals
    • Healthy
    • Dessert
    • Drinks
  • Eating Out
  • About Me
    • Privacy Policy
  • Resources
    • Must Have Kitchen Tools
  • Nav Social Menu

    • Email
    • Facebook
    • Instagram
    • Pinterest

Prawn Biryani

Aug 13, 2020 · 12 Comments

Jump to Recipe
bowl of prawn biryani with raita in a bowl in the corner

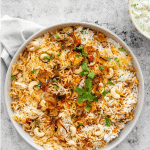
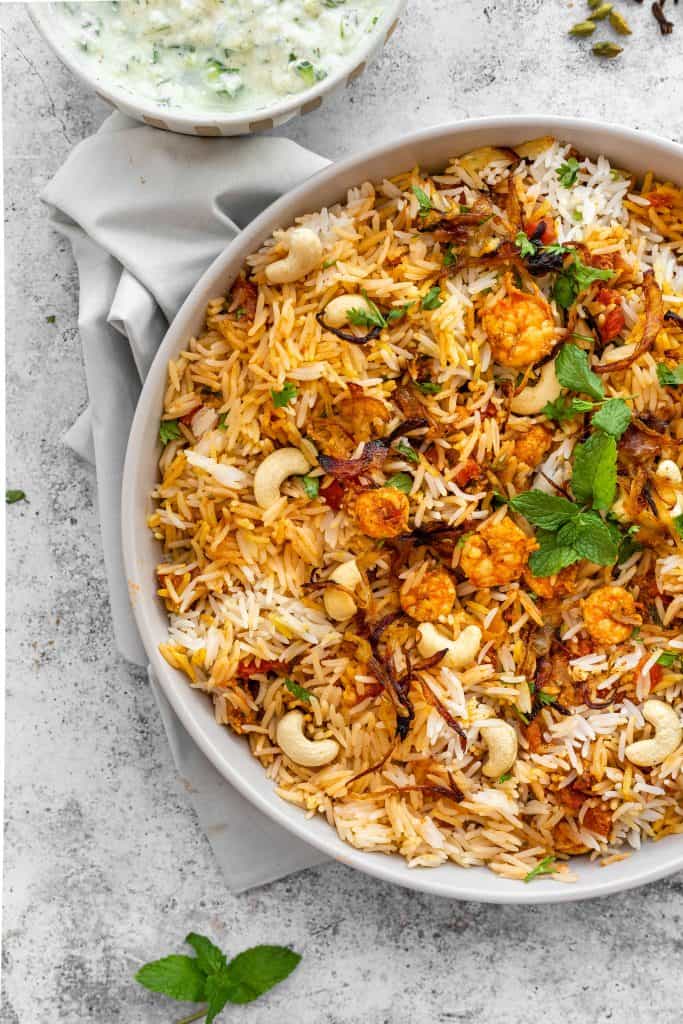
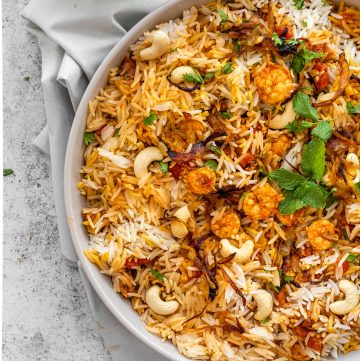
A step by step method to get flavorful and delicious prawn biryani, with easy to find ingredients and a simple process. An absolutely show stopping dish!

What is prawn biryani?

Biryani is a delicious dish made from layering rice with a mixture of yogurt and spice marinated meat, chicken or prawns.

In this case, I used prawns and the combination of the yogurt and ginger garlic marinated prawns with the rice was fantastic. I absolutely loved the recipe! Biryani made with prawns is definitely a combination you should try.

bowl of prawn biryani with raita in a bowl in the corner

What makes this easy prawn biryani recipe so good?

The fact that it’s easy! I simplified the steps as clearly as I could. I myself was overwhelmed researching different methods of biryani, with some recipes having very convoluted steps. This recipe brings it down to basics it so that biryani can be part of a regular weeknight meal rotation.

The recipe I ended up adapting, is from Indian Healthy Recipes. It seemed like the simplest to follow, and I changed it up based on my preferences.

Even though it’s easy, this biryani recipe is so packed with flavor that it makes for a really special meal. Perfect for an occasion or when you have people over.

I used ingredients that are very accessible, with spices simplified into easy to find ones. Instead of making a homemade biryani spice blend, I used a ready made blend and enhanced it with a few more spices.

The spice level is also moderate, so this is kid friendly as well. My kids actually asked for a second plate each!

bowl of biryani with raita in a bowl in the corner

What are the ingredients in prawn biryani?

ingredients needed to make the biryan

For the rice:

What kind of rice to use for prawn biryani? Basmati rice is the way to go. You need basmati rice, a bay leaf, and a few cardamom pods to flavor the rice.

To marinate the prawns:

prawns being marinaded before cooked

Prawns: small or large are fine, you’ll just need to adjust cooking time according to size. You need 300 g after cleaning (about 12 ounces)

Yogurt: A very traditional component of a marinate for biryani. You can use plain or Greek yogurt, you only need 1/3 cup.

How to make ginger garlic paste:

Ginger Garlic Paste: This can be store bought, but it’s so easy to make at home. You need to blend together an equal amount of peeled sliced ginger and garlic cloves with 1 tbsp of vegetable oil or so until a paste forms. I used 60 grams each of ginger and garlic.

I have a whole blog post on this, if you want to check it out!

I had plenty left over, which I stored in the fridge. Leftovers can be stored for 2-3 weeks in the fridge or frozen for up to 6 months

Spices: A mix of biryani masala spice, turmeric powder, red chili powder and salt. Keep in mind red chili powder isn’t the same as cayenne pepper which would add a lot of heat!

For the biryani gravy:

First, I’d prepare the onions, then proceed with the rest of the ingredients.

How to caramelize onions for biryani:

First, start with a heavy bottomed pan so that the onions won’t burn. Heat some vegetable oil- enough to coat the bottom of the pan. The pan should be on medium high heat.

Add some thinly sliced onions once the oil is hot. (I used a yellow onion, but this will work with any color onion). Stir occasionally and let the onion sizzle and change color.

Keep cooking until onions turn dark golden brown, watching carefully so onions don’t burnt.

Besides caramlized onions, the other ingredients you need are:

Whole spices: bay leaves, cardamom pods, cloves

Spice powders: cumin powder, cinnamon, biryani masala powder, red chili powder, salt and pepper to taste

Diced tomatoes with sauce: A can of diced tomatoes with all the liquid thrown in too

Fresh herbs: chopped fresh mint and coriander

How to make prawn biryani:

gravy in a pan with the cooked prawns

Since biryani is a layer of cooked rice and a prawn biryani gravy, theres a few steps involved to getting this layering.

Cook the rice:

First step is to cook the rice. To properly cook basmati rice, you want to rinse it well, soak for 30 minutes, then rinse again well. This will get rid of any extra starchiness so that the riee is firm and each grain defined, as opposed to mushy.

The ratio of rice to water is about 1.5 cups rice to 3 cups of water. Basically, you want the water to cover the rice by about an inch.

Boil the water with the aromatics (the bay leaf and cardamom pods) then once it comes to a boil, add the rinsed and drained rice, boil, then cover with a tight fitting lid and reduce heat to a low simmer.

Cook for 15-20 minutes or until all the water has been absorbed. Let stand for about 5 minutes off the heat.

To marinate the prawns:

While your rice is soaking, you might take that opportunity to marinate the prawns. Basically stir together the prawns with all the marination ingredients (yogurt, ginger garlic paste, spices). Cover and place in the fridge for 30 minutes.

To make the biryani gravy:

Heat oil in a large skillet. Fry the bay leaves, cardamom pods and cloves for 10 seconds, then add ginger garlic paste and fry for another 30 seconds. Add the diced tomatoes and all the dry spices and fresh herbs. Simmer, taste for seasoning. Add the prawns and caramelized onions back in and simmer for another few minutes until prawns have cooked through. Set aside, that’s your biryani gravy ready for assembling!

Assemble the biryani for the final step:

cooked rice in a pot and biryani gravy in another pot

Lightly oil the bottom of a large pot. Layer half the cooked rice, followed by all the prawn biryani gravy, then the second half of rice. I added a handful of rice to the pot I prepared the prawn gravy in and mixed it to get a nice color, then added it on top of the second half of the rice.

Cover this pot tightly with foil or a very tight fitting lid, and put on low heat for 15-20 minutes to steam, infusing the whole biryani with flavor. Remove from heat, let rest for 15 minutes, then transfer to a serving plate and enjoy!

What to serve biryani with?

Traditionally, raita is a great choice- a yogurt and cucumber salad. You could also serve with plain yogurt or a very simple green salad.

You can also make simple naan bread for a really delicious side.

plate with biryani and raita with bowls of biryani and raita in the corner

Prawn Biryani

A delicious step by step take on a delicious prawn biryani, with exotic warming flavors packed into one delicious rice dish. Easier than you might think, and absolutely show stopping!
5 from 5 votes
Print Pin
Rate
Course: Main Course
Cuisine: Indian
Keyword: biryani, Indian
Prep Time: 30 minutes
Cook Time: 30 minutes
Servings: 4 people
Calories: 358kcal
Author: Farah Abumaizar

Ingredients

For the rice:

  • 1 1/2 cups basmati rice
  • 3 cups water
  • 1 bay leaf
  • 3 cardamom pods

For the prawn marination:

  • 300 g prawns, cleaned (weight is without shell and after cleaning), can use shrimp
  • 1/3 cup yogurt
  • 1 heaped tsp ginger garlic paste *See notes
  • big pinch turmeric powder
  • 1/2 tsp biryani masala spice powder
  • 1/4 tsp red chili powder
  • pinch salt

For the biryani gravy:

  • 2-3 tbsp vegetable oil
  • 1 large yellow onion, thinly sliced
  • 1 bay leaf
  • 2 cardamom pods
  • 4-5 cloves
  • 1/2 tsp cumin powder
  • 1/2 tsp cinnamon powder
  • 1 tsp biryani masala spice powder
  • 1/2 tsp red chili powder
  • 1 heaped tsp ginger garlic paste
  • 1 can diced tomatoes (400g or 15 oz)
  • 2 tbsp finely chopped coriander
  • 1 tbsp finely chopped fresh mint
  • salt and pepper to taste

Instructions

For the rice:

  • Wash the rice, then soak for 30 minutes. Drain, and rinse again.
  • Bring the 3 cups of water to a boil, and add the bay leaf and cardamom pods. Add the drained rice, bring to a boil, then reduce the heat to a low simmer and cover with a tight fitting lid. The water should cover the rice by an inch or so, add a little more if you need to. Cook for 15-20 minutes or until all the water has been absorbed, then set aside.

For the prawns:

  • In a bowl, mix together the prawns with the yogurt, ginger garlic paste, turmeric powder, biryani masala, red chili powder and salt and marinate in the fridge for 30 minutes (you can do this while the rice is cooking).

To make the biryani gravy and assemble:

  • Add the vegetable oil to a large skillet or pot and heat on medium high heat. Once oil has heated up, add the onion slices, and cook, stirring occasionally, until golden brown and caramelized. This might take around 7-8 minutes. Once onions have browned, remove from the skillet onto paper towels to absorb some of the oil.
  • If you need to, add a little more oil to the skillet, then fry the bay leave, cardamom pods, and cloves for 10 seconds or so. Add the ginger garlic paste, and fry for 30 seconds or so.
  • Add the diced tomatoes, the chopped coriander and mint, along with the cumin, cinnamon powder, biryani masala, red chili powder, and salt and pepper to taste. Simmer for a few minutes, and add the caramelized onions back in.
  • Add the marinated prawns to the skillet, and cook for 3 minutes or so, until prawns have curled up into a c and are cooked through. Dont' overcook so they don't turn rubbery, they won't take much time at all. Set this prawn gravy aside.
  • Lightly grease the bottom of a large pot with oil, then layer half the cooked rice. Add the full amount of the prawn gravy, followed by the second half of the rice. If you'd like a little of the rice to be colorful, you can stir a scoop of rice into the pot that the prawns were cooked in to add some of that sauce color to it, then sprinkle it on top of the second layer of rice.
  • Cover the rice pot with a very tight fitting lid, or a tight layer of aluminum foil, then steam on low heat for 15-20 minutes. Set aside for another 15 minutes, then uncover and serve hot.

Notes

To make the ginger garlic paste, check this recipe out.
Alternately, you can buy ready made paste from a supermarket, usually in the Asian food aisle.
Recipe adapted from Indian Healthy Recipes.
Tried this recipe?Mention @everylittlecrumb or tag #everylittlecrumb!

Nutrition

Calories: 358kcal

Easy Prawn Biryani by everylittlecrumb on Jumprope.

If you liked this recipe, you might like:

Easy Homemade Naan

Vegan Cauliflower Curry

Persian Saffron Chicken and Rice

Garlic Honey Prawns

Did you make this? Tag @everylittlecrumb or hashtag #everylittlecrumb and I’ll share your images!

Pin for later!

Main Meals, Recipes

Previous Post: « Instant Pot Orange Chicken
Next Post: Ginger Garlic Paste »

Reader Interactions

Comments

  1. kim says

    August 14, 2020 at 1:27 pm

    5 stars
    Loved this recipe! It was so easy and had the best flavor. I’ll definitely be making again!

    Reply
    • Farah Abumaizar says

      August 14, 2020 at 1:27 pm

      Thanks Kim! So happy to hear that!

      Reply
  2. Sandhya Hariharan says

    August 14, 2020 at 1:40 pm

    5 stars
    Your Biryani looks so flavorful and amazing. I can’t wait to adapt them in cooking next time.

    Reply
    • Farah Abumaizar says

      August 14, 2020 at 1:42 pm

      I hope you do and love it!

      Reply
  3. Sarah James says

    August 14, 2020 at 3:22 pm

    5 stars
    I love biryani and your Prawn Biryani looks absolutely delicious. Thanks for the step by step instructions, pinning for later.

    Reply
    • Farah Abumaizar says

      August 14, 2020 at 7:48 pm

      It’s my pleasure hope you love it!!

      Reply
  4. Sue says

    August 14, 2020 at 3:33 pm

    5 stars
    This looks absolutely spectacular, your photos make my mouth water. I love biryani and love how you’ve simplified it for any night of the week!

    Reply
    • Farah Abumaizar says

      August 14, 2020 at 7:48 pm

      Thanks so much Sue !

      Reply
  5. Sue says

    August 14, 2020 at 4:10 pm

    5 stars
    This was delicious. So happy for the kid-friendly spice level.

    Reply
    • Farah Abumaizar says

      August 14, 2020 at 7:48 pm

      So glad to hear it!!

      Reply
  6. Supriya Kutty says

    December 7, 2020 at 4:10 pm

    This recipe is so delicious. I really loved it thank you so much for sharing this amazing recipe with us. I didnt know how to make prawn biryani but then I think I will be able to make this for my kids.

    Reply
    • Farah Abumaizar says

      December 7, 2020 at 4:29 pm

      Oh I am so so happy you enjoyed the recipe! Thanks so much for taking the time to comment, I’m sure your kids will love this!

      Reply

Leave a Reply Cancel reply

Your email address will not be published. Required fields are marked *

Recipe Rating


Primary Sidebar

Get more stuff

Subscribe to our mailing list and get interesting stuff and updates to your email inbox.

Thank you for subscribing.

Something went wrong.

we respect your privacy and take protecting it seriously

FeedFeed

Featured Recipes

Nana tea

Halal Guys Chicken and Rice

Aish El Saraya

Instant Pot Enchilada Soup

Death By Chocolate Zucchini Bread

More

Footer

everylittlecrumb

Farah Abu Maizar | Food Lover
Good morning! If there’s one thing we like doing Good morning! If there’s one thing we like doing, it’s experimenting with breakfast dishes 🍳.These beauties are froached eggs- poached eggs that are lightly fried and seasoned with breadcrumbs. Best of both worlds! Creamy poached eggs, runny yolk but a little crisp on the white part of the eggs. So good! Inspired by @sveverything , we used our sous vide machine for this but you can do this with regular poached eggs. Recipe can be found linked in bio or at https://everylittlecrumb.com/froached-eggs/ . Team runny yolk anyone? 
.
.
.
.
.
#eggs #poachedeggs #poachedegg #eggsontoast #beautifulcuisines #tasty #delish #foodphotography #foodstyling #foodstylingandphotography #cheeseontoast #foodblogger #foodie #breakfast #brunch #instayum #yum #brunch #tastingtable #f52community #food52 #yolkporn #friday
How I spend a lot of my weekends😂. Nothing like How I spend a lot of my weekends😂. Nothing like a big bowl of cookie dough to say weekend mode on! Are you like me and end up eating more dough than actual cookies? My foolproof recipe I use and post time and time again 👇🏼(and often double the batch so I can store some in the freezer!)

Ingredients:
1 stick butter, softened 113 g
3/4 cup tightly packed brown sugar (I like using 1/2 cup light brown and 1/4 cup dark brown, but you can use either or) 150 g total
1/4 cup white sugar 50 g
1 egg, room temperature
1 tsp vanilla extract
1 3/4 cup all purpose flour 220 g
3/4 tsp baking soda
1/4 tsp salt
1 cup semi-sweet chocolate chips or chunks
flaky salt for topping, optional

Instructions:
-In the bowl of a stand mixer fitted with a paddle attachment, or a handheld mixer, cream together butter, brown sugar, and white sugar for 5 minutes on medium speed until light and fluffy.
-Once five minutes is over, add in egg and vanilla and mix until combined.
In a separate bowl, mix flour, baking soda, and salt, and mix until combined. Add these dry ingredients to the butter mixture on low speed, and mix until just combined.
-Using a wooden spoon or spatula, mix in chocolate chips or chunks until just combined. Place bowl of dough in fridge for at least 30 minutes to chill.
-While dough is chilling, heat oven to 180 C (350F). Portion dough out into heaped 1 tbsp-2 tbsp sized dough pieces on parchment paper lined baking sheets. 
-Bake for 11-12 minutes or until golden brown on the edges but still soft in the center. Cool until cookies firm up, then enjoy, still warm.
.
.
.
.
.

#chocolatecake #cookiemonster #cakestagram #cakephotos #layercake #chocolate #weekendbaking #foodblog #instayum #yummy #bakery #foodporn #foodtographyschool #foodphotography #chocolatechips #delish #foodfluffer #damnthatsdelish #cookiedough #chocatechipcookies #bakes #bakestagram #doughbowl #chocolatechips #hersheys
Bbq salmon bowls with mango avocado salsa- unbelie Bbq salmon bowls with mango avocado salsa- unbelievable! And start to finish, you can be eating these in 15-20 minutes. Save this recipe for your next meal, you don’t want to miss out!

I’ve partnered with @kilosamak to produce a few recipes with their quality seafood- I’ve tried several of their items and genuinely loved them all! They deliver seafood straight to your door for you to enjoy and cook at home. Takes all the guesswork out of trying to choose and clean fish yourself, perfect solution for someone like me who loves seafood but isn’t so great at prepping it! Check out their Instagram page on how to order, or head to the link in my bio.

This salmon has a smoky slightly sweet rub, is baked in the oven for ultimate ease, and gets piled on to rice and topped with an easy, addictive, zingy mango and avocado salsa. Adapted from @pinchofyum , I’ll make this again and again!

Ingredients:
For the salmon:
2 fillets, about 250 g each 
Spice Rub:
2 tbsp brown sugar
1.5 tsp paprika 
1 tsp garlic powder
1 tsp onion powder, optional 
1/2 tsp chili powder
1/2 tsp salt 
2 tbsp olive oil 

Mango avocado salsa:
1 diced mangos 
1 diced avocado
1/4 cup finely diced coriander 
1/4 cup finely diced red onion 
1 inch spicy green chili pepper, finely chopped
1 tsp honey
Juice and zest of one lime
Salt to taste

Method:
- Make the salsa by mixing together all the salsa ingredients and placing bowl in fridge while you make the salmon.
- Heat oven to 240C, and line a baking sheet with parchment paper. 
-Mix together all the ingredients for the salmon rub, and rub thoroughly all over the salmon, both sides.
- Bake for 10-12 minutes until salmon is opaque and cooked all the way through.
-Assemble bowls with rice, flaked pieces of salmon,and plenty of mango avocado salsa. Enjoy 😍

Catch the steps in my story!
Have you tried this pasta yet? Save this for your Have you tried this pasta yet? Save this for your next weeknight meal! Saucy macarona iltaybeen, can’t get much more comforting.  Adapted from @jedir3waish , makes for an easy delicious main that’ll make your family including kids very happy! Can find a step by step linked bio, or at https://everylittlecrumb.com/macarona/ , or in my story!

INGREDIENTS:
 
2 tbsp olive oil, divided
big pinch of salt
3 heaped tbsp tomato paste, divided 2 oz or 70 g
1 pack elbow macaroni 14 oz or 400 g
1 onion, very finely diced
1 zucchini, finely diced
1 carrot, finely diced
4-5 garlic cloves, minced
250 g ground beef
1 tsp seven spices
1 tsp turmeric
1/2 tsp paprika powder
1/4 tsp basil
1/4 tsp cinnamon powder
1/4 tsp garlic powder
1/2 tsp black pepper
1 tsp salt
1 can crushed tomatoes 14.5oz (400g)

NSTRUCTIONS
 
Bring a large pot of water to boil, add 1 tbsp olive oil and the salt, one tbsp of tomato paste, then the pack of pasta. Cook until al dente, then drain the pasta, reserving the pasta water. Set cooked pasta aside.

In a large skillet, heat the remaining tbsp of olive oil. Once hot, add the diced onion, and cook for 4-5 minutes until softened. Add the diced zucchini and carrots, and garlic and cook for a further 4-5 minutes until softened slightly.

Add the ground beef, and cook, smushing with a wooden spoon to break up the meat. Keep cooking until the beef is browned and cooked through, then optionally, drain the fat.
Add in the salt, pepper, and all the spices. Cook for another minute or so. Add the remaining 2 tbsp of tomato paste, and stir.

Add the can of crushed tomatoes and stir to combine. Bring to a simmer, then add a big ladleful of the reserved pasta water and simmer for 2-3 minutes on low heat.

Add the pasta to the sauce (I don't always add all the pasta, maybe 3/4 of the cooked amount until the finished dish is as saucy as I like). Stir to coat, cook for another minute or so until the pasta is warmed through, then enjoy!
This gorgeous tiramisu was so kindly sent to me by This gorgeous tiramisu was so kindly sent to me by @cadysweets.sa on my birthday, and we enjoyed every light fluffy bite of it. Their old account got hacked so follow along and support their new account ! They have a bunch of cakes and sweets for every occasion, so make someone or yourself happy and order one for a treat🤩! Send this to the tiramisu lover in your life 🍰.
.
.
.
.
.

#chocolatecake #magnoliabakery #cakestagram #cakephotos #layercake #chocolate #ganache #foodblog #instayum #yummy #bakery #foodporn #foodtographyschool #foodphotography #slice #delish #foodfluffer #damnthatsdelish #tiramisu #birthdaytreat #dessertbae #dessertoftheday #scoop #foodstyling #foodstylingandphotography
Easiest at home crusty bread with a great open cru Easiest at home crusty bread with a great open crumb texture. It’s the no knead bread from @breadin5 and has yet to fail me. Check my story for the step by step, and swipe for a video reveal.

Ingredients for two small loaves:
1.5 cups lukewarm water 
1/2 tbsp any type of yeast
1/2 tbsp salt
3 1/4 cup plain flour (450g)

Method:
In a large bowl, stir together the water with the yeast and salt. Try to dissolve but it’s fine if you have clumps.
2. Add flour all at once and stir, just until no flour patches remain.
3. Cover loosely with a kitchen cloth and leave it to rest for 2 hours in a warm place until risen and bubbly.
After this rest you can:
- Use dough immediately if impatient, but it’s easier to work with if cold, so maybe pop in fridge briefly
- Or, their recommended method and the one I do, leave in the fridge loosely covered for 12 hours or overnight. 
Refrigerated dough lasts up to two weeks, and flavor depends over time!
4. The next day, the dough might look deflated. That’s fine! When ready to bake, divide dough in half (I got two 400g dough balls)- it might be easier to handle if you sprinkle the dough lightly with flour, and take the half you are going to bake out of the fridge. Let it rest on a parchment paper lined baking sheet 40-90 minutes. The longer the more interior bubbles you should have. Preheat oven to 235C (450F), and after rest, make a few deep slashes in the dough with a sharp knife.
5. Place in the middle rack of the oven, and on the bottom rack place a roasting pan that had about a cup of hot water in it. This will create steam which gives a crustier crust!
6. Bake for 30-35 minutes or until deep golden brown.
7. Let it cool completely before enjoying!
.
.

.
.
.

#damnthatsdelish #foodfluffer #thebakefeed #feedfeed #tastingtable #forthemaking #BHGfood #foodblogfeed #bakedfromscratch #bakinglove #f52grams #foodbloggerpro #bakersofinstagram #TOHfoodie #foodphotography #canonphotos #bread #instayummy #kitchn #huffposttaste #food #dough #foodie #nokneadbread #homemadebread #doughter
Good morning! With dine in still closed in Saudi, Good morning! With dine in still closed in Saudi, Friday pancakes are fast becoming a tradition. And honestly, I don’t think I’ve had better pancakes at any restaurant recently! The easiest, fluffiest diner style pancakes are a huge hit in our family, find the recipe below adapted from @allrecipes . I like to barely warm the oven (110C or so) and keep the finished pancakes in a pan in the oven until I’m done with all the batter so they stay warm and perfect 👌🏼.

Ingredients
3/4 cup milk 170g
1 tbsp white vinegar
1 cup flour 125g
2 tbsp sugar 25g
1 tsp baking powder
1/2 tsp baking soda
1/4 tsp salt
1 egg room temperature
1/2 tsp vanilla
2 tbsp butter, melted 28g

Instructions:
-In a large bowl, combine the milk and vinegar, and let aside to stand for 5 minutes until curdled. Whisk to combine.
-In a separate large bowl, mix together the flour, sugar, baking powder, baking soda and salt.
-Add an egg, the vanilla and the melted butter to the buttermilk and whisk to combine.
-Add the dry ingredients all at once to the wet, and whisk until flour patches disappear. A few lumps are fine, but don't over mix.
-Let the batter rest for 5-10 minutes while you heat a pan on the stove.
lightly grease the pan with nonstick spray or butter, and pour about 1/4 cup of batter on the pan. Cook for 2-3 minutes on each side or until golden brown. (Flip the first time once you see bubbles form and the edges of the pancake dry up).
-Enjoy with toppings of your choice!
.
.
.
.
.
#pancakes #pancakerecipe #blueberrypancakes #maplesyrup #breakfast #morningslikethese #fridaymorning #flatlay #foodfluffer #breakfastrecipes #breakfastfood #breakfastofchampions #pancakelover #food #foodtography #foodtographyschool #foodphotography #delish #foodphotos #weekendbreakfast #eatingathome #recipeoftheday #foodporn #foodflatlay #blueberries #trayoftheday
One of my photos from my shoot @tackle.baks . How One of my photos from my shoot @tackle.baks . How insane does this tom yum soup look? For those who haven’t tried this casual seafood spot yet, you really should! The food is great and priced very reasonably, and they have some menu items I’m obsessed with like their crispy fish burger, the salmon poke salad and the creamy truffle shrimp👌🏼. They currently have a delivery offer going for only 5SAR on HungerStation, so no time like the present! Have I tempted you with this photo of the tom yum soup? I’m hungry just writing this caption🤤.
.
.
.
.
.
#soup #tomyum #tomyumsoup #food #foodphotography #canonphotography #canon #seafood #seafoodlover #shrimp #delish #beautifulcuisines #foodtographyschool #foodtography #foodblogger #instayum #lonelyplanetfood #dametravelerfoodie #soupseason #restaurantphotography #khobar #tastemade #tastingtable #foodfluffer
Load More... Follow on Instagram

Copyright © 2019 on the Seasoned Pro Theme