• Skip to primary navigation
  • Skip to main content
  • Skip to primary sidebar
  • Skip to footer

 logo

  • Recipes
    • Breakfast
    • Sides
    • Soup
    • Main Meals
    • Healthy
    • Dessert
    • Drinks
  • Eating Out
  • About Me
    • Privacy Policy
  • Resources
    • Must Have Kitchen Tools
  • Nav Social Menu

    • Email
    • Facebook
    • Instagram
    • Pinterest

Choco Mallow Pie

Nov 9, 2020 · 10 Comments

Jump to Recipe

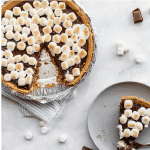
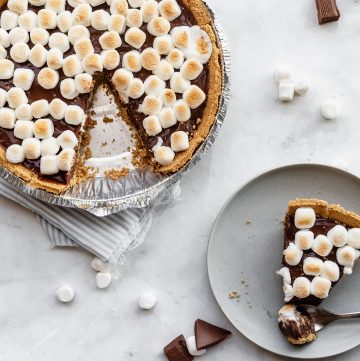
Choco mallow pie is the easiest nearly no bake four ingredient pie you can make, with a delicious chocolate ganache pie topped with torched marshmallows. The whole thing is reminiscent of a giant s’mores you can eat by the slice. What could be better!

This recipe is barely adapted from Food Network.

What is a choco mallow pie?

You could call this a s’mores pie, a chocolate marshmallow pie, a chocolate ganache pie. A rose by any other name would smell as sweet!

This is a basically like a giant s’mores bar. You have a graham cracker crust, a chocolate ganache filling, and marshmallow topping. Can’t not have a great result with those ingredients!

Why should I make a chocolate marshmallow pie?

I say this about a lot of my recipes, but this really is the easiest pie you could make!

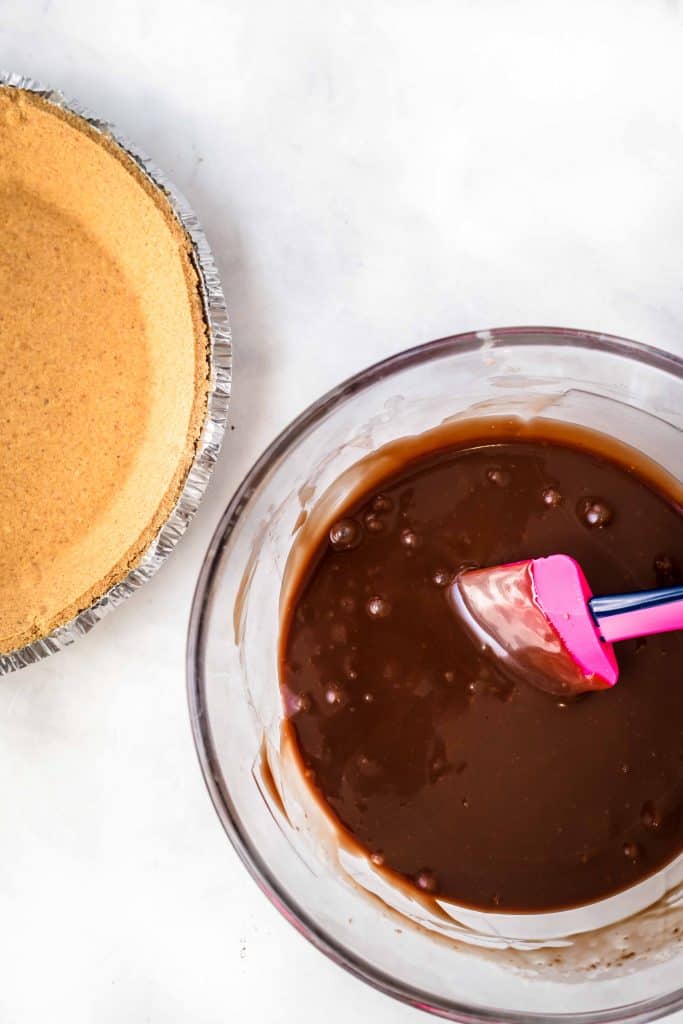
I used a ready made graham cracker crust (But you could make your own and it’s super simple too), and with the ready made crust you only need four ingredients!

The filling is no bake.

The combination of graham crackers, chocolate, and marshmallows is a classic.

This is a very kid friendly treat. My daughter had the task of topping the pie with the marshmallows which she thoroughly enjoyed, and she certainly loved eating this too.

The marshmallows are conveniently broiled in the oven and it takes just 1-2 minutes. You don’t need a blowtorch, or a campfire to get that yummy toasted marshmallow flavor.

What ingredients do I need to make a choco mallow pie?

Just four!

A ready made graham cracker pie crust: If you prefer making your own graham cracker crust, you could follow the steps in this recipe.

Chocolate: I used all milk chocolate to stay true to a traditional s’mores flavor, but you could use all semi-sweet, or a mix of 50% dark and 50% milk chocolate. It just depends on your flavor preference really!

Heavy Cream (Whipping Cream): This is what will be melted with the chocolate to make a ganache.

Marshmallows: I prefer the look of mini marshmallows (and I think it makes it easier to slice the pie) but you could also use sliced large marshmallows.

How to make this easy s’mores pie:

First: prepare the chocolate ganache. You can do this in a double boiler, but it’s even easier to melt the chocolate and cream together in the microwave. Just be sure to do it gently so the chocolate doesn’t burn. I like to take the bowl out every 30 seconds and stir gently, I do this for a total time of about 1.5-2 minutes or until chocolate has just melted. It’s ok if it doesn’t fully melt, once you stir to combine it’ll finish melting completely.

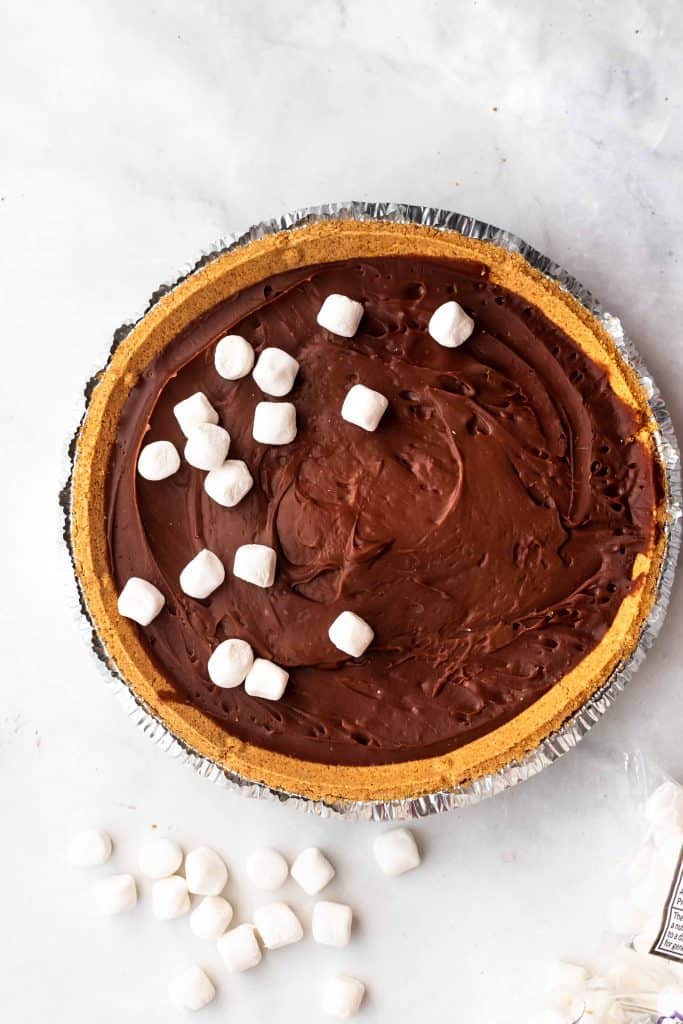
Second: Pour the chocolate ganache into the prepared pie crust and refrigerate either overnight, or for several hours (3-4) until set and firm to the touch.

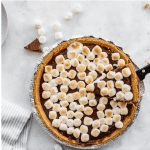
Third: Add the marshmallows and torch until golden brown. Once the chocolate has set, you can scatter the marshmallows on top. Preheat the oven to broil, then broil for 1-2 minutes. Turn the pie halfway through so that the marshmallows torch evenly. They are done once they are golden brown on the top.

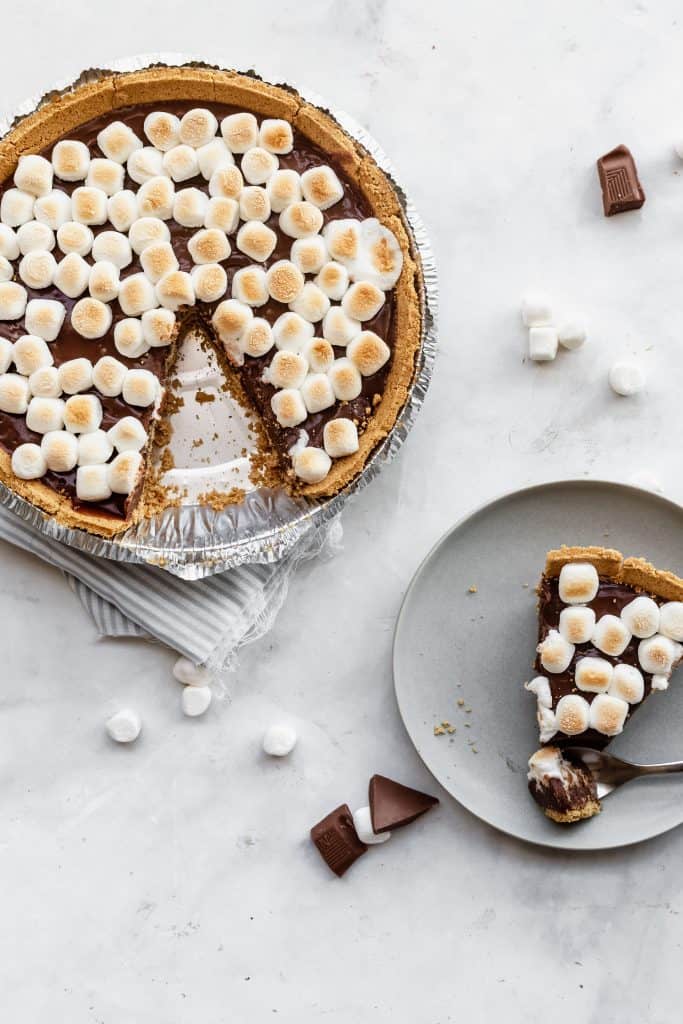
Fourth: Chill again until the chocolate has firmed up once more (It’ll melt in the oven while you broil it). Once the chocolate is set, you can slice and enjoy!

FAQs and tips for success:

Use milk or dark chocolate or a mix of both, based on your preference. Be sure you use good quality chocolate because that’s the bulk of the pies flavor.

You can substitute a gluten free pie crust by making your own with gluten free biscuits.

You can also use large marshmallows instead of mini marshmallows, just slice them up and top the pie with them.

Make sure you give the pie sufficient time to chill in the fridge, so that you can cut it and it’ll hold it’s shape instead of the chocolate oozing out everywhere.

If you liked this recipe, you might like:

Key Lime Pie

Lime Cracker Pie

Banoffee Pie

Chocolate Cake Trifle

Choco Mallow Pie

Farah Abumaizar
The easiest no bake four ingredient pie you can make, a delicious chocolate ganache pie topped with torched marshmallows, reminiscent of s'mores.
5 from 5 votes
Print Recipe Pin Recipe
Prep Time 15 mins
Course Dessert
Cuisine American
Servings 9 people
Calories 382 kcal

Ingredients
  

  • 2 1/3 cups milk chocolate chunks or chips 400 g
  • 3/4 cup heavy whipping cream
  • 1 ready made 9 inch graham cracker crust
  • 1/2 cup mini marshmallows

Instructions
 

  • Combine the chocolate and cream in a large bowl, and microwave gently until melted. Stir every 30 seconds or so then return and heat until chocolate is nearly completely melted. Stir to combine and smooth out.
  • Pour into prepared pie crust and refrigerate until set for 4 hours or overnight. Chocolate should be set and a little firm to the touch.
  • Preheat the oven to broil, and scatter the mini marshmallows evenly on the top of the ganache. Broil for 1-2 minutes, rotating halfway through to evenly toast the marshmallows until puffy and golden brown in places.
  • Carefully remove the pie from the oven and chill in the fridge again until the chocolate re-sets about 1-2 hours. Slice and enjoy!

Notes

Recipe adapted from Food Network
You can use all dark chocolate instead or a mix of 50/50 milk and dark chocolate.
You can also use large marshmallows sliced instead of mini marshmallows.
Keyword pie, dessert

No Bake S’mores Pie by everylittlecrumb on Jumprope.

Dessert, Recipes

Reader Interactions

Comments

  1. Priya Lakshminarayan says

    November 9, 2020 at 8:42 pm

    5 stars
    OMG this looks stunning. Thankfully I have all the ingredient..making it for sure.

    Reply
    • Farah Abumaizar says

      November 9, 2020 at 9:46 pm

      Great!! Hope you enjoy it

      Reply
  2. Alison says

    November 9, 2020 at 9:07 pm

    5 stars
    Super easy and delicious. My kids went crazy for it! It’s like a giant smore for everyone to share!

    Reply
    • Farah Abumaizar says

      November 9, 2020 at 9:46 pm

      It really is! So happy to hear that Alison!

      Reply
  3. Beth says

    November 9, 2020 at 9:15 pm

    5 stars
    This looks so delicious and yummy! I can’t wait to make this recipe! My family is going to love this!

    Reply
    • Farah Abumaizar says

      November 9, 2020 at 9:46 pm

      I hope they do ! Thanks Beth!

      Reply
  4. Neli Howard says

    November 9, 2020 at 9:20 pm

    5 stars
    Oh my goodness, this looks absolutely irresistible!!! I love chocolate and I love marshmallow, so this dessert is practically calling my name! Great work as usual! 🙂

    Reply
    • Farah Abumaizar says

      November 9, 2020 at 9:46 pm

      Thank you so much Neli!

      Reply
  5. Jess says

    November 14, 2020 at 1:38 am

    5 stars
    Love how easily this comes together!

    Reply
    • Farah Abumaizar says

      November 14, 2020 at 3:49 pm

      Thanks Jess! Totally agree it’s so easy

      Reply

Leave a Reply Cancel reply

Your email address will not be published. Required fields are marked *

Recipe Rating


Primary Sidebar

Get more stuff

Subscribe to our mailing list and get interesting stuff and updates to your email inbox.

Thank you for subscribing.

Something went wrong.

we respect your privacy and take protecting it seriously

FeedFeed

Featured Recipes

Egyptian Goulash

Pink Hummus

Orange Blossom Cake

Arayes

Sahleb

More

Footer

everylittlecrumb

Farah Abu Maizar | Food Lover
Magic bars. Addictive! And so easy to make- a dige Magic bars. Addictive! And so easy to make- a digestive biscuit crust topped with chocolate chips and butterscotch chips, walnuts or pecans, sweetened coconut and condensed milk and baked until golden brown and bubbly. I dare you to stop at one! This weeks recipe for @tamimimarkets is a keeper- they have the best range of chocolate chips!

Ingredients:

2 cups digestive biscuit crumbs (200g)
1/2 cup butter, melted (113g)
1 cup semi sweet chocolate chips (150g)
1 cup butterscotch chips (150g)
3/4 cup chopped walnuts or pecans (100g)
1 cup sweetened shredded coconut (signature select)
1/2-2/3 container sweetened condensed milk (400g container)

Method:
1. Preheat oven to 180C. Mix the biscuit crumbs and melted butter until well combined, then press into a parchment paper lined 9x13 inch pan.
2. Layer by scattering the chocolate chips on top of the biscuits, followed by the butterscotch chips, the walnuts, then the shredded coconut. Evenly drizzle the condensed milk on top.
3. Bake for 25-38 minutes or until edges are golden brown and the condensed milk is bubbling. Cool completely before slicing.
I know that the weekend is over, but you can keep I know that the weekend is over, but you can keep the party going with easy sheet pan nachos. For a recent game night, we actually made our nacho chips from scratch and it was so easy (and yum!), I’ll probably never buy store bought tortilla chips again. To make homemade tortilla chips:

Ingredients:
As many corn tortillas as you want, we used 12 small corn tortillas 
Some salt for sprinkling.

Method: 
-Heat the oven to 190C (375F). Cut the tortillas into wedges, each tortilla will give you six wedges. 
- Lay in a single layer on a baking sheet. Bake for 6-7 minutes until starting to turn golden brown, then sprinkle with salt and turn over for another 6-7 minutes until golden brown and crunchy.
- Make nachos by sprinkling the tortilla chips with shredded cheddar cheese, and adding optionally refried beans and cooked ground beef. Bake until cheese is melted then remove from oven and top with anything you like:
- We used diced tomatoes, diced avocados, jalapeños, sliced black olives and chopped coriander. Serve with sour cream and salsa on the side 😍🥳 
.
.
.
.
.

#cakephotos #layercake #chocolate #ganache #foodblog #instayum #yummy #bakery #foodporn #foodtographyschool #foodphotography #slice #delish #foodfluffer #damnthatsdelish #nachos #tortilla #tortillachips #partyfood #chipsandsalsa #mexicanfood #gamenight #sheetpan
We celebrated my husbands birthday with lots of tr We celebrated my husbands birthday with lots of treats, but this cake from home business @littlecakecompanyy really stood out! The talented young woman behind this home business made him a gorgeously decorated cake we devoured. Moist and fluffy chocolate cake layered with Oreo cheesecake filling. Dreamy! I loved the alternative to a regular buttercream filling and the cake itself is so soft and moist. Definitely check out her page fir her flavors and range- like the Nutella cake pops that my kids fought over lol. Swipe to see the inside, would definitely order a cake from her again! Save this to remind you for your next occasion 🎂🥳.
.
.
.
.
.

#chocolatecake #magnoliabakery #cakestagram #cakephotos #layercake #chocolate #ganache #foodblog #instayum #yummy #bakery #foodporn #foodtographyschool #foodphotography #slice #delish #foodfluffer #damnthatsdelish
I’m totally living the bbq life here. It’s bec I’m totally living the bbq life here. It’s become my mission to grill as many times as possible until it gets too hot to be outdoors. Lots of places in Khobar make it easy! We got these mini slider patties, potato buns, burger sauce and all the prepped and ready cut up veggies from @redmarblesa a newly opened premium butchery. Making hamburgers at home has never been this simple and convenient. I really like that it’s a one stop shot for your complete burger. Their burger sauce is really good too! Save this post for next time a burger craving hits!
.
.
.
.
.

#delish #shishtaouk #cakestagram #skewers #bbqporn #chocolate #bbqseason #foodblog #instayum #yummy #winter #foodporn #foodtographyschool #foodphotography #grill #delish #foodfluffer #damnthatsdelish #coleslaw #kebab #fries #grills #bbq #lebanesefood #middleeasternfood #lamb #sliders #burgers
Definitely one of my favorite ways to start the da Definitely one of my favorite ways to start the day. A cup of black coffee and a slice of cake 😍. Thank you @espresso_bh for always spoiling me with goodies and testing out your baked goods on me. I also have to shout out @azulmarblewll for their gorgeous marble trays. Wishing you all a happy Wednesday!
.
.
.
.
.

#chocolatecake #magnoliabakery #cakestagram #cakephotos #layercake #chocolate #ganache #foodblog #instayum #yummy #bakery #foodporn #foodtographyschool #foodphotography #slice #delish #foodfluffer #damnthatsdelish #espresso #blackcoffee
La Gondola is a classic Italian restaurant in Khob La Gondola is a classic Italian restaurant in Khobar. Every khobari I know has been going to @lagondolaksa since their childhood. The best thing about this restaurant is that it stands the test of time! It’s still as good as it’s been, with excellent service, a varied menu and delicious food. I really love it and always leave happy! Their salads were perfect (caprese and roasted eggplant with yogurt dressing). They have a comforting pumpkin soup in a bread bowl, amazing flatbreads served complimentary as a starter, and great pasta dishes. We had the seafood pasta which was light and tasty (could have used a tad more sauce though), and an off menu penne rose I ask them to make when I’m craving pasta. Excellent meal! My only tip is try hard not to fill up on the starter bread, I always do 😂.
.
.
.
.
.

#carbs #pastalover #pastapasta #linguine #hummus #italianfood #shrimp #penne #veggies #seafoodpasta #pasta #instayum #yummy #bakery #foodporn #foodtographyschool #foodphotography #slice #delish #foodfluffer #damnthatsdelish #foodie #foodies #foodofinstagram
Two of my favorite easy dips, recipes below! I got Two of my favorite easy dips, recipes below! I got you sorted with the ultimate chips and dip platter for all your BBQs and gatherings. @tamimimarkets #brandpartner has the best selection of chips, crackers and pretzels so you can mix and match with healthy and more indulgent types. Could not stop snacking, and the three ingredient labneh dip and creamy beetroot hummus were stars! I also got the ready made Signature salsa👌🏼 and Save this post and send it to your snack loving friends. Which would you go for the labneh or the beetroot?

Beetroot Hummus:
1 roasted beetroot (ready roasted, or roast a whole beetroot in a 200 C oven wrapped in foil for 1 hour or until tender) You can also get the ready cooked ones to save time!
1 can chickpeas, rinsed and drained
2 garlic cloves minced
Juice and zest of one lemon
1/4 cup olive oil
2-3 tbsp of tahini
big pinch salt and pepper
1/4 tsp ground cumin

Blend all ingredients in a blender until well mixed and creamy. If you want it looser, add a little more olive oil at a time. Store in fridge until ready to use.

Labneh Dip:
250 g Labneh
2 170g containers of Laban (yogurt)
1 pack dry vegetable soup mix, no noodles.

Mix all ingredients together until creamy and smooth. Store in fridge until ready to use.

Assemble your platter with the chips, crackers and veggies of your choice. Enjoy!! 
.
.
.
.
.
#chips #dip #chip #beetroot #hummus #hummusrecipe #labneh #healthysnack #veggies #snacks #snackplatter #instayum #yummy #bakery #foodporn #foodtographyschool #foodphotography #slice #delish #foodfluffer #damnthatsdelish #foodie #foodies #foodofinstagram
Arayes make the best lunch. You can grill them (pe Arayes make the best lunch. You can grill them (perfect for bbq season) or oven bake them like I did here. They are basically kafta(Lebanese meat mix) stuffed pita bread baked until crunchy and golden and served with extra pomegranate molasses. Yum! I always dip mine in yogurt 👌🏼

For the kafta:
1/2 lb ground beef 250g
1/2 lb ground lamb 250g
1/2 onion grated or pulsed in food processor
1 handful parsley, finely chopped
1 tbsp pomegranate molasses
1 tsp salt
1.5 tsp seven spices or all spice
1/2 tsp cinnamon powder
1/4 tsp cumin powder
1/4 tsp black pepper
pinch red chili flakes
To assemble:
4-5 large pita breads
olive oil
tomato paste optional
salt for sprinkling

INSTRUCTIONS
 
-Preheat oven to 200C. Prepare baking sheet by lining with parchment paper.
-Add all the ingredients into a large bowl and mix well until combined. You can use a spoon, or gloved hands to mix.
-Cut each pita bread in half, and fill each pita pocket with about 1/4 cup of meat mixture. Cut each half into quarter ( I like using kitchen scissors for this). You can also peel open a pita bread to separate the two halves, spread the meat filling all over evenly, top with the other half then cut into quarters.
-Place all stuffed pita quarters evenly spaced onto the baking sheet, and drizzle both sides with olive oil (you can brush the oil on if you want). I like to rub a little tomato paste on some of the outside of the pita breads, it gives a little color and flavor. -Sprinkle salt onto the pita bread. Bake for 18-20 minutes, flipping over halfway through until both sides are crisp and golden brown.
-Serve warm, preferably drizzled with pomegranate molasses, with a side of yogurt or a simple salad.

#delish #lebanese #kafta #skewers #bbqporn #chocolate #chickenrecipes #foodblog #instayum #yummy #winter #foodporn #foodtographyschool #foodphotography #grill #delish #foodfluffer #damnthatsdelish #foodie #kebab #hummus #grills #bbq #lebanesefood #middleeasternfood #lamb #redmeat #pitabread  #pita
Load More... Follow on Instagram

Copyright © 2019 on the Seasoned Pro Theme