• Skip to primary navigation
  • Skip to main content
  • Skip to primary sidebar
  • Skip to footer

 logo

  • Recipes
    • Breakfast
    • Sides
    • Soup
    • Main Meals
    • Healthy
    • Dessert
    • Drinks
  • Eating Out
  • About Me
    • Privacy Policy
  • Resources
    • Must Have Kitchen Tools
  • Nav Social Menu

    • Email
    • Facebook
    • Instagram
    • Pinterest

Turkish Pide

Jul 3, 2020 · Leave a Comment

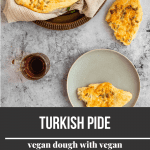
The easiest and tastiest Turkish pide dough, with a beautiful cheese filling, that’s very customizable and so quick to throw together!

a platter full of baked pides

What is Turkish Pide?

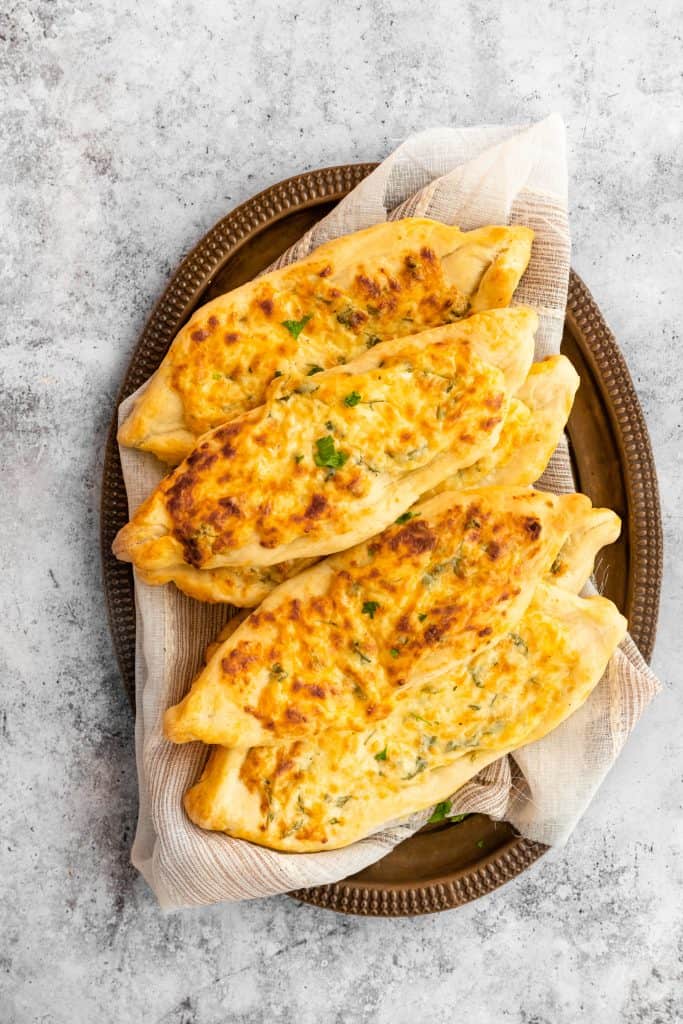
Pide is basically a Turkish version of a yeasted olive oil based bread, like a flatbread or a pizza. They usually come in elongated oval shapes, that look like little kayaks. They are stuffed with filling in the middle, everything from cheese, to meat, to vegetables.

What do you need to make pide?

ingredients needed to make Turkish pide

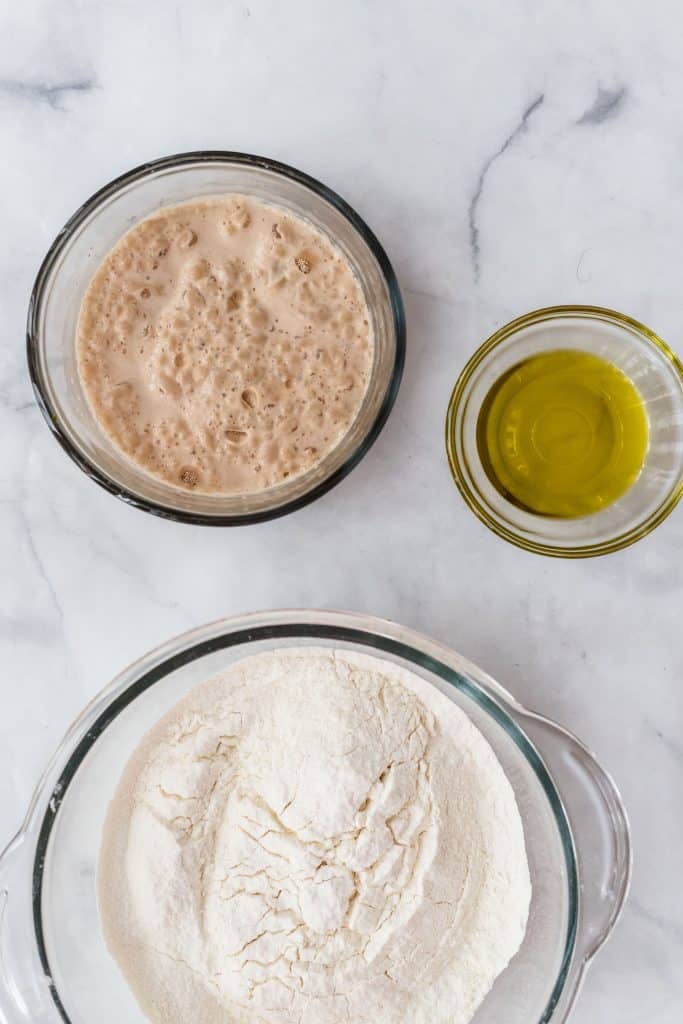
For the dough, the ingredients are very basic. You need regular all purpose (plain) flour, olive oil, salt, sugar, instant yeast and lukewarm water.

The water should be warm to the touch, but comfortable enough to be able to keep your hand in it, like tepid bath water. If it’s too hot, it’ll scald the yeast and the dough won’t rise.

Although the recipe calls for instant yeast which doesn’t technically need to be activated with the sugar and the water, it’s a good way to check if your yeast is still valid. When bubbles form, you know that the yeast is fresh and that the dough will rise!

What to fill the pide with:

filling ingredients for Turkish pide

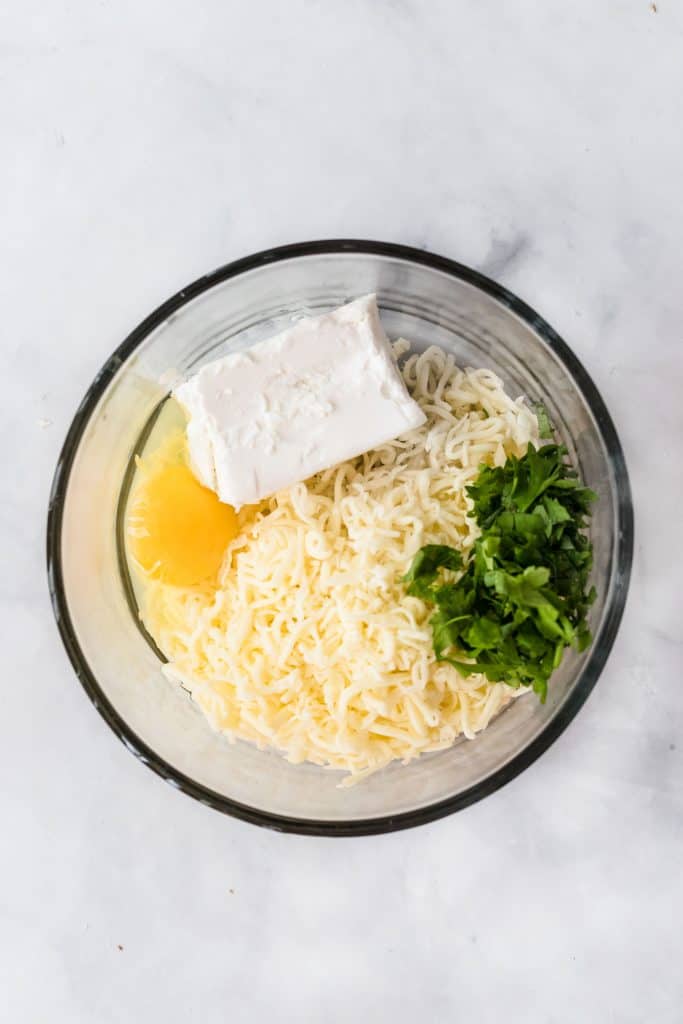
Here, I opted for a cheese version which is so easy. You just mix together your cheese of choice with an egg to bind the cheese.

I opted for a blend of mozzarella and kashkaval cheese and feta cheese. I also used some fresh parsley for seasoning, and just a sprinkle of black pepper.

Delicious blend, because the mozzarella and kashkaval are both mild and melty and stretchy, and the feta is tangy and creamy so it’s a beautiful contrast.

Cheese filling for pide in glass bowl

There are many versions out there for a minced meat pide, if that interests you. I would love to do a version of these with egg. Maybe sojuk and egg!

Vegan Turkish Pide:

Since the dough itself is vegan, with no egg or milk in sight (intentional from my part!), it’ll be very easy to do some vegan variations.

You can fill these with spinach, with vegan cheese, with eggplant, or red pepper dip (muhamarra). The possibilities are endless!

How to make the pide dough:

pide dough being mixed

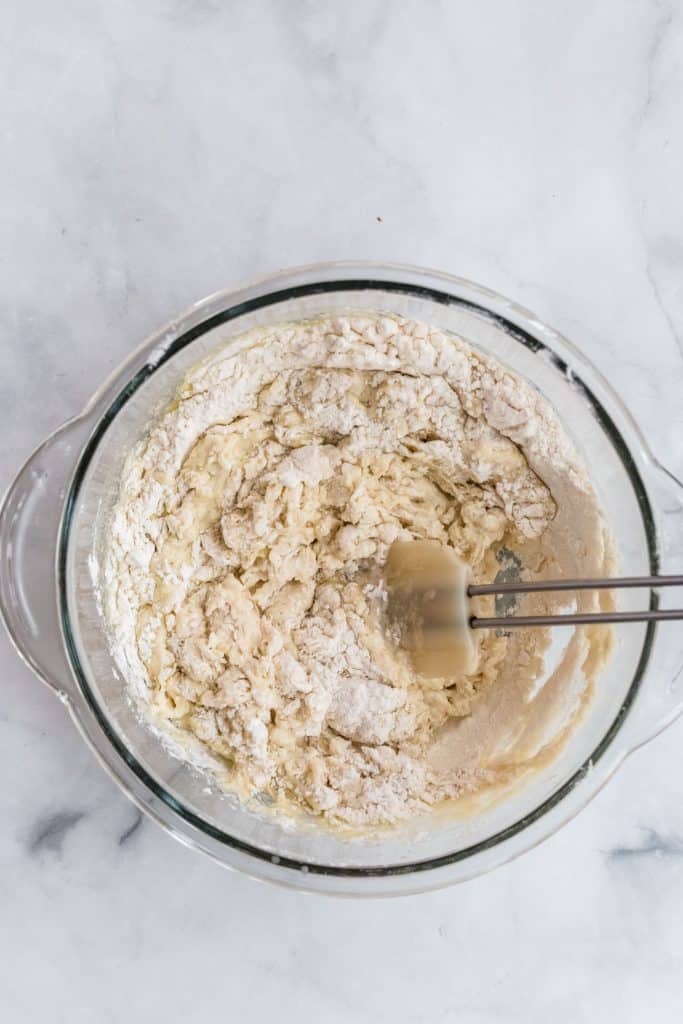
Mix together the dough ingredients (first, by mixing the sugar, salt and yeast together, and adding the lukewarm water, then by adding the oil and the flour.

The best part is that it’s a very easy to mix dough, and you don’t need a stand mixer or anything of that type. I mixed everything together with a spatula, and at the very end used my hands to just knead together any flour patches until the dough was cohesive. Less than 30 seconds of kneading!

pide dough rising

The dough should rise in a warm place for an hour until about doubled. Some suggestions would be to turn on the oven for a couple minutes, turn it off, and have the dough rise in the turned off but slightly warm oven.

Another good place to have dough rise is the laundry room or on top of a washing machine, or even on top of your refrigerator.

Assembling the pide:

After the dough has risen, divide it into 8 equal sized balls. Roll each ball out into an oval shape, then pinch the ends together to make that oblong kayak like shape.

Once all the dough has been shaped, you can fill it with your filling of choice. I like to roll the edges of the dough back over the filling a little (you can see this demonstrated in the video under the nutritional facts).

pide dough being formed and filled

How to bake turkish pide:

Traditionally, these are baked in a wood or clay oven, but they bake up beautifully in a regular oven. Just make sure the oven has heated up to temperature before placing the pides inside. I like to brush the edges of the pastry with an egg wash for a golden color, but this is completely optional.

Bake until edges turn golden, the cheese is melty and bubbling. This will take around 20-25 minutes at 200 C (390F). Enjoy warm, preferably with a cup of tea!

finished Turkish pide on a platter served with tea

Storing leftover pide:

Pide will keep well in the fridge for 2-3 days tightly covered, and they freeze beautifully for 2-3 months. You can thaw out individual ones for a light meal or snack.

Turkish Pide

An easy recipe for delightful Turkish pide, with the perfect cheese filling
Print Pin
Rate
Course: Breakfast
Cuisine: Turkish, Middle Eastern
Keyword: bread, cheese
Prep Time: 10 minutes
Cook Time: 20 minutes
Resting Time: 1 hour
Servings: 8 pide
Calories: 338kcal
Author: Farah Abumaizar

Ingredients

For the dough:

  • 3 cups all purpose flour 375g
  • 1 cup lukewarm watr
  • 1 tsp sugar
  • 1 tsp salt
  • 1 tbsp instant yeast
  • 3 tbsp olive oil

For the cheese filling:

  • 2 cups shredded mozzarella cheese, or a mix of mozzarella and kashkaval
  • 6 oz feta cheese 200g
  • 1 egg
  • 3 tbsp chopped parsley
  • pinch black pepper

Egg wash:

  • 1 egg
  • 1 tbsp cold water

Instructions

For the dough:

  • Mix the sugar and salt with the yeast in a small bowl. Add the lukewarm water and stir to dissolve. Set aside 5-10 minutes until some bubbles form.
  • Add the oil to the water mix and stir, then add all this mix to the flour and mix to combine. Use your hands to knead briefly if you have to until the flour patches disappear.
  • Set dough aside, loosely covered, in a warm place until it rises nearly double in size.

For the filling:

  • While the dough is rising, prepare the filling by mixing together all filling ingredients until well combined and storing in the fridge until ready to use.

To assemble:

  • When the dough has rise, preheat the oven to 200C (390F).
  • Divide the dough into 8 equal pieces and form each into an oval kayak type shape. Add 1-2 heaped tbps of the filling to the middle of each, and pinch the ends of the dough to make elongate the kayak shape. Roll the side edges of the dough towards the filling to contain it (check the recipe video below the nutritional facts to see this visually)
  • Once all the pide have been formed and filled, brush the edges with the egg wash (combine the egg and water together), and bake for 20-25 minutes until golden and bubbly.
Tried this recipe?Mention @everylittlecrumb or tag #everylittlecrumb!

Nutrition

Calories: 338kcal

Your embed Jumprope code:

Turkish Pide by everylittlecrumb on Jumprope.

If you liked this recipe, you might like:

Homemade Pizza Dough

Baby Marrow Fritters

Balaleet

Breads, Breakfast, Recipes

Previous Post: « Chocolate Orange Cake
Next Post: Chocolate Cake Trifle »

Reader Interactions

Leave a Reply Cancel reply

Your email address will not be published. Required fields are marked *

Recipe Rating


Primary Sidebar

Get more stuff

Subscribe to our mailing list and get interesting stuff and updates to your email inbox.

Thank you for subscribing.

Something went wrong.

we respect your privacy and take protecting it seriously

FeedFeed

Featured Recipes

Tamriyeh

Nescafe Cake

Berries and Cream Sara Lee Cake

Kebab Karaz

Eggplant Fatteh

More

Footer

everylittlecrumb

Farah Abu Maizar | Food Lover
You have to know, if I post a chicken recipe it me You have to know, if I post a chicken recipe it means it’s reaaaaaally good. This copy cat Halal guys chicken and rice is unbelievable dish! I got the turmeric rice recipe from @seriouseats and its buttery and perfectly spiced and fluffy and addictive, topped with juicy grilled spiced chicken cubes and a tangy, creamy dressing, tomatoes and parsley. AMAZING! Recipe below and in the @tamimimarkets catalogue❤️.

INGREDIENTS:

For the chicken marinade:
900 g chicken breasts
1/4 cup olive oil
2 tbsp lemon juice
1 tbsp white vinegar
3 garlic cloves, minced
1 tsp salt
1/2 tsp black pepper
1 tsp oregano powder
1 tsp seven spices
1/2 tsp ginger powder
1/2 tsp cumin powder
1/2 tsp paprika powder

For the white sauce:
3/4 cup Greek yogurt 170g (6oz)
1/2 cup mayonnaise 115 g
1 tbsp white vinegar
1 tbsp water
1 tsp lemon juice
1-2 tsp sugar
1/2 tsp salt
1/4 tsp black pepper

For the rice:
2 tbsp unsalted butter
1/2 tsp turmeric powder
1/4 tsp cumin powder
1 1/2 cups basmati rice, soaked for 20 minutes then rinsed
2 1/2 cups chicken stock or 1 stock cube dissolved in 2.5 cups hot water
salt and pepper to taste, a pinch of each

To assemble:
1 chopped tomato
handful chopped parsley
sriracha sauce

INSTRUCTIONS: 
For the chicken:
In a bowl, mix all the ingredients for chicken marinade. Add chicken breast and toss to coat evenly. Cover and marinade for 1-2 hours.

Heat 1 tbsp oil in a large skillet on medium high heat, and cook chicken for 5-6 min each side, or until golden brown and cooked.
Remove chicken to a cutting board, and rest for 10 minutes, before chopping roughly into 2 inch cubes.

For the white sauce:
Mix all ingredients and store in the fridge until ready to serve.

For the rice:
Add butter to a large saucepan over medium heat. Once melted, add the turmeric and cumin, and stir for 1 minutes.
Add the rice, and toast the rice by stirring for 4 minutes. Add chicken stock, salt and pepper to season. Stir and bring to a boil, then reduce heat to a simmer, cover and cook for 15 min, then set aside 15 min and fluff with a fork.

To assemble:
Place the rice in your serving platter, top with the chicken, the white sauce, and chopped tomatoes and parsley. Sriracha too!
This is my go to baked creamy cheesecake. It’s s This is my go to baked creamy cheesecake. It’s so good and rich and easy, topped with a sweet and tangy simple strawberry sauce (sauce recipe from @sallysbakeblog ). I used my new @kenwood_bahrain stand mixer and it was excellent- gave me silky smooth lump free filling. Another winner for my @digitrolley collab- all my new appliances are from them❤️ Check IGTV for recipe video!

For the strawberry topping:
-1 tbsp cornstarch
-3 tbsp water
-450 g strawberries, halved (big pack)
-zest and juice from 1/2 small lemon 
-1/4 cup (50g) sugar

-Whisk together cornstarch and water, then add to a saucepan along with all other ingredients, over medium heat.
-Bring to a simmer, stirring constantly and breaking up strawberries as they cook, 5 minutes or so until thickened. Set aside to cool, can be stored in fridge up to one week.

For the cheesecake:

Ingredients
For the crust:
* 250 g crushed digestive biscuits 2 cups 
* 135 g melted butter 1 stick and 1 tablespoon
* 1/2 tsp cinnamon

For the cheesecake:
* 900 g cream cheese (3 3/4 cup)
* 1 1/2 cup white sugar 300 g
* 3/4 cup milk, room temp
* 4 eggs, room temp
* 1 cup sour cream 240 g
* 1 tbsp vanilla extract
* 1/4 cup all purpose flour 32g

Instructions:

For the crust:
* In a mixing bowl, combine crushed biscuits, the melted butter, and the cinnamon with a fork until crumbs are moistened evenly throughout. Press along the bottom and sides of a lightly greased 9 inch springform pan. Let the crust chill a little in the fridge while you prepare cheesecake.

For the cheesecake:
-Preheat the oven to 180 C
-In  stand mixer, combine the cream cheese with the sugar in a large bowl and mix on medium speed until well combined and fluffy. Blend in the milk, then add the eggs one at a time, mixing briefly after each addition.

-Mix in sour cream, vanilla and flour until smooth. It may be easier to sift in the flour.

-Pour filling into prepared crust. Bake at 180 C for 1 hour, then turn off the oven and leave cheesecake inside for another 5 hours or so until oven has completely cooled. This is to prevent cracking.

* Store cheesecake in fridge after this time period is over until chilled, then top with the strawberry topping.
This, to me, is the sambosa that best embodies Bah This, to me, is the sambosa that best embodies Bahrain- the first- actually the only-place I have these cheesy corn sambosa ❤️. No fancy cheese goes in this, it’s literally the stuff out of a can and take SO melty and cheesy and good. I mix in a little mashed potatoes and it just makes these 💯 times better, creamy and delicious. Posting the full steps on IGTV, it’s so easy you prob won’t need them! Recipe below and tell me- what’s your go to sambosa cheese?

Ingredients
2 small potatoes, peeled and cut into cubes 8 oz total, 235 g
1/2 cup corn kernels, from a can, drained
12 oz American cheese, like Velveeta or Kraft, grated 340 g (2 170g cans of Kraft processed cheese)
pinch salt
pinch black pepper
1/2 pack samosa wrappers each pack is 500 g

Instructions:
-Cover potato cubes with water, and bring to a boil. Reduce heat and simmer until potatoes are completely cooked through. Drain, and mash.

-Let potatoes cool slightly then combine mashed potatoes with the grated cheese, drained corn, salt and pepper. Mix well until the mixture is evenly combined. Taste for and adjust seasoning.

-Fill each samosa wrapper with a tbsp of mixture on the bottom corner, then fold the corner of the samosa up and over the filling to the other side, to make a triangle. Keep folding this triangle over all the way up the top (check the video at the bottom of this recipe card to see how). Mix together the flour and water to form a thick paste, and seal the ends of the samosa to prevent them from opening up while frying.

-Place vegetable oil in a skillet, about 2 inches deep and heat on medium high heat. Once hot enough, add the sambosa and fry for around 2 minutes a side until golden brown. Remove to a paper towel lined plate to absorb some of the excess oil, then enjoy warm.

.
.
.
.
.

#harira #soup #ramadanrecipes #ramadan2021 #ramadan #ramadankareem #vegetablesoup #soupseason #soupsofinstagram #delishkitchen #friedfood #aprilisforarabfood #f52grams #foodfluffer #foodflatlay #foodphotography #foodphotographer #foodstylist #thefeedfeed #middleeasternfood #vegetarian #tasty #tastingtable #tastemade #samosa #sambosa
This is one of my top 5 recipes from this Ramadan’s recipe prep. One of my features does the @tamimimarkets recipe catalogue! Click the link in their bio to access this gorgeous (free!) catalogue.

This harira soup is unbelievable. Hearty and delicious and beautifully spiced- I’ve never been obsessed with harira soup until this one. It’s a simple one because it’s meat free, so it’s perfect to start your iftar with but also hearty enough to totally serve as a meal alongside some sambosas. Recipe below, and IGTV video coming in a bit!

Ingredients
3 tbsp olive oil
1 large onion, diced
3 celery stalks, diced
2 carrots, diced
1 tsp cinnamon powder
1/2 tsp salt
1/2 tsp black pepper
pinch red chili flakes
1/2 cup chopped parsley
1/2 cup chopped coriander(cilantro)
1 can tomato sauce 15 oz (430g)
7 cups vegetable stock or 2 stock cubes dissolved in 7 cups water
1 can drained chickpeas 15 oz (400 g)
1 cup green lentils
1/2 cup vermicelli noodles 50 g
2 lemons, juiced 1/4 cup juice
2 tbsp flour, dissolved in 1/4 cup water* use cornstarch if gluten free

Instructions:
-Start by adding the lentils to a bowl of water and soaking as you prepare the rest of the ingredients, this helps them cook through faster.
-Heat oil in a large saucepan over medium heat, and add the onions, celery and carrots. Saute for 6-8 minutes, until onions soften and turn golden brown.
-Add all the spices, the chopped parsley and chopped coriander, the tomato sauce, and the vegetable stock. Bring the pot to a boil, then add the drained chickpeas and drained lentils. Reduce heat and simmer for 25 minutes or until chickpeas and lentils are tender.
-Add the vermicelli, and let it boil for 3-4 minutes or until tender. Add the lemon juice, and the flour water mixture. Let it simmer another minute or until it thickens, then taste for seasoning and add salt and pepper if necessary.
.
.
.
.
.
#harira #soup #ramadanrecipes #ramadan2021 #ramadan #ramadankareem #vegetablesoup #soupseason #soupsofinstagram #moroccan #moroccanfood #aprilisforarabfood #f52grams #foodfluffer #foodflatlay #foodphotography #foodphotographer #foodstylist #thefeedfeed #veganrecipes #vegan #tasty #tastingtable #tastemade #lentils
Never ever liked vimto until I had it like this 🍧. Vimto smoothies means that the sweetness of vimto is tempered by that cold crunchy shaved ice. Could not stop eating/drinking these vimto slushees! So easy, you just need water, ice, vimto and a high speed blender- my @ninjakitchenme did so well breaking down huge ice chunks👏🏼. Save this for a little twist on your classic iftar drink🥳

Ingredients:
-3/4 cup water
- 3/4 cup vimto 
- 2 cups ice 

Method:
Add the ingredients to your blender in the order listed, and blend on frozen drink mode until slushy like consistency. Add more ice or water if you need to, and enjoy immediately with a spoon/straw. Yum!
.
.
.
.
.

#ramadan #ramadan2021 #ramadanrecipes #iceddrinks #slush #slushy #slushii #berries #syrup #cordial #drinkphotography #damnthatsdelish #foodfluffer #pour #dripshot #foodphotography #foodphotographyandstyling #foodstylist #foodstyling #thefeedfeed #vimto #foodtographyschool #foodtography #beautifulcuisines
A biscuit base topped with a super easy smooth, cr A biscuit base topped with a super easy smooth, creamy pistachio cheesecake and the crowning touch,  @mayadelices ‘s luscious milk chocolate melted and poured over the top. I mean- heavenly! Recipe below, adapted from @savoryandsweetfood ,, IGTV will be uploaded today. I am absolutely loving @mayadelices couverture, great quality baking chocolate thats so fun experimenting with! They have sugar free and vegan options too, and best of all it’s easily available in their shop in Bahrain 🍫👏🏼

Ingredients:

For the crust:
2 cups digestive biscuit crumbs (250 g)
1/2 cup butter melted, 115g
Pinch cinnamon powder

For the pistachio cheesecake filling:

1 cup pistachio powder (140g)
12 Kiri squares or cream cheese (215g)
250 ml thick cream
1/2 of a 400 g tin of sweetened condensed milk, more if you like it sweeter

To top:
1 cup Maya milk chocolate (160g)
pistachios to garnish

Method:
1. Preheat oven to 180C. Grease and line a 8x8 inch pan with parchment paper with extra paper hanging over the sides so you can easily lift out the bars.

2. Mix digestive crumbs with melted butter and cinnamon. Press this firmly into the base of the pan. Refrigerate for 10 minutes.

3. In a food processor, add the pistachio powder, kiri cheese cubes, thick cream, and condensed milk. Blend until well combined and smooth. Pour this mixture into the crust base and bake for 15-20 minutes until set but center is still a little jiggly. Let cool at room temperature for 1 hour then refrigerate for several hours.

4. Melt the milk chocolate gently in the microwave, in 10 second bursts, stirring after each increment. Once smooth and melted, spread over the top of the cheesecake, and refrigerate until set. Enjoy!
.
.
.
.
.
#ramadan #ramadan2021 #ramadanrecipes #cheesecakebars #cheesecakebites #chocolateporn #pistachio #chocolatelover #chocolaterecipes #cheesecakelovers #cheesecakelove #damnthatsdelish #foodfluffer #pour #chocolatedrip #dripshot #foodphotography #foodphotographyandstyling #foodstylist #foodstyling #thefeedfeed #thebakefeed #foodtographyschool #foodtography #beautifulcuisines
Want a Ramadan dessert that takes minutes to make Want a Ramadan dessert that takes minutes to make and tastes amazing? Yeah we all do - I got you! Try this coffee biscuit cake (barely adapted from the wonderful @littlesunnykitchen). Layers of coffee soaked biscuits and a super easy fluffy cream 👌🏼. I used my new @braun_bahrain handheld electric whisk, one of the attachments in the minipimer set-It whips the cream so fast, much faster than my stand mixer and it’s so convenient to be able to use any bowl to prep the cream in. I’ve partnered with @digitrolley to bring you lots of good recipes with their range of kitchen appliances, so keep following along! Recipe below , and IGTV video coming today in my Ramadan series!

Ingredients
2 tbsp nescafe powder dissolved in 1 cup hot water
1 cup heavy whipping cream 250ml
3 tbsp sweetened condensed milk
splash vanilla extract, optional
1 creme caramel sachet, powder only 49g
1 pack tea biscuits or graham crackers 7 oz or 200 g
2 tbsp cocoa powder for topping

Instructions:
-Add the heavy cream, sweetened condensed milk, vanilla and creme caramel powder to a bowl and beat until soft peaks form. Set this cream mixture aside.
-Dip the tea biscuits into the coffee briefly until they soak up the coffee but before they start to break apart. -Layer in a 7×11 or 9×9 inch clear pyrex dish, then top with half the cream mixture.
-Repeat another layer of coffee soaked biscuits on top of the heavy cream, followed by the remaining half of the cream. Sift the cocoa powder on to the top, then refrigerate for several hours until set. This is even better the next day!

.
.
.
.
.
#nescafe #nescafegold #coffeecake #biscuit #biscuitcake #nobake #nobakedessert #nobakecake #tiramisu #damnthatsdelish #tastingtable #beautifulcuisines #foodphotography #foodphotographyandstyling #tastyfood #easydessert #ramadankareem #ramadan2021 #ramadanrecipes #cream
Ramadan Kareem! And the first recipe is for these Ramadan Kareem! And the first recipe is for these unbelievable (and easy!) chicken musakhan sambosa was developed for @tamimimarkets Ramadan catalogue. One of the coolest projects I’ve ever worked on can’t wait to tell you more about it! In the meantime, enjoy this teaser recipe and check IGTV for full video steps coming up. 

Ingredients:
2 chicken breasts, cooked and finely shredded about 1 heaped cup of shredded chicken See notes
1/4 cup olive oil
2 large onions cut in half, then thinly sliced into wedges
1/4 cup toasted almond slivers or pine nuts
3 tbsp sumac
1/2 tsp salt
1/4 tsp black pepper
1/4 tsp cumin powder
1/4 tsp cinnamon powder
To assemble:
1 pack sambosa wrappers 500 g
1 tbsp flour
1/2 tbsp water
For frying:
vegetable oil, about 1/4 cup

Instructions:
-In a deep skillet over medium heat, add the olive oil until it heats up. Add the onions, and cook, stirring frequently until soft and starting to caramelize, 8-10 minutes.

-Add the shredded chicken, the toasted nuts, and all the spices. Stir to combine, then remove from the heat. Let mixture cool slightly 5 minutes or so.

-Fill each sambosa wrapper with a tbsp of mixture on the bottom corner, then fold the corner of the sambosa up and over the filling to the other side, to make a triangle. Keep folding this triangle over all the way up the top 

-Mix together the flour and water to form a thick paste, and seal the ends of the sambosa to prevent them from opening up while frying.

-Place vegetable oil in a skillet, about 2 inches deep and heat on medium high heat. Once hot enough, add the sambosa and fry for around 2 minutes a side until golden brown. Remove to a paper towel lined plate to absorb some of the excess oil, then enjoy warm, optionally with yogurt to dip in.
.
.
.
.
.
#chickensamosa #musakhan #ramadankareem #ramadan2021 #ramadanrecipes #samosa #friedfood #palestinianfood #middleeasternfood #beautifulcuisines #damnthatsdelish #f52community #thefeedfeed #foodgawker #f52grams #buzzfeedfood #tastingtable #tastemade #chickenrecipes #sumac #caramelizedonions #foodblogfeed #foodphotography #foodphotographyandstyling #foodstyling
Load More... Follow on Instagram

Copyright © 2019 on the Seasoned Pro Theme