


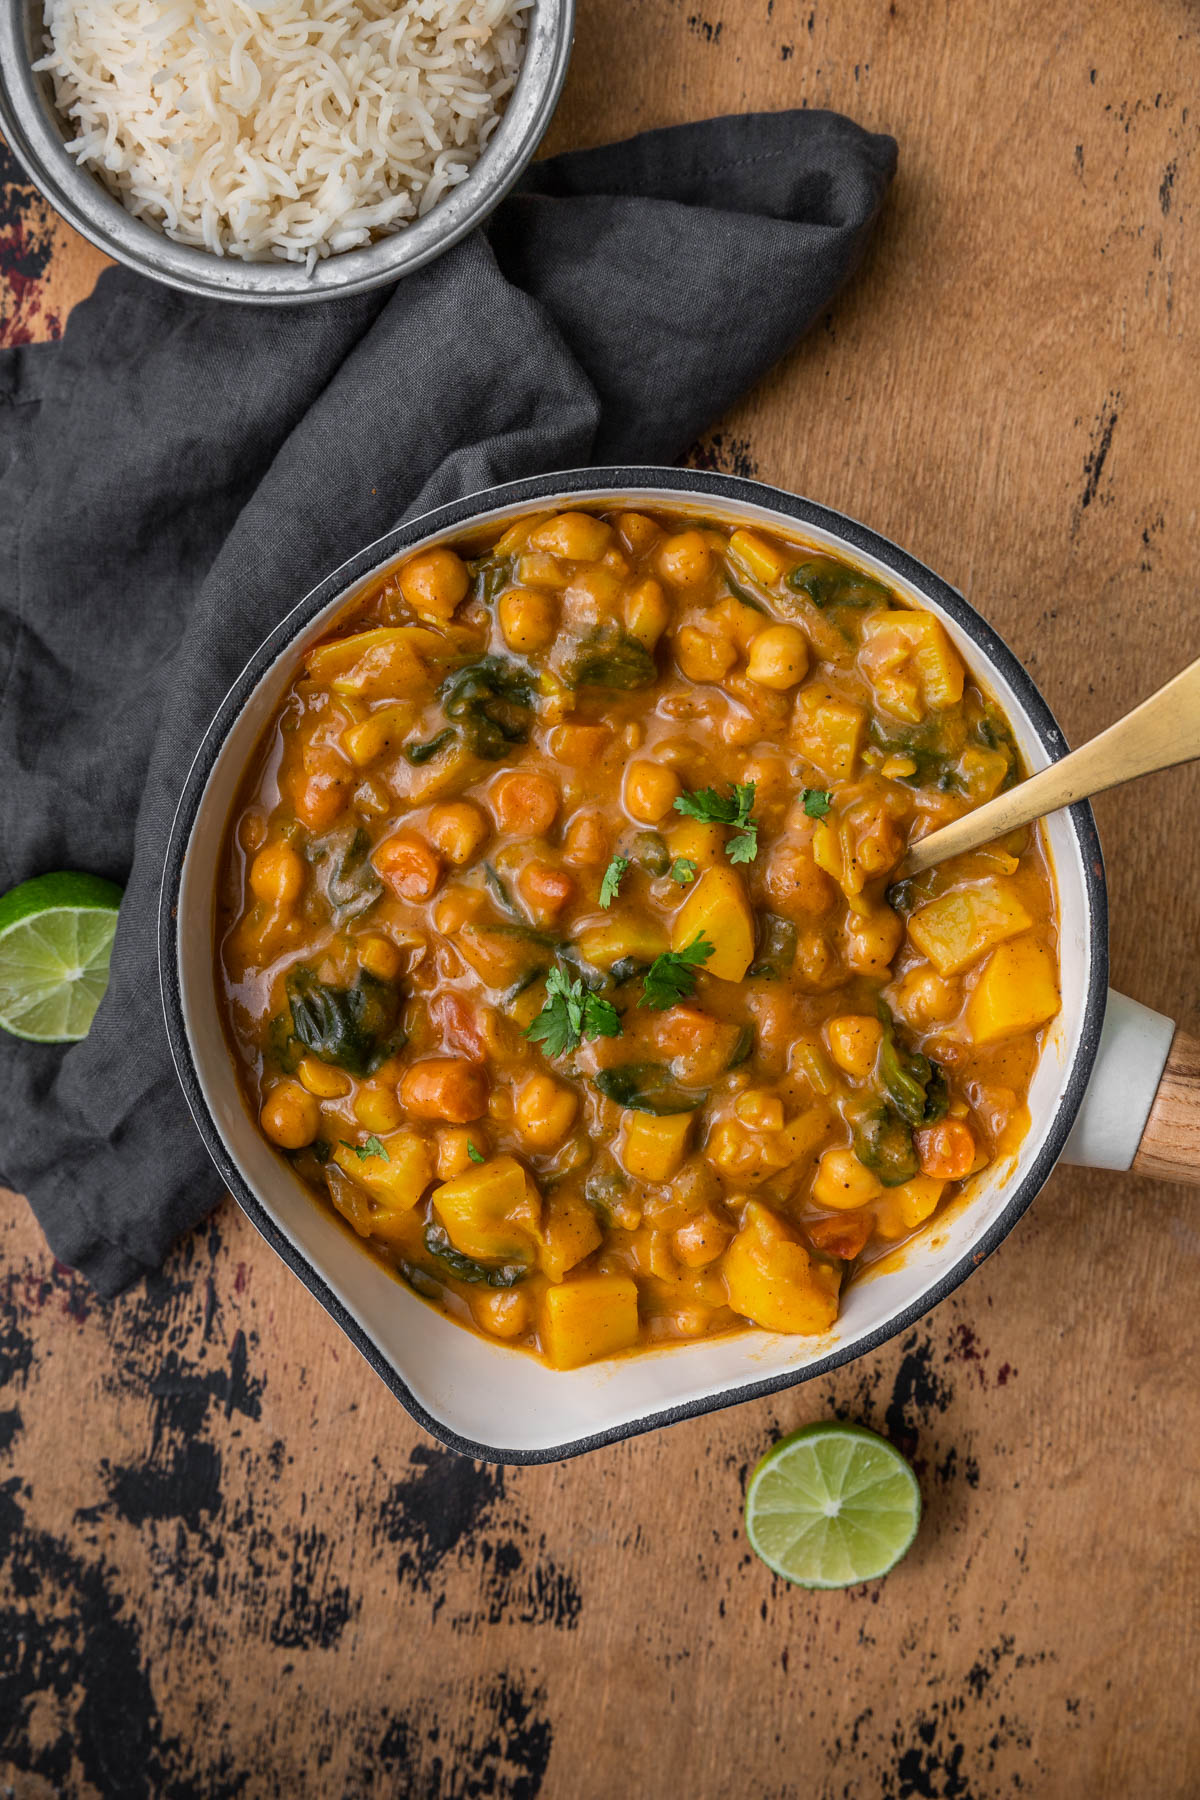
This pumpkin chickpea spinach curry is packed with good for you vegetables and spices like turmeric, cinnamon and curry. This pumpkin sweet potato curry recipe is vegan, gluten free, and absolutely healthy. It’s also very filling and easy to put together! Leftovers taste great too.
Jump to:
- Why make this pumpkin sweet potato curry:
- Ingredients in this pumpkin sweet potato curry:
- How to make this vegan sweet potato curry:
- What to serve pumpkin sweet potato curry with:
- Storing leftover sweet potato chickpea curry:
- Recipe tips and tricks:
- Sweet potato curry FAQs:
- Pumpkin Sweet Potato Curry
- For more healthy recipes:
Why make this pumpkin sweet potato curry:
Pumpkin sweet potato curry is a delicious and nutritious dish that has several benefits. Here are some reasons why this dish is so good:

- This curry is super healthy. The pumpkin and sweet potatoes are both rich in vitamins, antioxidants and fiber. The chickpeas are a great source of vegetarian protein.
- This sweet potato curry is packed with flavor. The combination of pumpkin and sweet potatoes in a curry makes for a sweet and savory flavor. It’s made with canned pumpkin filling, so that’s one less veggie to chop! Also, the puree forms the base of this curry, so it’s so thick and creamy. The curry powder and other spices used in the recipe add so much warm and complexity to the flavor.
- Pumpkin sweet potato curry can be made in a variety of ways, with different combinations of vegetables, spices, and proteins. This makes it a versatile dish that can be customized to suit different tastes and dietary preferences.
- Pumpkin sweet potato curry is a relatively easy dish to make, even for beginner cooks. It’s all made in one pot, and simmers together until the veggies cook through.
- This curry is naturally vegan and gluten-free, great for meatless Monday, or for people with dietary restrictions.
- Leftovers taste great! The flavors meld together really well, and this still tastes great a few days after making it.
Ingredients in this pumpkin sweet potato curry:

Pumpkin puree: This curry uses canned pumpkin, the perfect way to use up a can sitting in your pantry. It’s also easier than peeling and chopping a pumpkin!
Sweet potato: You can use the white or yellow/orange variety in this curry, they’ll both taste delicious.
Chickpeas: They give great texture and body to the curry. You’ll use canned chickpeas that you’ve drained and rinsed.
Baby spinach: You can also use regular spinach or frozen spinach if you like, or add another leafy green like kale instead.
Onion, garlic, and ginger: aromatics that start off the base of this curry
Spices: curry powder, garam masala, turmeric, cinnamon, salt and pepper. I also like using whole cumin seeds, but you can just add cumin powder instead.
Coconut milk: Use the type in a can
Water
Brown sugar: Just a tiny pinch of sugar adds a hint of sweetness to the curry.
Lime Juice: I love adding a squeeze at the end for a nice hint of acidity.
How to make this vegan sweet potato curry:
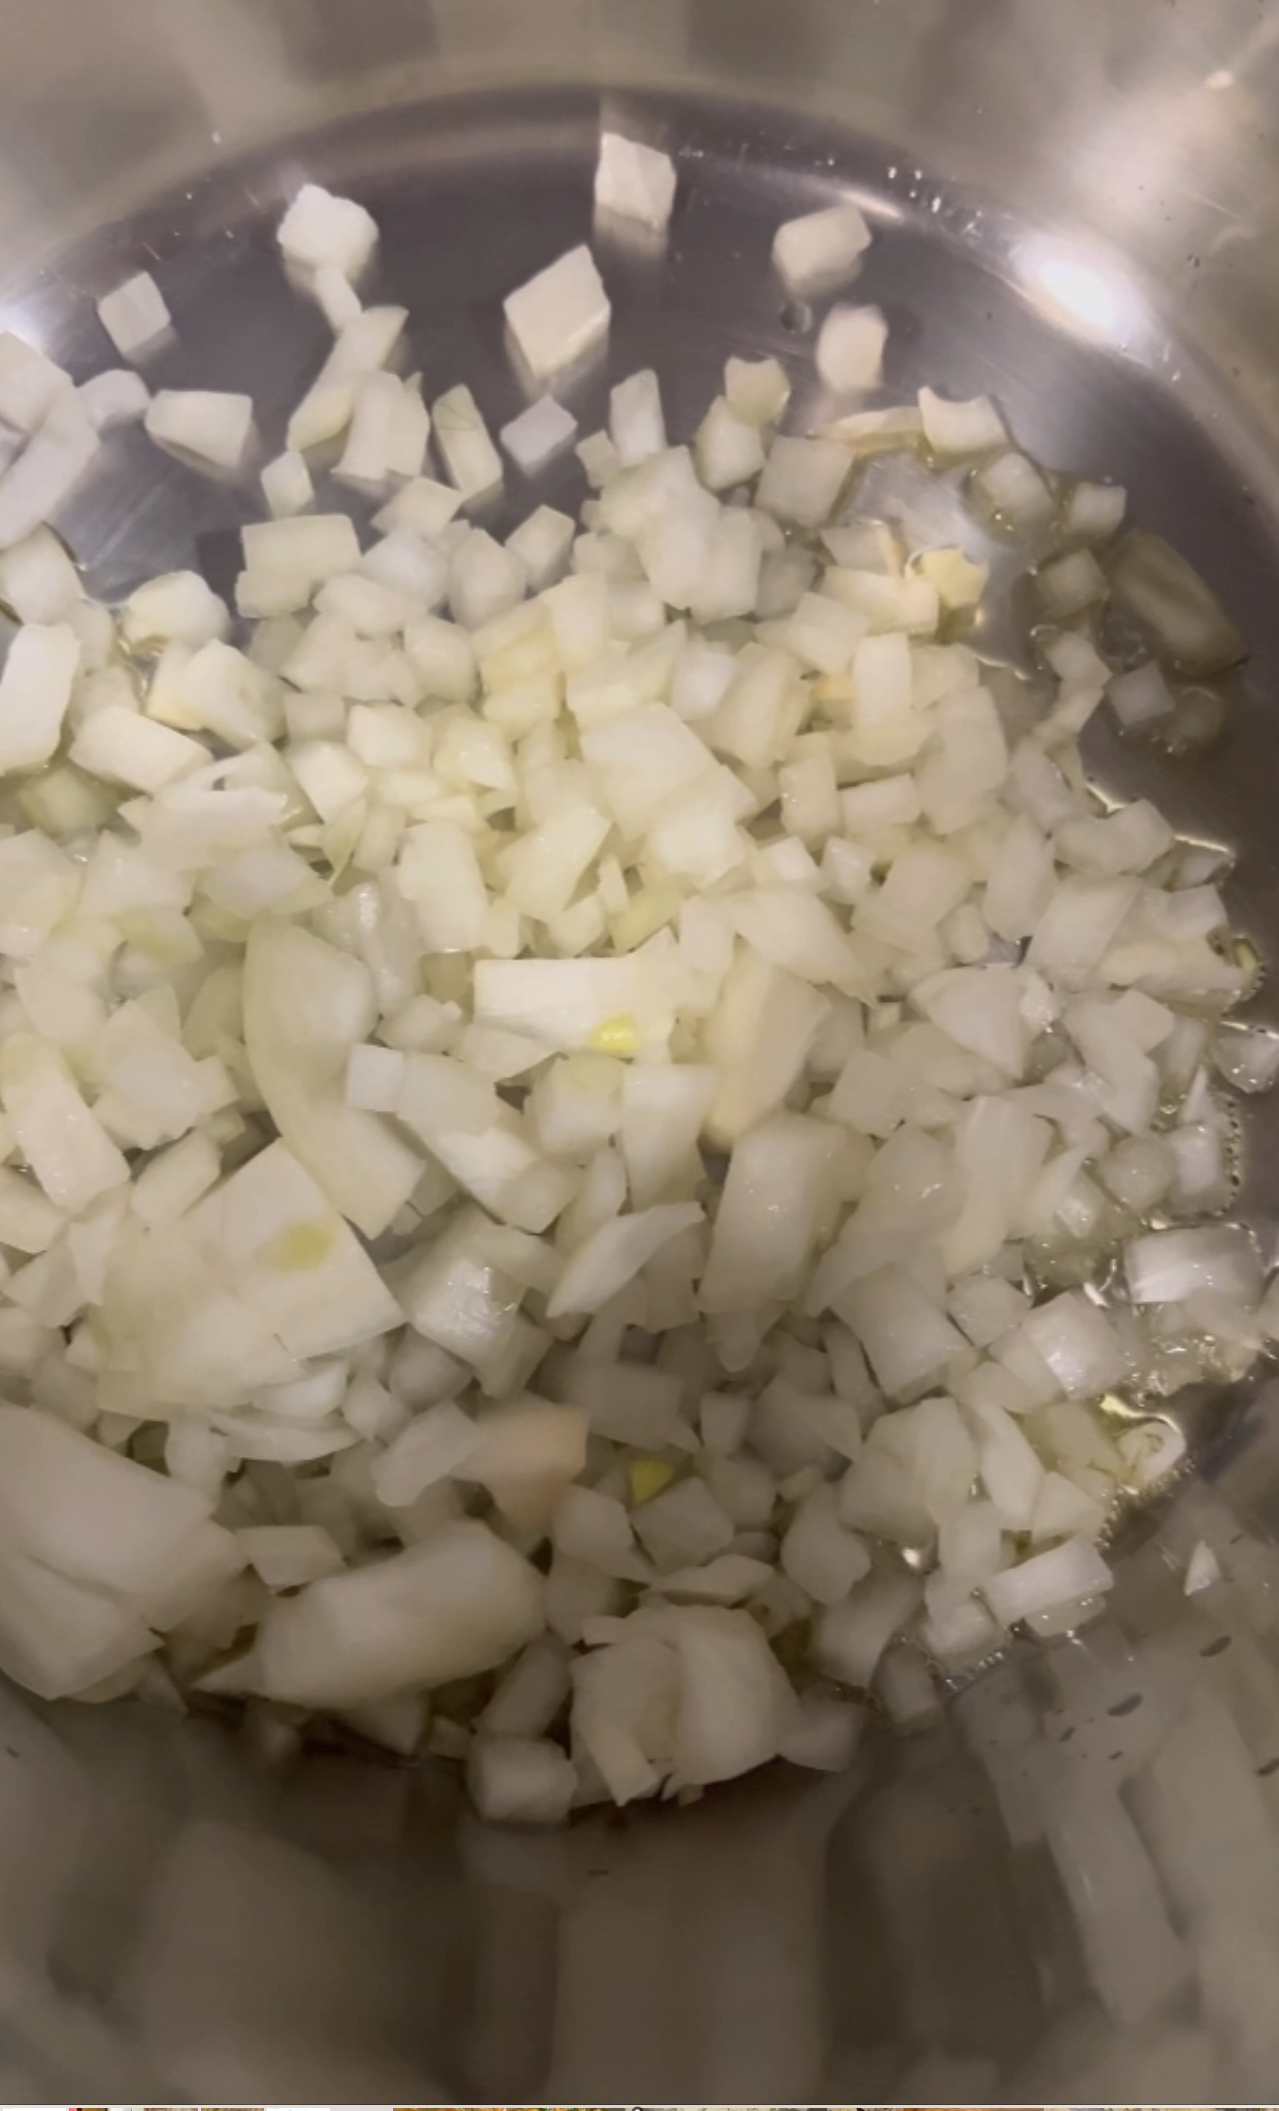
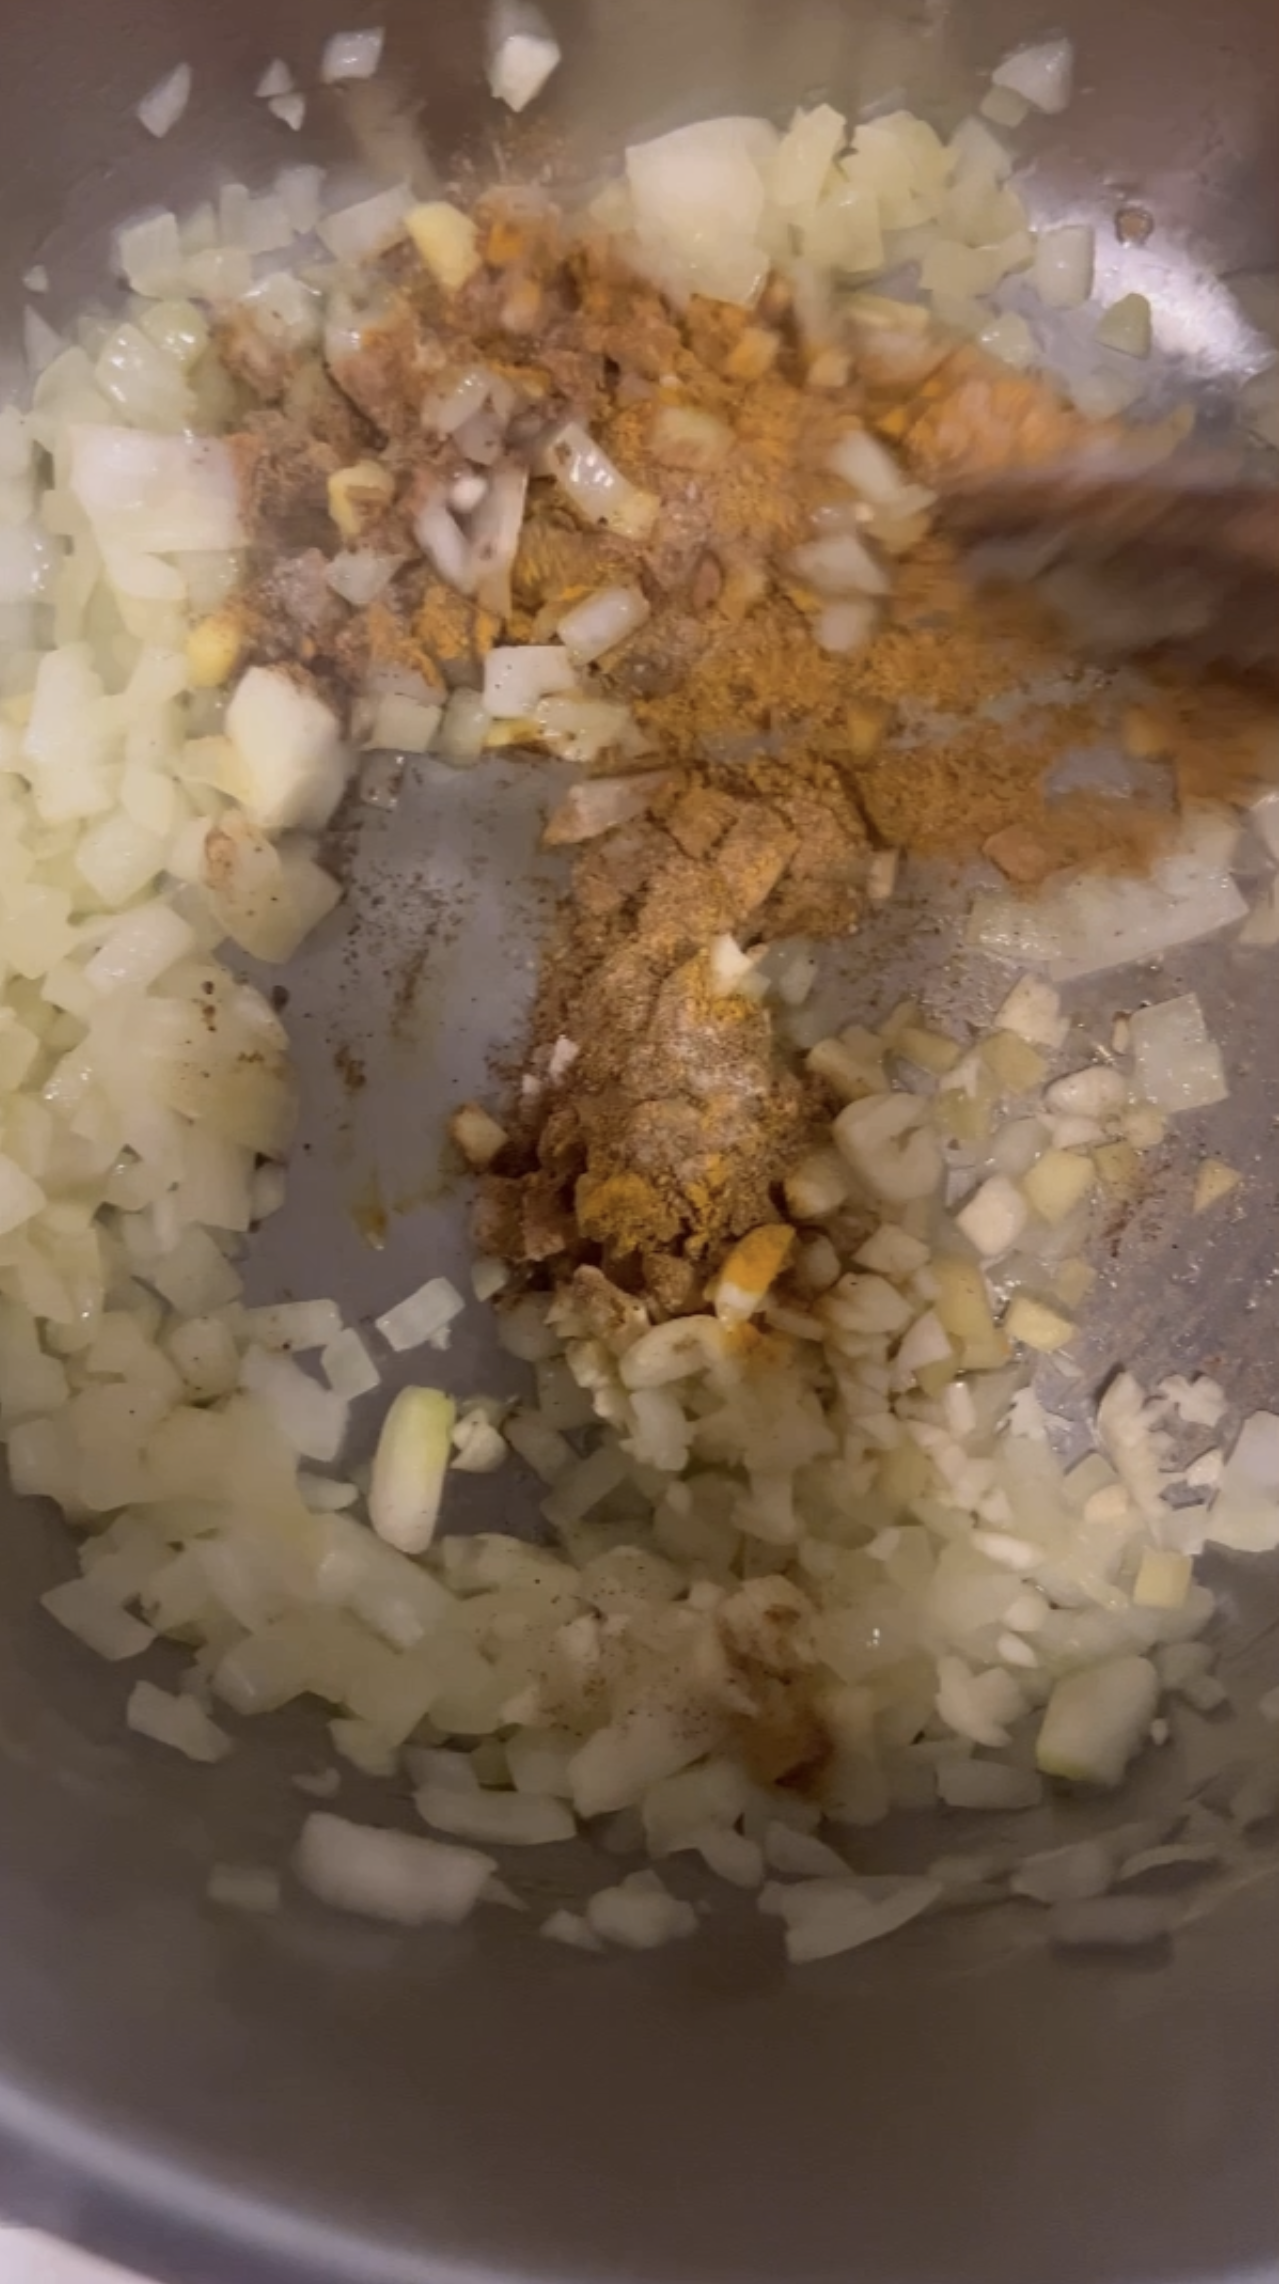
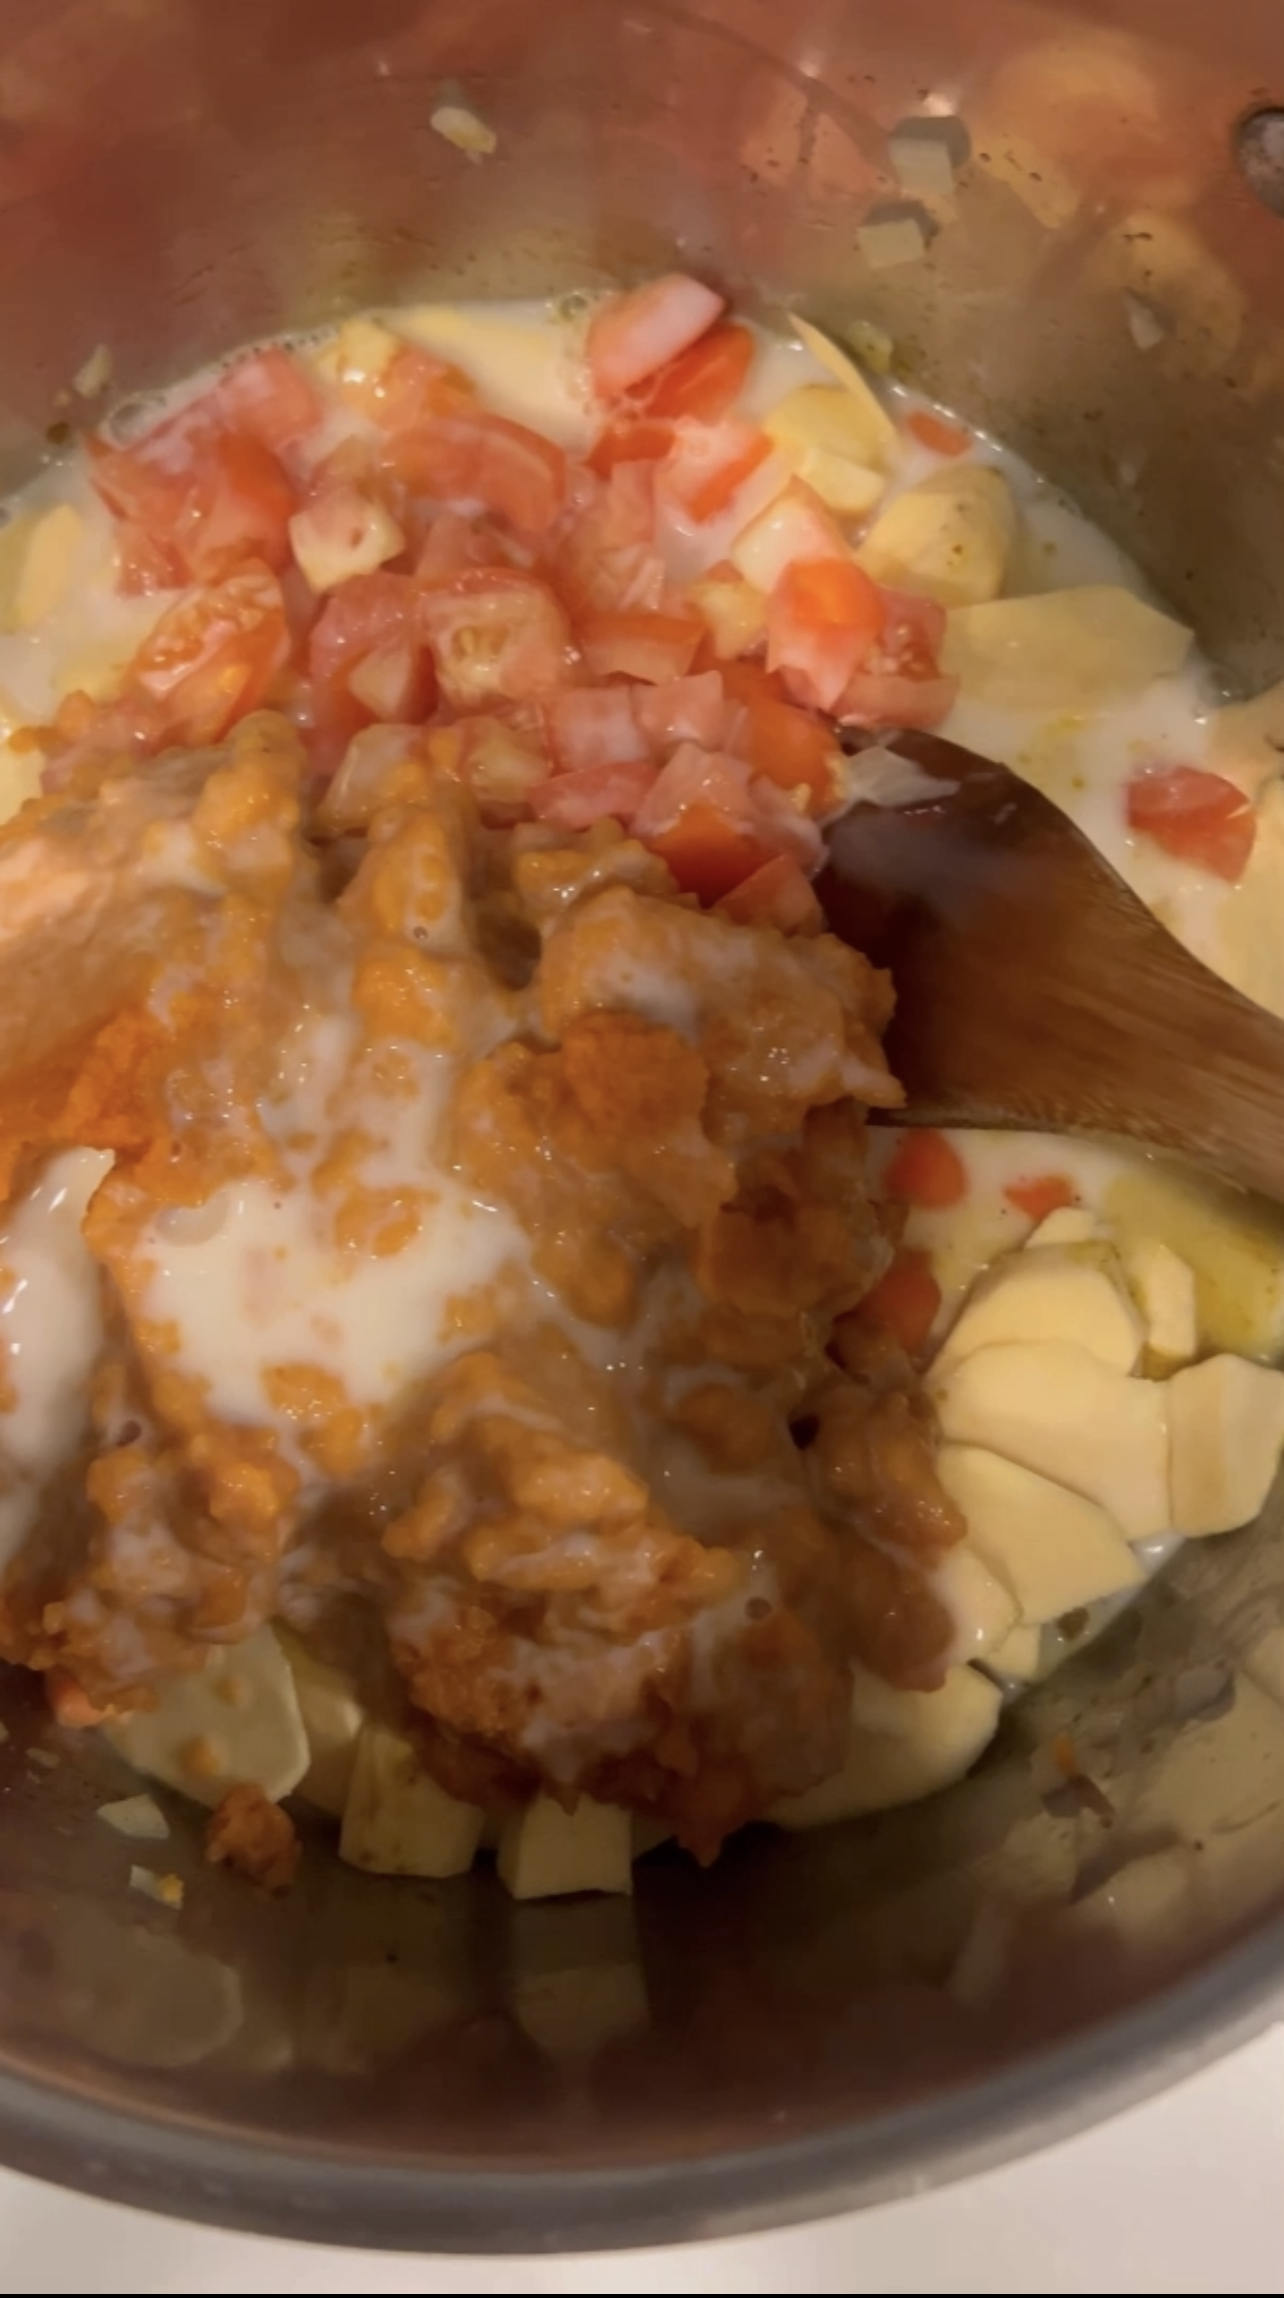


- In a large pot, heat the olive oil over medium heat. Once hot, add the onions and cook for 3-4 minutes until softened and translucent. Add the minced garlic, ginger, spices including cumin seeds and sauté for two more minutes.
- Stir in the carrots, sweet potato, tomatoes, pumpkin puree, chickpeas, coconut milk, sugar, salt and water or broth and bring to a simmer over medium heat.
- Cook for 20-30 minutes until sweet potatoes and carrots are tender. Turn off heat and add in spinach, and stir until it wilts. Add the lime juice.
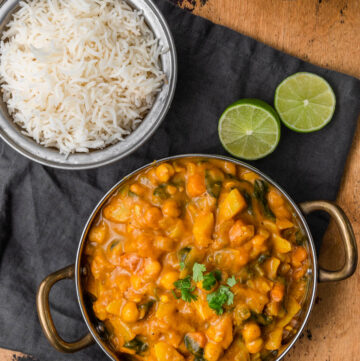
What to serve pumpkin sweet potato curry with:
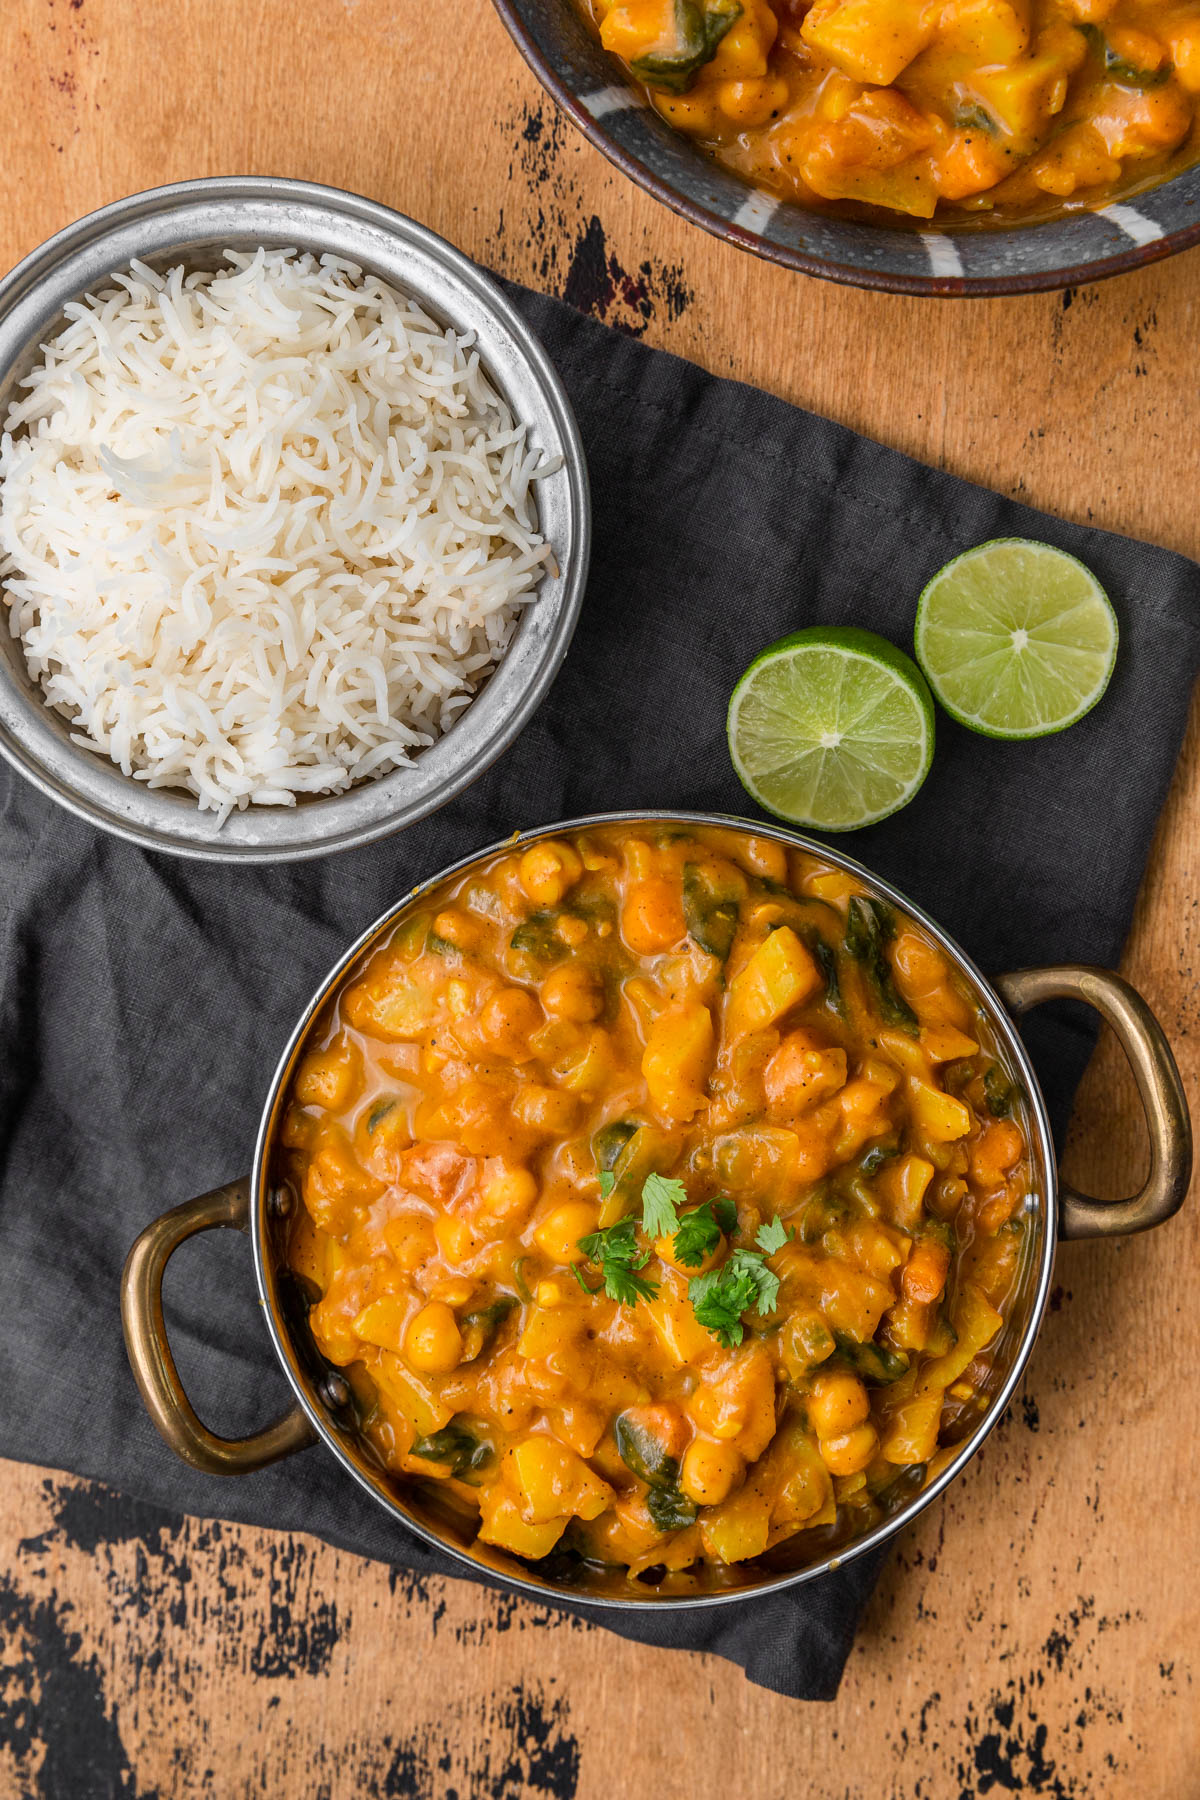
I like this with a simple side of basmati rice (like the one in this recipe, minus the vermicelli). It’s also delicious with homemade naan bread.
You can also serve this with brown rice, quinoa, jasmine rice, cauliflower rice, anything you like!
Storing leftover sweet potato chickpea curry:
You can store leftover curry in an airtight container in the fridge for 5-6 days- which makes it great for meal prep.
You can also freeze the curry for up to two months, thawing overnight in the fridge.
Recipe tips and tricks:

Here are some tips and tricks for making a delicious pumpkin sweet potato curry:
- Cut the sweet potatoes and carrots evenly so that they cook evenly. This will also ensure a consistent texture throughout the dish.
- Toast the spice before adding them to the curry to help to release the flavors and aromas, giving the pumpkin sweet potato curry a more complex taste.
- Add that pinch of sugar and squeeze of lime juice to balance the flavor and give sweet, sour and savory notes. The lime juice really brightens up the flavor of the curry.
- Don’t be afraid to experiment with different vegetables, protein sources, spices and toppings.
Sweet potato curry FAQs:

Absolutely, and the flavor will develop even more as it sits. This is great to prep the day before serving, and lasts 5-6 days in the fridge.
Yes you can- just cook whatever meat you choose (chicken, beef, lamb) after adding the spices until cooked through, then proceed with the recipe.
Yes you can, although the flavor will definitely change. You’ll still get that hint of sweetness from the pumpkin puree though!
Pumpkin Sweet Potato Curry
Ingredients
- 1 tablespoon olive oil
- 1 yellow onion, finely chopped
- 4 cloves garlic, minced
- 1 1 inch sized ginger piece, minced
- 1.5 tablespoon curry powder
- 1 teaspoon garam masala powder
- 1/2 teaspoon black pepper
- 1/2 teaspoon turmeric
- 1/2 teaspoon cinnamon
- 1 teaspoon cumin seeds or 1/2 teaspoon cumin powder
- 2 medium carrots, chopped into small cubes
- 1 sweet potato, chopped into small cubes
- 2-3 tomatoes, chopped
- 1 can pumpkin puree 15 oz, 400 g
- 1 can chickpeas, drained and rinsed 15 oz, 400 g
- 1 can coconut milk 13.5 oz, 380 g
- 1 1/4 cup water or vegetable broth
- 1 heaped teaspoon coconut sugar or brown sugar
- 1 teaspoon salt
- 2 big handfuls baby spinach leaves
- 1 lime or lemon juiced
Instructions
- In a large pot, heat the olive oil over medium heat. Once hot, add the onions and cook for 3-4 minutes until softened and translucent. Add the minced garlic, ginger, spices including cumin seeds and sauté for two more minutes.
- Stir in the carrots, sweet potato, tomatoes, pumpkin puree, chickpeas, coconut milk, sugar, salt and water or broth and bring to a simmer over medium heat.
- Cook for 20-30 minutes until sweet potatoes and carrots are tender. Turn off heat and add in spinach, and stir till it wilts. Add the juice of the lime or lemon.
- Serve with fluffy basmati rice, or to go above and beyond, homemade naan. Enjoy!
Video
Notes
Nutrition
For more healthy recipes:


Love this recipe? Please leave a 5-star 🌟🌟🌟🌟🌟rating in the recipe card and a comment!
Stay in touch with me through social media @ Instagram, Pinterest, and Facebook. Don’t forget to tag me when you try one of my recipes!
Jeannee says
This is the 1st recipe I saw when I opened my email this morning. Of course I’m making this for dinner. This reminds me of the meals my grandma would make with the last fresh veggies from the garden. Thanks for the meal memory. This will be in regular rotation.
Farah Abumaizar says
Aw! That makes me so happy, I love recipes that remind people of family!
Paul says
In the notes it says to make sure to saute the vegetables, but in the instructions it says to add the vegetables along with coconut milk and other liquids. If indeed the vegetables should be sauted it might make sense to add that step to the instructions (I read the instructions prior to starting but not the notes).
My first attempt is on the stove simmering smells great (sauted veggies or not), and can’t wait to dig in.
Farah Abumaizar says
You don’t need to sautee the veggies only the onion, so thanks for bringing that to my attention! Will amend the notes, and I really hope you enjoyed it!
Bushra Yar says
This looks delicious, turning vegetarian (I eat seafood sometimes) has got me hunting down for curry recipes, definitely trying this out! 🙂
Farah Abumaizar says
My husband who is a very dedicated meat eater loves this curry- so I can safely recommend it! Let me know if you do try it and hope it works out for you! Posting another vegan curry recipe next week inshallah xx
S says
Any curry with coconut milk is just fine by me! This was deliicous.