


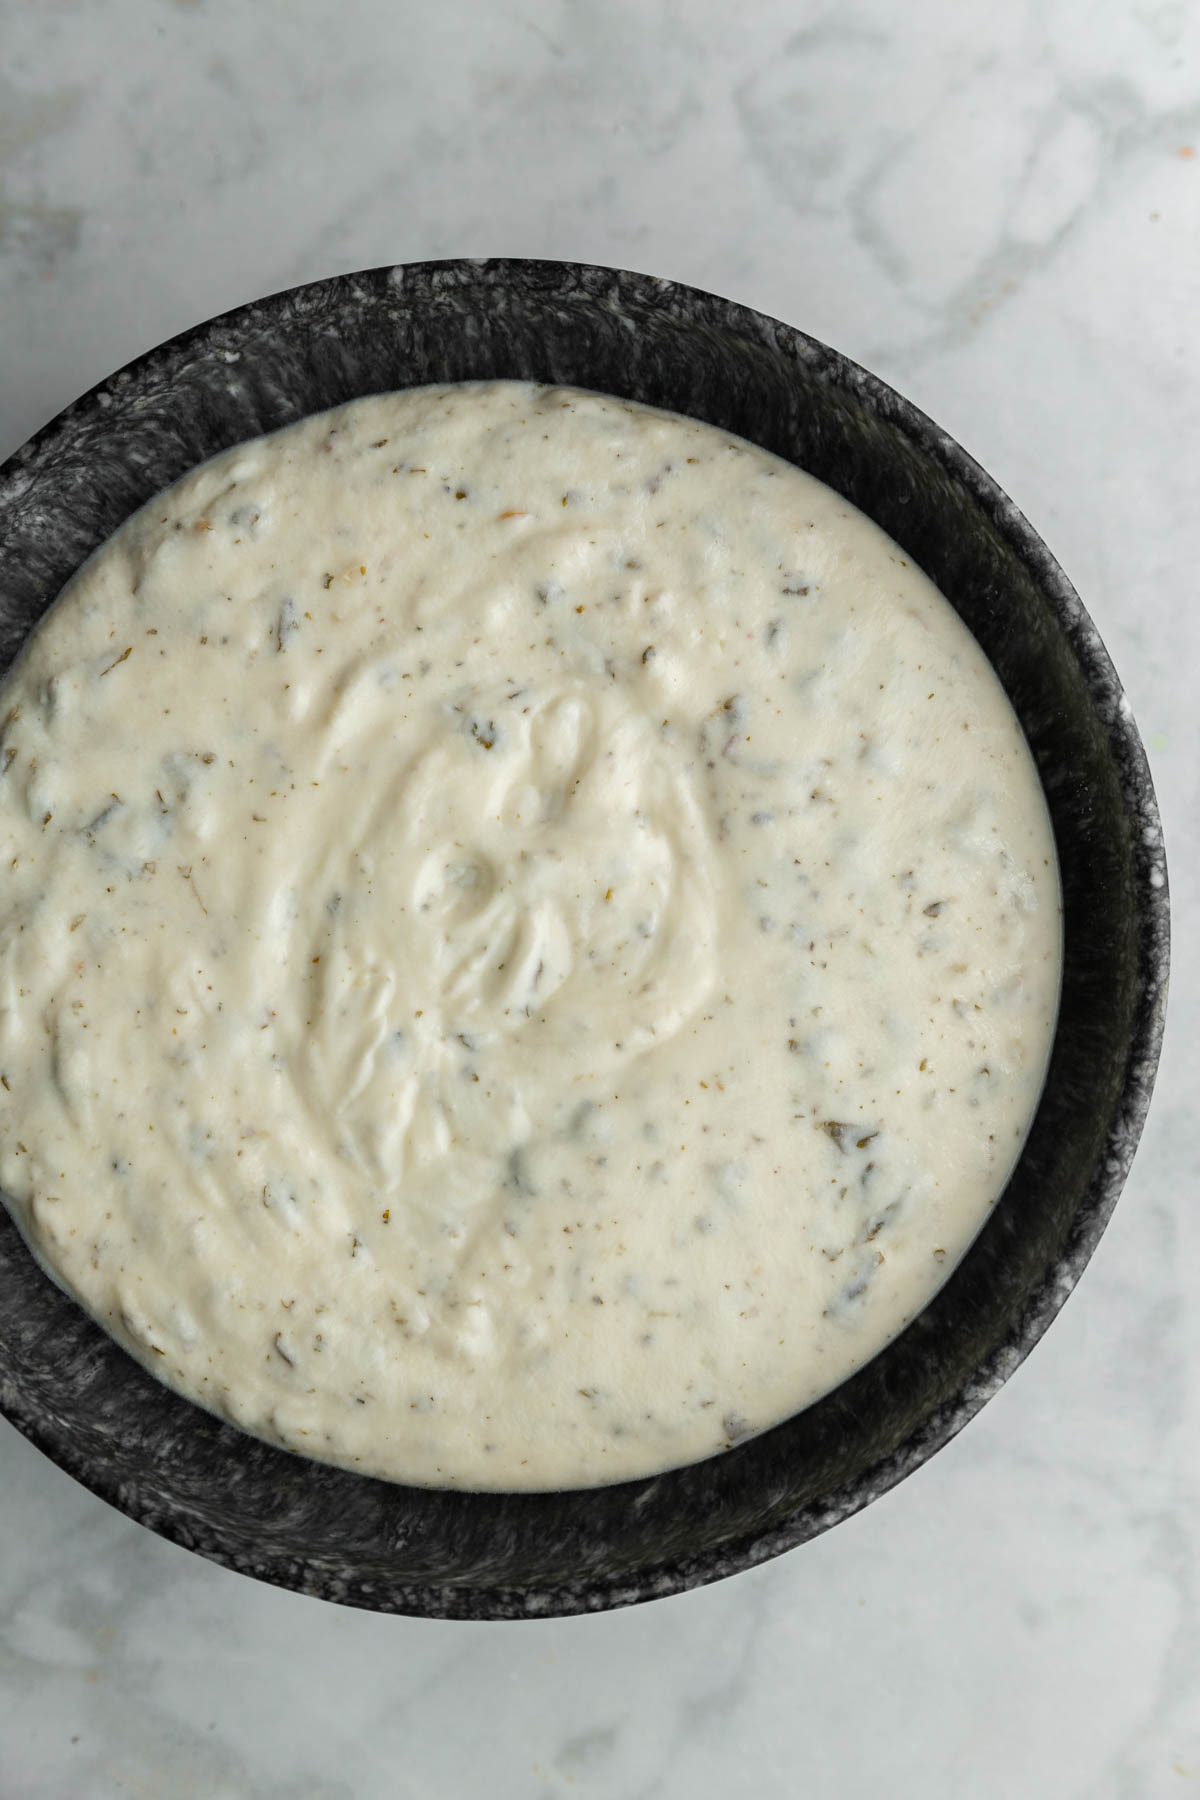
This Middle Eastern yogurt sauce (laban or labanieh) is the creamiest and most delicious garlic infused yogurt sauce. Cooked yogurt garlic sauce is a hallmark of so many Middle Eastern stews, and it’s actually really simple to make.

What is Middle Eastern yogurt sauce?
Middle Eastern stews can be categorized on what the base sauce is. The most common two sauces are tomato based sauces and yogurt based sauces. A lot of very popular stews have a tomato sauce base, but yogurt stews are also super popular.
A cooked yogurt garlic sauce basically means taking yogurt that’s mixed with a thickening agent, and cooking it slowly while whisking constantly. This will thicken the yogurt into a stew that you can then add different elements to.
You can use this laban base for everything from cooked cauliflower, to stuffed zucchini, to kebbe, or shish barak (meat stuffed dumpling). Another popular yogurt based dish is laban emmo, or lamb shanks in yogurt sauce.
Why should I make labanieh?
It’s an easy sauce to make, and so tangy and packed with flavor.
Cooked yogurt is a whole different flavor experience! You only need a handful of ingredients to transform regular yogurt into this creamy delicious sauce.
This will be your new base to make a whole lot of Middle Eastern dishes, it’ll totally expand your recipe repertoire.
Ingredients you need for Lebanese yogurt sauce:

Yogurt: regular plain yogurt, full fat. If you’re in the Middle East and have access to it, go for sour yogurt. It’ll give an even tangier flavor
Egg+Cornstarch: usually people use one or the other to thicken the yogurt sauce. I really recommend using a combination of both! It gives the perfect texture.
Water to dissolve the cornstarch in, and extra if you feel the sauce is too thick.
Salt
Dried Mint: adds a beautiful fresh flavor to the yogurt sauce. You can omit this if you prefer!
Garlic and cilantro (coriander): Crushed garlic and chopped cilantro are sauteed in olive oil to make this flavor adding step. You’ll then add the cooked garlic mixture to the cooked yogurt sauce. It’ll immediately infuse it with so much flavor.
How to make this easy cooked yogurt sauce:
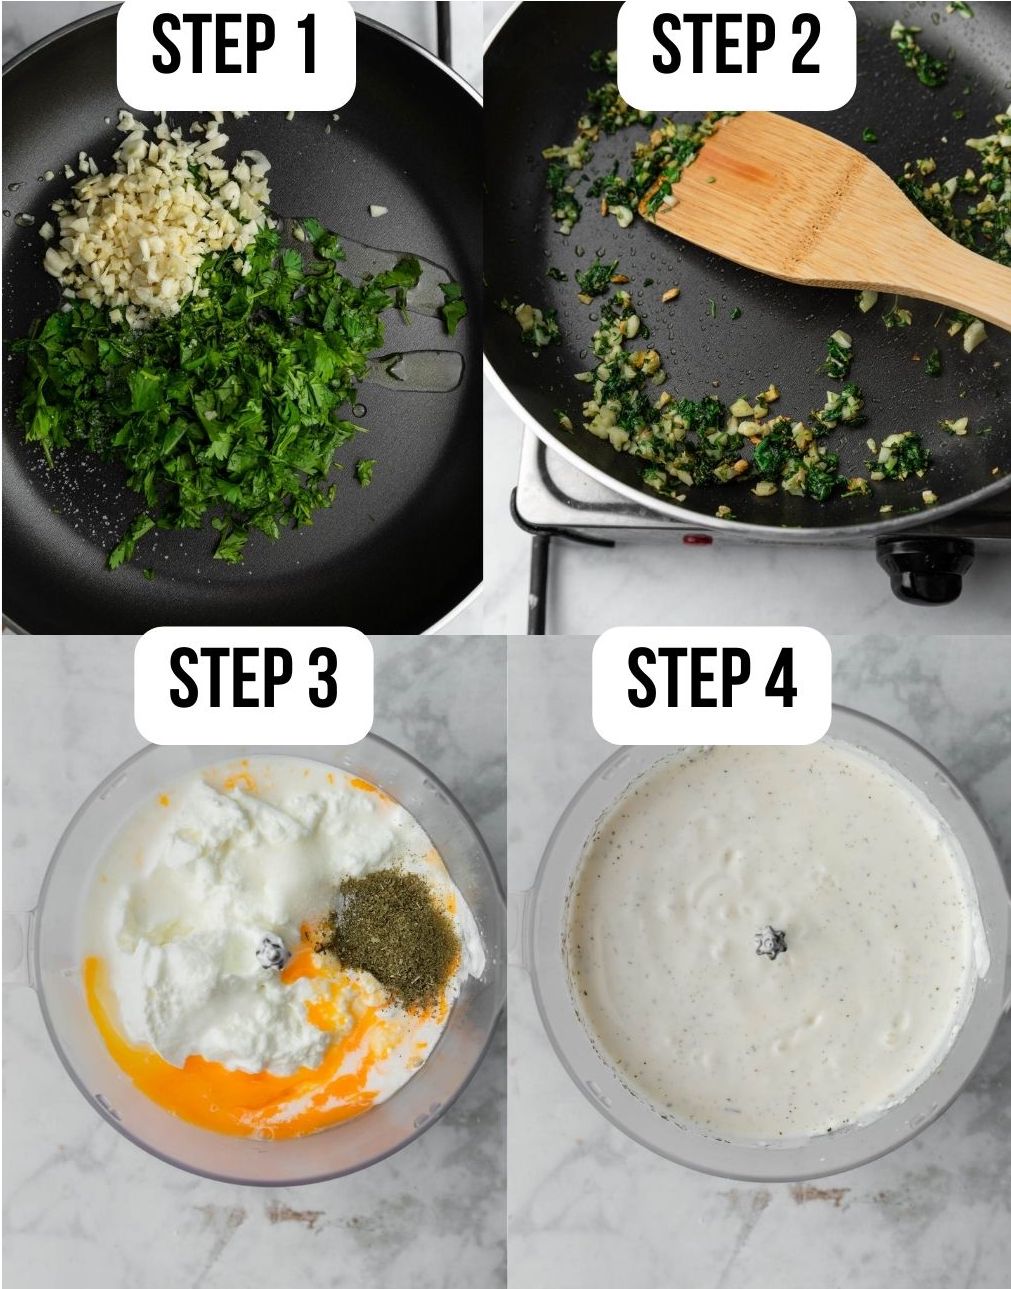

- Heat a small skillet over medium high heat, and saute the chopped coriander and crushed garlic with a pinch of salt until the garlic has just turned golden. Set aside.
- Mix the cornstarch with the water to form a paste. Add the yogurt, egg, cornstarch/water paste and salt to a blender. Blend until thick and combined.
- Pour yogurt mixture into a heavy saucepan over medium heat and immediately start whisking. Keep whisking and don’t stop or the sauce will separate. After 8-10 minutes or so, the sauce will begin to boil and as soon as that happens take it off the stove.
- Once the laban sauce is off the stove, add the garlic coriander mixture and stir to combine. Taste the sauce for seasoning and add more salt if needed. If you feel like the sauce is too thick, add a splash of water (1/4 cup or so).
What can I serve this Lebanese laban sauce with?

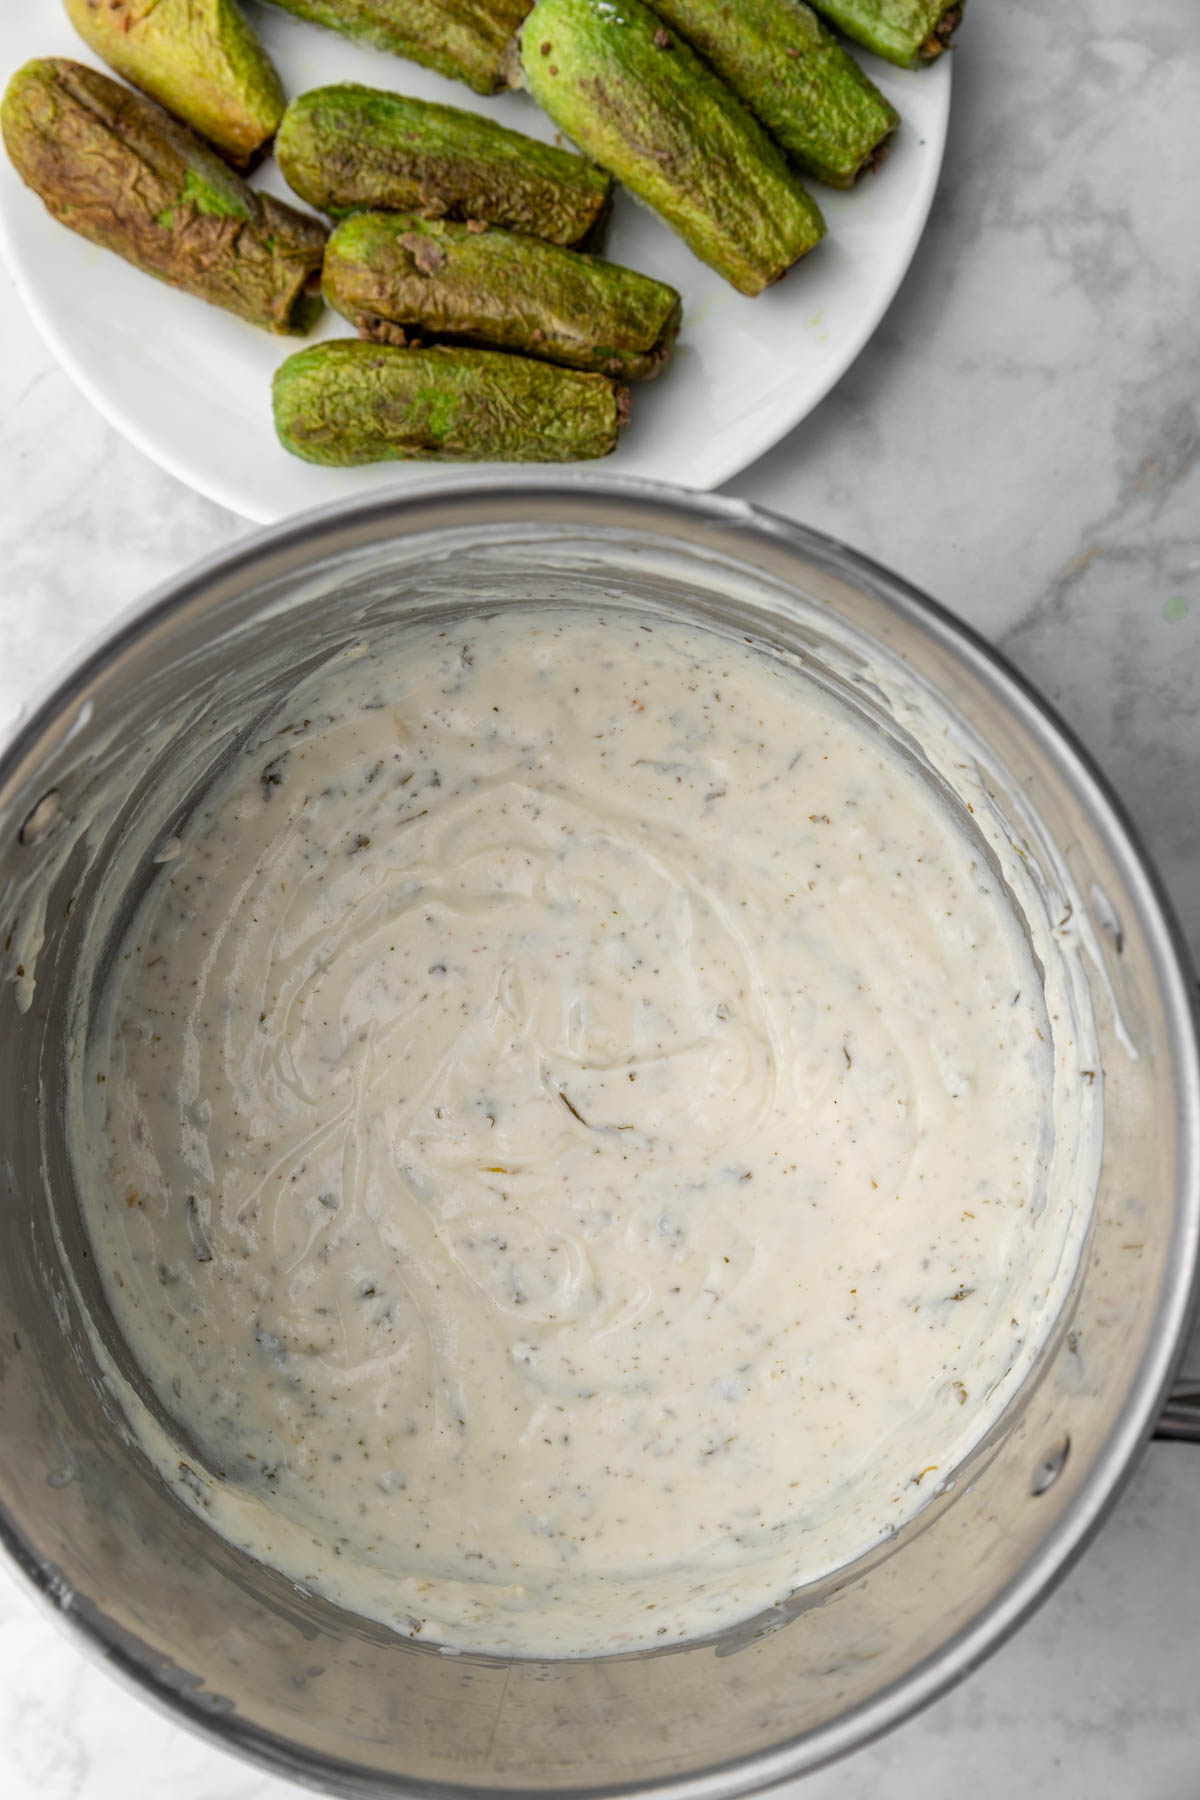
You can serve this as kibbeh labanieh or shishbarak:
You can also serve this with stuffed zucchini, fried cauliflower, or lamb shanks (laban emmo).
It’s almost always served with vermicelli rice on the side.
Storing leftover Middle Eastern yogurt sauce:
Leftover cooked yogurt sauce will last tightly covered in the fridge for up to 3 days tightly covered. Reheat over low heat and if it’s too thick, add a splash of water.
Recipe tips and tricks:
- Make sure to keep whisking the yogurt sauce when it’s on the stove. If you stop, you risk the sauce splitting and curdling- this can happen easily! Just whisk away until it first comes to a boil, then immediately remove it from the heat.
- Once the sauce has come to a boil and come off the heat, gauge the thickness. If you feel it’s too thin, you can dissolve another tablespoon of cornstarch in a splash of water, add it to the sauce and just cook another minute or so on low heat while whisking. It it’s too thick, add a splash of water (1/4 cup or so)
- Don’t miss out on adding the cooked garlic and coriander mixture- it adds SO much flavor.
Recipe FAQs:
As soon as the yogurt comes to the boil, it’s done! It’ll continue to thicken a little as it cools.
Yes you can. Plain yogurt is typical, but Greek yogurt will work too. If you can get sour yogurt, that’s even better!
I haven’t tried it, but I do think there’s a risk of it splitting in the freezer. I’d recommend making it fresh, it’s super fast and easy!
For related Middle Eastern recipes:


Love this recipe? Please leave a 5-star 🌟🌟🌟🌟🌟rating in the recipe card and a comment!
Stay in touch with me through social media @ Instagram, Pinterest, and Facebook. Don’t forget to tag me when you try one of my recipes!

Middle Eastern Yogurt Sauce (Laban)
Equipment
- Blender or immersion blender
Ingredients
- 1 tablespoon olive oil
- 1 bunch cilantro (coriander), finely chopped about 1 heaped cup
- 6 garlic cloves, crushed or minced
- 32 oz full fat yogurt 1 kg, sour yogurt preferred
- 1 egg
- 1 teaspoon salt plus extra for sprinkling on cilantro
- 2 tablespoon cornstarch
- 1/4 cup water
Instructions
- Heat a small skillet over medium high heat, and saute the chopped cilantro and crushed garlic with a pinch of salt until the garlic has just turned golden. Set aside.
- Mix the cornstarch with the water to form a paste.
- Using a blender or immersion blender, blend together the yogurt, the egg, the cornstarch paste,and the salt until well combined.
- Pour yogurt mixture into a heavy saucepan over medium heat and immediately start whisking. Keep whisking and don’t stop or the sauce will separate. After around 10 minutes or so, the sauce will begin to boil and as soon as that happens take it off the stove.
- Add the fried garlic and coriander mix, stir and taste for seasoning. Add any salt you feel it needs, and a splash of water if you think sauce is too thick.
- Use this as a base for any yogut stew you like!
H says
Once we’re done with the yoghurt sauce, can we cover it and keep it on low heat till it’s serving time? Or will it ruin the sauce?
Farah Abumaizar says
that works just fine if you are serving an hour or so away from the time of cooking! On a reaaaally low setting. Otherwise I’d recommend refrigerating then just rehearing on medium low for 10 min or so before serving. The sauce will seem very thick right out the fridge but will loosen up once heated!
SK says
My favorite dishes are also the ones in a yogurt sauce. I like that you added the fried garlic to this.
Farah says
Garlic always!!