• Skip to primary navigation
  • Skip to main content
  • Skip to primary sidebar
  • Skip to footer

 logo

  • Recipes
    • Breakfast
    • Sides
    • Soup
    • Main Meals
    • Healthy
    • Dessert
    • Drinks
  • Eating Out
  • About Me
    • Privacy Policy
  • Resources
    • Must Have Kitchen Tools
  • Nav Social Menu

    • Email
    • Facebook
    • Instagram
    • Pinterest

Pasta with Yogurt Sauce

Sep 3, 2019 · 10 Comments

Jump to Recipe
Bowl of macarona billaban over a white kitchen cloth with a spoon in it

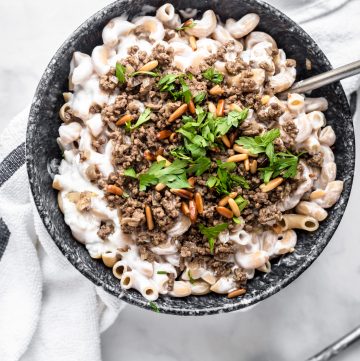
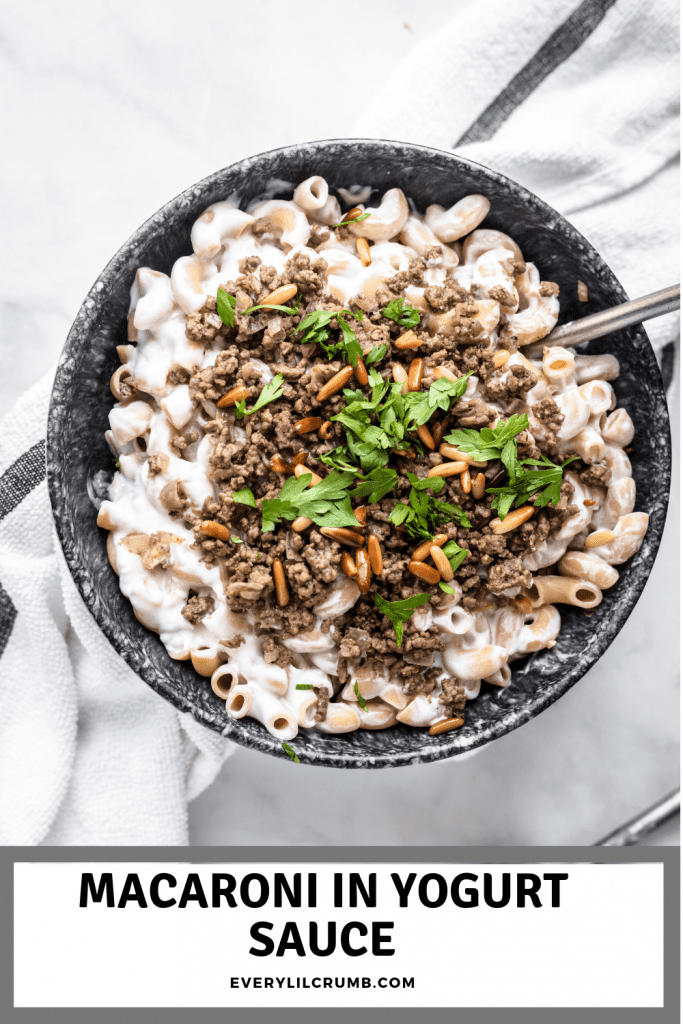
One of the simplest meals in Middle Eastern cuisine, this is a pasta with yogurt sauce made with a cold 3 ingredient yogurt sauce, topped with Middle Eastern spiced meat, pine nuts, and chopped parsley. It’s so good, and ridiculously simple.

What is this Middle Eastern pasta with yogurt sauce?

We call this Macarona Billaban which literally translates to yogurt macaroni. So what is macarona billaban? A very simple dish of cooked pasta that’s tossed with yogurt sauce with a good hint of garlic, usually topped with spiced minced meat.

To finish it off, I find toasted pine nuts to be essential, as well as a big handful of fresh chopped parsley.

What makes this pasta with yogurt sauce so good?

It’s the Middle Eastern equivalent of macaroni and cheese, but sorry to say it-SO MUCH BETTER.

Macarona billaban is so much lighter so you can eat a lot more of it. It’s way healthier too!

It’s the dinner of a busy mom who had no time in the kitchen that day, or one with really picky kids who barely eat anything.

A meal I ate so many times growing up, but it remained special each and every time. It’s also one of the meals my dad (who wasn’t usually in the kitchen) made us, when we’d be whining that we were hungry and there was no time to think about a more elaborate meal.

It’s an extremely well loved peasant dish!

How to make pasta with yogurt:

The sauce: Simply stir together yogurt, crushed garlic and salt. Go for less garlic if you like a milder flavor or more if you are a garlic lover like me. Mix it all up and taste. Add more or less salt and garlic as per your preference! You can also add dried mint if you prefer.

Should I use Greek yogurt or regular yogurt for the sauce?

I always use regular yogurt, but you can definitely substitute Greek yogurt.

The pasta: Typically I like elbow macaroni. Brings back all those childhood memories. I’ve grown up a little since then and I use whole wheat elbow macaroni pasta, but have tried this with spaghetti and penne- it’s all good!

The meat: I nearly always make this with cooked spiced ground beef that I’ve frozen. It’s such a good use of leftover meat. I included the recipe I use for most of my Middle Eastern ground meat dishes. You can use beef or lamb, and you can also completely leave it out for a lighter vegetarian dish.

The garnishes: For me, the toasted nuts mandatory, and the more the better. Especially pine nuts. They give so much depth and flavor. I always pile mine on! You can also add toasted almonds. Some people use parsley on top, some coriander/cilantro, I grew up with parsley so that’s what I do!

Toasting the pine nuts:

They toast really quickly, so the important thing is to keep an eye on them and stir constantly so they don’t burn. I heat some olive oil in a small skillet over medium heat, then add the pine nuts and stir stir stir till they turn golden brown.

At this point, immediately remove them from the heat into a separate small bowl until ready to use, otherwise they’ll continue cooking in the residual heat of the pan even if it’s off the stove.

Assembling the macarona billaban:

To assemble, you toss however much pasta you’ll eat immediately with your desired amount of yogurt sauce-based on the sauciness you like.

Top with the minced meat, toasted pine nuts and chopped fresh parsley. It will basically be room temperature, which is the way I like to eat this dish.

Can you have this as a vegetarian dish?

Definitely! And I’ve done that many times myself. Just omit the meat and it’s still really tasty!

Storing your leftovers:

I used to hate leftover pasta with yogurt. This is because leftovers usually took the form of the final dish, the pasta already mixed with the yogurt sauce and stored.

The yogurt turns clumpy and cold and basically stops being a sauce and starts being dry flecks of yogurt.

Then I discovered this hack! I store the leftover pasta without any sauce in a container in the fridge, and the leftover yogurt sauce in a separate container. Any extra meat also gets stored in it’s own container. Leftover pine nuts go on the counter.

When I want to eat, I pour some hot water over the cooked pasta to freshen it up a little, drain it, then mix it with my desired amount of yogurt sauce, top with some more meat and some pine nuts and parsley. Sometimes I heat the extra meat separately, sometimes I eat it cold. Either way it’s delicious, and solves all my leftover problems!

Bowl of macarona billaban over a white kitchen cloth with a spoon in it

Macarona Billaban

Simple Middle Eastern dish of pasta in a no cook garlic yogurt sauce, with toasted pine nuts and parsley (often topped with spiced meat)
5 from 4 votes
Print Pin
Rate
Course: Main Course
Cuisine: Middle Eastern
Keyword: pasta, yogurt, middle eastern
Prep Time: 5 minutes
Cook Time: 10 minutes
Servings: 6 people
Calories: 675kcal
Author: Farah Abumaizar

Ingredients

Spiced Meat:

  • 1-2 tbsp olive oil
  • 1 small onion, finely diced
  • 2 cloves garlic, minced
  • 500 g ground beef or lamb
  • 1 tsp salt
  • 1/2 tsp black pepper
  • 1 heaped tsp seven spices or all spice
  • 1 tsp cinnamon

For the yogurt sauce:

  • 500 g yogurt
  • 4-5 cloves garlic, crushed (I used 6, I like super garlicky!)
  • 1/4 tsp salt plus more to taste

To assemble:

  • 500 g cooked and drained pasta of choice, I like whole wheat elbow macaroni
  • 1/4 cup toasted pine nuts see notes for toasting instructions
  • handful chopped fresh parsley for garnish

Instructions

Make the yogurt sauce:

  • Mix together the yogurt, crushed garlic and salt until well combined. Taste for seasoning, add more salt or garlic if desired. Place it in the fridge to chill until meat and pasta are ready.

For the meat:

  • Heat the oil in a skillet over medium heat until hot. Add the diced onion and saute for a few minutes or until beginning to soften. Add the garlic, and continue to cook until onions are translucent.
  • Add the minced meat. If you are going to drain the cooked meat of it's fat after it browns, then don't add the salt, pepper and spices until after you drain it. If you won't drain the meat, you can add the salt, pepper, seven spices or allspice, and cinnamon and continue to cook the meat, breaking up any clumps with a wooden spoon until browned and well cooked through. Taste for seasoning and adjust accordingly.

To assemble:

  • Cook and drain pasta according to package instructions. Immediately before eating, toss pasta with yogurt sauce until well coated, then top with the spiced meat mixture, toasted pine nuts and parsley.*

Notes

To toast the pine nuts, heat 1 tbsp of olive oil over medium high heat in a skillet. Once oil is hot, add the pine nuts, and stir constantly until they turn golden brown, then remove IMMEDIATELY from the heat and place in a separate bowl to prevent further browning. Cool until using.
 
*If you won’t eat all the pasta at once, only combine enough pasta and yogurt as you need for your current serving, and store the cooked pasta and yogurt sauce separately in the fridge. Every time you want to eat some, combine the pasta and yogurt on the spot because the yogurt clumps and hardens once combined with pasta and it isn’t as appetizing. Topping with pine nuts and parsley should also be done right before eating.
Tried this recipe?Mention @everylittlecrumb or tag #everylittlecrumb!

Nutrition

Calories: 675kcal

If you liked this recipe, try:

Creamy Avocado Pasta

Middle Eastern Yogurt Sauce

Chicken Piccata Pasta

Did you make this? Tag @everylittlecrumb or hashtag #everylittlecrumb and I’ll share your images!

Healthy, Main Meals, Recipes meat, middle eastern, pasta

Previous Post: « Super Healthy Blueberry Muffins
Next Post: Shrimp and Clam Pasta »

Reader Interactions

Comments

  1. Sylvie says

    September 4, 2019 at 12:21 pm

    5 stars
    Love the idea of a lighter and healthier mac and cheese! It looks so creamy and delicious – perfect for an easy mid-week dinner

    Reply
    • Farah Abumaizar says

      September 4, 2019 at 12:24 pm

      Thanks Sylvie! It really is

      Reply
  2. Danielle says

    September 4, 2019 at 1:39 pm

    5 stars
    What a great idea! This looks like true comfort food and I am loving the flavors.

    Reply
    • Farah Abumaizar says

      September 4, 2019 at 3:25 pm

      Thanks so much Danielle!

      Reply
  3. Suzanne says

    September 4, 2019 at 1:43 pm

    5 stars
    I’m so glad I’ve discovered this dish! I love pasta and this is a totally new way of serving it that I’ve never experienced before. I bet the yogurt and spiced beef taste delicious together.

    Reply
    • Farah Abumaizar says

      September 4, 2019 at 3:24 pm

      So so good! Thanks Suzanne!

      Reply
  4. David says

    September 4, 2019 at 1:49 pm

    5 stars
    I love this Middle Eastern twist on mac and cheese! As a big fan of the latter I’m eager to try this delicious recipe.

    Reply
    • Farah Abumaizar says

      September 4, 2019 at 3:25 pm

      I hope you do and love it!

      Reply
  5. Lizzy says

    September 4, 2019 at 2:40 pm

    Yogurt is such a great idea for this macaroni! Looks delish

    Reply
    • Farah Abumaizar says

      September 4, 2019 at 3:24 pm

      It’s a natural pairing trust me !

      Reply

Leave a Reply Cancel reply

Your email address will not be published. Required fields are marked *

Recipe Rating


Primary Sidebar

Get more stuff

Subscribe to our mailing list and get interesting stuff and updates to your email inbox.

Thank you for subscribing.

Something went wrong.

we respect your privacy and take protecting it seriously

FeedFeed

Featured Recipes

Nana tea

Halal Guys Chicken and Rice

Aish El Saraya

Instant Pot Enchilada Soup

Death By Chocolate Zucchini Bread

More

Footer

everylittlecrumb

Farah Abu Maizar | Food Lover
Bbq salmon bowls with mango avocado salsa- unbelie Bbq salmon bowls with mango avocado salsa- unbelievable! And start to finish, you can be eating these in 15-20 minutes. Save this recipe for your next meal, you don’t want to miss out!

I’ve partnered with @kilosamak to produce a few recipes with their quality seafood- I’ve tried several of their items and genuinely loved them all! They deliver seafood straight to your door for you to enjoy and cook at home. Takes all the guesswork out of trying to choose and clean fish yourself, perfect solution for someone like me who loves seafood but isn’t so great at prepping it! Check out their Instagram page on how to order, or head to the link in my bio.

This salmon has a smoky slightly sweet rub, is baked in the oven for ultimate ease, and gets piled on to rice and topped with an easy, addictive, zingy mango and avocado salsa. Adapted from @pinchofyum , I’ll make this again and again!

Ingredients:
For the salmon:
2 fillets, about 250 g each 
Spice Rub:
2 tbsp brown sugar
1.5 tsp paprika 
1 tsp garlic powder
1 tsp onion powder, optional 
1/2 tsp chili powder
1/2 tsp salt 
2 tbsp olive oil 

Mango avocado salsa:
1 diced mangos 
1 diced avocado
1/4 cup finely diced coriander 
1/4 cup finely diced red onion 
1 inch spicy green chili pepper, finely chopped
1 tsp honey
Juice and zest of one lime
Salt to taste

Method:
- Make the salsa by mixing together all the salsa ingredients and placing bowl in fridge while you make the salmon.
- Heat oven to 240C, and line a baking sheet with parchment paper. 
-Mix together all the ingredients for the salmon rub, and rub thoroughly all over the salmon, both sides.
- Bake for 10-12 minutes until salmon is opaque and cooked all the way through.
-Assemble bowls with rice, flaked pieces of salmon,and plenty of mango avocado salsa. Enjoy 😍

Catch the steps in my story!
Have you tried this pasta yet? Save this for your Have you tried this pasta yet? Save this for your next weeknight meal! Saucy macarona iltaybeen, can’t get much more comforting.  Adapted from @jedir3waish , makes for an easy delicious main that’ll make your family including kids very happy! Can find a step by step linked bio, or at https://everylittlecrumb.com/macarona/ , or in my story!

INGREDIENTS:
 
2 tbsp olive oil, divided
big pinch of salt
3 heaped tbsp tomato paste, divided 2 oz or 70 g
1 pack elbow macaroni 14 oz or 400 g
1 onion, very finely diced
1 zucchini, finely diced
1 carrot, finely diced
4-5 garlic cloves, minced
250 g ground beef
1 tsp seven spices
1 tsp turmeric
1/2 tsp paprika powder
1/4 tsp basil
1/4 tsp cinnamon powder
1/4 tsp garlic powder
1/2 tsp black pepper
1 tsp salt
1 can crushed tomatoes 14.5oz (400g)

NSTRUCTIONS
 
Bring a large pot of water to boil, add 1 tbsp olive oil and the salt, one tbsp of tomato paste, then the pack of pasta. Cook until al dente, then drain the pasta, reserving the pasta water. Set cooked pasta aside.

In a large skillet, heat the remaining tbsp of olive oil. Once hot, add the diced onion, and cook for 4-5 minutes until softened. Add the diced zucchini and carrots, and garlic and cook for a further 4-5 minutes until softened slightly.

Add the ground beef, and cook, smushing with a wooden spoon to break up the meat. Keep cooking until the beef is browned and cooked through, then optionally, drain the fat.
Add in the salt, pepper, and all the spices. Cook for another minute or so. Add the remaining 2 tbsp of tomato paste, and stir.

Add the can of crushed tomatoes and stir to combine. Bring to a simmer, then add a big ladleful of the reserved pasta water and simmer for 2-3 minutes on low heat.

Add the pasta to the sauce (I don't always add all the pasta, maybe 3/4 of the cooked amount until the finished dish is as saucy as I like). Stir to coat, cook for another minute or so until the pasta is warmed through, then enjoy!
This gorgeous tiramisu was so kindly sent to me by This gorgeous tiramisu was so kindly sent to me by @cadysweets.sa on my birthday, and we enjoyed every light fluffy bite of it. Their old account got hacked so follow along and support their new account ! They have a bunch of cakes and sweets for every occasion, so make someone or yourself happy and order one for a treat🤩! Send this to the tiramisu lover in your life 🍰.
.
.
.
.
.

#chocolatecake #magnoliabakery #cakestagram #cakephotos #layercake #chocolate #ganache #foodblog #instayum #yummy #bakery #foodporn #foodtographyschool #foodphotography #slice #delish #foodfluffer #damnthatsdelish #tiramisu #birthdaytreat #dessertbae #dessertoftheday #scoop #foodstyling #foodstylingandphotography
Easiest at home crusty bread with a great open cru Easiest at home crusty bread with a great open crumb texture. It’s the no knead bread from @breadin5 and has yet to fail me. Check my story for the step by step, and swipe for a video reveal.

Ingredients for two small loaves:
1.5 cups lukewarm water 
1/2 tbsp any type of yeast
1/2 tbsp salt
3 1/4 cup plain flour (450g)

Method:
In a large bowl, stir together the water with the yeast and salt. Try to dissolve but it’s fine if you have clumps.
2. Add flour all at once and stir, just until no flour patches remain.
3. Cover loosely with a kitchen cloth and leave it to rest for 2 hours in a warm place until risen and bubbly.
After this rest you can:
- Use dough immediately if impatient, but it’s easier to work with if cold, so maybe pop in fridge briefly
- Or, their recommended method and the one I do, leave in the fridge loosely covered for 12 hours or overnight. 
Refrigerated dough lasts up to two weeks, and flavor depends over time!
4. The next day, the dough might look deflated. That’s fine! When ready to bake, divide dough in half (I got two 400g dough balls)- it might be easier to handle if you sprinkle the dough lightly with flour, and take the half you are going to bake out of the fridge. Let it rest on a parchment paper lined baking sheet 40-90 minutes. The longer the more interior bubbles you should have. Preheat oven to 235C (450F), and after rest, make a few deep slashes in the dough with a sharp knife.
5. Place in the middle rack of the oven, and on the bottom rack place a roasting pan that had about a cup of hot water in it. This will create steam which gives a crustier crust!
6. Bake for 30-35 minutes or until deep golden brown.
7. Let it cool completely before enjoying!
.
.

.
.
.

#damnthatsdelish #foodfluffer #thebakefeed #feedfeed #tastingtable #forthemaking #BHGfood #foodblogfeed #bakedfromscratch #bakinglove #f52grams #foodbloggerpro #bakersofinstagram #TOHfoodie #foodphotography #canonphotos #bread #instayummy #kitchn #huffposttaste #food #dough #foodie #nokneadbread #homemadebread #doughter
Good morning! With dine in still closed in Saudi, Good morning! With dine in still closed in Saudi, Friday pancakes are fast becoming a tradition. And honestly, I don’t think I’ve had better pancakes at any restaurant recently! The easiest, fluffiest diner style pancakes are a huge hit in our family, find the recipe below adapted from @allrecipes . I like to barely warm the oven (110C or so) and keep the finished pancakes in a pan in the oven until I’m done with all the batter so they stay warm and perfect 👌🏼.

Ingredients
3/4 cup milk 170g
1 tbsp white vinegar
1 cup flour 125g
2 tbsp sugar 25g
1 tsp baking powder
1/2 tsp baking soda
1/4 tsp salt
1 egg room temperature
1/2 tsp vanilla
2 tbsp butter, melted 28g

Instructions:
-In a large bowl, combine the milk and vinegar, and let aside to stand for 5 minutes until curdled. Whisk to combine.
-In a separate large bowl, mix together the flour, sugar, baking powder, baking soda and salt.
-Add an egg, the vanilla and the melted butter to the buttermilk and whisk to combine.
-Add the dry ingredients all at once to the wet, and whisk until flour patches disappear. A few lumps are fine, but don't over mix.
-Let the batter rest for 5-10 minutes while you heat a pan on the stove.
lightly grease the pan with nonstick spray or butter, and pour about 1/4 cup of batter on the pan. Cook for 2-3 minutes on each side or until golden brown. (Flip the first time once you see bubbles form and the edges of the pancake dry up).
-Enjoy with toppings of your choice!
.
.
.
.
.
#pancakes #pancakerecipe #blueberrypancakes #maplesyrup #breakfast #morningslikethese #fridaymorning #flatlay #foodfluffer #breakfastrecipes #breakfastfood #breakfastofchampions #pancakelover #food #foodtography #foodtographyschool #foodphotography #delish #foodphotos #weekendbreakfast #eatingathome #recipeoftheday #foodporn #foodflatlay #blueberries #trayoftheday
One of my photos from my shoot @tackle.baks . How One of my photos from my shoot @tackle.baks . How insane does this tom yum soup look? For those who haven’t tried this casual seafood spot yet, you really should! The food is great and priced very reasonably, and they have some menu items I’m obsessed with like their crispy fish burger, the salmon poke salad and the creamy truffle shrimp👌🏼. They currently have a delivery offer going for only 5SAR on HungerStation, so no time like the present! Have I tempted you with this photo of the tom yum soup? I’m hungry just writing this caption🤤.
.
.
.
.
.
#soup #tomyum #tomyumsoup #food #foodphotography #canonphotography #canon #seafood #seafoodlover #shrimp #delish #beautifulcuisines #foodtographyschool #foodtography #foodblogger #instayum #lonelyplanetfood #dametravelerfoodie #soupseason #restaurantphotography #khobar #tastemade #tastingtable #foodfluffer
I wanted to take a really pretty photo of the choc I wanted to take a really pretty photo of the chocolate fondants and post it with the recipe but I gave into peer pressure and am posting the recipe with this horribly lit and not at all beautifully set up video🤷🏻‍♀️. At least the video really demonstrates how gooey and perfect the center of these chocolate lava cakes are, and how unbelievably delicious they are. You won’t believe how easy it is to make these! And you may never order this at a restaurant again! You can even use muffin cups instead of ramekins. Save this recipe for when you want to be extra fancy with your dessert 👩‍🍳 I looked at a bunch of recipes online and compiled my favorite steps from each, this is most influenced from @gordongram 

Ingredients:
For greasing the ramekins:
1 tbsp melted butter
1 tbsp cocoa powder

For the fondants:
1 stick butter 115 g
2 eggs
2 egg yolks
170 g chocolate bittersweet chocolate (I used Lindt 70%)
1/2 cup caster sugar or regular sugar
Pinch salt 
3 tbsp flour (41g)
25 g butter melted

Method:
-Spray ramekins with nonstick spray, then dust with cocoa powder and shake until evenly coated, or brush inside of ramekins with melted butter, chill into butter sets, grease again with more melted butter and dust with cocoa powder (Gordon Ramsay’s fancy method)

-Melt together the butter and chocolate over a pan of simmering water (Bain marie ). Set aside melted chocolate to cool for 10 minutes.

-In an electric mixer, whisk the eggs, egg yolks, and sugar until thick and pale about 3-4 min. Sift in the flour and beat again until mixed.

-Pour melted chocolate into the egg mixture in 3 additions, mixing well between each until combined.

-Pour fondant batter evenly into prepared ramekins. If baking immediately, let them chill in the fridge while you preheat the oven to 200C. You can also store in the fridge for up to two days before baking.

- Bake 10-12 minute or until top just looks set. If using muffin pans, they’ll take less time, 8-10 minutes. Remove from oven and cool 1 minute before inverting onto a plate. Enjoy immediately with vanilla ice cream and berries!
I can’t stop myself from craving over the top de I can’t stop myself from craving over the top decadent desserts when it’s cloudy and a little chilly. One of my favorites in Bahrain is @joesbahrain ‘s sticky date cake that comes swimming in a pool of caramel sauce. It’s a drool worthy dessert! Their warm chocolate brownie is also unbelievable. I always end up confused on which to order and usually give in to ordering both 😂. Their coffee pairs perfectly with either👌🏼. Definitely miss this spot and wish I could be dining outdoors @theavenuesbh now indulging on this ultimate treat. Do you agree with my review? 
.
.
.
.

#chocolatecake #magnoliabakery #cakestagram #cakephotos #layercake #chocolate #ganache #foodblog #instayum #yummy #bakery #foodporn #foodtographyschool #foodphotography #slice #delish #foodfluffer #damnthatsdelish #datecake #caramel #stickytoffee
Load More... Follow on Instagram

Copyright © 2019 on the Seasoned Pro Theme