• Skip to primary navigation
  • Skip to main content
  • Skip to primary sidebar
  • Skip to footer

 logo

  • Recipes
    • Breakfast
    • Sides
    • Soup
    • Main Meals
    • Healthy
    • Dessert
    • Drinks
  • Eating Out
  • About Me
    • Privacy Policy
  • Resources
    • Must Have Kitchen Tools
  • Nav Social Menu

    • Email
    • Facebook
    • Instagram
    • Pinterest

Maamoul

Jul 28, 2020 · 6 Comments

Jump to Recipe
Plate of finished date maamoul with tea in the background

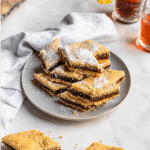
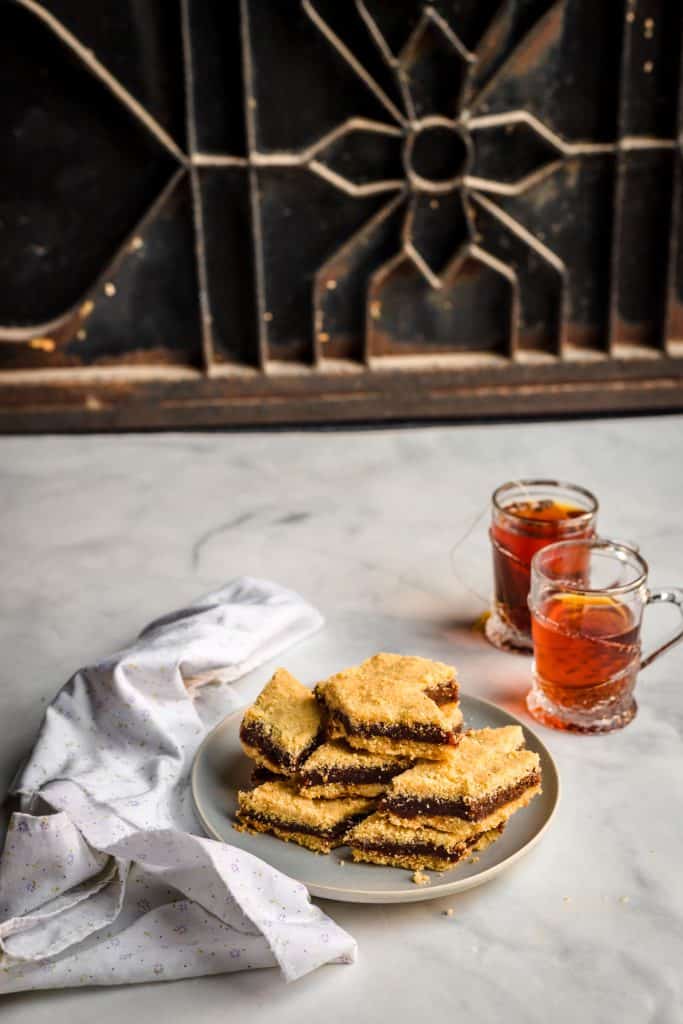
A very traditional Middle Eastern filled biscuit, this maamoul recipe will give you the easiest rendition of maamoul with a semolina dough and spiced date filling. So delicious, and made so much easier by making it into a bar form instead of individual molds.

What is maamoul?

overhead shot of maamoul in a plate with tea cups and a pan of maamoul in the background

Maamol is a filled Middle Eastern cookie, with the pastry usually made with semolina or flour, or a mix of both. The filling ranges from date, to pistachios or walnuts. I love them all, but I’d say the absolute classic is dates!

Maamoul is very commonly served during Eid Al Fitr (a Muslim celebration that follows Ramadan, the month of fasting and Eid Al Adha (the celebration that follows Hajj, a Muslim pilgrimage.

Maamoul is also served during Easter in the Middle East.

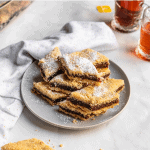
For all those reasons, it’s such a celebratory thing to have, and it always puts a smile on my face to have maamoul with a cup of tea. Brings back so many nostalgic memories!

Why is this maamoul recipe so good?

plate of maamoul with tea in front of a door

First and foremost, because it’s so much easier than individually moulded maamoul cookies!

It has barely any sugar- the whole pan uses just 2 tbsp of granulated sugar in the dough, because the dates are sweet enough to naturally sweeten the maamoul.

It’s full of exotic yet comforting flavours, like the rose water and orange blossom water, and just a pinch of spices.

The maamoul is truly addictive, and pairs perfectly with coffee or tea, and brings so much joy to a household!

How is maamoul made?

The dough is prepared, and needs to rest to give the semolina time to soak in the ghee. After resting, it is filled with the filling of your choice.

Usually, maamoul is prepared in individual molds, (click to see what they look like) these pretty wooden molds that you can get in different patterns. It makes for stunning maamoul, but can get very time consuming to fill the mold each time first with dough, then with filling, then whacking the cookie out of the mold.

The best thing about this easy maamoul recipe is that it’s made in bar form, so that cuts down on so much time of the individual shaping of maamoul. This is sometimes referred to as maamoul mad (mad means stretched out in Arabic).

I’m so happy I found this recipe on Tania’s page, because I don’t think I’d ever have been brave enough to attempt individual maamoul!

What ingredients are in maamoul?

all the ingredients needed to make date maamoul

The dough:

Some recipes call for a blend of semolina and all purpose flour. Here, we mix coarse and fine semolina.

This blend gets mixed with just a hint of sugar, a little instant yeast, some ghee, and rose water and orange blossom water for fragrance and flavour.

What is ghee?

Ghee is almost like concentrated butter, where the water and the milk solids have been removed. This forms a clarified butter with less dairy proteins. It’s commonly used in Middle Eastern and Indian cooking.

How do I make my own ghee or clarified butter?

The basic concept is by melting regular unsalted butter slowly and skim off the solids on the surface. Cook the butter until all the milk solids have sunk to the bottom and the liquid is clear — this is clarified butter.

Cook for a few more minutes until the milk solids at the bottom of the pan turn brown, then strain the liquid to get rid of the brown butter bits.

This page has a great step by step recipe on how to do this.

For the filling:

I made a date filling, but this would be delicious with sweetened walnuts or pistachios too.

For the date filling, you need date paste. You can purchase this ready. If you can’t find, make your own by chopping the medjool dates. Next, process in a food processor until a paste forms.

The dates naturally sweeten the filling, so no sugar is added at all! We just add a few spices to enhance the flavor. Cinnamon, a pinch of nutmeg, and mahleb.

date filling in a bowl and semolina dough in a separate bowl

Mahleb is a Middle Eastern spice, made from cherry stones that is commonly used in Middle Eastern breads, cakes and biscuits. If you can’t find it, it’s totally fine to omit it. You can add a little extra pinch of cinnamon instead.

Steps in making the maamoul:

First, start with the dough, because it needs a lengthy rest period. The rest is to ensure the semolina absorbs the ghee, so it softens and isn’t too gritty. You need at least two hours of rest, and you can do this overnight and leave the semolina mixture on the counter covered in plastic wrap while it rests.

The dough is as simple as working together the semolina, the sugar and yeast, and mahleb if using. Work the ghee in once the dry ingredients have mixed. Rub it in with your fingertips, and progress to rubbing the mixture between your two palms, almost like you are trying to generate heat in between your palms. Toss and working the ghee in until the semolina mix is evenly coated. Then comes the rest.

After the rest period, add the rose water and orange blossom water, then give the dough another one hour rest. This is the point at which I’d prepare my filling and set aside.

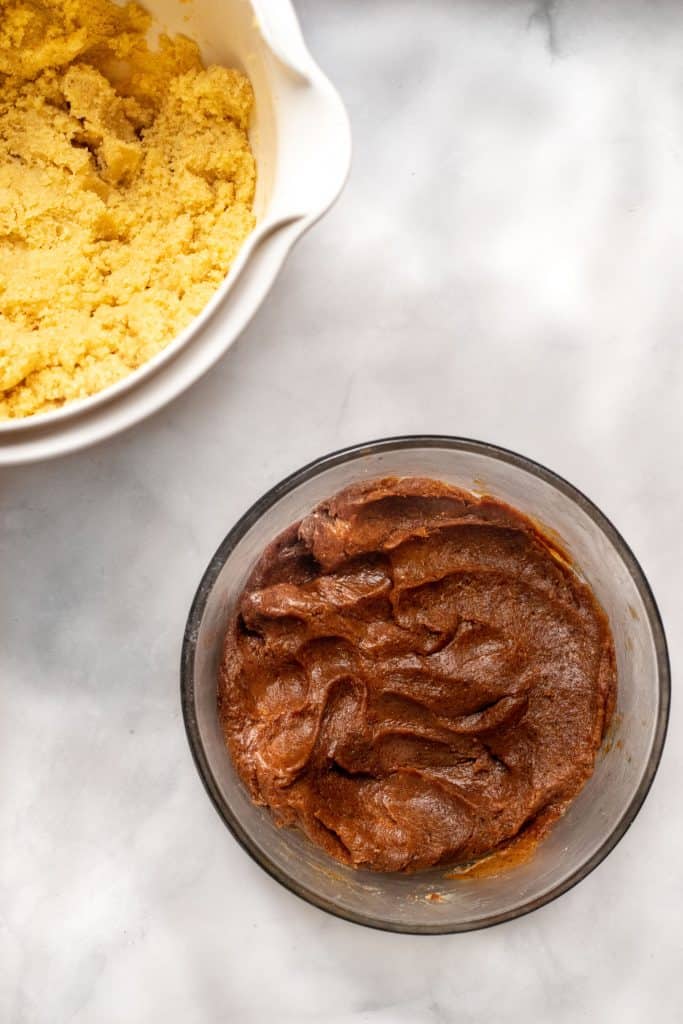
To make the filling, you just need to mix together the date filling, spices, rose water and orange blossom water and a little extra ghee until well combined. I think using a gloved hand is easiest for this!

Assembling the maamoul:

Assemble: the semolina dough needs to be divided into two. I use a 9×13 pyrex pan to bake the maamoul bars in. Roll out the dough halves and the filling to the size of the pan.

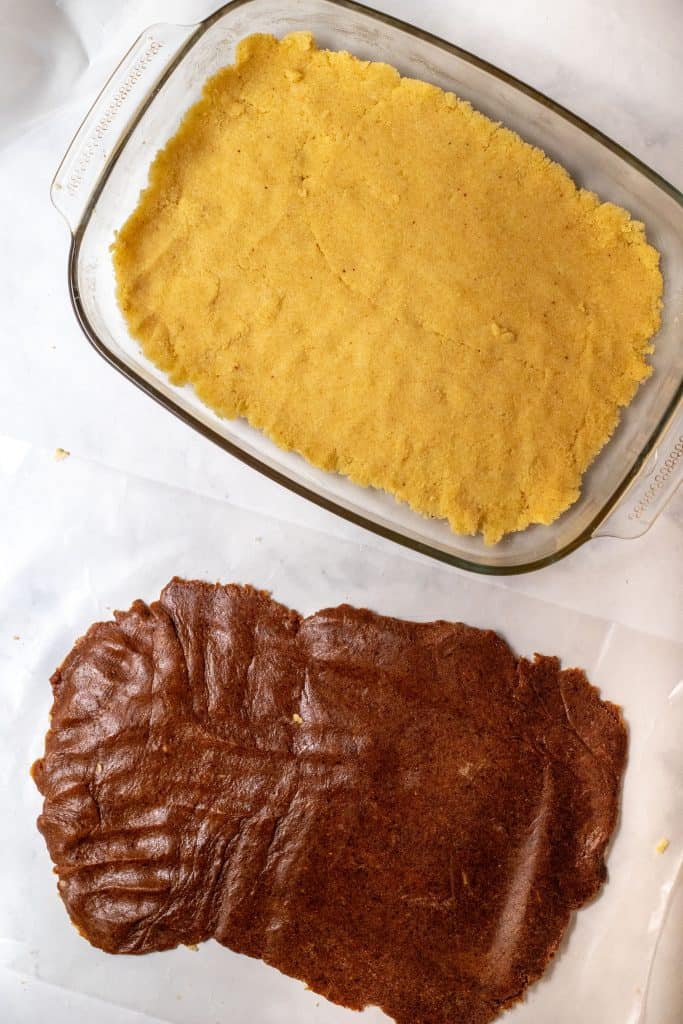
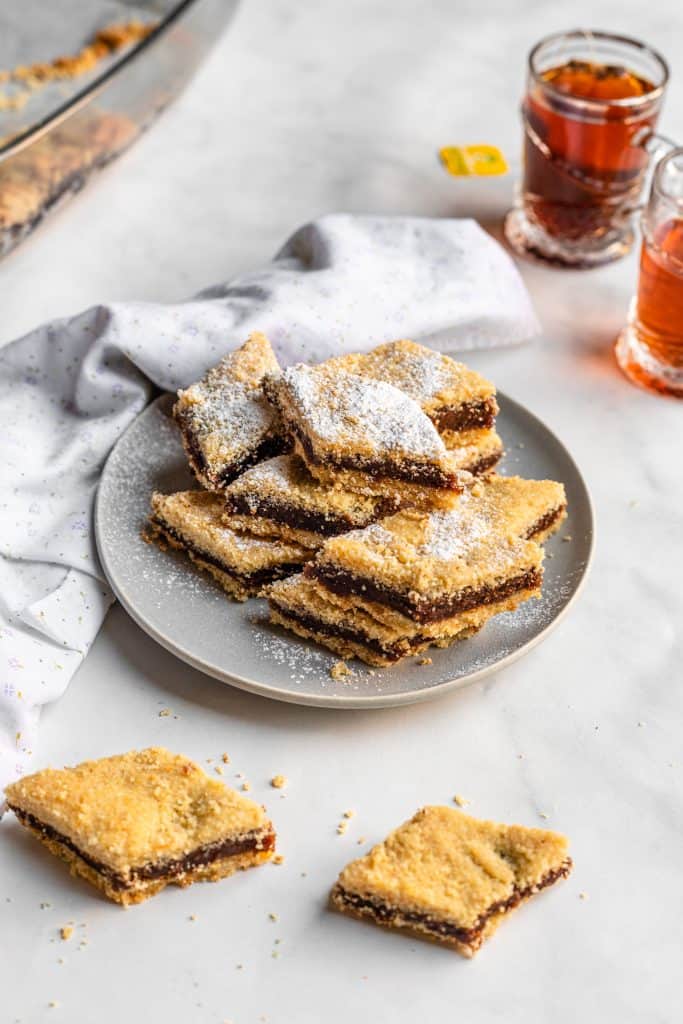
The first layer is semolina dough, topped with the date filling, topped with the second layer of dough. This makes a sandwich cookie.

If the dough is a little too dry and crumbly to roll out, just add cold water a tbsp at a time until it comes together.

baked pan of assembled maamoul

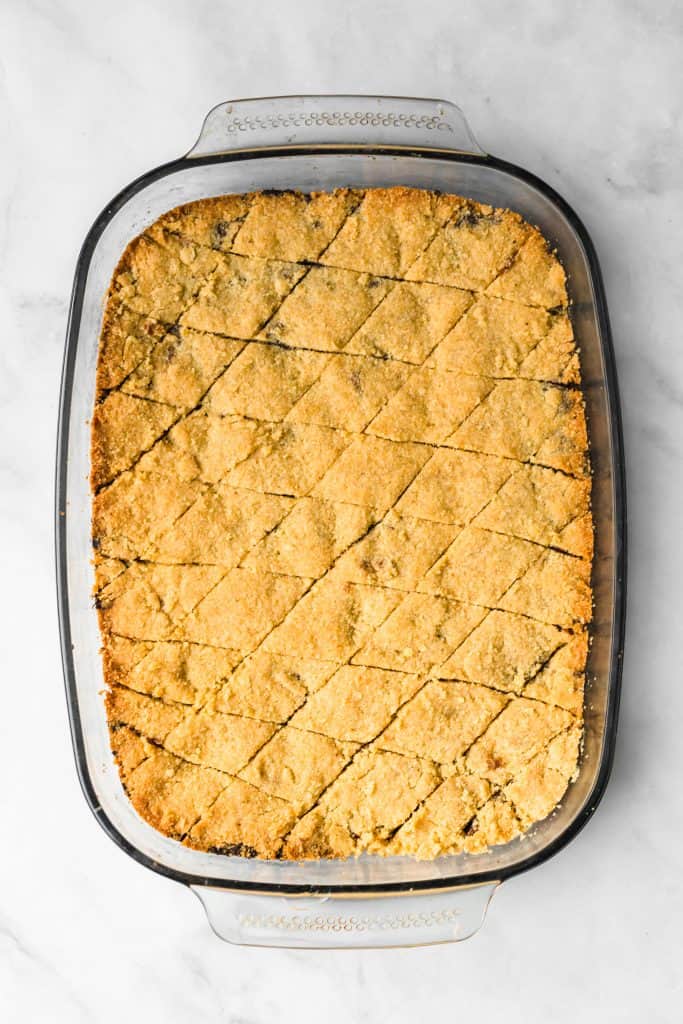
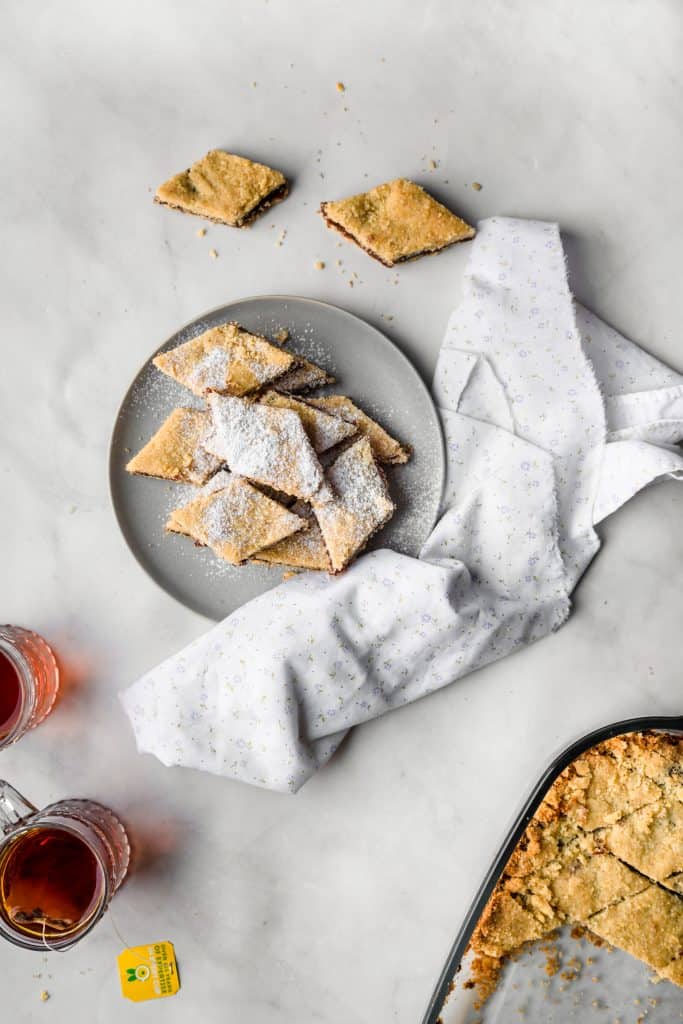
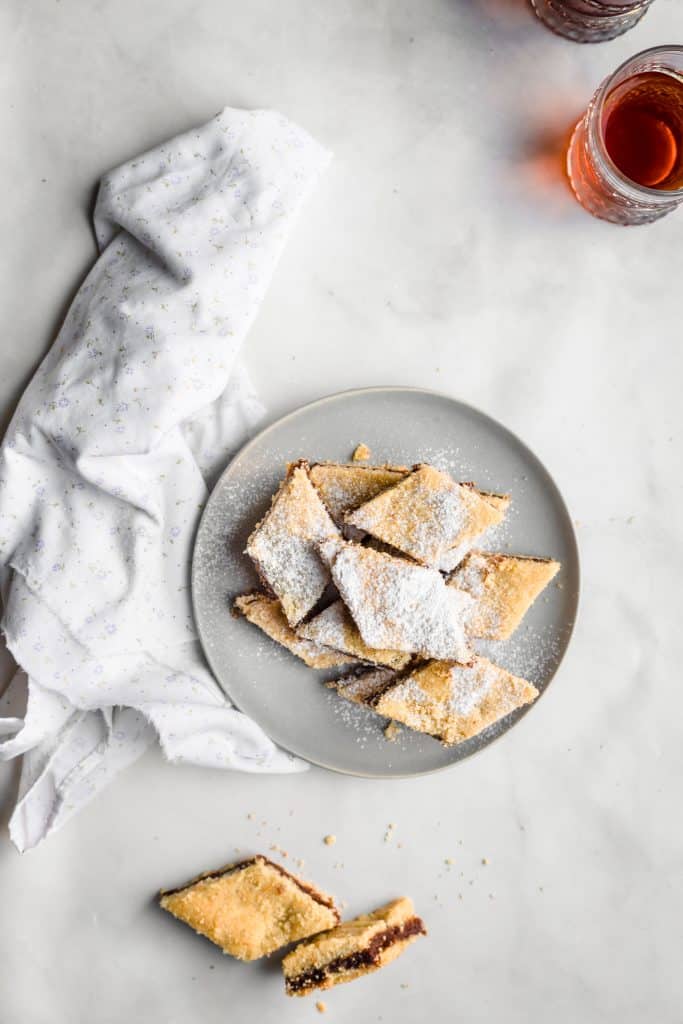
Before baking, cut the maamoul into diagonals, cutting all the way to the bottom of the pan and the bottom layer of dough, to make lifting them out of the pan easier.

Bake until golden brown, then cool completely- or else they’ll crumble! Dust with icing sugar before serving and enjoy!

Steps to remember for maamoul success:

Let the semolina dough absorb the ghee completely before using. Minimum two hours!

If the semolina dough is crumbly after its rest period, just add a little water (1-2 tbsp) and mix until dough holds together.

Don’t overthink it if you can’t find mahleb, just proceed without. It’s just a nice little touch that isn’t essential in the slightest.

This maamoul recipe is just a guideline. Be creative with your fillings! Try different nut mixtures.

Cut the bars all the way through to the bottom before baking, it’ll be hard to cut once they are cooked and crumbly.

maamoul cut into diagnols on a plate with tea in the back

Maamoul Recipe

A far easier way to make maamoul- in convenient bar form! This recipe is absolutely delicious, and will satisfy any maamoul craving you have with the fraction of the time and work!
5 from 3 votes
Print
Rate
Course: Dessert
Cuisine: Middle Eastern
Keyword: date, maamoul
Prep Time: 20 minutes
Cook Time: 35 minutes
Resting Time: 2 hours
Servings: 10 people
Author: Farah Abumaizar

Ingredients

For the dough:

  • 2 cups coarse semolina flour 340g
  • 1 cup fine semolina flour 160g
  • 2 tbsp granulated sugar 30g
  • 1/2 tsp instant dry yeast
  • 1/2 tsp ground mahleb see recipe notes*
  • 1 cup ghee or clarified butter 210g , see recipe notes**
  • 2 tbsp rose water
  • 2 tbsp orange blossom water

For the filling:

  • 600 g date paste (2 packed cups), 21 oz , see recipe notes***
  • 1 tsp rose water
  • 1 tsp orange blossom water
  • 1/2 tsp ground mahleb
  • 1/4 tsp cinnamon powder
  • pinch nutmeg

Instructions

For the dough:

  • In a large bowl mix the coarse semolina and fine semolina, sugar, yeast, and ground mahleb.
  • Add the clarified butter and rub the mixture together with the palm of your hands until mixture is fully combined.
  • Cover in plastic wrap and let it sit on the kitchen counter overnight or at least 2 hours to allow the semolina to absorb the ghee.
  • After resting the dough, add the rose and orange blossom water, mix and cover with plastic wrap for another hour. Meanwhile, make the filling.

For the date filling:

  • Mix together all filling ingredients with your hands, kneading until fully combined, set aside.

To assemble:

  • Once dough and filling are ready, heat the oven to 350 F (180C). Grease a 9×13 pan with a little ghee.
  • If semolina dough is too crumbly add 1-2 tbsp of water and mix to combine. Divide the dough in half, and roll out each half to the size of the 9×13 pan. Transfer one layer of dough to the prepared pan and press into place.
  • Roll out the date filling into the same size, and place it on top of the dough in the pan
  • Roll out the second half of the dough, and place on top of the dates.
  • Using a sharp knife, cut diagonal slices 1.5inches apart, cutting all the way to the bottom of the pan. Cut the opposite side to make diamonds .
  • Bake 30 min or until top is light golden and edges are golden brown. Cool completely before removing from pan. Dust with confectioners sugar (icing sugar) before serving!

Notes

Recipe adapted from Tania Bakes
* Mahleb is a Middle Eastern spice, made from cherry stones that is commonly used in Middle Eastern breads, cakes and biscuits. If you can’t find it, it’s totally fine to omit it. You can add a little pinch of cinnamon instead.
** If you can’t find ghee, you can clarify your own butter, follow this tutorial.
*** If you can’t find ready made date paste (very commonly found in the Middle East) you can make your own by pitting and chopping medjool dates and processing into a paste. 
Tried this recipe?Mention @everylittlecrumb or tag #everylittlecrumb!

Date maamoul by everylittlecrumb on Jumprope.

If you liked this recipe, you might like:

Aish El Saraya

Kunafa

Um Ali

Dessert, Recipes

Previous Post: « Beef and Broccoli Instant Pot Noodles
Next Post: Healthy Mango Sorbet »

Reader Interactions

Comments

  1. Nart at Cooking with Nart says

    July 29, 2020 at 3:30 pm

    5 stars
    I’ve never heard of or seen this type of biscuit before but it sure looks delicious. Will definitely have to try this.

    Reply
    • Farah Abumaizar says

      July 29, 2020 at 4:17 pm

      Truly! You’ll love it!

      Reply
  2. Toni says

    July 29, 2020 at 4:18 pm

    5 stars
    These were so good! Everyone at my house loved it!

    Reply
    • Farah Abumaizar says

      July 29, 2020 at 4:18 pm

      Maamoul is always a crowd pleaser!

      Reply
  3. Kathryn Donangelo says

    July 29, 2020 at 4:39 pm

    5 stars
    Yummm! I’m so glad I gave these bars a try! So good and will make again soon!

    Reply
    • Farah Abumaizar says

      July 30, 2020 at 4:28 pm

      So happy to hear it!!

      Reply

Leave a Reply Cancel reply

Your email address will not be published. Required fields are marked *

Recipe Rating


Primary Sidebar

Get more stuff

Subscribe to our mailing list and get interesting stuff and updates to your email inbox.

Thank you for subscribing.

Something went wrong.

we respect your privacy and take protecting it seriously

FeedFeed

Featured Recipes

Nana tea

Halal Guys Chicken and Rice

Aish El Saraya

Instant Pot Enchilada Soup

Death By Chocolate Zucchini Bread

More

Footer

everylittlecrumb

Farah Abu Maizar | Food Lover
Good morning! If there’s one thing we like doing Good morning! If there’s one thing we like doing, it’s experimenting with breakfast dishes 🍳.These beauties are froached eggs- poached eggs that are lightly fried and seasoned with breadcrumbs. Best of both worlds! Creamy poached eggs, runny yolk but a little crisp on the white part of the eggs. So good! Inspired by @sveverything , we used our sous vide machine for this but you can do this with regular poached eggs. Recipe can be found linked in bio or at https://everylittlecrumb.com/froached-eggs/ . Team runny yolk anyone? 
.
.
.
.
.
#eggs #poachedeggs #poachedegg #eggsontoast #beautifulcuisines #tasty #delish #foodphotography #foodstyling #foodstylingandphotography #cheeseontoast #foodblogger #foodie #breakfast #brunch #instayum #yum #brunch #tastingtable #f52community #food52 #yolkporn #friday
How I spend a lot of my weekends😂. Nothing like How I spend a lot of my weekends😂. Nothing like a big bowl of cookie dough to say weekend mode on! Are you like me and end up eating more dough than actual cookies? My foolproof recipe I use and post time and time again 👇🏼(and often double the batch so I can store some in the freezer!)

Ingredients:
1 stick butter, softened 113 g
3/4 cup tightly packed brown sugar (I like using 1/2 cup light brown and 1/4 cup dark brown, but you can use either or) 150 g total
1/4 cup white sugar 50 g
1 egg, room temperature
1 tsp vanilla extract
1 3/4 cup all purpose flour 220 g
3/4 tsp baking soda
1/4 tsp salt
1 cup semi-sweet chocolate chips or chunks
flaky salt for topping, optional

Instructions:
-In the bowl of a stand mixer fitted with a paddle attachment, or a handheld mixer, cream together butter, brown sugar, and white sugar for 5 minutes on medium speed until light and fluffy.
-Once five minutes is over, add in egg and vanilla and mix until combined.
In a separate bowl, mix flour, baking soda, and salt, and mix until combined. Add these dry ingredients to the butter mixture on low speed, and mix until just combined.
-Using a wooden spoon or spatula, mix in chocolate chips or chunks until just combined. Place bowl of dough in fridge for at least 30 minutes to chill.
-While dough is chilling, heat oven to 180 C (350F). Portion dough out into heaped 1 tbsp-2 tbsp sized dough pieces on parchment paper lined baking sheets. 
-Bake for 11-12 minutes or until golden brown on the edges but still soft in the center. Cool until cookies firm up, then enjoy, still warm.
.
.
.
.
.

#chocolatecake #cookiemonster #cakestagram #cakephotos #layercake #chocolate #weekendbaking #foodblog #instayum #yummy #bakery #foodporn #foodtographyschool #foodphotography #chocolatechips #delish #foodfluffer #damnthatsdelish #cookiedough #chocatechipcookies #bakes #bakestagram #doughbowl #chocolatechips #hersheys
Bbq salmon bowls with mango avocado salsa- unbelie Bbq salmon bowls with mango avocado salsa- unbelievable! And start to finish, you can be eating these in 15-20 minutes. Save this recipe for your next meal, you don’t want to miss out!

I’ve partnered with @kilosamak to produce a few recipes with their quality seafood- I’ve tried several of their items and genuinely loved them all! They deliver seafood straight to your door for you to enjoy and cook at home. Takes all the guesswork out of trying to choose and clean fish yourself, perfect solution for someone like me who loves seafood but isn’t so great at prepping it! Check out their Instagram page on how to order, or head to the link in my bio.

This salmon has a smoky slightly sweet rub, is baked in the oven for ultimate ease, and gets piled on to rice and topped with an easy, addictive, zingy mango and avocado salsa. Adapted from @pinchofyum , I’ll make this again and again!

Ingredients:
For the salmon:
2 fillets, about 250 g each 
Spice Rub:
2 tbsp brown sugar
1.5 tsp paprika 
1 tsp garlic powder
1 tsp onion powder, optional 
1/2 tsp chili powder
1/2 tsp salt 
2 tbsp olive oil 

Mango avocado salsa:
1 diced mangos 
1 diced avocado
1/4 cup finely diced coriander 
1/4 cup finely diced red onion 
1 inch spicy green chili pepper, finely chopped
1 tsp honey
Juice and zest of one lime
Salt to taste

Method:
- Make the salsa by mixing together all the salsa ingredients and placing bowl in fridge while you make the salmon.
- Heat oven to 240C, and line a baking sheet with parchment paper. 
-Mix together all the ingredients for the salmon rub, and rub thoroughly all over the salmon, both sides.
- Bake for 10-12 minutes until salmon is opaque and cooked all the way through.
-Assemble bowls with rice, flaked pieces of salmon,and plenty of mango avocado salsa. Enjoy 😍

Catch the steps in my story!
Have you tried this pasta yet? Save this for your Have you tried this pasta yet? Save this for your next weeknight meal! Saucy macarona iltaybeen, can’t get much more comforting.  Adapted from @jedir3waish , makes for an easy delicious main that’ll make your family including kids very happy! Can find a step by step linked bio, or at https://everylittlecrumb.com/macarona/ , or in my story!

INGREDIENTS:
 
2 tbsp olive oil, divided
big pinch of salt
3 heaped tbsp tomato paste, divided 2 oz or 70 g
1 pack elbow macaroni 14 oz or 400 g
1 onion, very finely diced
1 zucchini, finely diced
1 carrot, finely diced
4-5 garlic cloves, minced
250 g ground beef
1 tsp seven spices
1 tsp turmeric
1/2 tsp paprika powder
1/4 tsp basil
1/4 tsp cinnamon powder
1/4 tsp garlic powder
1/2 tsp black pepper
1 tsp salt
1 can crushed tomatoes 14.5oz (400g)

NSTRUCTIONS
 
Bring a large pot of water to boil, add 1 tbsp olive oil and the salt, one tbsp of tomato paste, then the pack of pasta. Cook until al dente, then drain the pasta, reserving the pasta water. Set cooked pasta aside.

In a large skillet, heat the remaining tbsp of olive oil. Once hot, add the diced onion, and cook for 4-5 minutes until softened. Add the diced zucchini and carrots, and garlic and cook for a further 4-5 minutes until softened slightly.

Add the ground beef, and cook, smushing with a wooden spoon to break up the meat. Keep cooking until the beef is browned and cooked through, then optionally, drain the fat.
Add in the salt, pepper, and all the spices. Cook for another minute or so. Add the remaining 2 tbsp of tomato paste, and stir.

Add the can of crushed tomatoes and stir to combine. Bring to a simmer, then add a big ladleful of the reserved pasta water and simmer for 2-3 minutes on low heat.

Add the pasta to the sauce (I don't always add all the pasta, maybe 3/4 of the cooked amount until the finished dish is as saucy as I like). Stir to coat, cook for another minute or so until the pasta is warmed through, then enjoy!
This gorgeous tiramisu was so kindly sent to me by This gorgeous tiramisu was so kindly sent to me by @cadysweets.sa on my birthday, and we enjoyed every light fluffy bite of it. Their old account got hacked so follow along and support their new account ! They have a bunch of cakes and sweets for every occasion, so make someone or yourself happy and order one for a treat🤩! Send this to the tiramisu lover in your life 🍰.
.
.
.
.
.

#chocolatecake #magnoliabakery #cakestagram #cakephotos #layercake #chocolate #ganache #foodblog #instayum #yummy #bakery #foodporn #foodtographyschool #foodphotography #slice #delish #foodfluffer #damnthatsdelish #tiramisu #birthdaytreat #dessertbae #dessertoftheday #scoop #foodstyling #foodstylingandphotography
Easiest at home crusty bread with a great open cru Easiest at home crusty bread with a great open crumb texture. It’s the no knead bread from @breadin5 and has yet to fail me. Check my story for the step by step, and swipe for a video reveal.

Ingredients for two small loaves:
1.5 cups lukewarm water 
1/2 tbsp any type of yeast
1/2 tbsp salt
3 1/4 cup plain flour (450g)

Method:
In a large bowl, stir together the water with the yeast and salt. Try to dissolve but it’s fine if you have clumps.
2. Add flour all at once and stir, just until no flour patches remain.
3. Cover loosely with a kitchen cloth and leave it to rest for 2 hours in a warm place until risen and bubbly.
After this rest you can:
- Use dough immediately if impatient, but it’s easier to work with if cold, so maybe pop in fridge briefly
- Or, their recommended method and the one I do, leave in the fridge loosely covered for 12 hours or overnight. 
Refrigerated dough lasts up to two weeks, and flavor depends over time!
4. The next day, the dough might look deflated. That’s fine! When ready to bake, divide dough in half (I got two 400g dough balls)- it might be easier to handle if you sprinkle the dough lightly with flour, and take the half you are going to bake out of the fridge. Let it rest on a parchment paper lined baking sheet 40-90 minutes. The longer the more interior bubbles you should have. Preheat oven to 235C (450F), and after rest, make a few deep slashes in the dough with a sharp knife.
5. Place in the middle rack of the oven, and on the bottom rack place a roasting pan that had about a cup of hot water in it. This will create steam which gives a crustier crust!
6. Bake for 30-35 minutes or until deep golden brown.
7. Let it cool completely before enjoying!
.
.

.
.
.

#damnthatsdelish #foodfluffer #thebakefeed #feedfeed #tastingtable #forthemaking #BHGfood #foodblogfeed #bakedfromscratch #bakinglove #f52grams #foodbloggerpro #bakersofinstagram #TOHfoodie #foodphotography #canonphotos #bread #instayummy #kitchn #huffposttaste #food #dough #foodie #nokneadbread #homemadebread #doughter
Good morning! With dine in still closed in Saudi, Good morning! With dine in still closed in Saudi, Friday pancakes are fast becoming a tradition. And honestly, I don’t think I’ve had better pancakes at any restaurant recently! The easiest, fluffiest diner style pancakes are a huge hit in our family, find the recipe below adapted from @allrecipes . I like to barely warm the oven (110C or so) and keep the finished pancakes in a pan in the oven until I’m done with all the batter so they stay warm and perfect 👌🏼.

Ingredients
3/4 cup milk 170g
1 tbsp white vinegar
1 cup flour 125g
2 tbsp sugar 25g
1 tsp baking powder
1/2 tsp baking soda
1/4 tsp salt
1 egg room temperature
1/2 tsp vanilla
2 tbsp butter, melted 28g

Instructions:
-In a large bowl, combine the milk and vinegar, and let aside to stand for 5 minutes until curdled. Whisk to combine.
-In a separate large bowl, mix together the flour, sugar, baking powder, baking soda and salt.
-Add an egg, the vanilla and the melted butter to the buttermilk and whisk to combine.
-Add the dry ingredients all at once to the wet, and whisk until flour patches disappear. A few lumps are fine, but don't over mix.
-Let the batter rest for 5-10 minutes while you heat a pan on the stove.
lightly grease the pan with nonstick spray or butter, and pour about 1/4 cup of batter on the pan. Cook for 2-3 minutes on each side or until golden brown. (Flip the first time once you see bubbles form and the edges of the pancake dry up).
-Enjoy with toppings of your choice!
.
.
.
.
.
#pancakes #pancakerecipe #blueberrypancakes #maplesyrup #breakfast #morningslikethese #fridaymorning #flatlay #foodfluffer #breakfastrecipes #breakfastfood #breakfastofchampions #pancakelover #food #foodtography #foodtographyschool #foodphotography #delish #foodphotos #weekendbreakfast #eatingathome #recipeoftheday #foodporn #foodflatlay #blueberries #trayoftheday
One of my photos from my shoot @tackle.baks . How One of my photos from my shoot @tackle.baks . How insane does this tom yum soup look? For those who haven’t tried this casual seafood spot yet, you really should! The food is great and priced very reasonably, and they have some menu items I’m obsessed with like their crispy fish burger, the salmon poke salad and the creamy truffle shrimp👌🏼. They currently have a delivery offer going for only 5SAR on HungerStation, so no time like the present! Have I tempted you with this photo of the tom yum soup? I’m hungry just writing this caption🤤.
.
.
.
.
.
#soup #tomyum #tomyumsoup #food #foodphotography #canonphotography #canon #seafood #seafoodlover #shrimp #delish #beautifulcuisines #foodtographyschool #foodtography #foodblogger #instayum #lonelyplanetfood #dametravelerfoodie #soupseason #restaurantphotography #khobar #tastemade #tastingtable #foodfluffer
Load More... Follow on Instagram

Copyright © 2019 on the Seasoned Pro Theme