
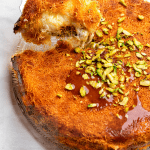
The perfect kunafa. Crispy shredded pastry, ooey and gooey stretchy cheese, and a rose water scented creamy semolina pudding. And this is all a lot more approachable than you might think!
I never, ever appreciated the beauty of Kunafa until I grew older. I clearly remember as a kid and teenager declining the obligatory family gathering kunafa without the faintest idea of what I was missing.
So much lingering regret about how much kunafa I missed out on eating. I’m spending my life making up for lost time. The best kunafa is in Jordan (yes I’m going there) with the exception of kunafa bilkaak from Lebanon- that’s kunafa that’s placed in toasted sesame kaak bread and soaked with syrup.

I reside in Bahrain, so both are out of my reach and I knew I needed to find the perfect recipe for whenever my craving hits.
So what is Kunafa?
It is a glorious confection of soft melty cheese (or cream), sandwiched with shredded phyllo dough, and soaked in a rose and orange water scented syrup.
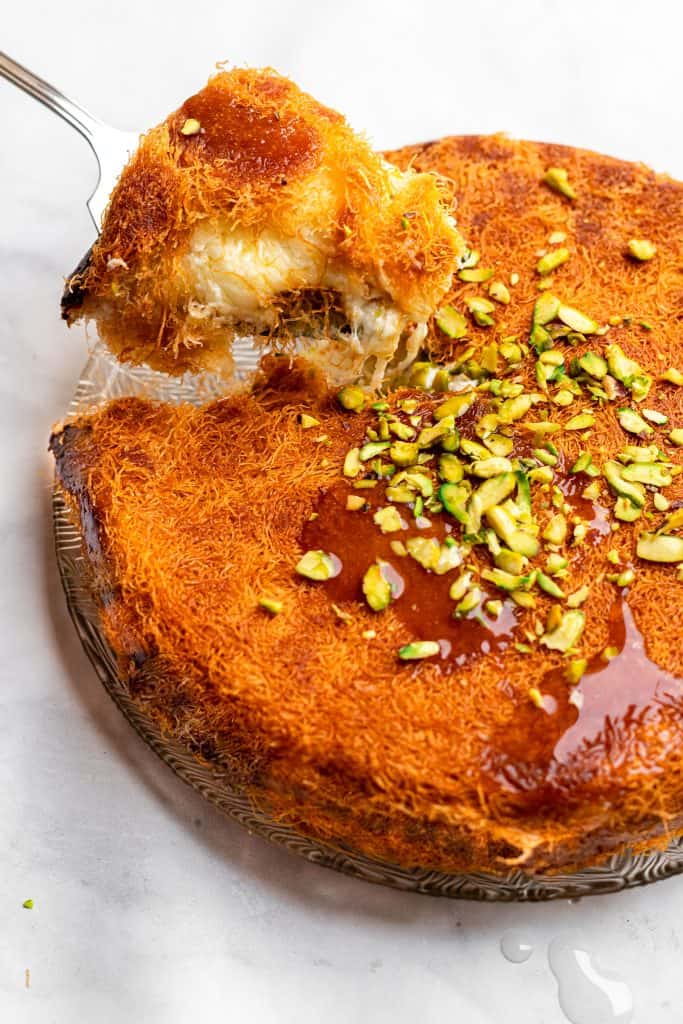
It’s baked until golden brown and crispy. EAT IT WARM, when the cheese stretches out in soft strands to contrast with the crunchy bottom and upper layer.
Traditionally, it’s made with Akkawi or Nabulsi cheese. With these cheeses, you need to desalt them by soaking them in water. Those can be hard to source, and they need a lot of prep work before they can use them. They are really, really salty off the bat.
However, this recipe adapted from the amazing Cleobuttera uses none other than very accessible mozzarella cheese!
I love this recipe. It uses both mozzarella cheese and a rose water scented semolina pudding, ensuring the filling stays soft and gooey and the cheese doesn’t harden once out of the oven.
What are the different types of kunafa?
The first thing you need to consider is the dough.
There are two main types, naameh aw khishna (fine kunafa or coarse kunafa)
Kunafa Naameh: is made with a semolina based dough that is then ground into a breadcrumb type texture. It’s usually more work because you need to make this dough from scratch. It’s usually one layer- one layer of cheese topped with one layer of the semolina dough.
Kunafa khishna (coarse), what we are making today, is usually made with a special shredded phyllo dough, which is usually found in the freezer section. This can be one layered (cheese topped with the dough) or two layered like this recipe, where the cheese is sandwiched between two dough layers.
If you can’t find it, you can try this recipe I have for kunafa kazaba (translates to lying kunafa lol) which uses breadcrumbs for the crust! It’s delicious too.
The second consideration is the filling: cheese or cream?
What makes this kunafa so good?
It’s the perfect marriage of kunafa bil-ishta (kunafa stuffed with cream) and kunafa biljibne (cheese kunafa). You get the best of both worlds- the stretchy oozing cheese, and the smooth and rich cream.
The cream keeps the knafeh moist even when it cools, as opposed to recipes using only cheese which hardens quickly at room temperature.
The recipe below seems like a lot of steps, but you get through them quickly!
Plus, you get the ultimate reward at the end. It is absolutely delicious. Just make it. Enjoy it with friends, and a warm cup of red tea!
If you’ve never tried this completely classic and delicious Middle Eastern desset before, trust me, now is the time.
Steps to make kunafa:
Make the sugar syrup:
We use sugar syrup in a lot of Middle Eastern desserts. It’s a fragrant syrup enhanced with rose water and orange blossom water
It needs just a few basic ingredients: sugar, water, lemon juice, rose water, and orange blossom water.
The ratio of sugar and water is nearly double the sugar to the amount of water.
What is rose water and orange blossom water?
Simply put, the water made from steeping rose petals and orange blossom petals. They both have a very distinctive flavor that’s floral and beautifully scented. They are very commonly used in Middle Eastern cuisine and we often use orange blossom water to help with stomach ailments!
To make the sugar syrup, we combine sugar, water and lemon juice in a medium saucepan over medium high heat. Stir a little initially to dissolve the sugar, then back off so the sugar doesn’t crystallize.
Let the mixture come to a boil, then reduce heat and simmer for 10-15 minutes. It will still be a little liquidy, sort of the texture of pancake syrup- not as thick as honey. Set aside to cool slightly while you prepare the rest of the kunafa. Once off the heat, add in the rose water and orange blossom water.
This recipe makes a pretty good amount, but leftover syrup will keep well in the fridge for 7-10 days, and I always serve kunafa with extra syrup. I always ladle on more for myself before eating!
Make the semolina pudding:
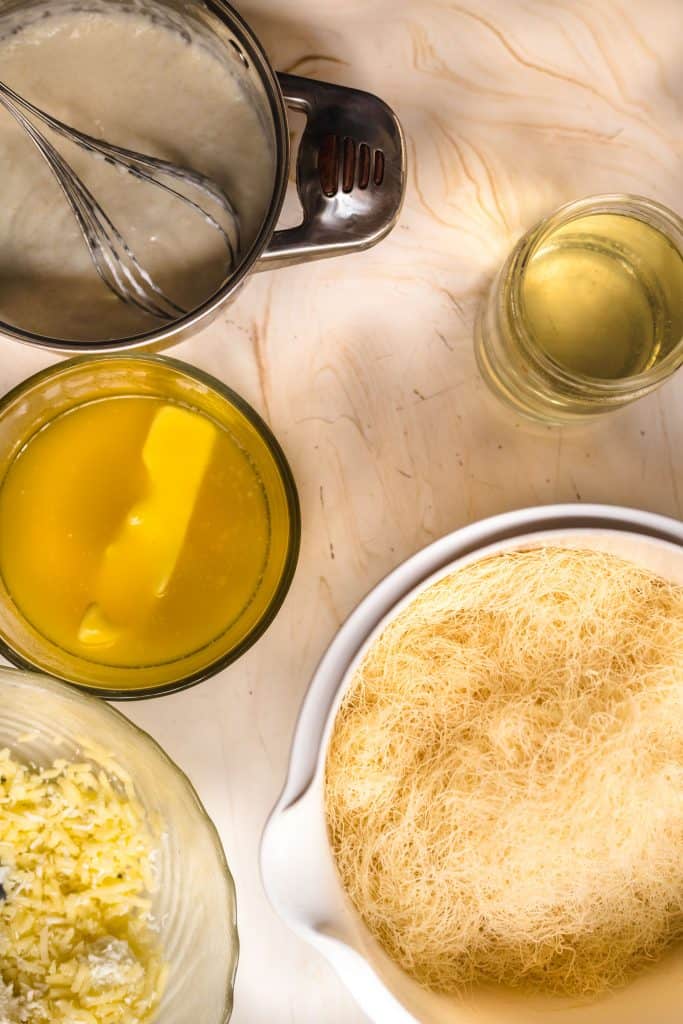
The semolina pudding is made with a mixture of milk and heavy cream for richness, semolina, sugar, a little cornstarch to thicken, and rose water that gets added off the heat.
You add these to a pan on medium high heat, and be sure to keep whisking so the pudding doesn’t clump up. Once it boils, reduce the heat and keep whisking around 5 minutes until pudding thickens. Let it cool slightly at which point it’ll thicken some more.
Make the cheese filling:
The easiest cheese filling you’ll ever make for kunafa! Simply mix together mozzarella cheese with a little sugar and rose water for a touch of sweetness and fragrance. That’s it!
Any mozzarella works- you can get it grated fresh at the deli counter, or in a packaged bag. I’ve done both and they both turned out equally well.
Prepare the kunafa dough:
Make sure the dough is thawed enough to be able to handle, but it really shouldn’t take that long to thaw on the countertop.
Shred the dough evenly into 1 inch long pieces. I use a combination of my hands and kitchen scissors, figure out what works with you!
Pour the melted ghee or butter on top of the dough and work this through evenly. This is much easier using your fingers. You want to make sure the dough is evenly coated so that the kunafa takes on an even golden brown color and crisps up beautifully in the oven.
Assembling the kunafa:
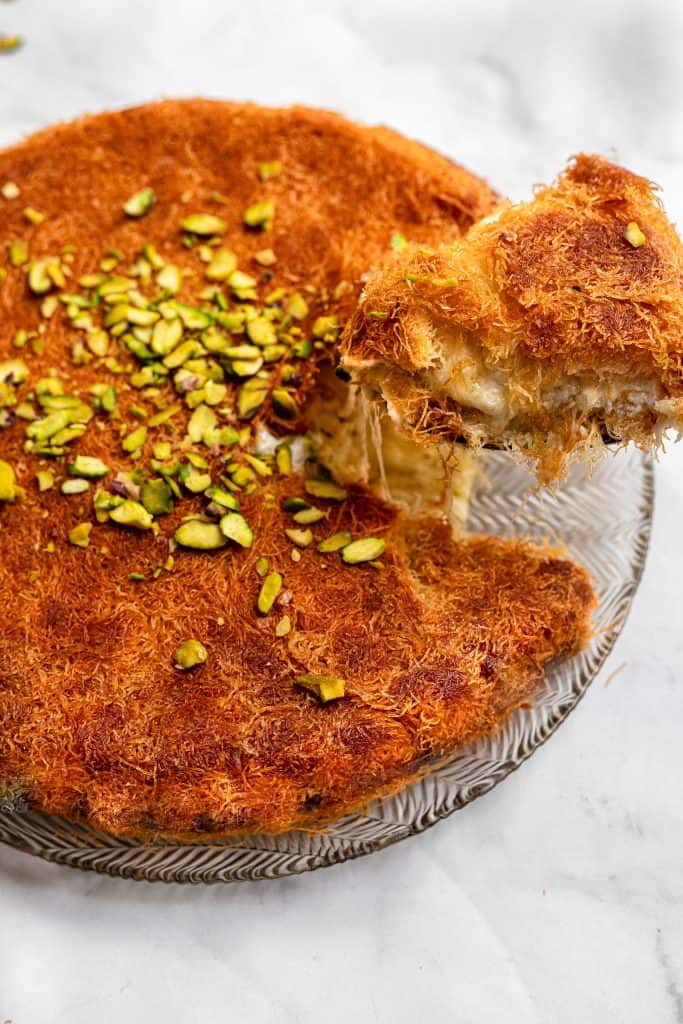
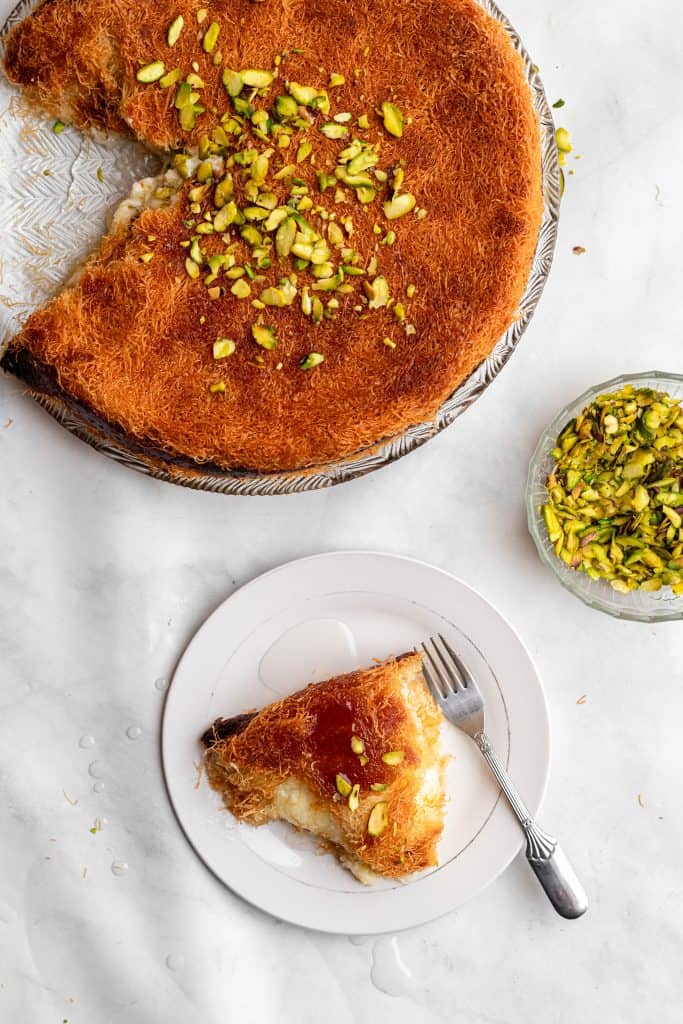
This makes one large kunafa (12 inches, a deep pan) or two smaller shallower kunafas, 9 inches each. The kunafa photographed on the grey linen is the 9 inch one, and the one on the white background is the larger one.
If you split the mixture into two kunafas, you can freeze one before baking to bake at a later date. Let me tell you, that is one pleasant thing to find in your freezer! Just thaw it in the fridge overnight and bake as directed.
To assemble, you’ll layer 2/3 of the shredded dough, top with 1/2 the semolina pudding, all the cheese, the remaining 1/2 of the pudding, then the remaining 1/3 of the dough.

Bake at 390 F (200C) until golden brown and crispy, around 40-45 minutes. As soon as it comes out of the oven, pour a good 1/2- 3/4 of the sugar syrup you prepared immediately onto the hot kunafa to soak in. Let it stand just a few minutes, then turn onto a serving plate and serve hot with extra syrup on the side.
Recipe below adapted from Cleobuttera.
Storing leftover kunafa:
Leftovers will last 2-3 days in the fridge, or 2-3 months in the freezer.
Either way, you can reheat in a hot oven or in the microwave.
You can also store unbaked kunafa in the freezer for 2-3 months, thaw overnight or for several hours then bake as directed in the recipe

Kunafa كنافة
Ingredients
FOR THE SUGAR SYRUP:
- 2 1/2 cups granulated sugar 500 g
- 1 1/4 cup water 300 ml
- squeeze fresh lemon juice
- 1 tablespoon rosewater
- 1 tablespoon orange blossom water
FOR THE SEMOLINA PUDDING:
- 1 1/2 cups milk 350 ml
- 3/4 cup heavy whipping cream 180 ml
- 3 tablespoon sugar
- 3 tablespoon semolina
- 1 teaspoon cornstarch
- 1 teaspoon water
- 1 teaspoon rosewater
FOR THE CHEESE FILLING:
- 400 grams mozzarella cheese, shredded
- 2 tablespoon granulated sugar
- 2 teaspoon rosewater
FOR THE KUNAFA CRUST:
- 500 g kunafa or kataifi/kadaifi pastry frozen (thaw just slightly before using)
- 1 cup ghee, melted – I used butter flavored 226 grams
Instructions
TO MAKE THE SUGAR SYRUP – can be made up to 1 week in advance
- In a medium saucepan, combine the sugar, water and lemon juice. Set on a stovetop over medium high heat. Stir just to combine then let it be. If sugar isn’t dissolving you can stir a couple times but as soon as it starts to boil stop stirring.
- Bring to a boil, then reduce heat to low and let it simmer for 10 minutes. Remove from stove immediately once 10 minutes is over. It should have thickened to the consistency of maple syrup.
- Once off the heat, stir in rosewater an orange blossom water, and transfer to a container to cool.
TO MAKE THE SEMOLINA PUDDING:
- In a small saucepan, combine the milk, heavy cream, sugar and semolina. Dissolve the cornstarch in the 1 teaspoon of water and add to the mixture.
- Place over medium-high heat and cook, whisking constantly. Bring to a boil, and continue cooking for about 3 more minutes or until mixture thickens into a pudding like consistency. Remove from heat and stir in the rosewater. Allow to cool slightly while you prepare the kunafa.
TO MAKE THE CHEESE FILLING:
- Stir together the mozzarella cheese, rosewater, and sugar.
TO ASSEMBLE AND BAKE:
- Preheat oven to 200 C/390 F, and grease either two 9 inch pans or a 12 inch pan with ghee or butter. I baked one 9 inch pan and assembled the second and froze it before baking. Yay! Future kunafa party.
- In a large bowl, shred the konafa dough into 1inch/2.5 cm long pieces. I like doing this with kitchen scissors, and Cleobuttera recommends the kunafa pastry be semi frozen while doing this so If it has thawed completely stick it back in the freezer for an hour or so.
- Pour the melted ghee over the shredded pastry, and toss with your hands until all strands are evenly coated and glistening with fat. Stir well!
- Transfer 2/3 of the pastry into the bottom of the prepared pan, and firmly press it down around the bottom and sides. Pack it in tightly, try using the bottom of a measuring cup to get it even and smoothed out.
- Pour in half of the cooled, semolina pudding and spread into a thin layer. Sprinkle with the cheese mixture and pat down into an even layer. Cover with the remaining semolina pudding.
- Scatter on the remaining third of kunafa dough evenly over the semolina pudding, pressing lightly to stick it down.
- Bake for 40-45 minutes or until a deep golden brown. When you think it’s done, lift the sides away from the pan with a knife and make sure the sides and bottom are golden brown too.
- Remove from oven and immediately pour on 3/4 of the syrup, going in a circular motion to evenly disperse it. Serve the kunafa with the extra syrup for those who want to top up their slice (always me)
- Garnish with pistachios and serve warm! You can store leftover kunafa in the fridge and reheat in the oven or microwave but there’s nothing like that first slice out of a piping hot fresh kunafa.
Notes
Nutrition
If you liked this recipe, you might like:
Did you make this? Tag @everylittlecrumb or hashtag #everylittlecrumb and I’ll share your images! Don’t forget to pin for later!
Stephanie says
This recipe is INSANE!!! Soooo delicious!! Best Kunafa I’ve had!! Was wondering if I could do it on the stove? After 40 mins it wasn’t ready, so i had to broil both sides!
Farah Abumaizar says
Broiling is a great idea! And I’ve never tried it, but I know some people do cook kunafa on the stove or even a bbq grill- the key is you’d need to keep moving it so it cooks evenly so I almost feel its easier to just do it in the oven, but if you try please do let me know!
Marie-Rose says
I love this dessert, I have made and put it in the freezer. I want to bake it tomorrow. Do I need to thaw the Kunafa?
Thank you
Farah Abumaizar says
Hi Marie! I hope it turns out fabulously! I would thaw it on the counter while you heat the oven – the vermicelli strands will thaw quickly and even that 20 min time on the counter will get it to bake evenly. Please let me know how it turns out!
Elizabeth Fidalgo says
Ok I tried it in the skillet but it didn’t come out as crispy as I wanted it, I wish I could post you a picture. The flavor was great, but the texture wasn’t. I have one more batch of noodles left so I will try in in the oven this weekend. I really love this dessert and want to nail it. Thank you for your recipe, the waters really do a great job!
Blessings!
Farah Abumaizar says
Try the oven!! You can bake it as long as it needs till it gets crispy and golden brown, just make sure it’s preheated well. I love this dessert too!! And it’s so easy to nail def try the cooking method outlined in the recipe 😘Thanks for getting back to me!
Elizabeth Fidalgo says
I have seen recipes where they put it in a skillet and then flip it instead of baking it. Which way would you recommend that works better or wait, how is it done in the traditional way, baked or in a skillet?
I have all the ingredients and going to make it tonight but not sure if baked or skillet.
Yours looks delish!!!
Farah Abumaizar says
Ive seen that too, but have never tried their method! Can definitely attest to the baking method especially if you coat the kunafa strands really well with melted butter it turns out crispy and delicious. Do try it and let me know! ❤️
Carrie Robinson says
I have never heard of this before until now, but this sounds absolutely amazing! 🙂
Farah Abumaizar says
It really is 🥰
Adrianne says
This is so different, I love it!! It its completely new to me and I enjoy seeing the variety. What a great recipe, cheers!
Farah Abumaizar says
Thanks Adrianne! It’s a good one !
Kelly Anthony says
I missed out on lots of yummy food as a kid too because I was afraid to try something that looked different. We encourage our girls to at least take a bite because you never know if you will like it until you try it. Thanks for sharing one of your favorite recipes!
Farah Abumaizar says
That’s the best way to do it Kelly! Great idea
Danielle Wolter says
This sounds delicious! I’ve never had anything like this before and am very excited to try it!
Farah Abumaizar says
It’s so good! Completely traditional in Middle Eastern cuisine
Kacey Perez says
I love learning about new recipes specific to different regions and cultures! This sounds amazing!
Farah Abumaizar says
It’s really good! One of my favorites!
Zaakirah says
Amazing recipe. Tasted fantastic. But the kunafa didn’t crisp up and turn golden brown. Any tips?
Farah Abumaizar says
Glad to hear it! Did you make sure the kunafa pastry was really evenly coated with the ghee/butter? The oven should be very hot too, 200 C before you put it in, and finally you can bake it for longer. Up to 60 min even to get the crispiness you desire! Glad to hear your feedback XX
Dilfiza says
Is Semolina necessary to be added. My kunafa dough became very crispy and hard. So it doesnt stay on the plate when i serve, its starts falling all over the place. what could be the reason. I have never used semolina in my mix.
I also used mozarella cheese, but it gave a slight pungent taste. Slightly bitter i would say. What could go wrong
Farah Abumaizar says
So the semolina keeps the inside of the kunafa moist and creamy even when the cheese cools, you could try mixing the mozzarella with some ricotta cheese and it may have the same effect! There are more classic kunafas with nabulsi or akkawi cheese this is kind of a modern take! As for the bitter taste not sure at all why that is! I’ve used packaged shredded mozzarella with great result, have you been adding sugar and rose water to the cheese? The kunafa dough make sure to toss really thoroughly with the ghee so that it’s completely coated and shiny so that it doesn’t dry out! Please let me know if this helps xx
Dilfiza says
Thank you for the lovely help. I’m trying to make it again tonight with semolina. Only once I added sugar to the cheese. But not rose water.
Farah Abumaizar says
I like putting a little rose water too to make the cheese really fragrant (optional though!) Please let me know if it works out better tonight fingers crossed for you! Don’t forget to shred the kunafa dough finely 😚
Y says
Came out PERFECT!
Farah Abumaizar says
So so happy to hear it!
Mansoor says
Amazing details, love the point about making them smaller, I have made kunafa for a year so I can agree
Farah Abumaizar says
Glad to hear that Mansoor! Nothing like a good kunafa 😍😍😍
Basma says
Looks amazing! I cannot wait to try it, but before I attempt to make it, which heavy whipping cream do you use? xx
Farah Abumaizar says
I use the small blue al marai whipping cream containers! You want the cream that if you whipped it with a mixer it would turn into soft peaks (which you actually won’t do in this recipe but thats the type) Let me know if you try this!!
Tasbih @Cleobuttera says
Farah your Kunafa is making me want to eat the screen right now! Looks delicious! I’m so happy you loved this recipe enough to share it on your blog. That means EVERYTHING! Thank you so much for your kind words…I’m no genius though; just a food lover who makes a ton of mistakes in the kitchen and eventually learns from them 😄
Farah says
We are happy to follow along on your journey! This kunafa was a hit with everyone I ever served it to which has been plenty of people.. you have some very hardcore fans in Bahrain now ❤️