• Skip to primary navigation
  • Skip to main content
  • Skip to primary sidebar
  • Skip to footer

 logo

  • Recipes
    • Breakfast
    • Sides
    • Soup
    • Main Meals
    • Healthy
    • Dessert
    • Drinks
  • Eating Out
  • About Me
    • Privacy Policy
  • Resources
    • Must Have Kitchen Tools
  • Nav Social Menu

    • Email
    • Facebook
    • Instagram
    • Pinterest

Heaven Bars

Jan 18, 2021 · Leave a Comment

Jump to Recipe
stack of heaven bars on a silver plate with more in the background

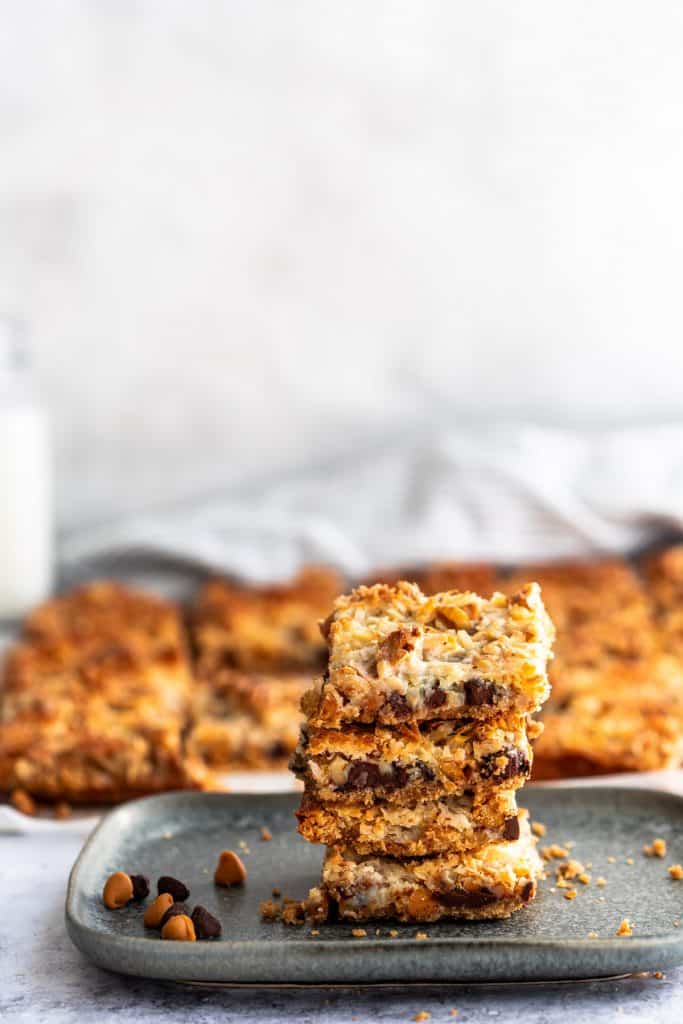
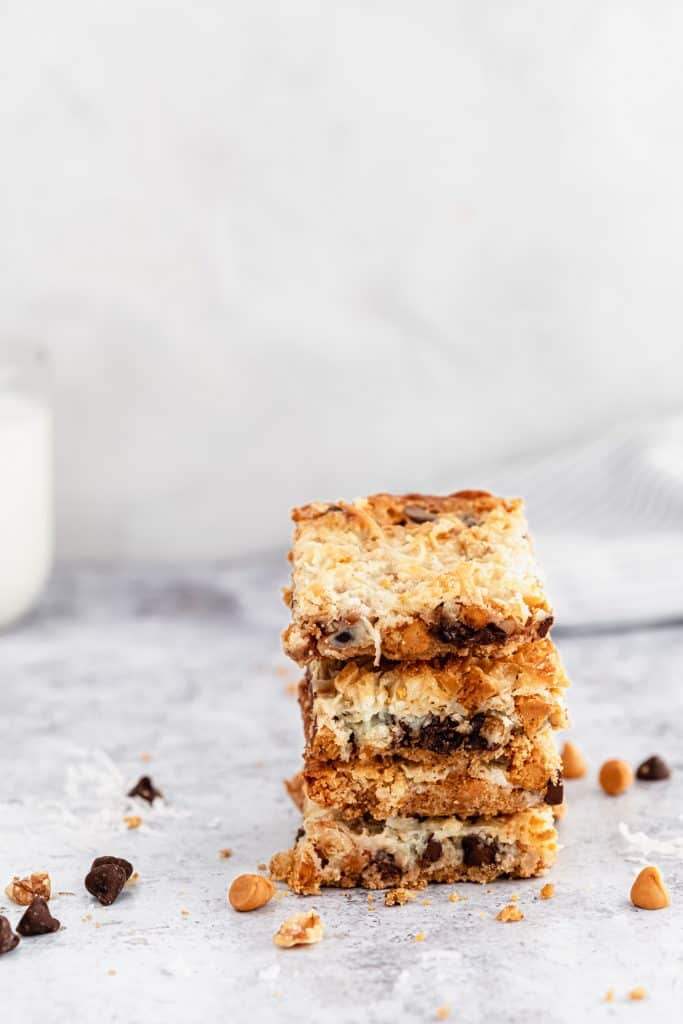
These heaven bars are indeed heavenly, with a biscuit crumb crust, chocolate and butterscotch chips, chopped nuts, coconut and sweetened condensed milk. Ridiculously easy and they bake up into something wonderful!

What are heaven bars?

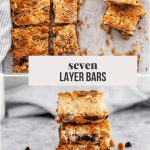
These heaven bars are seven layers of goodness. Also known as magic bars, or seven layer bars, one bite and you’ll understand where the name comes from!

seven layer bars on top of each other with more in the background

They are bars with a biscuit crust topped with chocolate chips of your choice (I use semi-sweet and butterscotch), nuts, sweetened shredded coconut and drizzled with condensed milk. Once you bake these bars the condensed milk bubbles and caramelizes in the oven and adds an ooey gooey layer of goodness.

Why should you make these bars?

stack of heaven bars with kitchen towel in the background

They are ridiculously easy. There is no hard part! All you do is layer a bunch of ingredients in a pan and bake them. It’ll take about 5 minutes of effort.

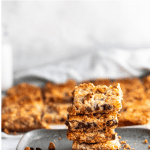
Heaven bars are DELICIOUS. Absolutely addictive. The combination of textures, from the crumb crust, to the melty chocolate chips, to the nuts that toast in the oven and the gooey condensed milk. So, so good.

They are extremely adaptable. Throw in your favorite nuts, or any chocolate chips or chopped chocolate you have on hand. You can leave out the coconut if you prefer (But I highly recommend trying with, toasting the coconut in the oven gives such great flavor).

What ingredients do you need to make heaven bars?

ingredients for making magic bars

The crumb crust:

Biscuits Crumbs: For the crumb crust, you need either digestive biscuit or graham cracker crumbs. I usually use digestive biscuit because that’s more easily found in the Middle East. The bars will be fantastic with either.

Melted Butter: Melted unsalted butter to mix with the crumbs.

biscuit crust in pan with chocolate chips and nuts in bowls on the side

The chocolate chips:

I used semi-sweet and butterscotch chips. The butterscotch chips have a unique, caramel like flavor. I love them! You can use peanut butter chips, or white chocolate chips if you like. You can even add more regular semi-sweet chips if you like.

The nuts:

I like using walnuts, the toasted flavor they get in the oven is delicious. You can also use pecans, one of my favorite nuts.

One trademark of these seven layer bars is the sweetened shredded coconut on top. The coconut toasts up in the oven and turns golden brown and crispy. It’s a great addition, but if you absolutely don’t like coconut, you can leave it out.

The sweetened condensed milk:

I get a 14 oz can of condensed milk, and drizzle about 2/3 of the can onto the top. I make sure I have a good amount of drizzle but usually don’t use up the whole can. Most recipes call for the whole can, so feel free to do that if you like! The reason I use a little less is just to control the sweetness of the bars since the butterscotch chips and sweetened coconut already add a lot.

chocolate chips and butterscotch chips layered onto biscuit crust in pan

How do I make the bars?

It’s a very easy process.

  1. Preheat the oven to 350 F, and prepare a 9×13 inch pan by lightly greasing a pan and lining with parchment paper.
  2. Prepare the biscuit crumbs. This is easiest to do by blitzing the biscuit or graham crackers in a food processor until fine crumbs form, or by placing them in a large ziploc bag and bashing them with a rolling pin, what I usually do.
  3. Mix the biscuit crumbs with melted butter, until evenly coated and moistened.
  4. Press the biscuit mixture into the base of the prepared pan. This can sometimes get a little difficult because the crumbs tend to stick to your hand, so one trick I have is to spray the base of a measuring cup with a little non stick spray then use that to pack the crumbs into the pan.
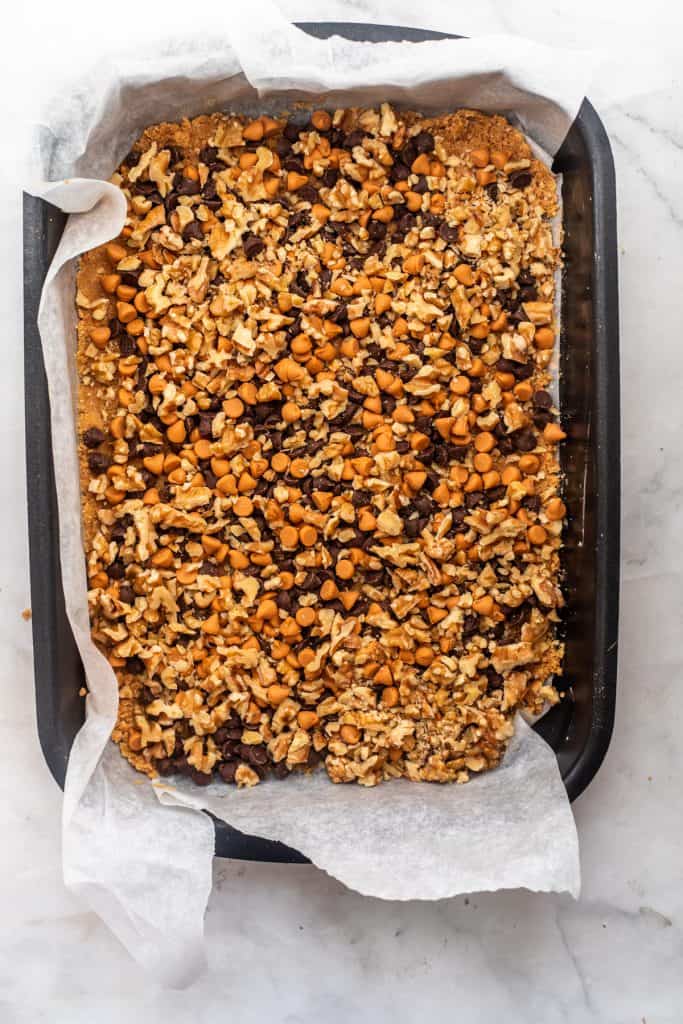
  5. Layer with the chocolate chips, butterscotch chips, chopped nuts, sweetened coconut.
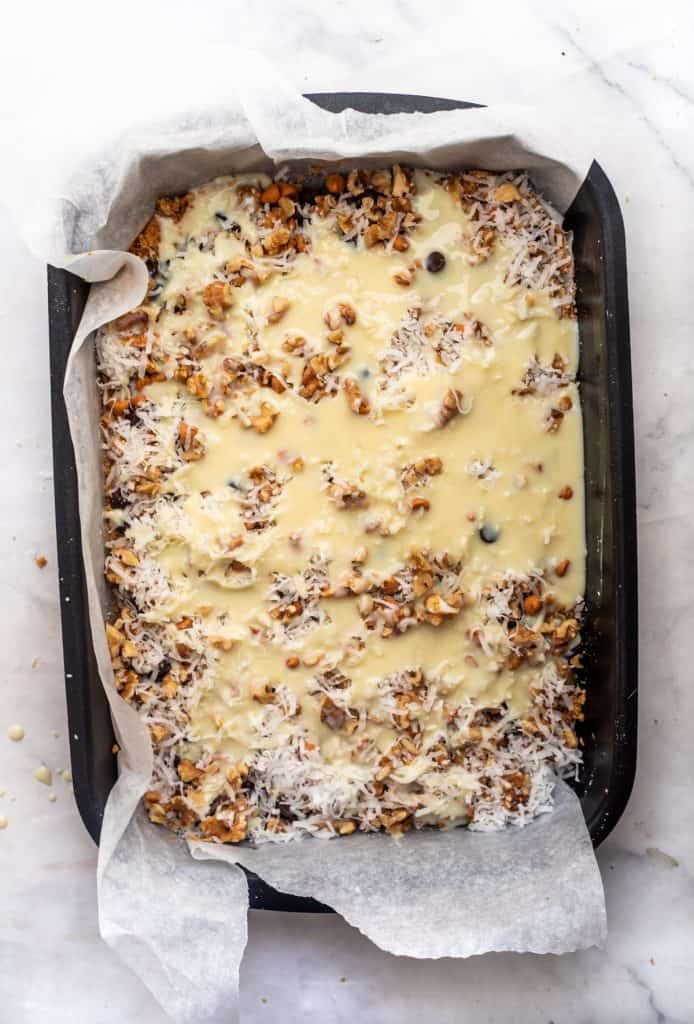
  6. Finally, drizzle the condensed milk evenly on top and bake for 25 minutes or until edges have turned golden brown and the condensed milk has also turned light golden brown and is bubbling.
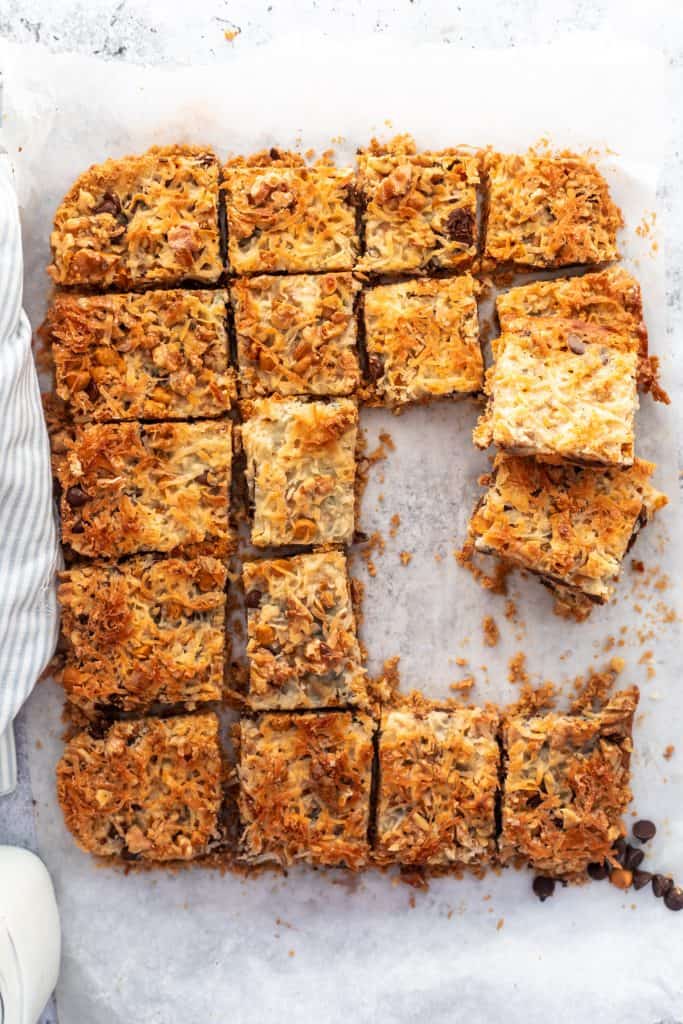
  7. Cool completely before removing from pan and cutting into squares.
seven layer bars in pan with condensed milk drizzled on them before baking

FAQs and tips for heaven bars success:

Can I halve the recipe?

Absolutely! You can halve the amount of ingredients and make this in an 8×8 inch square pan. Bake time should be the same.

Can I leave out the nuts?

Yes. You can also substitute the walnuts for pecans, and the sweetened shredded coconut with dry dessicated coconut.

Can I freeze leftover bars?

Yes, bars freeze very well for up to 3 months.

cut seven layer bars on parchment paper with a glass of milk on the background

Storing leftover bars:

Leftover bars will last up to 4 days tightly covered at room temperature, up to one week tightly covered in the fridge, and up to three months in the freezer.

If you liked this recipe, you might like:

Date Nut Bars

Lazy Cake

Chocolate Chip Brownies

Banoffee Pie

stack of seven layer bars with a glass of milk in teh background

Heaven Bars

These bars are heavenly! A biscuit crumb crust topped with semi-sweet and butterscotch chips, nuts, coconut and condensed milk. Absolutely addictive!
Print Pin
Rate
Course: Main Course
Cuisine: American
Keyword: bars, dessert
Prep Time: 10 minutes
Cook Time: 25 minutes
Servings: 20 squares
Calories: 264kcal
Author: Farah Abumaizar

Ingredients

  • 2 cups graham cracker or digestive biscuit crumbs 200g
  • 1/2 cup butter, melted 113g, 1 stick
  • 1 cup semi-sweet chocolate chips 150g
  • 1 cup butterscotch chips 150g
  • 3/4 cup chopped walnuts or pecans 100g
  • 1 cup sweetened shredded coconut 120g
  • 1/2-a whole can sweetened condensed milk 14 oz can (400g)* see notes

Instructions

  • Preheat oven to 350F ((180C.) Prepare a 9×13 inch pan by lightly greasing with butter then lining with parchment paper.
  • In a medium sized bowl, add the biscuit crumbs and melted butter. Using a fork, stir to combine until all the crumbs are evenly moistened.
  • Press the crumbs into the lined pan. Try to cover the base evenly. You may find it easier to lightly grease the base of a measuring cup with nonstick spray and use that to spread the crumbs.
  • Layer by evenly scattering the chocolate chips on top, then the butterscotch chips, the chopped nuts, and then the sweetened shredded coconut. Evenly drizzle the condensed milk on top.
  • Bake in the middle rack of the oven for 25 minutes or until edges are golden brown and condensed milk is bubbling.
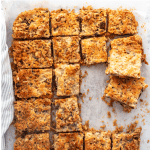
  • Let cool completely before lifting the parchment paper out of the pan and cutting into even sized squares. I did 20 squares, but you can make them even smaller, these are rich and decadent!

Notes

*You can use as much condensed milk as you like. I’d recommend at least 1/2 the can for that gooey layer we are looking for, but if you don’t want the finished bars to be too sweet you don’t need to use the whole can. I usually end up using between 1/2-2/3 of a 14 oz can.
Tried this recipe?Mention @everylittlecrumb or tag #everylittlecrumb!

Nutrition

Calories: 264kcal
 

Magic Bars by everylittlecrumb on Jumprope.

Did you make this? Tag @everylittlecrumb or hashtag #everylittlecrumb and I’ll share your images!

Dessert, Recipes

Previous Post: « Egyptian Goulash
Next Post: Arabic Grills »

Reader Interactions

Leave a Reply Cancel reply

Your email address will not be published. Required fields are marked *

Recipe Rating


Primary Sidebar

Get more stuff

Subscribe to our mailing list and get interesting stuff and updates to your email inbox.

Thank you for subscribing.

Something went wrong.

we respect your privacy and take protecting it seriously

FeedFeed

Featured Recipes

Nana tea

Halal Guys Chicken and Rice

Aish El Saraya

Instant Pot Enchilada Soup

Death By Chocolate Zucchini Bread

More

Footer

everylittlecrumb

Farah Abu Maizar | Food Lover
Good morning! If there’s one thing we like doing Good morning! If there’s one thing we like doing, it’s experimenting with breakfast dishes 🍳.These beauties are froached eggs- poached eggs that are lightly fried and seasoned with breadcrumbs. Best of both worlds! Creamy poached eggs, runny yolk but a little crisp on the white part of the eggs. So good! Inspired by @sveverything , we used our sous vide machine for this but you can do this with regular poached eggs. Recipe can be found linked in bio or at https://everylittlecrumb.com/froached-eggs/ . Team runny yolk anyone? 
.
.
.
.
.
#eggs #poachedeggs #poachedegg #eggsontoast #beautifulcuisines #tasty #delish #foodphotography #foodstyling #foodstylingandphotography #cheeseontoast #foodblogger #foodie #breakfast #brunch #instayum #yum #brunch #tastingtable #f52community #food52 #yolkporn #friday
How I spend a lot of my weekends😂. Nothing like How I spend a lot of my weekends😂. Nothing like a big bowl of cookie dough to say weekend mode on! Are you like me and end up eating more dough than actual cookies? My foolproof recipe I use and post time and time again 👇🏼(and often double the batch so I can store some in the freezer!)

Ingredients:
1 stick butter, softened 113 g
3/4 cup tightly packed brown sugar (I like using 1/2 cup light brown and 1/4 cup dark brown, but you can use either or) 150 g total
1/4 cup white sugar 50 g
1 egg, room temperature
1 tsp vanilla extract
1 3/4 cup all purpose flour 220 g
3/4 tsp baking soda
1/4 tsp salt
1 cup semi-sweet chocolate chips or chunks
flaky salt for topping, optional

Instructions:
-In the bowl of a stand mixer fitted with a paddle attachment, or a handheld mixer, cream together butter, brown sugar, and white sugar for 5 minutes on medium speed until light and fluffy.
-Once five minutes is over, add in egg and vanilla and mix until combined.
In a separate bowl, mix flour, baking soda, and salt, and mix until combined. Add these dry ingredients to the butter mixture on low speed, and mix until just combined.
-Using a wooden spoon or spatula, mix in chocolate chips or chunks until just combined. Place bowl of dough in fridge for at least 30 minutes to chill.
-While dough is chilling, heat oven to 180 C (350F). Portion dough out into heaped 1 tbsp-2 tbsp sized dough pieces on parchment paper lined baking sheets. 
-Bake for 11-12 minutes or until golden brown on the edges but still soft in the center. Cool until cookies firm up, then enjoy, still warm.
.
.
.
.
.

#chocolatecake #cookiemonster #cakestagram #cakephotos #layercake #chocolate #weekendbaking #foodblog #instayum #yummy #bakery #foodporn #foodtographyschool #foodphotography #chocolatechips #delish #foodfluffer #damnthatsdelish #cookiedough #chocatechipcookies #bakes #bakestagram #doughbowl #chocolatechips #hersheys
Bbq salmon bowls with mango avocado salsa- unbelie Bbq salmon bowls with mango avocado salsa- unbelievable! And start to finish, you can be eating these in 15-20 minutes. Save this recipe for your next meal, you don’t want to miss out!

I’ve partnered with @kilosamak to produce a few recipes with their quality seafood- I’ve tried several of their items and genuinely loved them all! They deliver seafood straight to your door for you to enjoy and cook at home. Takes all the guesswork out of trying to choose and clean fish yourself, perfect solution for someone like me who loves seafood but isn’t so great at prepping it! Check out their Instagram page on how to order, or head to the link in my bio.

This salmon has a smoky slightly sweet rub, is baked in the oven for ultimate ease, and gets piled on to rice and topped with an easy, addictive, zingy mango and avocado salsa. Adapted from @pinchofyum , I’ll make this again and again!

Ingredients:
For the salmon:
2 fillets, about 250 g each 
Spice Rub:
2 tbsp brown sugar
1.5 tsp paprika 
1 tsp garlic powder
1 tsp onion powder, optional 
1/2 tsp chili powder
1/2 tsp salt 
2 tbsp olive oil 

Mango avocado salsa:
1 diced mangos 
1 diced avocado
1/4 cup finely diced coriander 
1/4 cup finely diced red onion 
1 inch spicy green chili pepper, finely chopped
1 tsp honey
Juice and zest of one lime
Salt to taste

Method:
- Make the salsa by mixing together all the salsa ingredients and placing bowl in fridge while you make the salmon.
- Heat oven to 240C, and line a baking sheet with parchment paper. 
-Mix together all the ingredients for the salmon rub, and rub thoroughly all over the salmon, both sides.
- Bake for 10-12 minutes until salmon is opaque and cooked all the way through.
-Assemble bowls with rice, flaked pieces of salmon,and plenty of mango avocado salsa. Enjoy 😍

Catch the steps in my story!
Have you tried this pasta yet? Save this for your Have you tried this pasta yet? Save this for your next weeknight meal! Saucy macarona iltaybeen, can’t get much more comforting.  Adapted from @jedir3waish , makes for an easy delicious main that’ll make your family including kids very happy! Can find a step by step linked bio, or at https://everylittlecrumb.com/macarona/ , or in my story!

INGREDIENTS:
 
2 tbsp olive oil, divided
big pinch of salt
3 heaped tbsp tomato paste, divided 2 oz or 70 g
1 pack elbow macaroni 14 oz or 400 g
1 onion, very finely diced
1 zucchini, finely diced
1 carrot, finely diced
4-5 garlic cloves, minced
250 g ground beef
1 tsp seven spices
1 tsp turmeric
1/2 tsp paprika powder
1/4 tsp basil
1/4 tsp cinnamon powder
1/4 tsp garlic powder
1/2 tsp black pepper
1 tsp salt
1 can crushed tomatoes 14.5oz (400g)

NSTRUCTIONS
 
Bring a large pot of water to boil, add 1 tbsp olive oil and the salt, one tbsp of tomato paste, then the pack of pasta. Cook until al dente, then drain the pasta, reserving the pasta water. Set cooked pasta aside.

In a large skillet, heat the remaining tbsp of olive oil. Once hot, add the diced onion, and cook for 4-5 minutes until softened. Add the diced zucchini and carrots, and garlic and cook for a further 4-5 minutes until softened slightly.

Add the ground beef, and cook, smushing with a wooden spoon to break up the meat. Keep cooking until the beef is browned and cooked through, then optionally, drain the fat.
Add in the salt, pepper, and all the spices. Cook for another minute or so. Add the remaining 2 tbsp of tomato paste, and stir.

Add the can of crushed tomatoes and stir to combine. Bring to a simmer, then add a big ladleful of the reserved pasta water and simmer for 2-3 minutes on low heat.

Add the pasta to the sauce (I don't always add all the pasta, maybe 3/4 of the cooked amount until the finished dish is as saucy as I like). Stir to coat, cook for another minute or so until the pasta is warmed through, then enjoy!
This gorgeous tiramisu was so kindly sent to me by This gorgeous tiramisu was so kindly sent to me by @cadysweets.sa on my birthday, and we enjoyed every light fluffy bite of it. Their old account got hacked so follow along and support their new account ! They have a bunch of cakes and sweets for every occasion, so make someone or yourself happy and order one for a treat🤩! Send this to the tiramisu lover in your life 🍰.
.
.
.
.
.

#chocolatecake #magnoliabakery #cakestagram #cakephotos #layercake #chocolate #ganache #foodblog #instayum #yummy #bakery #foodporn #foodtographyschool #foodphotography #slice #delish #foodfluffer #damnthatsdelish #tiramisu #birthdaytreat #dessertbae #dessertoftheday #scoop #foodstyling #foodstylingandphotography
Easiest at home crusty bread with a great open cru Easiest at home crusty bread with a great open crumb texture. It’s the no knead bread from @breadin5 and has yet to fail me. Check my story for the step by step, and swipe for a video reveal.

Ingredients for two small loaves:
1.5 cups lukewarm water 
1/2 tbsp any type of yeast
1/2 tbsp salt
3 1/4 cup plain flour (450g)

Method:
In a large bowl, stir together the water with the yeast and salt. Try to dissolve but it’s fine if you have clumps.
2. Add flour all at once and stir, just until no flour patches remain.
3. Cover loosely with a kitchen cloth and leave it to rest for 2 hours in a warm place until risen and bubbly.
After this rest you can:
- Use dough immediately if impatient, but it’s easier to work with if cold, so maybe pop in fridge briefly
- Or, their recommended method and the one I do, leave in the fridge loosely covered for 12 hours or overnight. 
Refrigerated dough lasts up to two weeks, and flavor depends over time!
4. The next day, the dough might look deflated. That’s fine! When ready to bake, divide dough in half (I got two 400g dough balls)- it might be easier to handle if you sprinkle the dough lightly with flour, and take the half you are going to bake out of the fridge. Let it rest on a parchment paper lined baking sheet 40-90 minutes. The longer the more interior bubbles you should have. Preheat oven to 235C (450F), and after rest, make a few deep slashes in the dough with a sharp knife.
5. Place in the middle rack of the oven, and on the bottom rack place a roasting pan that had about a cup of hot water in it. This will create steam which gives a crustier crust!
6. Bake for 30-35 minutes or until deep golden brown.
7. Let it cool completely before enjoying!
.
.

.
.
.

#damnthatsdelish #foodfluffer #thebakefeed #feedfeed #tastingtable #forthemaking #BHGfood #foodblogfeed #bakedfromscratch #bakinglove #f52grams #foodbloggerpro #bakersofinstagram #TOHfoodie #foodphotography #canonphotos #bread #instayummy #kitchn #huffposttaste #food #dough #foodie #nokneadbread #homemadebread #doughter
Good morning! With dine in still closed in Saudi, Good morning! With dine in still closed in Saudi, Friday pancakes are fast becoming a tradition. And honestly, I don’t think I’ve had better pancakes at any restaurant recently! The easiest, fluffiest diner style pancakes are a huge hit in our family, find the recipe below adapted from @allrecipes . I like to barely warm the oven (110C or so) and keep the finished pancakes in a pan in the oven until I’m done with all the batter so they stay warm and perfect 👌🏼.

Ingredients
3/4 cup milk 170g
1 tbsp white vinegar
1 cup flour 125g
2 tbsp sugar 25g
1 tsp baking powder
1/2 tsp baking soda
1/4 tsp salt
1 egg room temperature
1/2 tsp vanilla
2 tbsp butter, melted 28g

Instructions:
-In a large bowl, combine the milk and vinegar, and let aside to stand for 5 minutes until curdled. Whisk to combine.
-In a separate large bowl, mix together the flour, sugar, baking powder, baking soda and salt.
-Add an egg, the vanilla and the melted butter to the buttermilk and whisk to combine.
-Add the dry ingredients all at once to the wet, and whisk until flour patches disappear. A few lumps are fine, but don't over mix.
-Let the batter rest for 5-10 minutes while you heat a pan on the stove.
lightly grease the pan with nonstick spray or butter, and pour about 1/4 cup of batter on the pan. Cook for 2-3 minutes on each side or until golden brown. (Flip the first time once you see bubbles form and the edges of the pancake dry up).
-Enjoy with toppings of your choice!
.
.
.
.
.
#pancakes #pancakerecipe #blueberrypancakes #maplesyrup #breakfast #morningslikethese #fridaymorning #flatlay #foodfluffer #breakfastrecipes #breakfastfood #breakfastofchampions #pancakelover #food #foodtography #foodtographyschool #foodphotography #delish #foodphotos #weekendbreakfast #eatingathome #recipeoftheday #foodporn #foodflatlay #blueberries #trayoftheday
One of my photos from my shoot @tackle.baks . How One of my photos from my shoot @tackle.baks . How insane does this tom yum soup look? For those who haven’t tried this casual seafood spot yet, you really should! The food is great and priced very reasonably, and they have some menu items I’m obsessed with like their crispy fish burger, the salmon poke salad and the creamy truffle shrimp👌🏼. They currently have a delivery offer going for only 5SAR on HungerStation, so no time like the present! Have I tempted you with this photo of the tom yum soup? I’m hungry just writing this caption🤤.
.
.
.
.
.
#soup #tomyum #tomyumsoup #food #foodphotography #canonphotography #canon #seafood #seafoodlover #shrimp #delish #beautifulcuisines #foodtographyschool #foodtography #foodblogger #instayum #lonelyplanetfood #dametravelerfoodie #soupseason #restaurantphotography #khobar #tastemade #tastingtable #foodfluffer
Load More... Follow on Instagram

Copyright © 2019 on the Seasoned Pro Theme