


These Lebanese kebabs are delicious Middle Eastern spiced meat patties, also known as kafta kabobs. You can make beef kebabs, lamb kebabs, or a mixture of both. They are so simple to make, coming together in minutes, juicy and absolutely packed with flavor. You need this Lebanese kebab recipe in your weeknight meal roster immediately!
Jump to:
What are kafta kebabs?
A Middle Eastern kebab made with fresh parsley, onions, garlic and fragrant kafta spices. They are shaped in a signature oblong shape, and grilled, baked or even air fried.
They are common all across the Middle East. In Lebanon, they are known as kafta, but in other Middle Eastern countries as kofta.
What’s so good about this kafta kabob recipe:

I experimented with a bunch of different mixes until I got to this mix, which is my all time favorite.
I think the blend of beef and lamb is the best way to go. You get the flavor of the lamb with less of the fat, and the beef and lamb balance each other out nicely.
The kafta is juicy, and full of texure and flavor from the onion, garlic, and fresh parsley. There is the perfect mix of spices with enough to really pack enough flavor without overwhelming.
Best of all, it’s so easy! You just dump all the ingredients into a bowl, mix thoroughly to combine and that’s your mix ready.
It’s convenient because this recipe can be used to make Lebanese kebabs you grill, or oven baked ones. You could also use a stovetop grill pan and grill indoors.
This recipe is the ultimate in kid friendly. My kids love making simple sandwiches with pita bread and hummus, or just dunking the kofta fingers into ketchup with a side of fries.
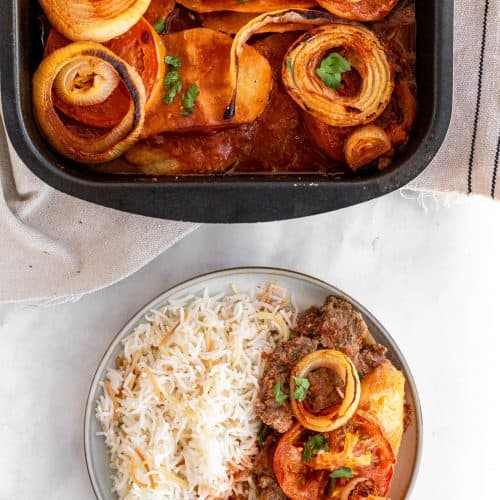
There’s a lot you can do with the meat mix. You can form it into kebabs. You can spread it out into a pan to make kafta bil sanieh. This is an Arabic meatloaf topped with tomato and potato slices).
You can make it into meatballs and cook it in a tomato pomegranate molasses stew- this is called Dawood Basha and it’s delicious! I have a recipe for that right here.
Kafta ingredients:

The meat: My preference is a 50/50 mix of beef and lamb, but you can use all of one type of meat if preferred.
The herbs: Fresh chopped parsley imparts a lot of flavor in this, and is crucial to the flavor of Lebanese kafta. Finely chop the parsley after washing so it mixes in well.
Kafta spices: salt, pepper, seven spices (or all spice or mixed spices), cinnamon, cumin, a pinch of red chili flakes.
Onion and garlic: The key is pureeing or grating the onion so you don’t get big chunks of onion that will make it hard to form meatballs. I made this mistake once, and it was a messy process with lots of diced onions falling out. You can use the rough side of a cheese grater, or just process in a food processor.
How to make the best Lebanese kafta kebabs:
It’s the easiest process ever! Once you have your parsley chopped and your onion grated, there’s nothing to it.
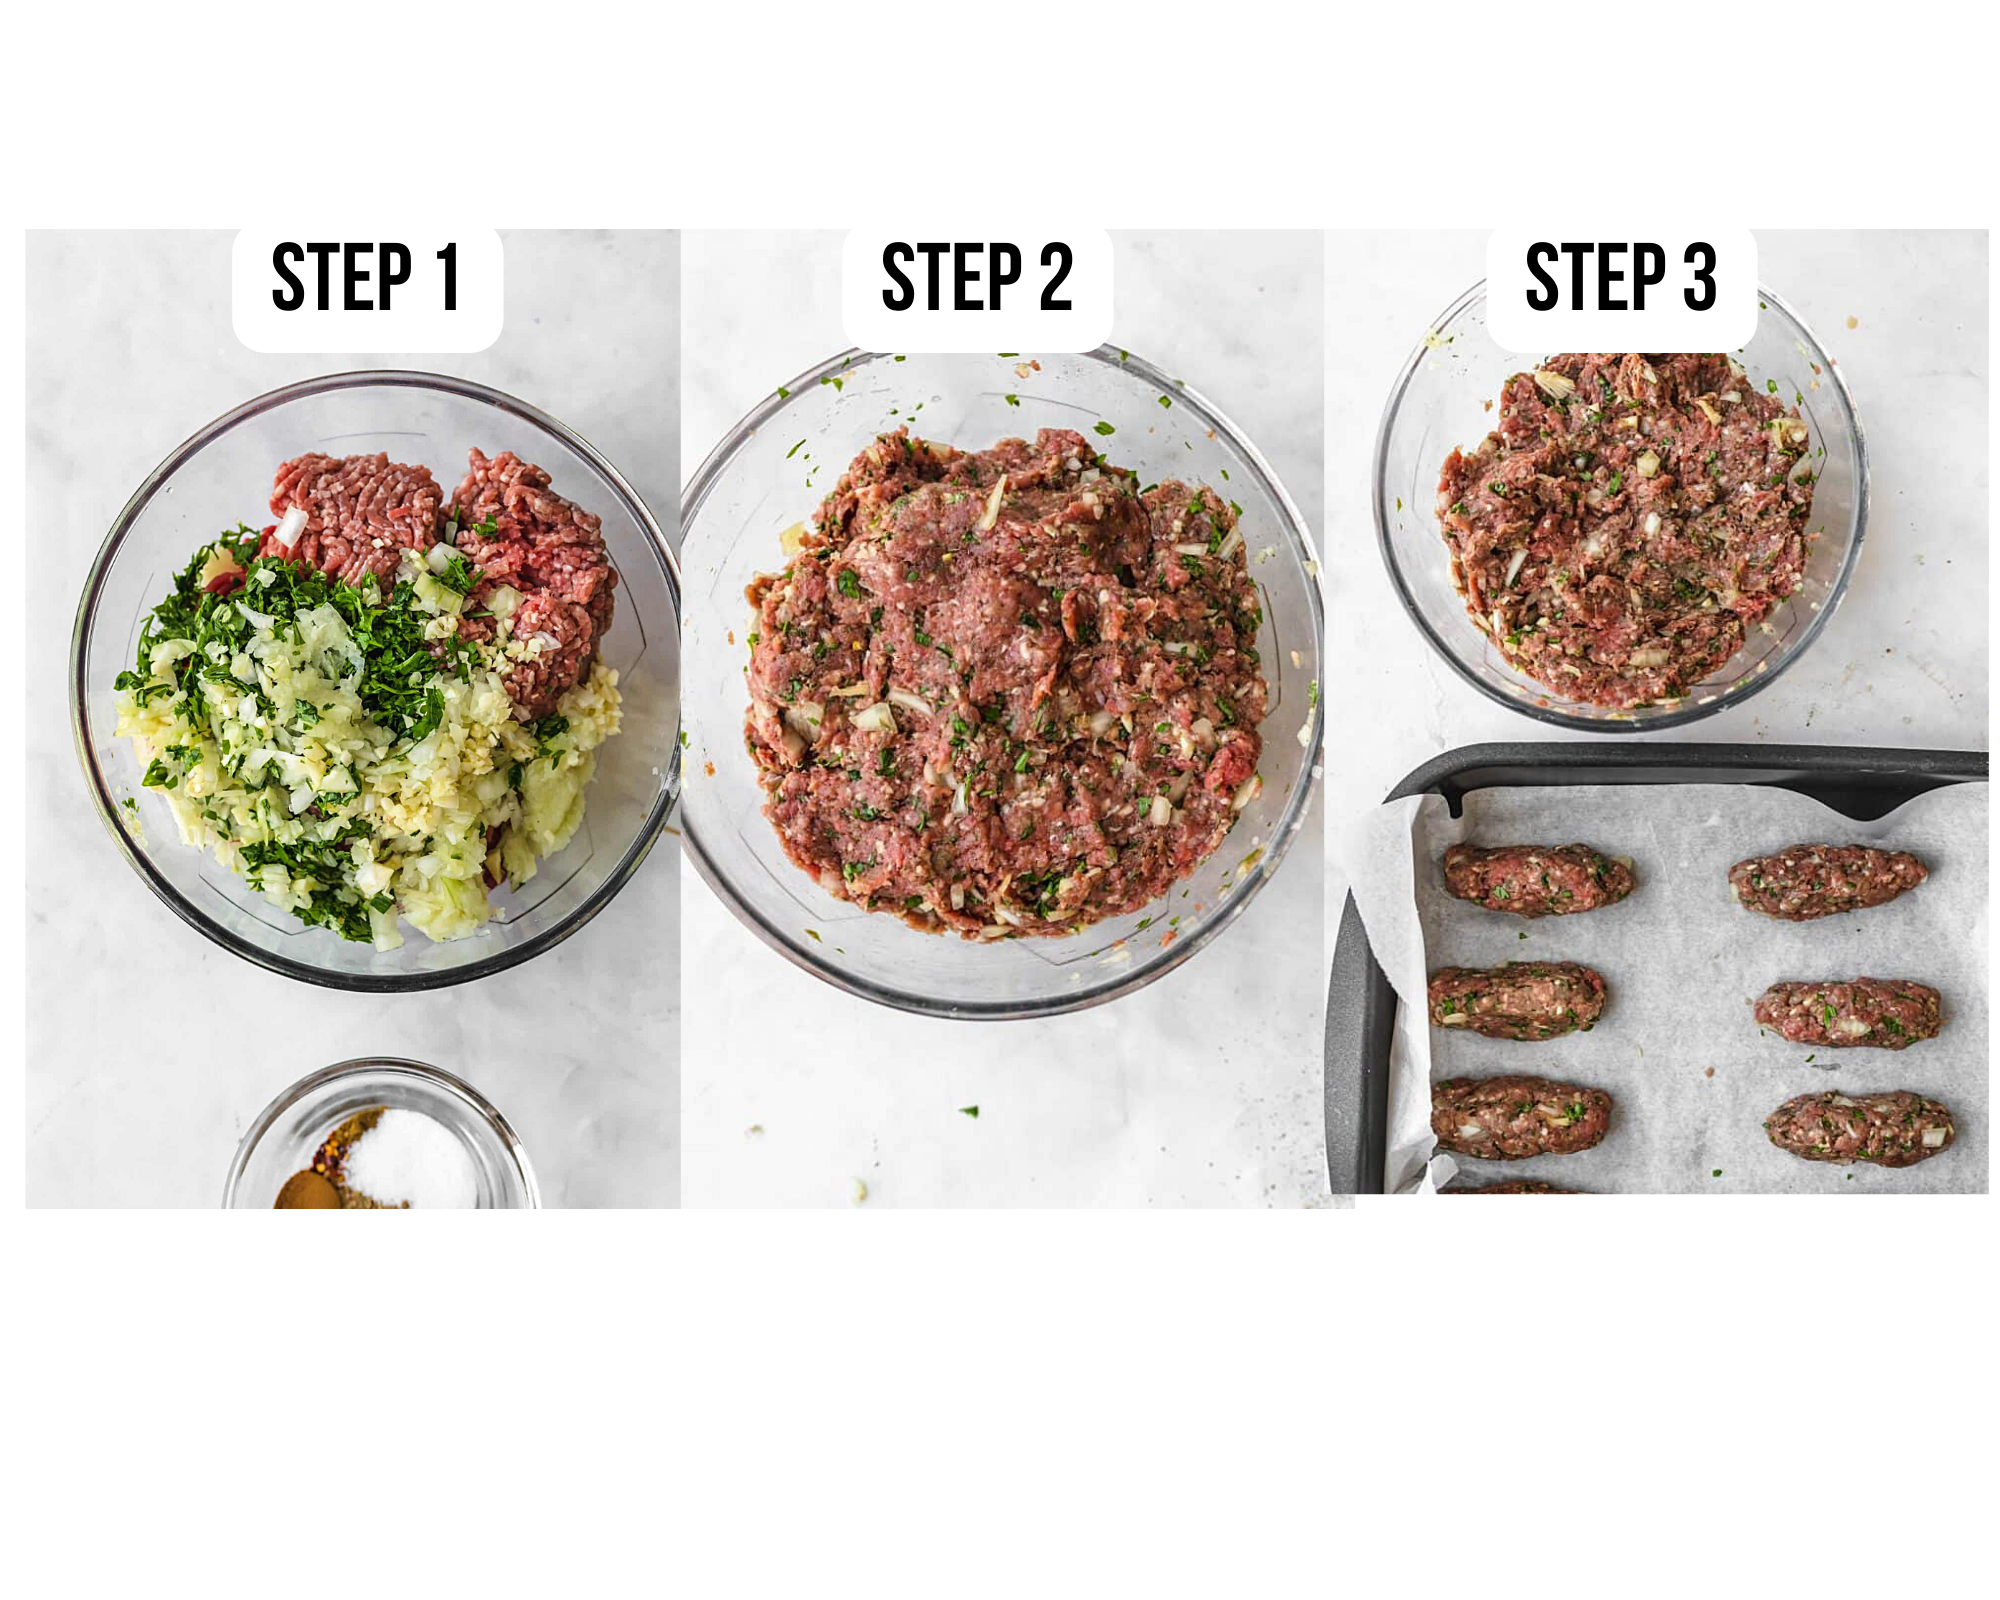
- Simply mix together all the ingredients in a large bowl. I like using gloved hands so I can really work in the spices and herbs into the meat. Give it a good mix!
- You can also pulse the onion in a food processor, as well as the parsley, then add the meat and all the other ingredients in and pulse. You have to be careful with this though and barely pulse once the meat is added so that you don’t overwork the meat and it ends up too dry.
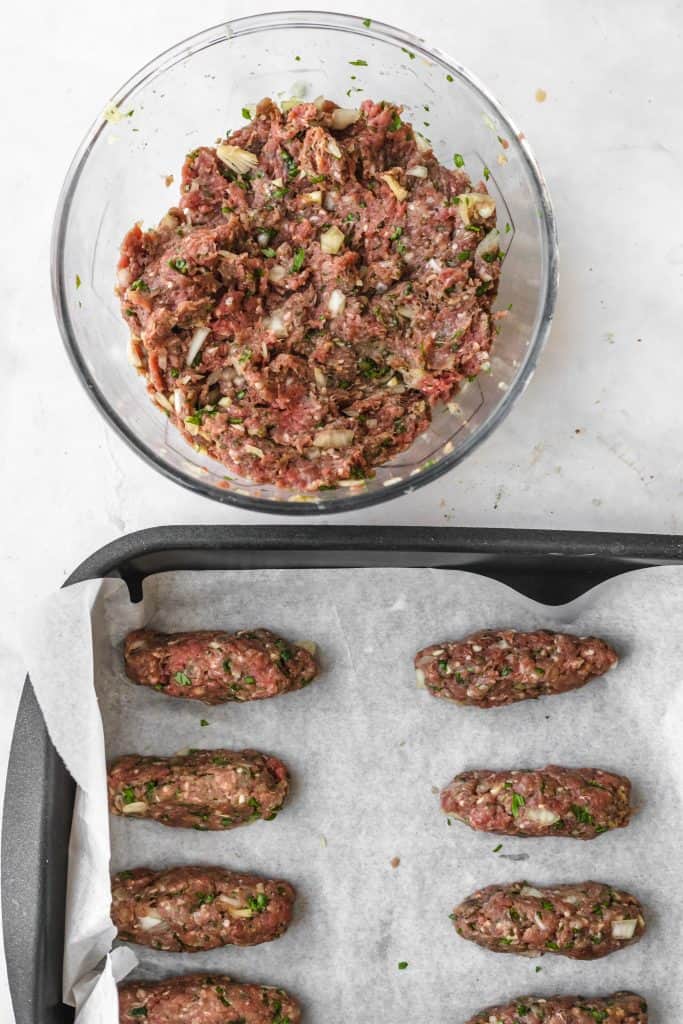
- Form the meat mixture into kebab shapes (little oblong cylinders). Place on a parchment paper lined baking sheet or pan.
- Place on parchment lined baking sheet, and chill in fridge until the oven heats.
- Heat the oven to 350 F (180C). Bake the kafta for 15 minutes or until cooked through. Optional, heat the oven to broil and broil for 2-3 minutes to get golden brown crispy edges on the kafta.
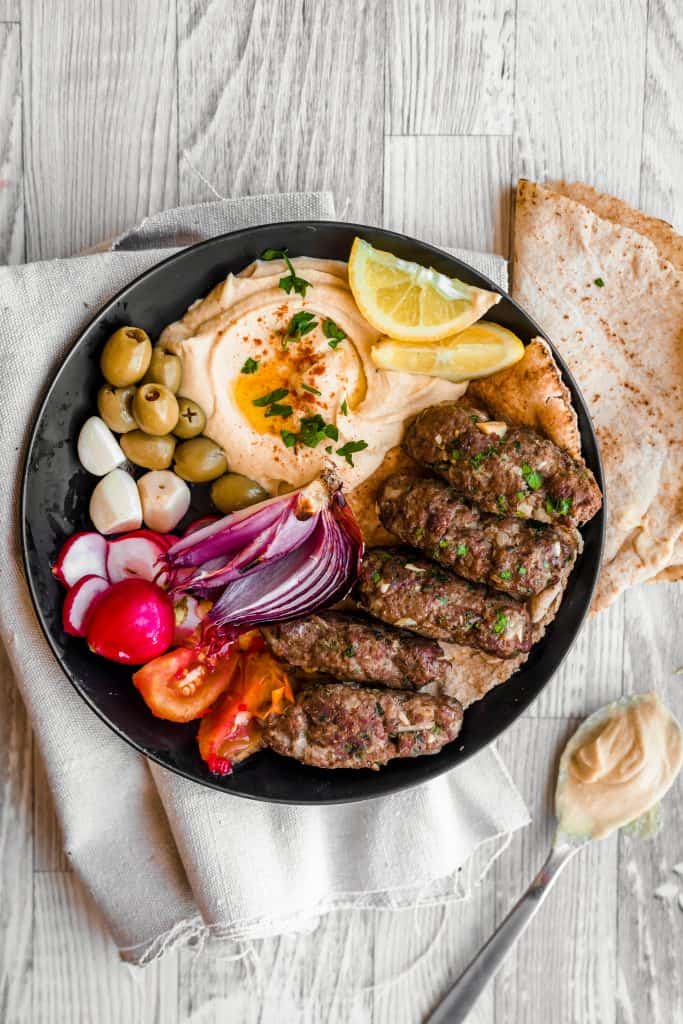
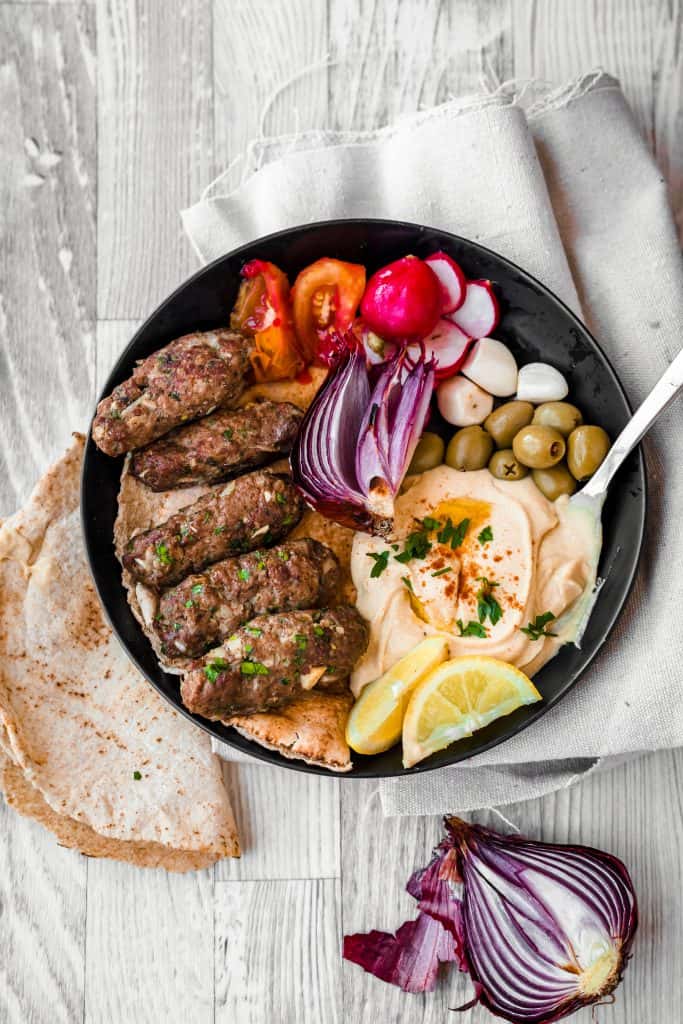
What to serve Lebanese kebabs with:

I love having kafta sandwiches. What I do is stick a couple halved tomatoes and halved onions on the baking sheet with the kafta before it goes in the oven so that they cook through and char a little when I broil the dish. Then, I make sandwiches with hummus, kafta, and a little grilled onion and tomato, and gherkins.
My kids love having kafta plain with french fries and ketchup on the side.
You can keep this low carb and have it with a side salad, or on top of quinoa or cauliflower rice.
You can also do kafta rice bowls, serve it alongside vermicelli rice with a dollop of hummus and some diced tomatoes and vegetables.
Alternately, you can use the kafta mixture to make meatballs like in this Dawood Basha, or to make kafta bilsanieh.
How long can kafta be stored:
Cooked kafta can be stored in an airtight container in the fridge for 3-4 days.
Cooked kafta also freezes well for up to 3 months. You can also freeze the raw kafta patties in an air tight container for 1-2 months.

Recipe tips and tricks:
- Chill the kebabs before cooking just while the oven heats up (if oven baking) or for 10-15 minutes before grilling. It’ll just help them hold their shape better.
- It’ll make your life a lot easier to just add the onions and parsley to a food processor, and pulse until finely chopped. You can of course chop by hand, but make sure the onion pieces are really small. Otherwise, you’ll get chunky bits of onion affecting the texture of the kebabs.
- You can also add the the meat to the food processor and pulse until just mixed in with the parsley and onions. You do run the risk of overworking the meat, toughening it, which is why I don’t go down this route. If you do however, just be careful and pulse until JUST combined.
- Broil the kebabs for a minute or two in the oven to get a nice golden crust on them that simulates outdoor grilling.
Recipe FAQs:
Yes! Whichever you prefer. Although I like using a mix, I wouldn’t hesitate to use all of either type of meat.
Yes, absolutely! Try air frying at 375 F (190C) for 10-12 minutes until cooked through.
Just shape them around the metal or wooden skewers you are using, with your hands squeezing the meat into an oblong shape around the skewers. If using wooden skewers, soak them in water before grilling to avoid them burning on the grill.
Related Middle Eastern meat recipes:


Love this recipe? Please leave a 5-star 🌟🌟🌟🌟🌟rating in the recipe card and a comment!
Stay in touch with me through social media @ Instagram, Pinterest, and Facebook. Don’t forget to tag me when you try one of my recipes!

Lebanese Kebab-Kafta
Ingredients
- 1/2 lb ground beef 250 g
- 1/2 lb ground lamb 250 g
- 1/2 onion, grated or pulsed in a food processor
- 2 garlic cloves, minced
- handful of parsley, finely chopped
- 1 teaspoon salt
- 1.5 teaspoon seven spice or all spice powder
- 1/2 teaspoon cinnamon powder
- 1/4 teaspoon cumin powder
- 1/4 teaspoon black pepper
- pinch red chili flakes
Instructions
- Add all the ingredients in a large bowl, and mix well until combined. You can use gloved hands or a spoon to mix. I prefer using hands!
- Form the meat mixture into oblong kebab shapes like pictured. Place on parchment lined baking sheet, and chill in fridge until the oven heats.
- Heat the oven to 350 F (180C). Bake the kafta for 15 minutes or until cooked through. Optional, heat the oven to broil and broil for 2-3 minutes to get golden brown crispy edges on the kafta.
Video
Notes
Nutrition
Did you make this? Tag @everylittlecrumb or hashtag #everylittlecrumb and I’ll share your images!
Pin for later!

Prithi Pais says
Looks delicious .. what are the spices in the seven spice mix? Thanks!
Farah Abumaizar says
Hi!! Usually any mix of: black pepper, cinnamon, paprika, turmeric, coriander, cumin, cayenne pepper and sometimes garam masala!
Beth Sachs says
Delicious with homemade flatbreads and hummus. Thanks for sharing the recipe!
Farah Abumaizar says
Thanks so much Beth! Homemade flatbreads sound wonderful
Lizet Bowen says
I love eating kafta. I’ve never made them before and was a little nervous to try and do it myself. Great explanations. They turned out really well!
Farah Abumaizar says
It’s actually the easiest thing ever !
Kate says
Wow, what a delicious plate of food! Everything about that looks irresistable – just perfect for a meal with friends. Thanks for the recipe!
Farah Abumaizar says
Thank you Kate! Appreciate the kind comment
kim says
This recipe was absolutely delicious! The whole family enjoyed. I’ll definitely be making this one again!
Farah Abumaizar says
Thanks so much Kim! So happy to hear it
Kylie Archer says
These are so amazingly delicious! Thanks for this recipe, the whole family loved it!
Farah Abumaizar says
Thanks so much! So glad to hear that Kylie