
I remember when my father traveled to the US a few years ago and asked me if I wanted anything. Yes, I said, a few things. The first was a bunch of makeup from Sephora. The poor man was completely lost in that store, until a sales lady took pity on him and took over his (my) entire shopping list. The second was a pasta maker. I just HAD to have a heavy duty (also literally extremely heavy) pasta making machine.
Pasta Making Adventures…or not
My father being the awesome man that he is, without complaint, hauled this bulky, cumbersome pasta making machine with him all the way to Bahrain. How many times have I made fresh pasta since? A grand total of one time. It was good pasta, it really was. But packaged pasta is just so much easier and kind of just does the job for you, doesn’t it? I mean look how simple this pasta recipe is.
When I saw this sweet potato gnocchi recipe, I skimmed past it a little guiltily because I don’t like thinking about how little I utilize my pasta machine that’s currently taken up residence in my storage room. Then, I scrolled right back up. Packaged pasta may do the job, but packaged gnocchi certainly doesn’t. I’ve never had a good ready made gnocchi. Also, the recipe is from the brilliant Pinch of Yum. What could go wrong? I was sold.
Gnocchi convert, right here.
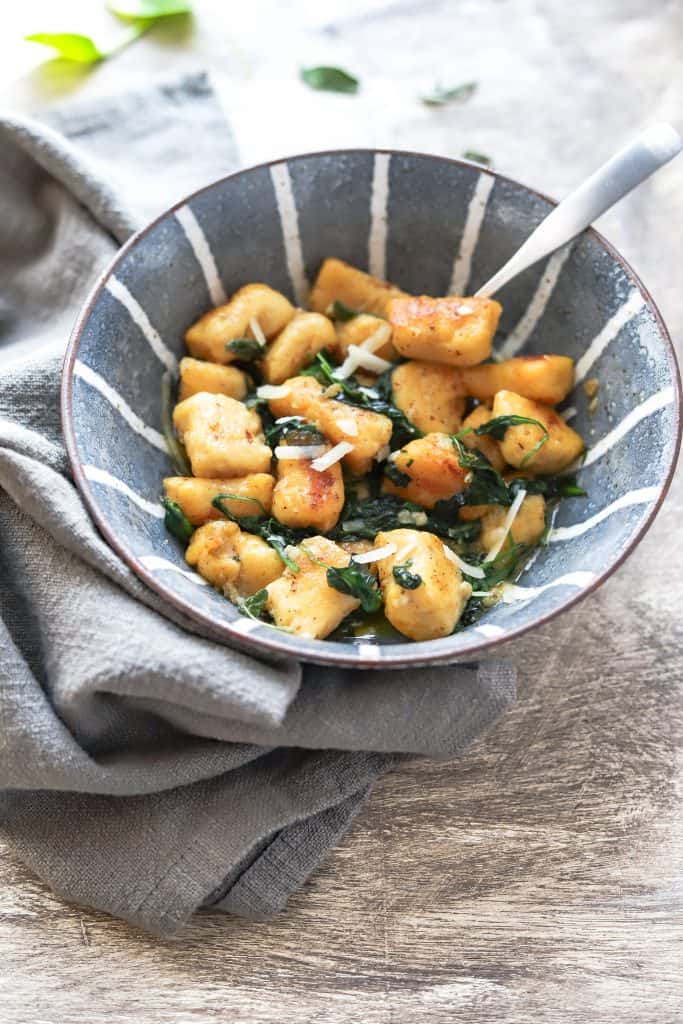
Oh my God. So easy, and frankly quite fun to make. And absolutely delicious! I’ll never go back. This sweet potato gnocchi starts with microwaved sweet potato (easy), thats mixed with ricotta, parmesan cheese and flour (easy), then cut into a loaf which is then sliced up into little twisty ropes that you cut little gnocchi shaped bits off of (fun!!). The gnocchi are then boiled until they just rise to the top of the water ->really addictive to watch, and finished off with the simplest garlic butter sauce and some wilted spinach. Restaurant quality, a tiny bit sweet from the sweet potato, melt in your mouth soft and delicious. Impress everyone with this because it is freaking impressive. Or just impress yourself! Enjoy!
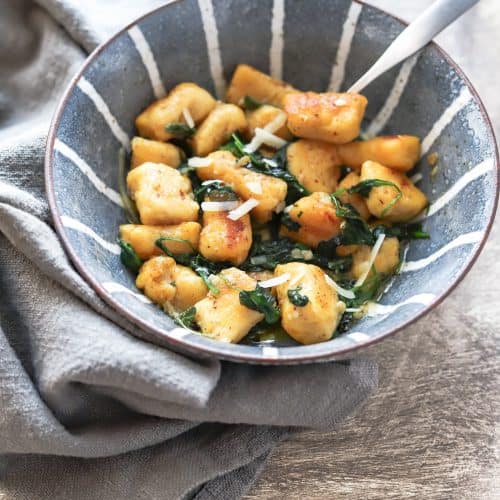
Sweet Potato Gnocchi
Ingredients
Gnocchi:
- 1 500 g (1 lb) sweet potato
- 1 cup ricotta
- 1/4 cup freshly grated Parmesan cheese
- 1 1/2 teaspoon salt
- 1 1/4 cup flour
Sauce and veggies:
- 8 tablespoon butter
- 2 cloves garlic, crushed
- 5-6 sage leaves
- 2-3 big handfuls spinach
- 1 teaspoon salt
- 1/4 cup Parmesan cheese
Instructions
For the gnocchi:
- Prick the sweet potato all over with a fork, then wrap it in a damp paper towel and microwave for 7 minutes or until soft and cooked through. Alternately, you could just oven bake the potato.
- Scoop the sweet potato flesh out into a bowl, go over it with a potato masher until you make sure it’s all smooth and properly mashed through. Mix in the ricotta, 1/4 cup freshly grated parmesan cheese and salt until smooth and well combined. You may want to use your hands for this.
- Add the flour 1/2 cup at a time, kneading very gently after each addition. Kneading too much could cause the gnocchi to get tough
- Transfer the dough to a lightly floured work surface, and form it into a loaf, about 9×5 inches. (think the size of a loaf of banana bread). Cut into slices of dough, like you are cutting yourself thin slices of banana bread.
- Roll and stretch each slice until it’s forms a long skinny rope shape. Cut each of these rope shapes into 1 inch inch segments with a sharp knife to form your gnocchi pieces.
- Bring a large pot of water to a boil, add the gnocchi and boil until the gnocchi rise to the top. Drain and toss with a little olive oil. You can continue making the recipe using this gnocchi, or refrigerate or freeze them at this point.
For the sauce and finishing:
- Heat the butter in a large saucepan or skillet until bubbling and slightly golden brown. Add the gnocchi and pan fry until golden brown on each side, (might have to do this in batches) then add the handfuls of baby spinach, garlic, sage leaves, and salt and pan fry for another few minutes.
- Toss the gnocchi in the butter spinach sauce, top with the remaining parmesan cheese and serve.
Brian Nagele says
Yet another post I’m going share with my buddies on Facebook. Thanks!
Farah Abumaizar says
Thanks Brian! I hope you enjoy the recipe!