


This easy, non alcoholic tiramisu is also an eggless tiramisu which means it comes together so quickly and easily, with a handful of ingredients. You get the creamiest most delicious tiramisu with barely any effort and I promise you’ll make this again and again!
Jump to:
Why make this tiramisu recipe without alcohol?
For a lot of reasons! This makes it easier for everyone to enjoy, whether they don’t consume alcohol, for age related reasons, if you don’t have any liquor on hand.
This specific tiramisu is also an eggless tiramisu recipe, so that’s another reason everyone can enjoy this, whether they are immunocompromised, pregnant, young, whatever the case. Also, it makes it easier to make instead of having to worry about whisking the egg yolks into a custard.
This is the easiest take on on tiramisu you could make, and it’s gotten rave reviews from everyone who has tried it! There’s no custard making, no egg whipping, no technical business.
This tiramisu without alcohol or eggs gets better with time. if you think this is good the same day, wait till you have it after it’s chilled overnight. The lady fingers become fluffier and more sponge like and all the flavors just soak in.
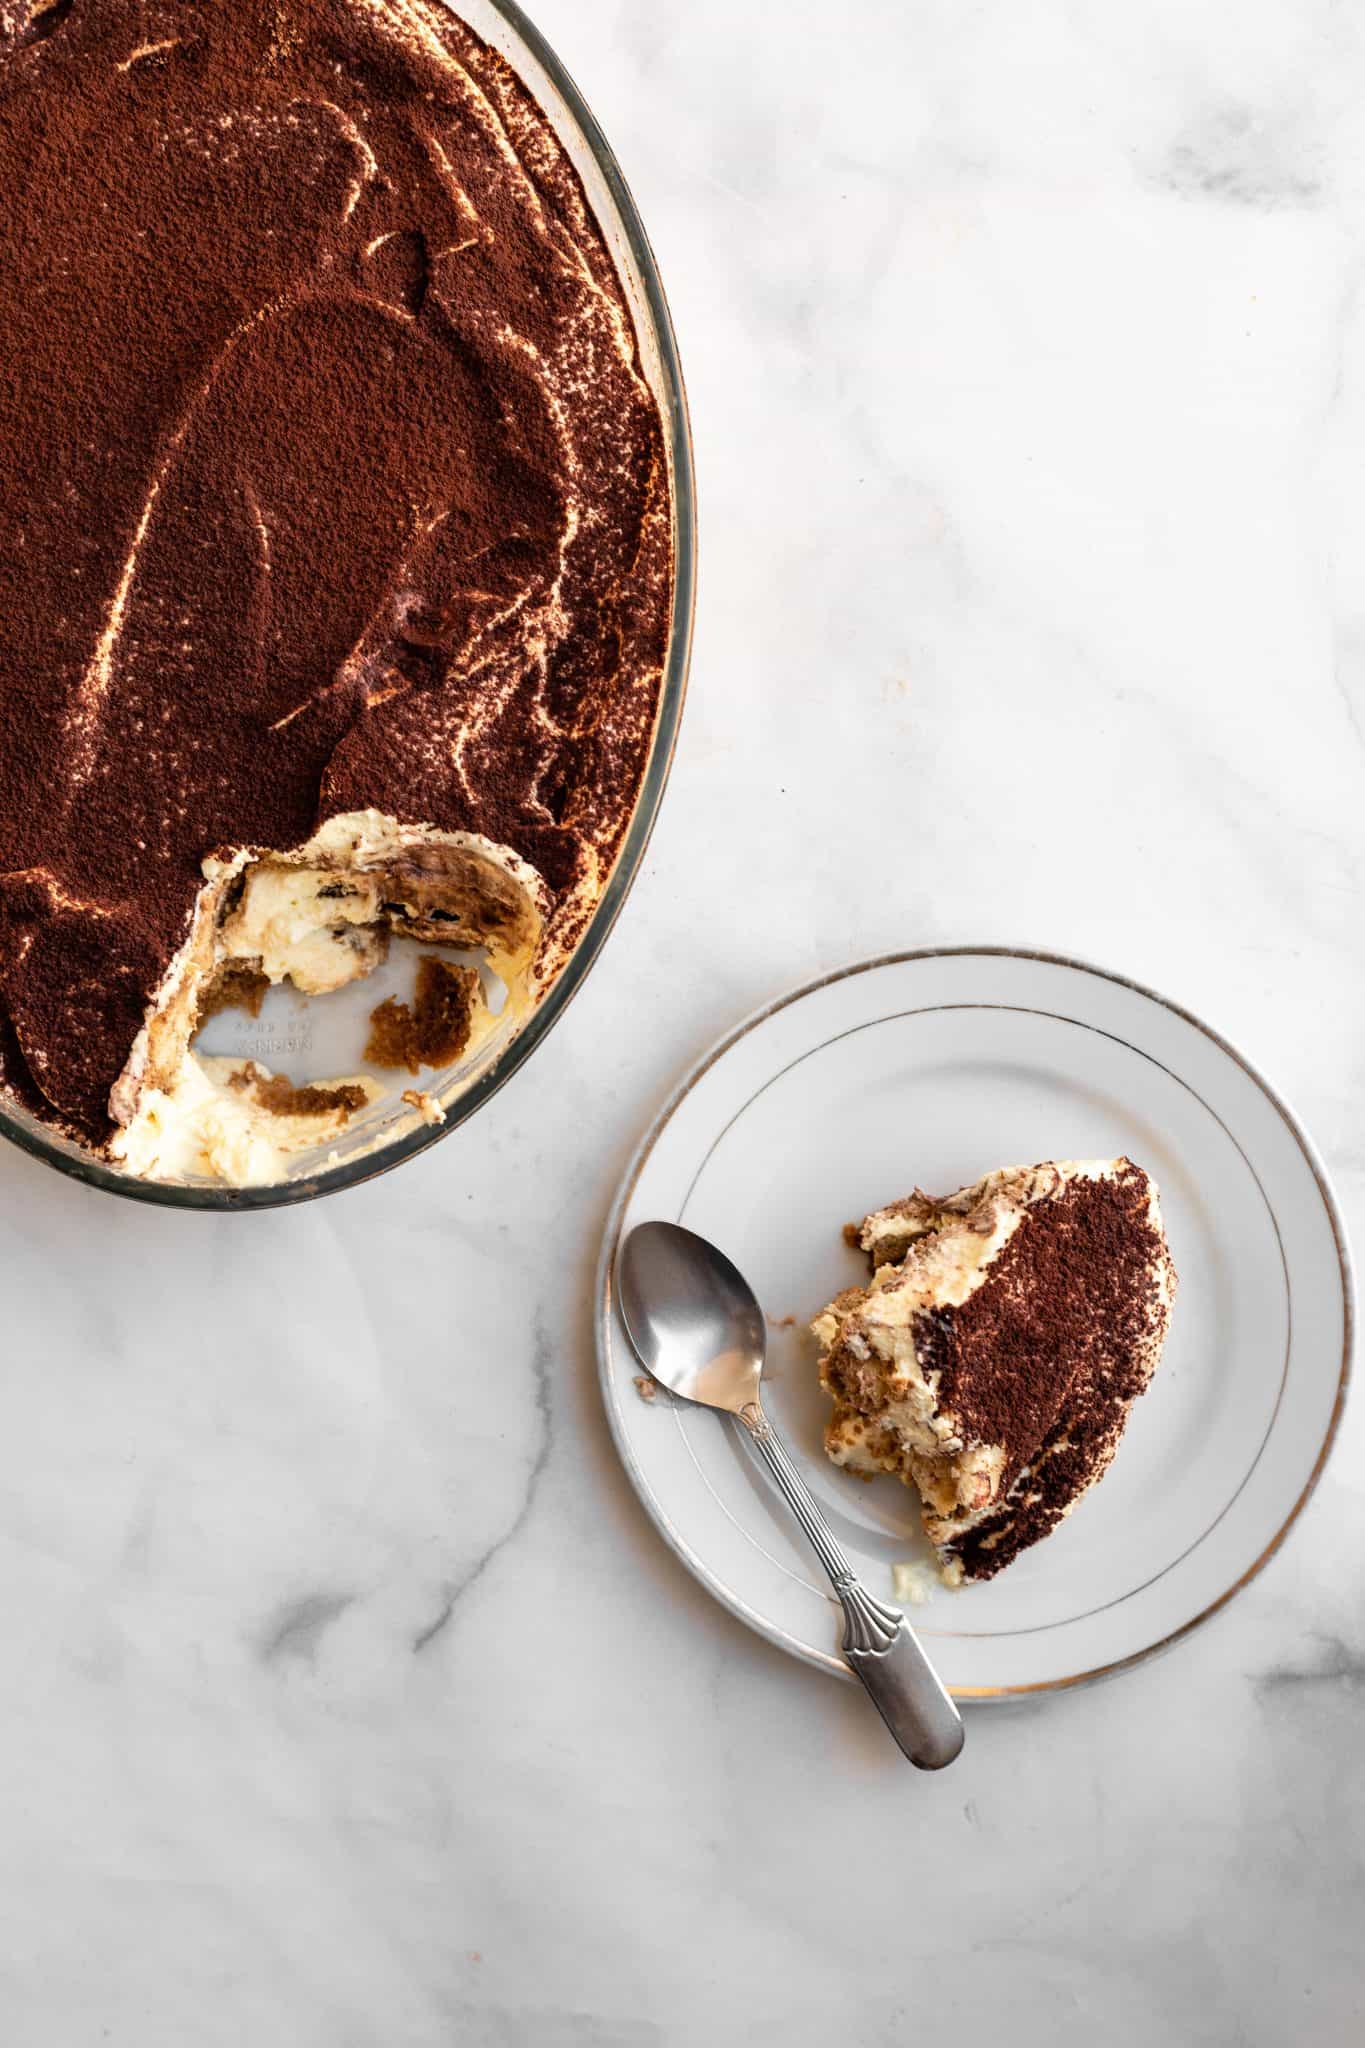
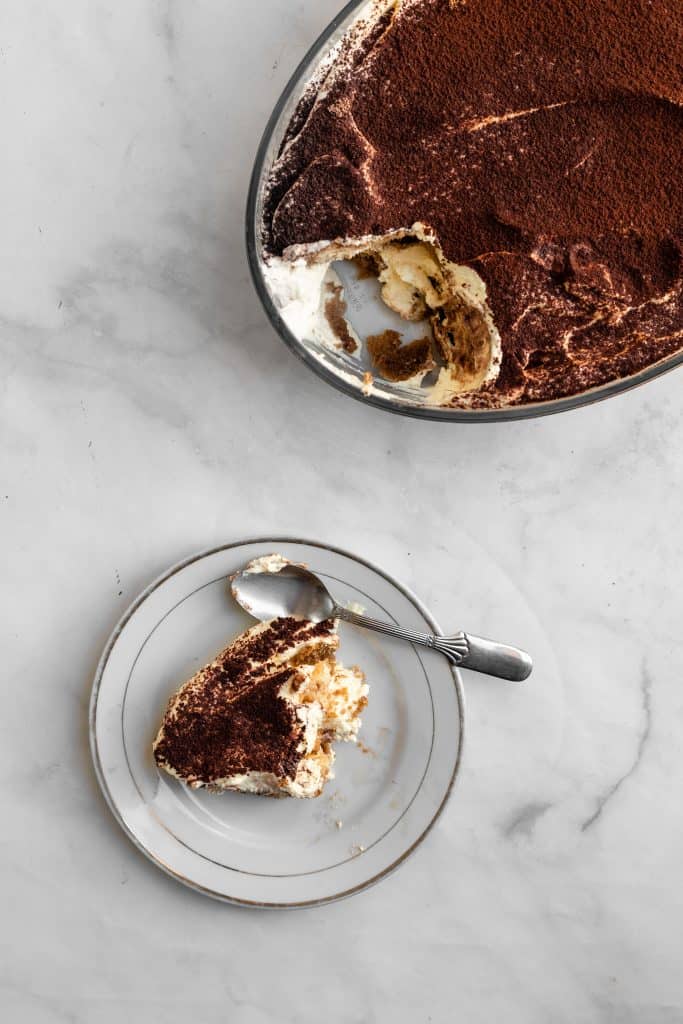
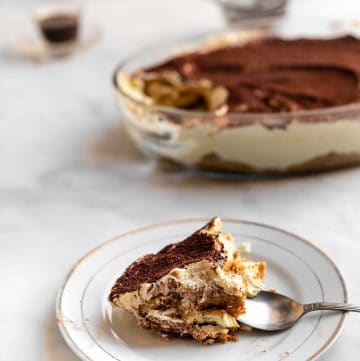
It’s fluffy and creamy and light. It doesn’t taste too heavy at all, and isn’t stiff like some tiramisu made with gelatin can be. I like serving this in scoops rather than slices!

What is in an egg- free, alcohol-free tiramisu?

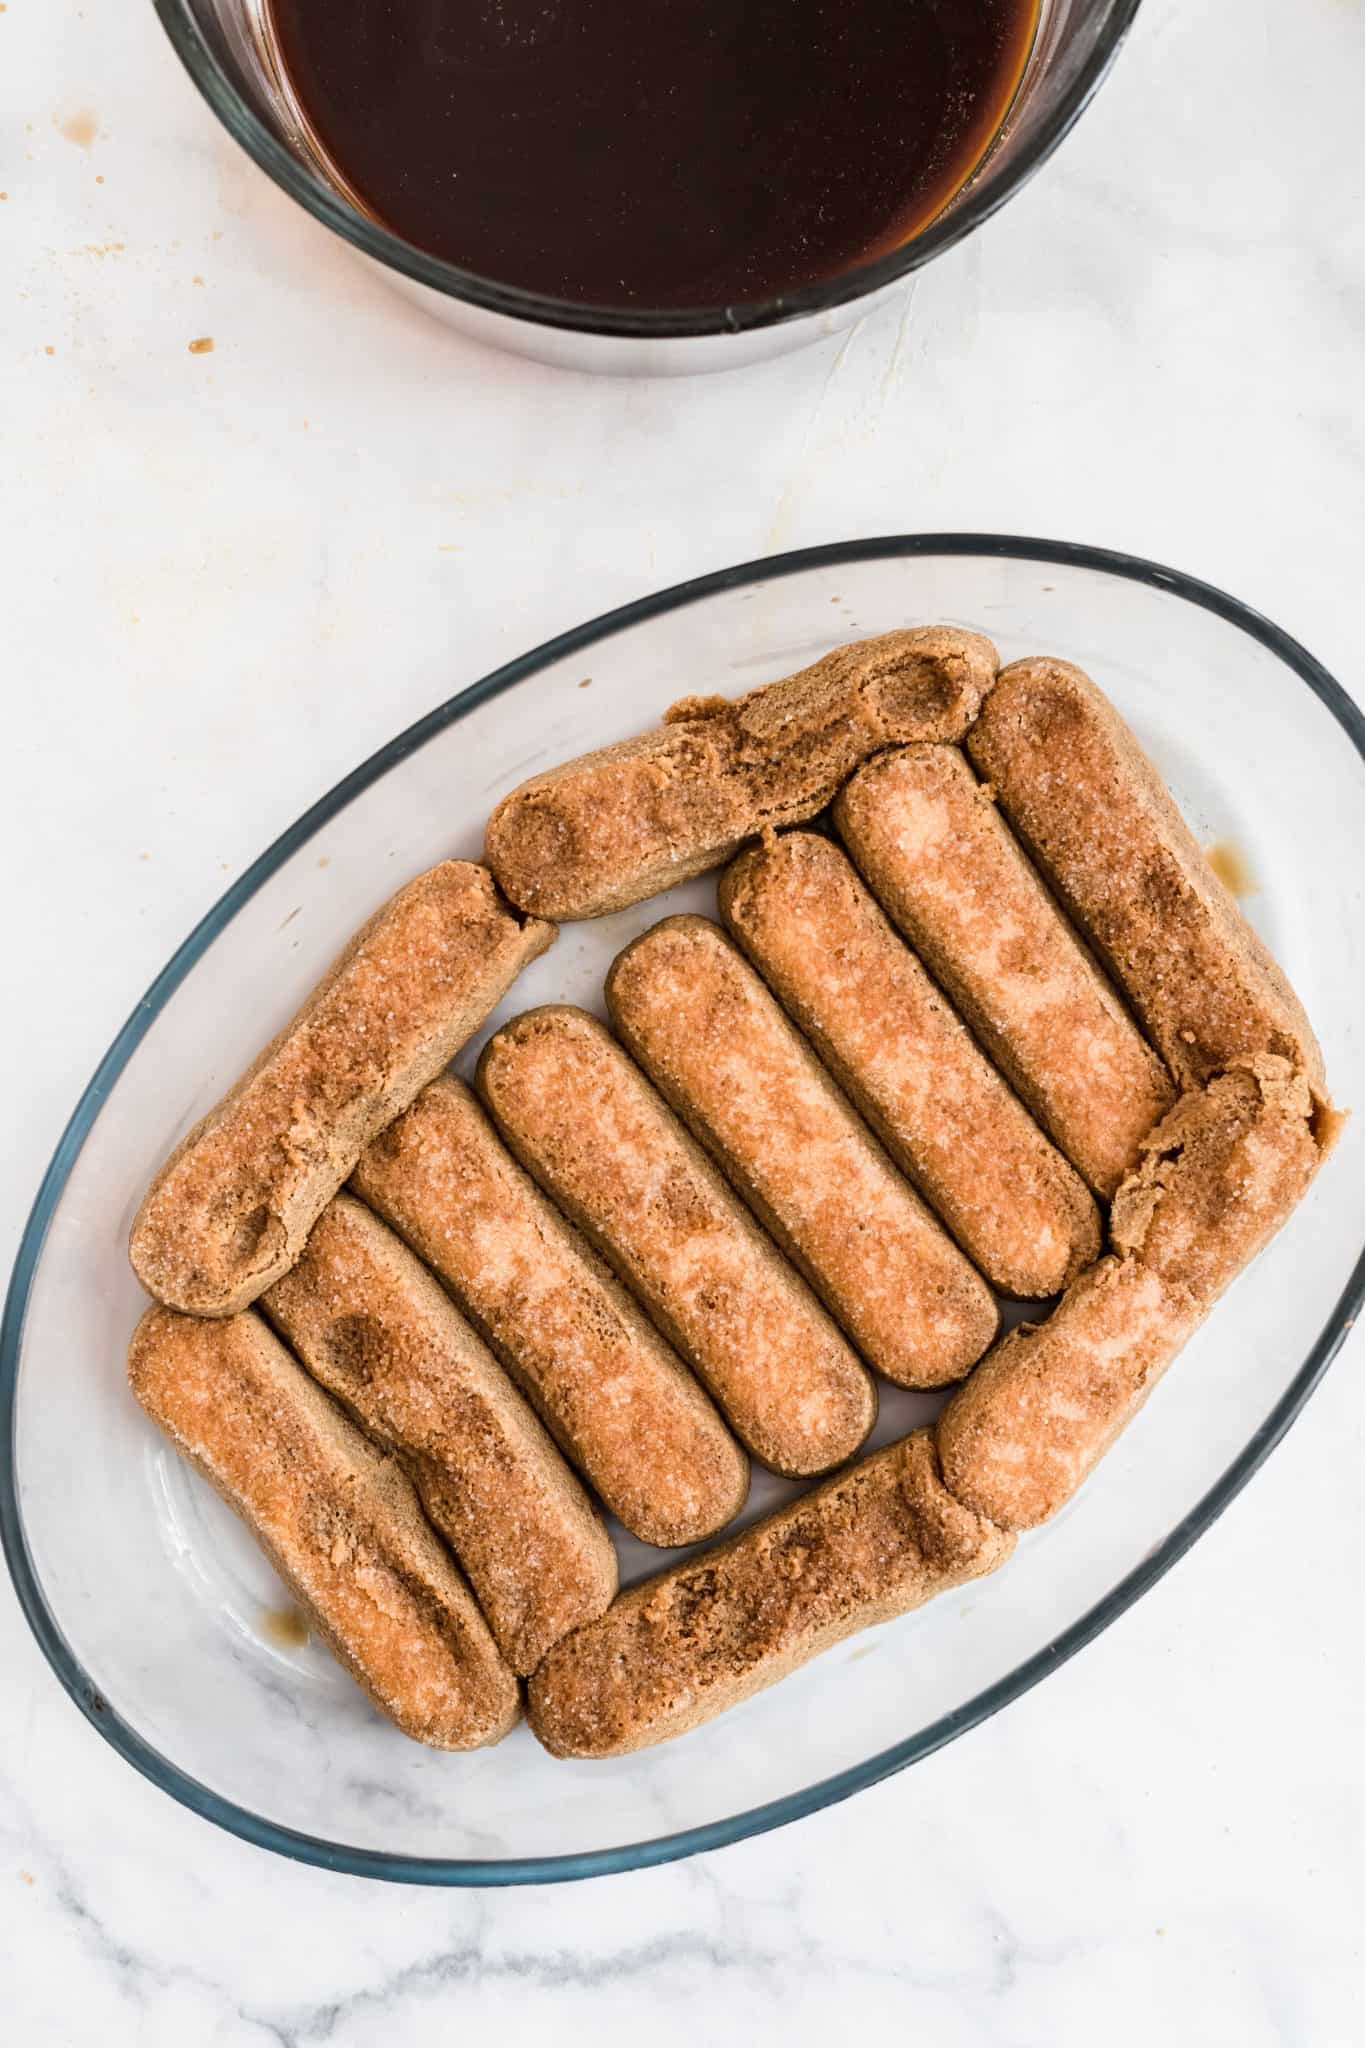
Lady fingers (or savoiardi biscuits): the traditional Italian biscuits that get soaked in the espresso/coffee mix. These are wonderful because they become sponge like and fluffy after soaking, and are mildly sweet.
Heavy Cream (whipping cream): This is what gives us that lovely creaminess without making an egg based custard.
Sweetened Condensed Milk: Just a little bit to sweeten the heavy cream and add a little richness. I loved the way it turned out with this. You can also use powdered (icing) sugar to sweeten instead.
Vanilla extract
Creme Caramel Powder: This is my secret ingredient! It gives depth to the heavy cream when you whip it in, a little sweetness, a little richness. You can definitely leave it out, and perhaps add a little more sweetened condensed milk or icing sugar to the cream, but I do recommend trying it.
Mascarpone cheese: Mascarpone cheese is an Italian cheese that’s like a double or triple cream cheese. It’s made with whole cow’s milk and is richer and silkier than regular cream cheese. It’s whipped in with the heavy cream and gives so much body to it.
However, if you can’t find or don’t want to purchase it, you can substitute cream cheese in this recipe. I do prefer mascarpone, but cream cheese will still be very tasty.
Cocoa powder: for dusting the top and giving that signature slightly bitter taste at the end. Both the natural (Hershey’s) and dutch processed cocoa (the darker European stuff) will work just fine.
Espresso or Coffee for soaking: Tiramisu is traditionally made with espresso. I will have you know I made this with regular Nescafe instant coffee powder and it was fantastic. So if you don’t want to get instant espresso just for this, sub some strong instant coffee. If you have an espresso machine at home, you can also brew espresso, and let it cool slightly and use that for dipping.
How to make a tiramisu without alcohol:
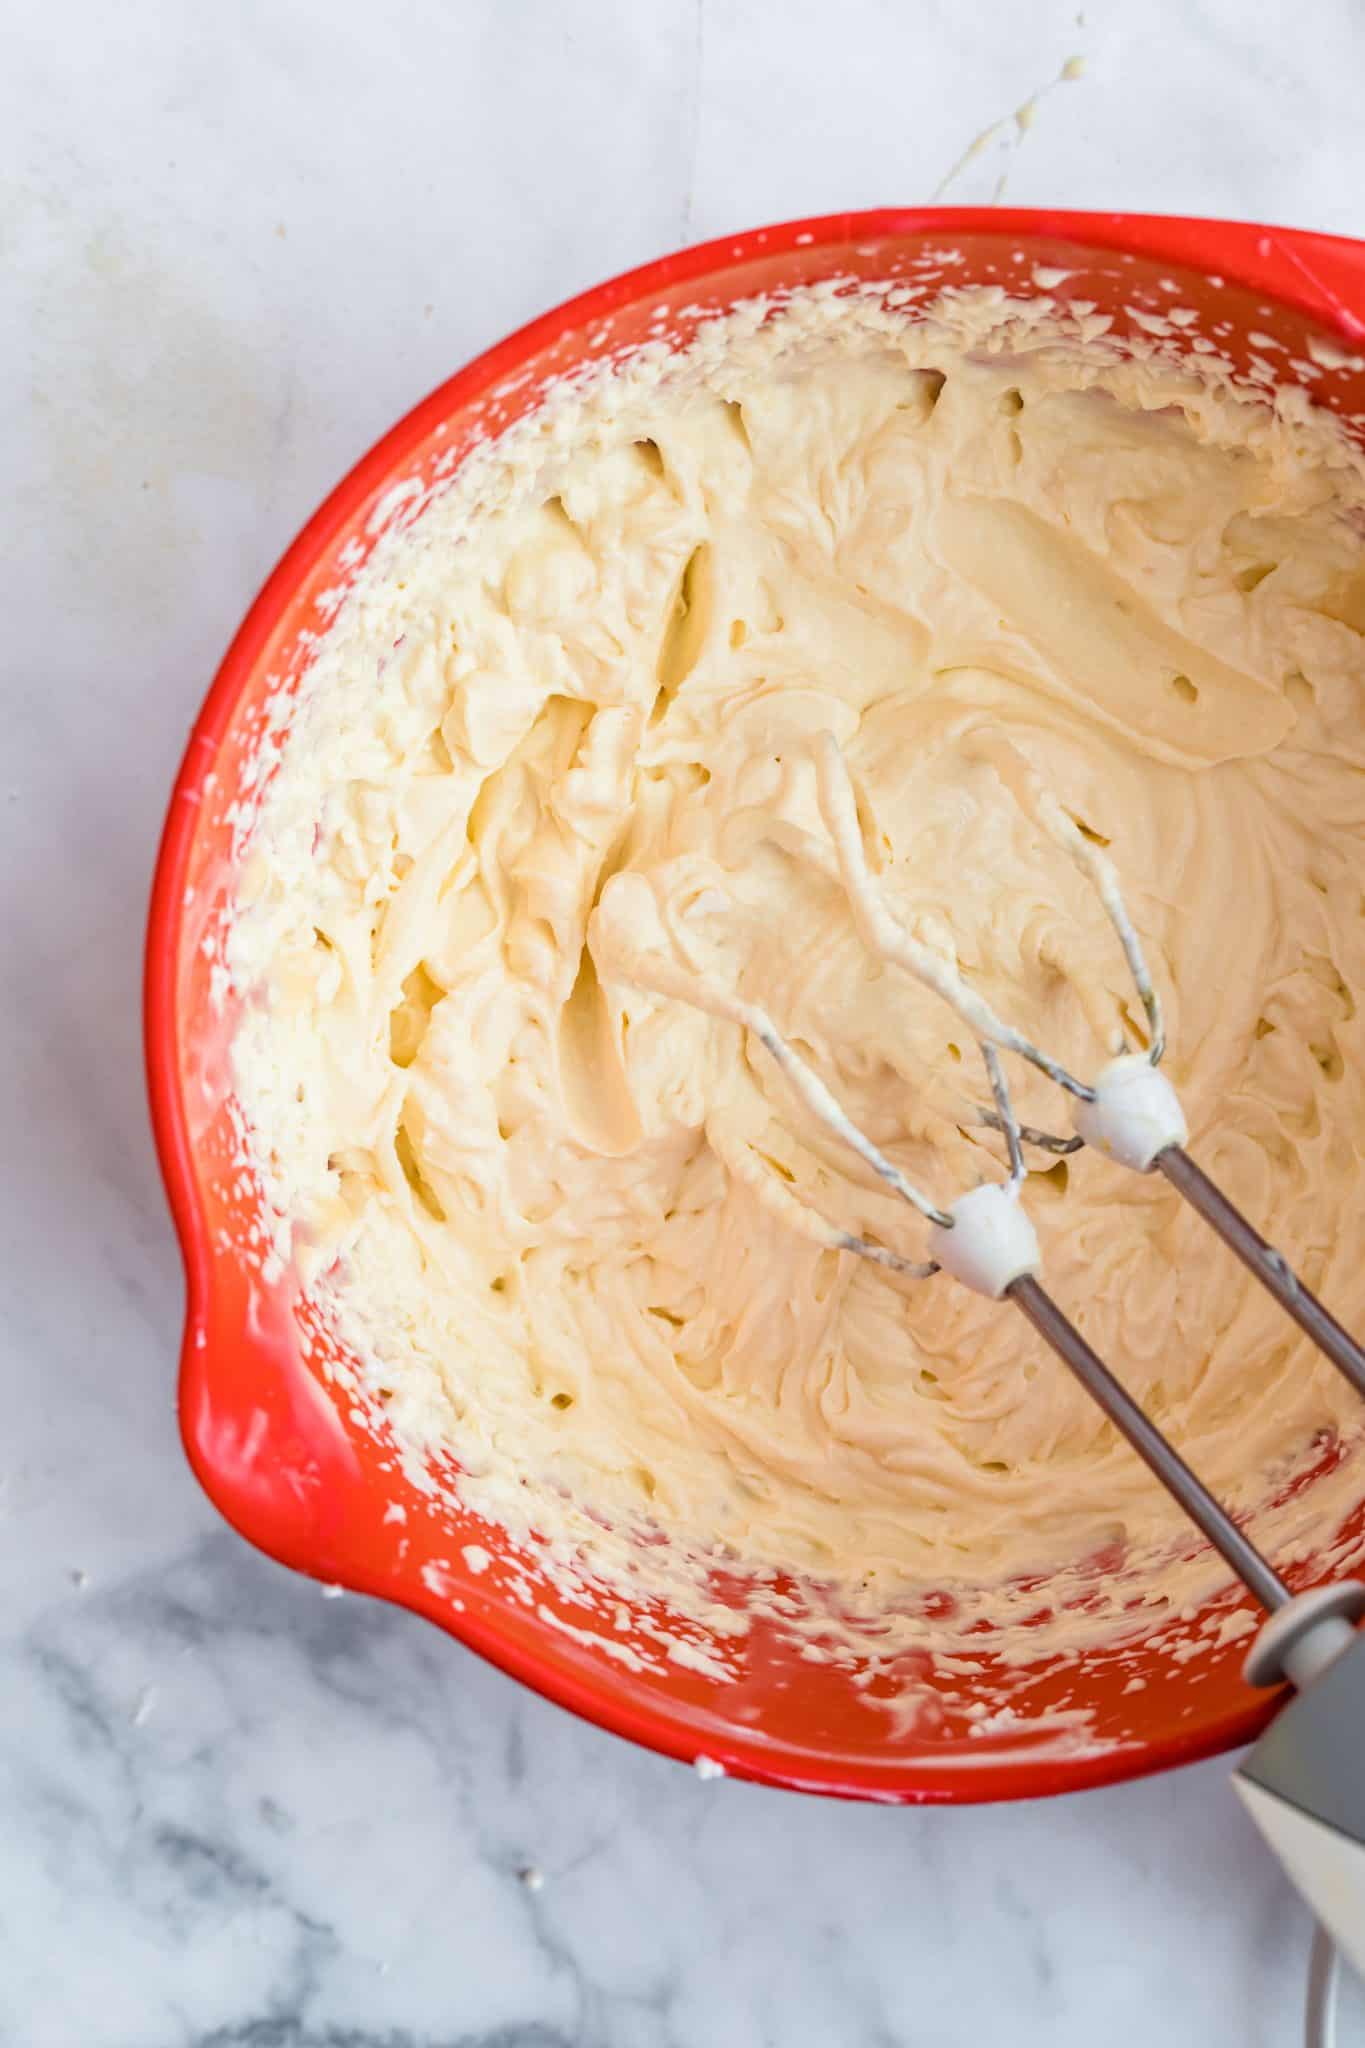


- Make the cream: Whip together the heavy cream, creme caramel powder, vanilla extract, and sweetened condensed milk until stiff peaks form. You can use a stand mixer or a hand mixer for this.
- Then, add the mascarpone cheese and whip until thick and fluffy and peaks hold their shape, but not so much the the mascarpone churns and turns into butter.
- Dip the lady fingers: Dip the lady fingers into a cooled strong espresso/coffee mixture.
- Layer: You’ll need one layer of dipped lady fingers followed by half the cream mixture, another layer of dipped lady fingers, then the remainder of the cream.
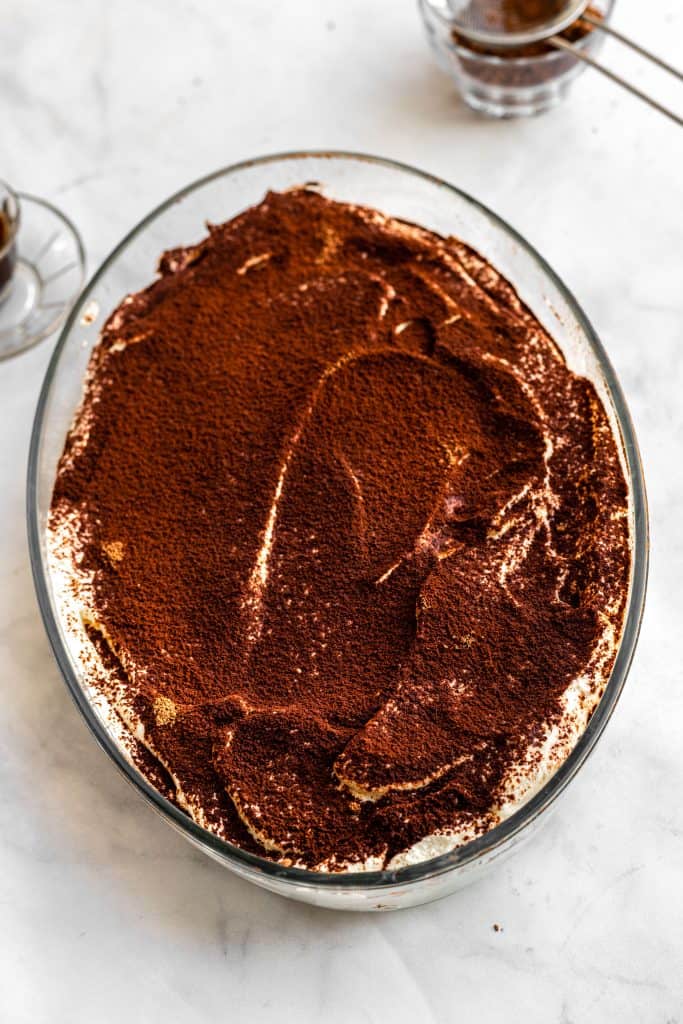
- Dust: The final step is to give tiramisu its signature cocoa dusted top. I recommend using a mini sieve to get a nice even coating all over without any lumps.
How to store leftover non alcoholic tiramisu:
Cover leftover tiramisu and keep in the fridge for up to 3-4 days. It’ll stay delicious throughout! It can also be frozen for up to 3 months, tightly wrapped. Thaw in the fridge before enjoying.
Recipe and tricks:

- Whip enough but not too much: You want to whip the heavy cream to stiff peaks, but once the mascarpone goes in, whip until firm and thick and a nice creamy texture. Don’t over whip when the mascarpone goes in so it doesn’t turn into butter, it shouldn’t take long at all.
- Since there is no raw egg in the tiramisu cream, you can taste throughout. Try the cream after adding the condensed milk and see if you feel like you want to add extra sweetness.
- Don’t over dip the lady fingers: You want to get the lady fingers wet, but just wet. No need to soak them or they’ll fall apart in the tiramisu. Just a quick dip to get the cookies wet, then into a baking dish.
Recipe FAQS:
I used an 11×7 pyrex pan. You can also do this in a 9×9 square pan, or whatever you have on hand, that isn’t too big so that the cream is enough to go around.
I’ve made this recipe before with cream cheese and it still works out great! More cost-efficient too. My favorite is using mascarpone, but you can definitely substitute with cream cheese.
At least a couple of hours, but if you have the time, you can prepare this to chill overnight to make sure it sets up firmly.
For more no bake dessert recipes:


Love this recipe? Please leave a 5-star 🌟🌟🌟🌟🌟rating in the recipe card and a comment!
Stay in touch with me through social media @ Instagram, Pinterest, and Facebook. Don’t forget to tag me when you try one of my recipes!
Easy Tiramisu
Ingredients
- 250 ml heavy cream (whipping cream) 1 cup
- 1 teaspoon vanilla
- 1 creme caramel powder packet, optional (or caramel flan mix, about 1 oz)
- 2-3 tablespoon sweetened condensed milk 3 will give you a sweeter cream, taste and adjust
- 250 g mascarpone cheese 1 cup, about 8 oz
- 1 pack of lady fingers 7 oz, 200g
- 3 tablespoon instant coffee or espresso powder
- 2 cups water
- cocoa powder for dusting
Instructions
- In the bowl of an electric mixer, add the heavy cream, vanilla extract, creme caramel powder, and condensed milk. Use the whisk attachment and beat on medium high until stiff peaks form.
- Add the mascarpone cheese and mix on medium speed until well combined, thick, and fluffy.
- Dissolve the instant coffee or espresso powder in the water. It doesn't need to be that hot, but if you used hot water, cool the prepared coffee before using.
- Dip the lady finger biscuits one at a time into the coffee mix briefly until the lady finger has just gotten wet. Layer one layer of dipped biscuits on the base of your serving dish (I use a pyrex dish 11×7 inches, but see notes for more pan sizes)
- Spread half of the mascarpone cream on the lady fingers until even. Dip the remaining half of the lady fingers in the coffee like above, then layer a second layer of lady fingers on top of the cream.
- Top the second layer of lady fingers with the remainder of the cream. Spread out evenly with a rubber spatula. Dust with cocoa powder evenly, then chill for at least 3-4 hours or preferably overnight.
Deb says
Hi, I made this for the first time. Please advise it was somewhat dry. Thanks
Farah Abumaizar says
Hi Deb! What was dry the actual cream part or the sponge part from the ladyfingers? If it was the ladyfingers I’d just dip them longer in coffee!
Deb says
It was the lady fingers. I tried dipping a little longer but ended up too soggy. I’ll try again.
If it was the cream, any suggestions?
Farah Abumaizar says
Make sure the coffee you are dipping in isn’t too hot, and even if they end up soggy if you keep the tiramisu in the fridge overnight, they should become fluffy! As to the cream, have never had problems with but just make sure you aren’t whipping the heavy cream so much that it churns! Do let me know if that helps
Deb says
Thank you so much!!
Farah Abumaizar says
My pleasure !!
Rasha says
Hi
Can I use cream cheese instead of mascarpone?
You probably answered that question many times, sorry?
Farah Abumaizar says
No problem! You absolutely can, many people have done it with great results!