• Skip to primary navigation
  • Skip to main content
  • Skip to primary sidebar
  • Skip to footer

 logo

  • Recipes
    • Breakfast
    • Sides
    • Soup
    • Main Meals
    • Healthy
    • Dessert
    • Drinks
  • Eating Out
  • About Me
    • Privacy Policy
  • Resources
    • Must Have Kitchen Tools
  • Nav Social Menu

    • Email
    • Facebook
    • Instagram
    • Pinterest

Balaleet بلاليط

Jun 15, 2020 · 2 Comments

Jump to Recipe
close up picture of balaleet with a fork twirling noodles out

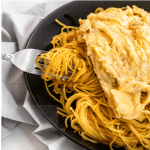
A traditional Gulf Middle Eastern dish, balaleet (بلاليط) consists of sweetened, fragrant vermicelli noodles topped with eggs. Sounds like a strange combination but it works PERFECTLY! I’ll give you a step by step guide and video so you can see exactly how to recreate this on your own!

What is balaleet? (بلاليط)

Balaleet is a traditional dish in the Gulf (the UAE, Kuwait, Bahrain, etc) that incorporates sweet and salty elements. Balaleet is usually eaten for breakfast. In Arabic, it’s referred to as: بلاليط.

It consists of two main parts, vermicelli noodles and an egg topping.

The vermicelli noodles are sweetened and flavored with rose water, cardamom, turmeric and saffron.

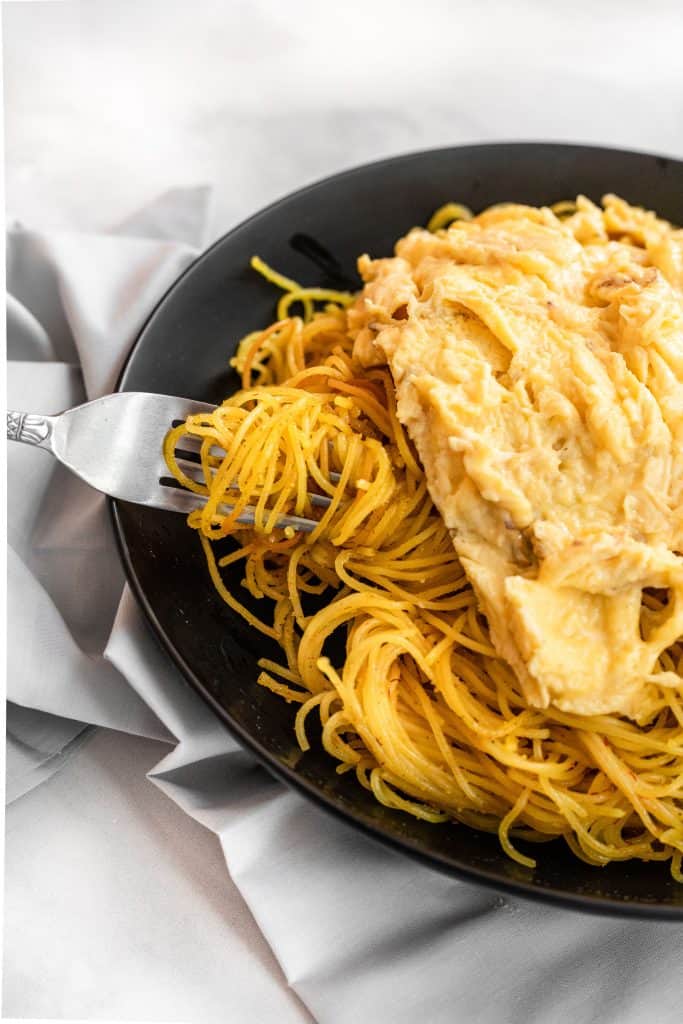
After cooking, they are topped with an egg omelette, or scrambled eggs that have also been flavored with cardamom and saffron, and salt and pepper.

I had never heard of these until I moved to Bahrain in my early teens, but they are ubiquitous in Bahraini cuisine, so I tried them and never looked back.

So good! There’s so much fragrant flavor from all the aromatics used, the noodles are lightly sweetened and contrast perfectly with the saltier spiced eggs. They are truly addictive.

Around the internet you’ll see these often referred to as a traditional UAE dish, but you’ll find them in most Gulf countris and each might have their own take.

Complete plate of balaleet with eggs on top

What makes this recipe so good?

I took all the bits and pieces that I liked of recipes from the different regions I’d seen. I wrote down a rough recipe I wanted to try, thinking this would be a trial and error sort of process. The first try and these were perfect! That usually never happens.

The sugar is very balanced: Most recipes will have at least 3/4-1 cup of sugar for the same amount of noodles. I added 1/2 cup thinking I’d add more if I needed to- I definitely didn’t need to! Sweet enough without being cloying or overly sweet.

There is a great combination of spices: Feel free to play around if you’d like. The amount of cardamom, turmeric, saffron, etc, was just perfect for us! Good ratio, giving enough flavor without being too over the top. I saw a lot of recipes that added a lot more cardamom, but this was enough for our taste!

It’s exotic- but it’s also super comforting!

It’s easy. I made sure to keep it as simple as I could, and it takes probably 15 minutes start to finish for a really great breakfast.

Ingredients in Balaleet:

ingredients needed to make balaleet

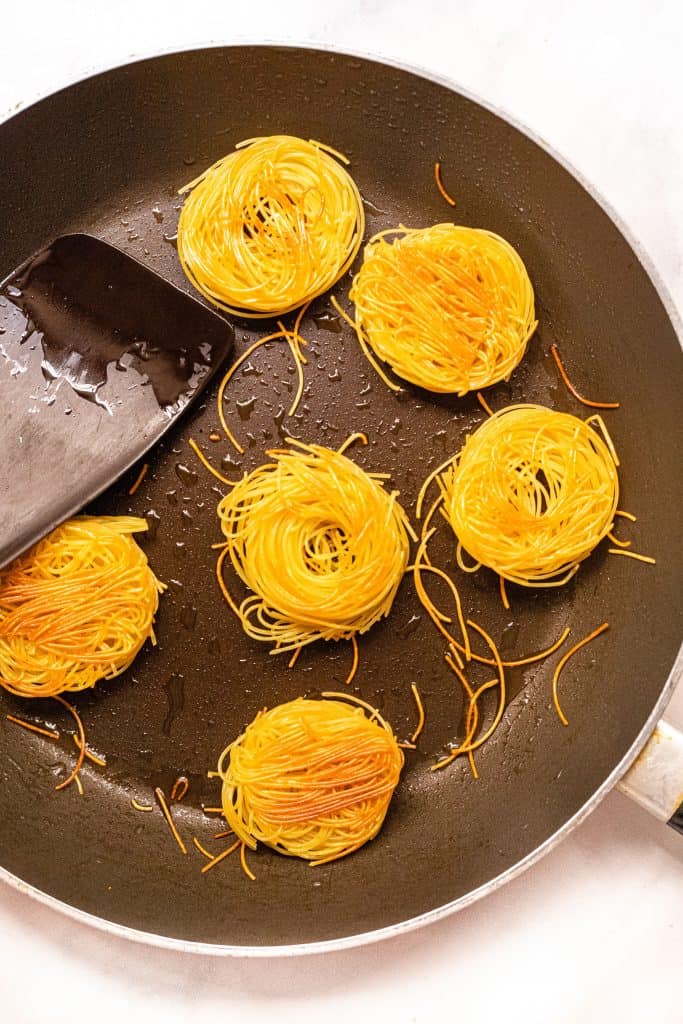
Vermicelli Noodles: I like to use these vermicelli nests for longer strands instead of the short and broken vermicelli. I attached this link for a photo reference.

Oil and butter: You’ll use vegetable oil initially to toast half the vermicelli. Then, some more oil and butter to coat the cooked noodles.

Sugar: Regular white sugar, you can increase or decrease the amount according to taste.

Spices and flavoring: Cardamom is essential in this, as well as turmeric and saffron which will give the noodles a lovely yellow color. I like using rosewater which gives so much fragrance. Also, a pinch of black pepper for a little contrast.

Eggs: I like making a simple omelette to top the noodles with, and season the eggs slightly with saffron and cardamom, as well as salt and pepper.

My husband is really cool and went all out and made a Japanese style omurice omelette to top these with. Incredible! You can do scrambled eggs too! Feel free to increase the amount of eggs if you are serving a larger crowd.

Steps in making balaleet:

Make the noodles by toasting 1/2 of them until golden brown, then adding in the untoasted half.

toasting vermicelli noodles in a skillet

Add boiling water until noodles have cooked to al dente according to package instuctions.

Make sure not to overcook, because once you drain them you’ll be returning them to the skillet.

drained vermicelli noodles after cooking

Wipe out your skillet after draining the noodles, add some oil and butter, and the vermicelli back in.

In goes the spices, the rosewater steeped saffron, the sugar, and the mixture bubbles a little until sugar dissolves and noodles dry out.

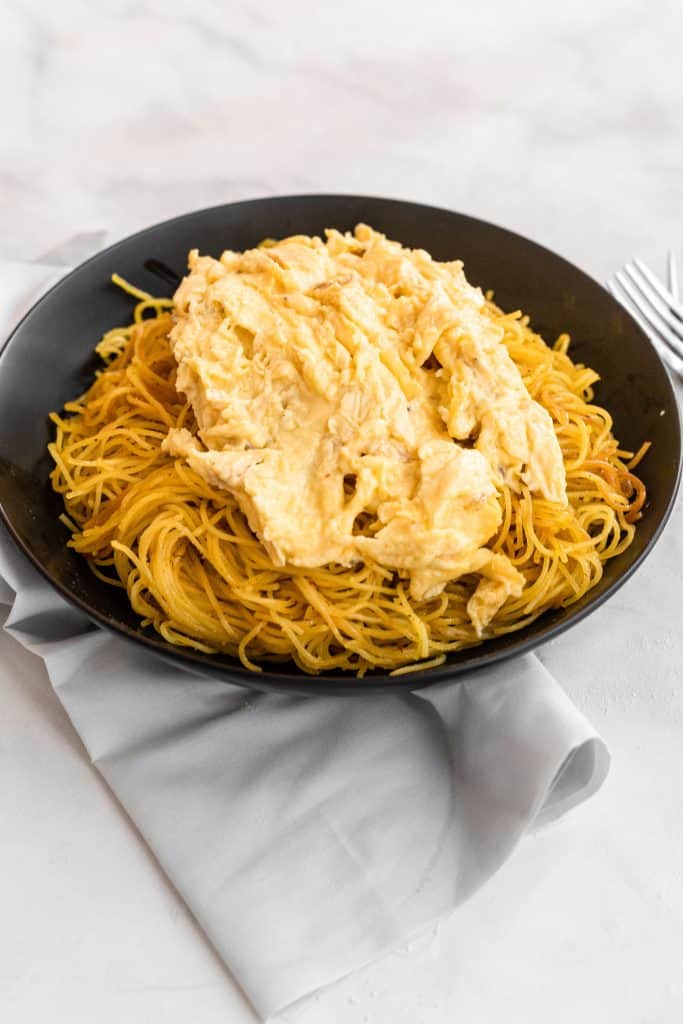
In a separate skillet, prepare the eggs however you like, and top the noodles with them before serving.

egg omelette on top of vermicelli noodles

Enjoy warm, preferably with a cup of tea or chai. Ultimate comfort!

Balaleet -بلاليط

A very traditional and delicious recipe in Gulf Arabian cuisine, balaleet consists of sweetened and fragrant vermicelli noodles topped with eggs. Somehow, this combination works perfectly!
5 from 1 vote
Print Pin
Rate
Course: Breakfast
Cuisine: Middle Eastern
Keyword: eggs, middle eastern
Prep Time: 5 minutes
Cook Time: 10 minutes
Servings: 4 people
Calories: 600kcal
Author: Farah Abumaizar

Ingredients

For the vermicelli:

  • 1/2 tsp saffron threads or powder
  • 1/4 cup rosewater
  • 3 tbsp vegetable oil (divided)
  • 2 cups vermicelli (I used nests) 420g
  • 1 tbsp butter
  • 1/2 cup sugar
  • 1/2 tsp turmeric powder
  • 2 tsp cardamom powder
  • pinch black pepper

For the eggs:

  • 4 eggs
  • pinch saffron optional
  • pinch cardamom
  • salt and pepper to taste

Instructions

For the vermicelli:

  • Dissolve the saffron into the rosewater and set aside to steep for 10 minutes or until ready to use in the recipe.
  • Heat 2 tbsp of the vegetable oil over medium high heat in a large, deep skillet, then add half the vermicelli noodles. Toast on both sides until golden brown, then add the remaining vermicelli.
  • Pour boiling water on top, enough to just submerge the noodles, and boil for 4-5 minutes until cooked al dente or according to vermicelli package instructions.
  • Drain the noodles over a colander, wipe out the skillet, and add the butter and remaining 1 tbsp of vegetable oil over medium high heat. Once hot and bubbling, add the vermicelli back in, along with the sugar, turmeric, cardamom, black pepper, and rosewater saffron mix. Reduce heat to medium, and stir for a few minutes until sugar is dissolved and noodles have dried out a little. Meanwhile, prepare the eggs.

To make the eggs:

  • Whisk together the eggs, saffron (optional), cardamom, and salt and pepper. Make an omelette or scrambled eggs to top the noodles with.

Assemble:

  • Place the cooked vermicelli noodles on serving platter and top with the prepared eggs. Serve immediately.
Tried this recipe?Mention @everylittlecrumb or tag #everylittlecrumb!

Nutrition

Calories: 600kcal
 

Balaleet by everylittlecrumb on Jumprope.


If you liked this recipe, you might like:

Gordon Ramsay Scrambled Eggs

Egg and Toast Cups

Sous Vide Eggs

Did you make this? Tag @everylittlecrumb or hashtag #everylittlecrumb and I’ll share your images! Don’t forget to pin for later!

Breakfast, Recipes

Previous Post: « Garlic Confit
Next Post: Oat Soup »

Reader Interactions

Comments

  1. S says

    February 15, 2021 at 5:58 pm

    5 stars
    Hi Farah, Thank you for the delicious Balaleet recipe. I look forward to making it for my family. Could you please post more Bahraini recipes? I miss Bahraini food and really the recipes and photography on your blog. X

    Reply
    • Farah Abumaizar says

      February 21, 2021 at 7:01 am

      Hello! I’m so glad you enjoy these types of recipes. Definitely! I love Bahraini cuisine and I’ll be working on replicating more recipes. Thanks for the suggestion and hope you enjoy the balaleet !

      Reply

Leave a Reply Cancel reply

Your email address will not be published. Required fields are marked *

Recipe Rating


Primary Sidebar

Get more stuff

Subscribe to our mailing list and get interesting stuff and updates to your email inbox.

Thank you for subscribing.

Something went wrong.

we respect your privacy and take protecting it seriously

FeedFeed

Featured Recipes

Nana tea

Halal Guys Chicken and Rice

Aish El Saraya

Instant Pot Enchilada Soup

Death By Chocolate Zucchini Bread

More

Footer

everylittlecrumb

Farah Abu Maizar | Food Lover
How I spend a lot of my weekends😂. Nothing like How I spend a lot of my weekends😂. Nothing like a big bowl of cookie dough to say weekend mode on! Are you like me and end up eating more dough than actual cookies? My foolproof recipe I use and post time and time again 👇🏼(and often double the batch so I can store some in the freezer!)

Ingredients:
1 stick butter, softened 113 g
3/4 cup tightly packed brown sugar (I like using 1/2 cup light brown and 1/4 cup dark brown, but you can use either or) 150 g total
1/4 cup white sugar 50 g
1 egg, room temperature
1 tsp vanilla extract
1 3/4 cup all purpose flour 220 g
3/4 tsp baking soda
1/4 tsp salt
1 cup semi-sweet chocolate chips or chunks
flaky salt for topping, optional

Instructions:
-In the bowl of a stand mixer fitted with a paddle attachment, or a handheld mixer, cream together butter, brown sugar, and white sugar for 5 minutes on medium speed until light and fluffy.
-Once five minutes is over, add in egg and vanilla and mix until combined.
In a separate bowl, mix flour, baking soda, and salt, and mix until combined. Add these dry ingredients to the butter mixture on low speed, and mix until just combined.
-Using a wooden spoon or spatula, mix in chocolate chips or chunks until just combined. Place bowl of dough in fridge for at least 30 minutes to chill.
-While dough is chilling, heat oven to 180 C (350F). Portion dough out into heaped 1 tbsp-2 tbsp sized dough pieces on parchment paper lined baking sheets. 
-Bake for 11-12 minutes or until golden brown on the edges but still soft in the center. Cool until cookies firm up, then enjoy, still warm.
.
.
.
.
.

#chocolatecake #cookiemonster #cakestagram #cakephotos #layercake #chocolate #weekendbaking #foodblog #instayum #yummy #bakery #foodporn #foodtographyschool #foodphotography #chocolatechips #delish #foodfluffer #damnthatsdelish #cookiedough #chocatechipcookies #bakes #bakestagram #doughbowl #chocolatechips #hersheys
Bbq salmon bowls with mango avocado salsa- unbelie Bbq salmon bowls with mango avocado salsa- unbelievable! And start to finish, you can be eating these in 15-20 minutes. Save this recipe for your next meal, you don’t want to miss out!

I’ve partnered with @kilosamak to produce a few recipes with their quality seafood- I’ve tried several of their items and genuinely loved them all! They deliver seafood straight to your door for you to enjoy and cook at home. Takes all the guesswork out of trying to choose and clean fish yourself, perfect solution for someone like me who loves seafood but isn’t so great at prepping it! Check out their Instagram page on how to order, or head to the link in my bio.

This salmon has a smoky slightly sweet rub, is baked in the oven for ultimate ease, and gets piled on to rice and topped with an easy, addictive, zingy mango and avocado salsa. Adapted from @pinchofyum , I’ll make this again and again!

Ingredients:
For the salmon:
2 fillets, about 250 g each 
Spice Rub:
2 tbsp brown sugar
1.5 tsp paprika 
1 tsp garlic powder
1 tsp onion powder, optional 
1/2 tsp chili powder
1/2 tsp salt 
2 tbsp olive oil 

Mango avocado salsa:
1 diced mangos 
1 diced avocado
1/4 cup finely diced coriander 
1/4 cup finely diced red onion 
1 inch spicy green chili pepper, finely chopped
1 tsp honey
Juice and zest of one lime
Salt to taste

Method:
- Make the salsa by mixing together all the salsa ingredients and placing bowl in fridge while you make the salmon.
- Heat oven to 240C, and line a baking sheet with parchment paper. 
-Mix together all the ingredients for the salmon rub, and rub thoroughly all over the salmon, both sides.
- Bake for 10-12 minutes until salmon is opaque and cooked all the way through.
-Assemble bowls with rice, flaked pieces of salmon,and plenty of mango avocado salsa. Enjoy 😍

Catch the steps in my story!
Have you tried this pasta yet? Save this for your Have you tried this pasta yet? Save this for your next weeknight meal! Saucy macarona iltaybeen, can’t get much more comforting.  Adapted from @jedir3waish , makes for an easy delicious main that’ll make your family including kids very happy! Can find a step by step linked bio, or at https://everylittlecrumb.com/macarona/ , or in my story!

INGREDIENTS:
 
2 tbsp olive oil, divided
big pinch of salt
3 heaped tbsp tomato paste, divided 2 oz or 70 g
1 pack elbow macaroni 14 oz or 400 g
1 onion, very finely diced
1 zucchini, finely diced
1 carrot, finely diced
4-5 garlic cloves, minced
250 g ground beef
1 tsp seven spices
1 tsp turmeric
1/2 tsp paprika powder
1/4 tsp basil
1/4 tsp cinnamon powder
1/4 tsp garlic powder
1/2 tsp black pepper
1 tsp salt
1 can crushed tomatoes 14.5oz (400g)

NSTRUCTIONS
 
Bring a large pot of water to boil, add 1 tbsp olive oil and the salt, one tbsp of tomato paste, then the pack of pasta. Cook until al dente, then drain the pasta, reserving the pasta water. Set cooked pasta aside.

In a large skillet, heat the remaining tbsp of olive oil. Once hot, add the diced onion, and cook for 4-5 minutes until softened. Add the diced zucchini and carrots, and garlic and cook for a further 4-5 minutes until softened slightly.

Add the ground beef, and cook, smushing with a wooden spoon to break up the meat. Keep cooking until the beef is browned and cooked through, then optionally, drain the fat.
Add in the salt, pepper, and all the spices. Cook for another minute or so. Add the remaining 2 tbsp of tomato paste, and stir.

Add the can of crushed tomatoes and stir to combine. Bring to a simmer, then add a big ladleful of the reserved pasta water and simmer for 2-3 minutes on low heat.

Add the pasta to the sauce (I don't always add all the pasta, maybe 3/4 of the cooked amount until the finished dish is as saucy as I like). Stir to coat, cook for another minute or so until the pasta is warmed through, then enjoy!
This gorgeous tiramisu was so kindly sent to me by This gorgeous tiramisu was so kindly sent to me by @cadysweets.sa on my birthday, and we enjoyed every light fluffy bite of it. Their old account got hacked so follow along and support their new account ! They have a bunch of cakes and sweets for every occasion, so make someone or yourself happy and order one for a treat🤩! Send this to the tiramisu lover in your life 🍰.
.
.
.
.
.

#chocolatecake #magnoliabakery #cakestagram #cakephotos #layercake #chocolate #ganache #foodblog #instayum #yummy #bakery #foodporn #foodtographyschool #foodphotography #slice #delish #foodfluffer #damnthatsdelish #tiramisu #birthdaytreat #dessertbae #dessertoftheday #scoop #foodstyling #foodstylingandphotography
Easiest at home crusty bread with a great open cru Easiest at home crusty bread with a great open crumb texture. It’s the no knead bread from @breadin5 and has yet to fail me. Check my story for the step by step, and swipe for a video reveal.

Ingredients for two small loaves:
1.5 cups lukewarm water 
1/2 tbsp any type of yeast
1/2 tbsp salt
3 1/4 cup plain flour (450g)

Method:
In a large bowl, stir together the water with the yeast and salt. Try to dissolve but it’s fine if you have clumps.
2. Add flour all at once and stir, just until no flour patches remain.
3. Cover loosely with a kitchen cloth and leave it to rest for 2 hours in a warm place until risen and bubbly.
After this rest you can:
- Use dough immediately if impatient, but it’s easier to work with if cold, so maybe pop in fridge briefly
- Or, their recommended method and the one I do, leave in the fridge loosely covered for 12 hours or overnight. 
Refrigerated dough lasts up to two weeks, and flavor depends over time!
4. The next day, the dough might look deflated. That’s fine! When ready to bake, divide dough in half (I got two 400g dough balls)- it might be easier to handle if you sprinkle the dough lightly with flour, and take the half you are going to bake out of the fridge. Let it rest on a parchment paper lined baking sheet 40-90 minutes. The longer the more interior bubbles you should have. Preheat oven to 235C (450F), and after rest, make a few deep slashes in the dough with a sharp knife.
5. Place in the middle rack of the oven, and on the bottom rack place a roasting pan that had about a cup of hot water in it. This will create steam which gives a crustier crust!
6. Bake for 30-35 minutes or until deep golden brown.
7. Let it cool completely before enjoying!
.
.

.
.
.

#damnthatsdelish #foodfluffer #thebakefeed #feedfeed #tastingtable #forthemaking #BHGfood #foodblogfeed #bakedfromscratch #bakinglove #f52grams #foodbloggerpro #bakersofinstagram #TOHfoodie #foodphotography #canonphotos #bread #instayummy #kitchn #huffposttaste #food #dough #foodie #nokneadbread #homemadebread #doughter
Good morning! With dine in still closed in Saudi, Good morning! With dine in still closed in Saudi, Friday pancakes are fast becoming a tradition. And honestly, I don’t think I’ve had better pancakes at any restaurant recently! The easiest, fluffiest diner style pancakes are a huge hit in our family, find the recipe below adapted from @allrecipes . I like to barely warm the oven (110C or so) and keep the finished pancakes in a pan in the oven until I’m done with all the batter so they stay warm and perfect 👌🏼.

Ingredients
3/4 cup milk 170g
1 tbsp white vinegar
1 cup flour 125g
2 tbsp sugar 25g
1 tsp baking powder
1/2 tsp baking soda
1/4 tsp salt
1 egg room temperature
1/2 tsp vanilla
2 tbsp butter, melted 28g

Instructions:
-In a large bowl, combine the milk and vinegar, and let aside to stand for 5 minutes until curdled. Whisk to combine.
-In a separate large bowl, mix together the flour, sugar, baking powder, baking soda and salt.
-Add an egg, the vanilla and the melted butter to the buttermilk and whisk to combine.
-Add the dry ingredients all at once to the wet, and whisk until flour patches disappear. A few lumps are fine, but don't over mix.
-Let the batter rest for 5-10 minutes while you heat a pan on the stove.
lightly grease the pan with nonstick spray or butter, and pour about 1/4 cup of batter on the pan. Cook for 2-3 minutes on each side or until golden brown. (Flip the first time once you see bubbles form and the edges of the pancake dry up).
-Enjoy with toppings of your choice!
.
.
.
.
.
#pancakes #pancakerecipe #blueberrypancakes #maplesyrup #breakfast #morningslikethese #fridaymorning #flatlay #foodfluffer #breakfastrecipes #breakfastfood #breakfastofchampions #pancakelover #food #foodtography #foodtographyschool #foodphotography #delish #foodphotos #weekendbreakfast #eatingathome #recipeoftheday #foodporn #foodflatlay #blueberries #trayoftheday
One of my photos from my shoot @tackle.baks . How One of my photos from my shoot @tackle.baks . How insane does this tom yum soup look? For those who haven’t tried this casual seafood spot yet, you really should! The food is great and priced very reasonably, and they have some menu items I’m obsessed with like their crispy fish burger, the salmon poke salad and the creamy truffle shrimp👌🏼. They currently have a delivery offer going for only 5SAR on HungerStation, so no time like the present! Have I tempted you with this photo of the tom yum soup? I’m hungry just writing this caption🤤.
.
.
.
.
.
#soup #tomyum #tomyumsoup #food #foodphotography #canonphotography #canon #seafood #seafoodlover #shrimp #delish #beautifulcuisines #foodtographyschool #foodtography #foodblogger #instayum #lonelyplanetfood #dametravelerfoodie #soupseason #restaurantphotography #khobar #tastemade #tastingtable #foodfluffer
I wanted to take a really pretty photo of the choc I wanted to take a really pretty photo of the chocolate fondants and post it with the recipe but I gave into peer pressure and am posting the recipe with this horribly lit and not at all beautifully set up video🤷🏻‍♀️. At least the video really demonstrates how gooey and perfect the center of these chocolate lava cakes are, and how unbelievably delicious they are. You won’t believe how easy it is to make these! And you may never order this at a restaurant again! You can even use muffin cups instead of ramekins. Save this recipe for when you want to be extra fancy with your dessert 👩‍🍳 I looked at a bunch of recipes online and compiled my favorite steps from each, this is most influenced from @gordongram 

Ingredients:
For greasing the ramekins:
1 tbsp melted butter
1 tbsp cocoa powder

For the fondants:
1 stick butter 115 g
2 eggs
2 egg yolks
170 g chocolate bittersweet chocolate (I used Lindt 70%)
1/2 cup caster sugar or regular sugar
Pinch salt 
3 tbsp flour (41g)
25 g butter melted

Method:
-Spray ramekins with nonstick spray, then dust with cocoa powder and shake until evenly coated, or brush inside of ramekins with melted butter, chill into butter sets, grease again with more melted butter and dust with cocoa powder (Gordon Ramsay’s fancy method)

-Melt together the butter and chocolate over a pan of simmering water (Bain marie ). Set aside melted chocolate to cool for 10 minutes.

-In an electric mixer, whisk the eggs, egg yolks, and sugar until thick and pale about 3-4 min. Sift in the flour and beat again until mixed.

-Pour melted chocolate into the egg mixture in 3 additions, mixing well between each until combined.

-Pour fondant batter evenly into prepared ramekins. If baking immediately, let them chill in the fridge while you preheat the oven to 200C. You can also store in the fridge for up to two days before baking.

- Bake 10-12 minute or until top just looks set. If using muffin pans, they’ll take less time, 8-10 minutes. Remove from oven and cool 1 minute before inverting onto a plate. Enjoy immediately with vanilla ice cream and berries!
Load More... Follow on Instagram

Copyright © 2019 on the Seasoned Pro Theme