• Skip to primary navigation
  • Skip to main content
  • Skip to primary sidebar
  • Skip to footer

 logo

  • Recipes
    • Breakfast
    • Sides
    • Soup
    • Main Meals
    • Healthy
    • Dessert
    • Drinks
  • Eating Out
  • About Me
    • Privacy Policy
  • Resources
    • Must Have Kitchen Tools
  • Nav Social Menu

    • Email
    • Facebook
    • Instagram
    • Pinterest

Baked Fish and Chips

Aug 6, 2019 · 16 Comments

Jump to Recipe
Parchment paper lined baking tray with baked crispy fish and chips on it along with a bowl of peas and homemade tartar sauce

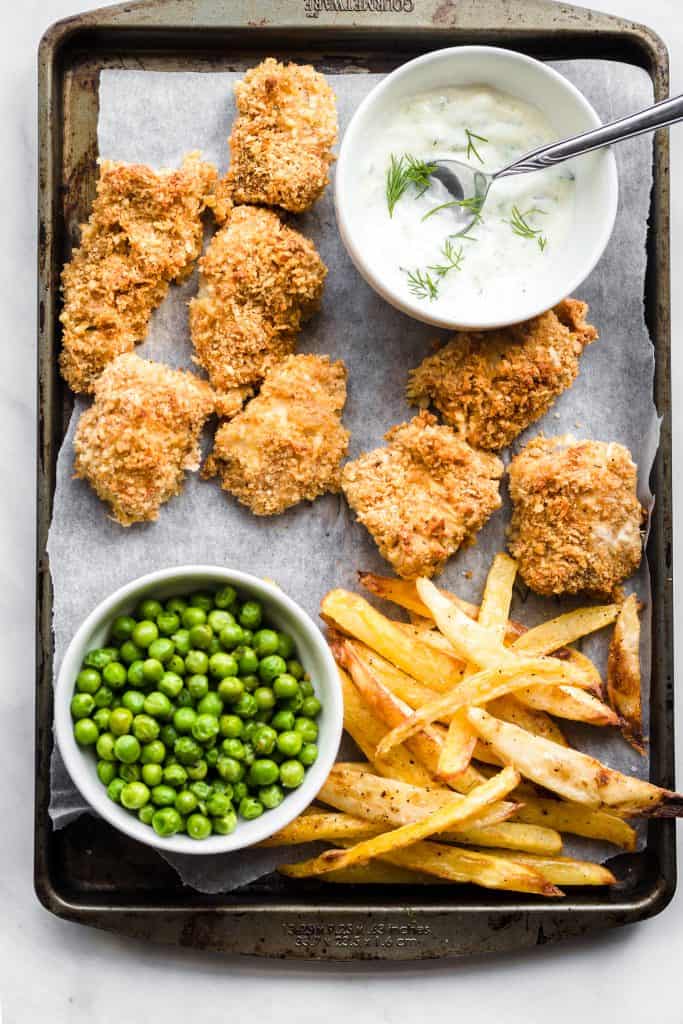
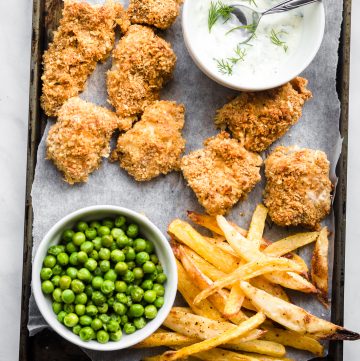
This recipe gives you baked fish and chips that are golden crispy and delicious. Not to mention easier and healthier! Just a few simple steps to follow ensures that you get all the crunch you want without any frying involved.

Is there anyone among us who hasn’t indulged in the occasional plate of fish and chips? Typically fried, the crispy batter that gives way to tender white fish is a true pleasure enjoyed by both kids and adults.

Why bake fish and chips?

It’s a lot healthier than frying, and easier and less mess too. When you make them this way, you still get all the delicious crispiness while baking in the oven. This method, adapted from New York Times Cooking, allows you to cook both fish and fries at the same time, which means your meal is ready before you know it

What kind of fish can you use? Any firm white fish. Locally, hammour is a great choice and what I used. You can also use cod or haddock. Don’t use overly flaky fish like tilapia which will fall apart in this preparation.

Dredging:

Dredging is a method to coat any item of food in flour or breadcrumbs before baking/frying it. The flour gets the egg wash to stick, and the egg wash gets the breadcrumbs to stick. You’ll need:

Flour: Just basic all purpose flour, or you can try using whole wheat flour.

Mustard/Egg Mix: This recipe is the first time I’ve seen that combination, but I really liked it. I feel that the mustard was a great way to counter any fishy flavor, and mixing it with the eggs made a great sticky base to the fish.

Coating: Panko breadcrumbs are ideal for this because they are processed into large flakes which get very crispy when heated, and they absorb less oil than normal crumbs. I love the idea of toasting the breadcrumbs even before going in the oven, which infuses them from so much flavor from the garlic and herbs. This also gets them golden brown before even going in the oven, so you don’t need to overcook the fish inside the oven to get that ideal color.

How to get your oven baked fries to be crispy?

This is the first time I’ve succeeded at making good, crispy, addictive oven baked fries. The key was in parboiling them for just 5 minutes before they go in the oven. The fries are added to COLD not hot water, with a tiny bit of vinegar and salt, then brought to a boil. After boiling, you need to get all that water and moisture off so that they crisp up, so drain then, then thoroughly pat all over with paper towels.

In this recipe, I simply tossed with salt, pepper, and olive oil before baking in a very hot oven but feel free to add anything like paprika, chili powder, flavored salt. Make sure the fries are in a single layer in the baking sheet- use two if you need to- so that they don’t overcrowd onto each other which will result in steaming and limp soggy fries.

Once in the oven, halfway through their cook time (around 10-15 minutes in) you’ll toss them around so that they cook through evenly without burning in any spots.

What to serve with your baked fish and chips:

I sauteed some frozen peas in a pan with butter and minced garlic. That and some corn on the cob made for great side dishes. You could always go simple and just serve as is with some ketchup and homemade tartar sauce for dipping (recipe included)

Homemade tartar sauce:

This was so insanely easy to make, and so much better than the store bought stuff! Thank you Natasha’s kitchen for the inspiration. I just changed the ratios around on her recipe a little for preference. I also used pickle juice instead of going through the process of juicing a lemon for that little amount of liquid needed.

Preparing in advance and storing leftovers:

Fish can be breaded for up to 4 hours before baking, store in the fridge after breading.

This is best fresh out of the oven, but I’ve had leftovers up to 2 days after making. Store tightly wrapped in the fridge, and reheat in a 180 C oven (350 F). Hint- the leftovers made for some GREAT fish tacos!

What are you waiting for? These baked fish and chips are going to be a real hit!

Parchment paper lined baking tray with baked crispy fish and chips on it along with a bowl of peas and homemade tartar sauce

Baked Fish and Chips

Oven baked super crunchy panko coated fish strips with easy and delicious oven baked and crispy fries and homemade tartar sauce
4.86 from 7 votes
Print Pin
Rate
Course: Main Course
Cuisine: American
Keyword: fish, potato
Prep Time: 30 minutes
Cook Time: 15 minutes
Servings: 4 people
Calories: 650kcal
Author: Farah Abumaizar

Ingredients

For the fish:

  • 2 tbsp olive oil
  • 1 1/2 cups panko breadcrumbs
  • 1 tsp dried oregano or thyme
  • 1/4 tsp paprika
  • 1 garlic clove, crushed
  • 1/2 tsp black pepper
  • 1 tsp salt
  • 1/4 cup Dijon mustard
  • 2 eggs
  • 1 1/4 cup flour
  • 600 g white fish like hammour or cod, cut into 1 inch thick slices (1 1/4 lb)

For the fries:

  • 3 or 4 large potatoes, cut into thin strips 1/4 inch thick
  • big pinch of salt
  • 2 tsp white vinegar
  • 4 tbsp olive oil
  • 1/2 tsp salt
  • 1/2 tsp black pepper

For the tartar sauce:

  • 1/2 cup mayonnaise
  • 1/4 cup finely chopped dill pickles
  • 1 tsp pickle juice from the jar
  • 1 tbsp fresh dill, chopped finely
  • small pinch sugar
  • small pinch pepper

Instructions

For the fish:

  • Preheat the oven to 220 C (425 F). Line a baking sheet with parchment paper.
  • In a large skillet over medium heat, warm the 2 tbsp of olive oil. Add the panko breadcrumbs, the dried oregano, paprika, garlic, and black pepper. Cook, stirring constantly until crumbs have turned golden brown, around 5 minutes. When this happens, immediately transfer them to a bowl.
  • In a separate bowl whisk together the Dijon mustard and eggs until well combined. Place flour in a third bowl.
  • Sprinkle the fish fillets evenly all over with salt and pepper. Dredge them by coating them first in the flour mixture, then the mustard mixture, then coating them in the panko breadcrumbs. Make sure they are all evenly coated. Transfer fish pieces to your parchment lined baking sheet. You can bake immediately or store in the fridge for up to 4 hours.

For the fries:

  • Add the sliced potatoes to a large pot and fill with cold water. Add the salt and vinegar. Heat water over medium high heat, and when it comes to a boil let the potatoes boil for 5 minutes before draining them. Dry very thoroughly, patting dry with paper towels. Let them cool just a couple minutes for easier handling.
  • In a large bowl, toss together the olive oil, salt, pepper, and par-boiled potato strips until evenly coated. Spread them evenly on a baking sheet. Bake on the upper rack of the oven for 10-15 minutes, then use a metal spatula and toss them around. Transfer the baking pan to the lower rack in the oven.
  • At this point, put your fish into the oven onto the upper rack of the oven. Bake for another 15 minutes or until fish is flakey and golden and potatoes crispy and browned.
  • Serve hot with ketchup or tartar sauce for dipping

For the homemade tartar sauce:

  • Mix together the mayonnaise, chopped pickles, pickle juice, chopped dill, sugar and pepper until well combined. Store in the fridge until ready to use.

Notes

Fish and Chips adapted from New York Times
Tartar sauce adapted from Natasha’s Kitchen
Tried this recipe?Mention @everylittlecrumb or tag #everylittlecrumb!

Nutrition

Calories: 650kcal

If you liked this recipe, you might like:

Ultimate Grilled Cheese Sandwich with Pesto

Slow Cooker BBQ Beef

Did you make this? Tag @everylittlecrumb or hashtag #everylittlecrumb and I’ll share your images!

Main Meals, Recipes fish, potatoes

Previous Post: « Mini Chocolate Chip Cookies
Next Post: Indian Spiced Shepherd’s Pie »

Reader Interactions

Comments

  1. Danielle says

    August 6, 2019 at 1:40 pm

    5 stars
    Love the idea of baking fish and chips. I definitely need to try this. Great tips for getting crispy fries.

    Reply
    • Farah Abumaizar says

      August 6, 2019 at 1:41 pm

      Thanks Danielle! Hope you enjoy it

      Reply
  2. Amanda Wren-Grimwood says

    August 6, 2019 at 3:11 pm

    5 stars
    I love fish and chips and a lighter option looks perfect for me!

    Reply
    • Farah Abumaizar says

      August 6, 2019 at 3:30 pm

      It’s a great one!

      Reply
  3. Pam says

    August 6, 2019 at 4:40 pm

    5 stars
    Loving this healthy take on the classic. And anytime you can make meal prep easier by cooking two dishes at once I’m all in favor!

    Reply
    • Farah Abumaizar says

      August 6, 2019 at 4:40 pm

      Makes it very convenient! Thanks Pam :))

      Reply
  4. Natalie says

    August 6, 2019 at 5:41 pm

    5 stars
    My kid is obsessed with fish and chips since we moved to UK. I bet he’s gonna love this recipe. It’s super easy to make and so healthy. Better than restaurant bought. I’m definitely making this.

    Reply
    • Farah Abumaizar says

      August 6, 2019 at 5:56 pm

      Thanks Natalie! I can guarantee it’s a hit with the kids. Hope you enjoy it!

      Reply
  5. Tawnie says

    August 6, 2019 at 5:57 pm

    5 stars
    The whole family loved this recipe – thank you!!

    Reply
    • Farah Abumaizar says

      August 6, 2019 at 6:01 pm

      Aw! So so glad to hear it ❤️

      Reply
  6. Hiba says

    August 7, 2019 at 12:05 pm

    Thanks for this recipe will definitely try it for my kids
    But may I know how long do we bake the fish fro?

    Reply
    • Farah Abumaizar says

      August 7, 2019 at 12:09 pm

      Thanks Hiba I’m sure they’ll love it! The dish needs about 15 min depending on the size, when you want to check just cut into one and make sure it’s cooked!!

      Reply
  7. Olga says

    August 9, 2019 at 7:55 pm

    5 stars
    My kids are obsessed with these. Love how easy it is and your tips. Definitely adding this recipe to my kids menu 🙂

    Reply
    • Farah Abumaizar says

      August 10, 2019 at 7:16 am

      I’m so glad that you liked it! That makes me very happy thank you Olga!

      Reply
  8. raida jarrar says

    August 23, 2019 at 9:15 am

    4 stars
    Very comparable taste to my fried but much healthier. Thank you Farah.
    An alternative condiment to try is chipotle mayo made with mayo and a bit of chipotle in adobe sauce and a dash of lemon juice.

    Reply
    • Farah Abumaizar says

      August 25, 2019 at 6:53 pm

      My pleasure! Anything with chipotle I’m just fine with. Sounds great!

      Reply

Leave a Reply Cancel reply

Your email address will not be published. Required fields are marked *

Recipe Rating


Primary Sidebar

Get more stuff

Subscribe to our mailing list and get interesting stuff and updates to your email inbox.

Thank you for subscribing.

Something went wrong.

we respect your privacy and take protecting it seriously

FeedFeed

Featured Recipes

Tamriyeh

Nescafe Cake

Berries and Cream Sara Lee Cake

Kebab Karaz

Eggplant Fatteh

More

Footer

everylittlecrumb

Farah Abu Maizar | Food Lover
You have to know, if I post a chicken recipe it me You have to know, if I post a chicken recipe it means it’s reaaaaaally good. This copy cat Halal guys chicken and rice is unbelievable dish! I got the turmeric rice recipe from @seriouseats and its buttery and perfectly spiced and fluffy and addictive, topped with juicy grilled spiced chicken cubes and a tangy, creamy dressing, tomatoes and parsley. AMAZING! Recipe below and in the @tamimimarkets catalogue❤️.

INGREDIENTS:

For the chicken marinade:
900 g chicken breasts
1/4 cup olive oil
2 tbsp lemon juice
1 tbsp white vinegar
3 garlic cloves, minced
1 tsp salt
1/2 tsp black pepper
1 tsp oregano powder
1 tsp seven spices
1/2 tsp ginger powder
1/2 tsp cumin powder
1/2 tsp paprika powder

For the white sauce:
3/4 cup Greek yogurt 170g (6oz)
1/2 cup mayonnaise 115 g
1 tbsp white vinegar
1 tbsp water
1 tsp lemon juice
1-2 tsp sugar
1/2 tsp salt
1/4 tsp black pepper

For the rice:
2 tbsp unsalted butter
1/2 tsp turmeric powder
1/4 tsp cumin powder
1 1/2 cups basmati rice, soaked for 20 minutes then rinsed
2 1/2 cups chicken stock or 1 stock cube dissolved in 2.5 cups hot water
salt and pepper to taste, a pinch of each

To assemble:
1 chopped tomato
handful chopped parsley
sriracha sauce

INSTRUCTIONS: 
For the chicken:
In a bowl, mix all the ingredients for chicken marinade. Add chicken breast and toss to coat evenly. Cover and marinade for 1-2 hours.

Heat 1 tbsp oil in a large skillet on medium high heat, and cook chicken for 5-6 min each side, or until golden brown and cooked.
Remove chicken to a cutting board, and rest for 10 minutes, before chopping roughly into 2 inch cubes.

For the white sauce:
Mix all ingredients and store in the fridge until ready to serve.

For the rice:
Add butter to a large saucepan over medium heat. Once melted, add the turmeric and cumin, and stir for 1 minutes.
Add the rice, and toast the rice by stirring for 4 minutes. Add chicken stock, salt and pepper to season. Stir and bring to a boil, then reduce heat to a simmer, cover and cook for 15 min, then set aside 15 min and fluff with a fork.

To assemble:
Place the rice in your serving platter, top with the chicken, the white sauce, and chopped tomatoes and parsley. Sriracha too!
This is my go to baked creamy cheesecake. It’s s This is my go to baked creamy cheesecake. It’s so good and rich and easy, topped with a sweet and tangy simple strawberry sauce (sauce recipe from @sallysbakeblog ). I used my new @kenwood_bahrain stand mixer and it was excellent- gave me silky smooth lump free filling. Another winner for my @digitrolley collab- all my new appliances are from them❤️ Check IGTV for recipe video!

For the strawberry topping:
-1 tbsp cornstarch
-3 tbsp water
-450 g strawberries, halved (big pack)
-zest and juice from 1/2 small lemon 
-1/4 cup (50g) sugar

-Whisk together cornstarch and water, then add to a saucepan along with all other ingredients, over medium heat.
-Bring to a simmer, stirring constantly and breaking up strawberries as they cook, 5 minutes or so until thickened. Set aside to cool, can be stored in fridge up to one week.

For the cheesecake:

Ingredients
For the crust:
* 250 g crushed digestive biscuits 2 cups 
* 135 g melted butter 1 stick and 1 tablespoon
* 1/2 tsp cinnamon

For the cheesecake:
* 900 g cream cheese (3 3/4 cup)
* 1 1/2 cup white sugar 300 g
* 3/4 cup milk, room temp
* 4 eggs, room temp
* 1 cup sour cream 240 g
* 1 tbsp vanilla extract
* 1/4 cup all purpose flour 32g

Instructions:

For the crust:
* In a mixing bowl, combine crushed biscuits, the melted butter, and the cinnamon with a fork until crumbs are moistened evenly throughout. Press along the bottom and sides of a lightly greased 9 inch springform pan. Let the crust chill a little in the fridge while you prepare cheesecake.

For the cheesecake:
-Preheat the oven to 180 C
-In  stand mixer, combine the cream cheese with the sugar in a large bowl and mix on medium speed until well combined and fluffy. Blend in the milk, then add the eggs one at a time, mixing briefly after each addition.

-Mix in sour cream, vanilla and flour until smooth. It may be easier to sift in the flour.

-Pour filling into prepared crust. Bake at 180 C for 1 hour, then turn off the oven and leave cheesecake inside for another 5 hours or so until oven has completely cooled. This is to prevent cracking.

* Store cheesecake in fridge after this time period is over until chilled, then top with the strawberry topping.
This, to me, is the sambosa that best embodies Bah This, to me, is the sambosa that best embodies Bahrain- the first- actually the only-place I have these cheesy corn sambosa ❤️. No fancy cheese goes in this, it’s literally the stuff out of a can and take SO melty and cheesy and good. I mix in a little mashed potatoes and it just makes these 💯 times better, creamy and delicious. Posting the full steps on IGTV, it’s so easy you prob won’t need them! Recipe below and tell me- what’s your go to sambosa cheese?

Ingredients
2 small potatoes, peeled and cut into cubes 8 oz total, 235 g
1/2 cup corn kernels, from a can, drained
12 oz American cheese, like Velveeta or Kraft, grated 340 g (2 170g cans of Kraft processed cheese)
pinch salt
pinch black pepper
1/2 pack samosa wrappers each pack is 500 g

Instructions:
-Cover potato cubes with water, and bring to a boil. Reduce heat and simmer until potatoes are completely cooked through. Drain, and mash.

-Let potatoes cool slightly then combine mashed potatoes with the grated cheese, drained corn, salt and pepper. Mix well until the mixture is evenly combined. Taste for and adjust seasoning.

-Fill each samosa wrapper with a tbsp of mixture on the bottom corner, then fold the corner of the samosa up and over the filling to the other side, to make a triangle. Keep folding this triangle over all the way up the top (check the video at the bottom of this recipe card to see how). Mix together the flour and water to form a thick paste, and seal the ends of the samosa to prevent them from opening up while frying.

-Place vegetable oil in a skillet, about 2 inches deep and heat on medium high heat. Once hot enough, add the sambosa and fry for around 2 minutes a side until golden brown. Remove to a paper towel lined plate to absorb some of the excess oil, then enjoy warm.

.
.
.
.
.

#harira #soup #ramadanrecipes #ramadan2021 #ramadan #ramadankareem #vegetablesoup #soupseason #soupsofinstagram #delishkitchen #friedfood #aprilisforarabfood #f52grams #foodfluffer #foodflatlay #foodphotography #foodphotographer #foodstylist #thefeedfeed #middleeasternfood #vegetarian #tasty #tastingtable #tastemade #samosa #sambosa
This is one of my top 5 recipes from this Ramadan’s recipe prep. One of my features does the @tamimimarkets recipe catalogue! Click the link in their bio to access this gorgeous (free!) catalogue.

This harira soup is unbelievable. Hearty and delicious and beautifully spiced- I’ve never been obsessed with harira soup until this one. It’s a simple one because it’s meat free, so it’s perfect to start your iftar with but also hearty enough to totally serve as a meal alongside some sambosas. Recipe below, and IGTV video coming in a bit!

Ingredients
3 tbsp olive oil
1 large onion, diced
3 celery stalks, diced
2 carrots, diced
1 tsp cinnamon powder
1/2 tsp salt
1/2 tsp black pepper
pinch red chili flakes
1/2 cup chopped parsley
1/2 cup chopped coriander(cilantro)
1 can tomato sauce 15 oz (430g)
7 cups vegetable stock or 2 stock cubes dissolved in 7 cups water
1 can drained chickpeas 15 oz (400 g)
1 cup green lentils
1/2 cup vermicelli noodles 50 g
2 lemons, juiced 1/4 cup juice
2 tbsp flour, dissolved in 1/4 cup water* use cornstarch if gluten free

Instructions:
-Start by adding the lentils to a bowl of water and soaking as you prepare the rest of the ingredients, this helps them cook through faster.
-Heat oil in a large saucepan over medium heat, and add the onions, celery and carrots. Saute for 6-8 minutes, until onions soften and turn golden brown.
-Add all the spices, the chopped parsley and chopped coriander, the tomato sauce, and the vegetable stock. Bring the pot to a boil, then add the drained chickpeas and drained lentils. Reduce heat and simmer for 25 minutes or until chickpeas and lentils are tender.
-Add the vermicelli, and let it boil for 3-4 minutes or until tender. Add the lemon juice, and the flour water mixture. Let it simmer another minute or until it thickens, then taste for seasoning and add salt and pepper if necessary.
.
.
.
.
.
#harira #soup #ramadanrecipes #ramadan2021 #ramadan #ramadankareem #vegetablesoup #soupseason #soupsofinstagram #moroccan #moroccanfood #aprilisforarabfood #f52grams #foodfluffer #foodflatlay #foodphotography #foodphotographer #foodstylist #thefeedfeed #veganrecipes #vegan #tasty #tastingtable #tastemade #lentils
Never ever liked vimto until I had it like this 🍧. Vimto smoothies means that the sweetness of vimto is tempered by that cold crunchy shaved ice. Could not stop eating/drinking these vimto slushees! So easy, you just need water, ice, vimto and a high speed blender- my @ninjakitchenme did so well breaking down huge ice chunks👏🏼. Save this for a little twist on your classic iftar drink🥳

Ingredients:
-3/4 cup water
- 3/4 cup vimto 
- 2 cups ice 

Method:
Add the ingredients to your blender in the order listed, and blend on frozen drink mode until slushy like consistency. Add more ice or water if you need to, and enjoy immediately with a spoon/straw. Yum!
.
.
.
.
.

#ramadan #ramadan2021 #ramadanrecipes #iceddrinks #slush #slushy #slushii #berries #syrup #cordial #drinkphotography #damnthatsdelish #foodfluffer #pour #dripshot #foodphotography #foodphotographyandstyling #foodstylist #foodstyling #thefeedfeed #vimto #foodtographyschool #foodtography #beautifulcuisines
A biscuit base topped with a super easy smooth, cr A biscuit base topped with a super easy smooth, creamy pistachio cheesecake and the crowning touch,  @mayadelices ‘s luscious milk chocolate melted and poured over the top. I mean- heavenly! Recipe below, adapted from @savoryandsweetfood ,, IGTV will be uploaded today. I am absolutely loving @mayadelices couverture, great quality baking chocolate thats so fun experimenting with! They have sugar free and vegan options too, and best of all it’s easily available in their shop in Bahrain 🍫👏🏼

Ingredients:

For the crust:
2 cups digestive biscuit crumbs (250 g)
1/2 cup butter melted, 115g
Pinch cinnamon powder

For the pistachio cheesecake filling:

1 cup pistachio powder (140g)
12 Kiri squares or cream cheese (215g)
250 ml thick cream
1/2 of a 400 g tin of sweetened condensed milk, more if you like it sweeter

To top:
1 cup Maya milk chocolate (160g)
pistachios to garnish

Method:
1. Preheat oven to 180C. Grease and line a 8x8 inch pan with parchment paper with extra paper hanging over the sides so you can easily lift out the bars.

2. Mix digestive crumbs with melted butter and cinnamon. Press this firmly into the base of the pan. Refrigerate for 10 minutes.

3. In a food processor, add the pistachio powder, kiri cheese cubes, thick cream, and condensed milk. Blend until well combined and smooth. Pour this mixture into the crust base and bake for 15-20 minutes until set but center is still a little jiggly. Let cool at room temperature for 1 hour then refrigerate for several hours.

4. Melt the milk chocolate gently in the microwave, in 10 second bursts, stirring after each increment. Once smooth and melted, spread over the top of the cheesecake, and refrigerate until set. Enjoy!
.
.
.
.
.
#ramadan #ramadan2021 #ramadanrecipes #cheesecakebars #cheesecakebites #chocolateporn #pistachio #chocolatelover #chocolaterecipes #cheesecakelovers #cheesecakelove #damnthatsdelish #foodfluffer #pour #chocolatedrip #dripshot #foodphotography #foodphotographyandstyling #foodstylist #foodstyling #thefeedfeed #thebakefeed #foodtographyschool #foodtography #beautifulcuisines
Want a Ramadan dessert that takes minutes to make Want a Ramadan dessert that takes minutes to make and tastes amazing? Yeah we all do - I got you! Try this coffee biscuit cake (barely adapted from the wonderful @littlesunnykitchen). Layers of coffee soaked biscuits and a super easy fluffy cream 👌🏼. I used my new @braun_bahrain handheld electric whisk, one of the attachments in the minipimer set-It whips the cream so fast, much faster than my stand mixer and it’s so convenient to be able to use any bowl to prep the cream in. I’ve partnered with @digitrolley to bring you lots of good recipes with their range of kitchen appliances, so keep following along! Recipe below , and IGTV video coming today in my Ramadan series!

Ingredients
2 tbsp nescafe powder dissolved in 1 cup hot water
1 cup heavy whipping cream 250ml
3 tbsp sweetened condensed milk
splash vanilla extract, optional
1 creme caramel sachet, powder only 49g
1 pack tea biscuits or graham crackers 7 oz or 200 g
2 tbsp cocoa powder for topping

Instructions:
-Add the heavy cream, sweetened condensed milk, vanilla and creme caramel powder to a bowl and beat until soft peaks form. Set this cream mixture aside.
-Dip the tea biscuits into the coffee briefly until they soak up the coffee but before they start to break apart. -Layer in a 7×11 or 9×9 inch clear pyrex dish, then top with half the cream mixture.
-Repeat another layer of coffee soaked biscuits on top of the heavy cream, followed by the remaining half of the cream. Sift the cocoa powder on to the top, then refrigerate for several hours until set. This is even better the next day!

.
.
.
.
.
#nescafe #nescafegold #coffeecake #biscuit #biscuitcake #nobake #nobakedessert #nobakecake #tiramisu #damnthatsdelish #tastingtable #beautifulcuisines #foodphotography #foodphotographyandstyling #tastyfood #easydessert #ramadankareem #ramadan2021 #ramadanrecipes #cream
Ramadan Kareem! And the first recipe is for these Ramadan Kareem! And the first recipe is for these unbelievable (and easy!) chicken musakhan sambosa was developed for @tamimimarkets Ramadan catalogue. One of the coolest projects I’ve ever worked on can’t wait to tell you more about it! In the meantime, enjoy this teaser recipe and check IGTV for full video steps coming up. 

Ingredients:
2 chicken breasts, cooked and finely shredded about 1 heaped cup of shredded chicken See notes
1/4 cup olive oil
2 large onions cut in half, then thinly sliced into wedges
1/4 cup toasted almond slivers or pine nuts
3 tbsp sumac
1/2 tsp salt
1/4 tsp black pepper
1/4 tsp cumin powder
1/4 tsp cinnamon powder
To assemble:
1 pack sambosa wrappers 500 g
1 tbsp flour
1/2 tbsp water
For frying:
vegetable oil, about 1/4 cup

Instructions:
-In a deep skillet over medium heat, add the olive oil until it heats up. Add the onions, and cook, stirring frequently until soft and starting to caramelize, 8-10 minutes.

-Add the shredded chicken, the toasted nuts, and all the spices. Stir to combine, then remove from the heat. Let mixture cool slightly 5 minutes or so.

-Fill each sambosa wrapper with a tbsp of mixture on the bottom corner, then fold the corner of the sambosa up and over the filling to the other side, to make a triangle. Keep folding this triangle over all the way up the top 

-Mix together the flour and water to form a thick paste, and seal the ends of the sambosa to prevent them from opening up while frying.

-Place vegetable oil in a skillet, about 2 inches deep and heat on medium high heat. Once hot enough, add the sambosa and fry for around 2 minutes a side until golden brown. Remove to a paper towel lined plate to absorb some of the excess oil, then enjoy warm, optionally with yogurt to dip in.
.
.
.
.
.
#chickensamosa #musakhan #ramadankareem #ramadan2021 #ramadanrecipes #samosa #friedfood #palestinianfood #middleeasternfood #beautifulcuisines #damnthatsdelish #f52community #thefeedfeed #foodgawker #f52grams #buzzfeedfood #tastingtable #tastemade #chickenrecipes #sumac #caramelizedonions #foodblogfeed #foodphotography #foodphotographyandstyling #foodstyling
Load More... Follow on Instagram

Copyright © 2019 on the Seasoned Pro Theme