• Skip to primary navigation
  • Skip to main content
  • Skip to primary sidebar
  • Skip to footer

 logo

  • Recipes
    • Breakfast
    • Sides
    • Soup
    • Main Meals
    • Healthy
    • Dessert
    • Drinks
  • Eating Out
  • About Me
    • Privacy Policy
  • Resources
    • Must Have Kitchen Tools
  • Nav Social Menu

    • Email
    • Facebook
    • Instagram
    • Pinterest

Labneh Cheesecake Bars

Nov 19, 2020 · Leave a Comment

Jump to Recipe
two cheesecake slices, one plain and one covered with honey caramel

Creamy tangy labneh cheesecake bars are made with labneh and Greek yogurt, and optionally served with a delicious and easy honey caramel sauce. This dessert is a showstopper and comes together so easily!

What is labneh?

Labneh is yogurt that’s been strained to remove most of the moisture and whey. This gives a thicker, creamier consistency, more like a soft cheese than yogurt. That’s why it makes for such a great cream cheese replacement in cheesecake!

Why make cheesecake with labneh?

Labneh is creamy and smooth. It’s much like cream cheese, but with more of a tangy flavor. This makes it a great substitute for cream cheese.

Some people find labneh an easier to digest dairy product then cheese, especially when it’s made from goats or sheeps milk. My mom is one of them! She doesn’t tolerate regular cheese well, so this labneh cheesecake is right up her ally!

zoomed in shot of slice of labneh cheesecake with honey caramel sauce and pistachio nuts

Why make cheesecake into bars?

It’s so much easier! You don’t have to worry about the cheesecake cracking, or a water bath or any of that stuff. Making it into bars will eliminate any cracks.

It’s a more manageable dessert size- about half the amount of ingredients that you’d use in a traditional 9 inch springform cheesecake. Good for portion control!

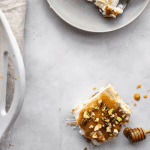
It’s also more portable. Once chilled, you can cut these into nice little bars and take with you on the go.

What ingredients do I need to make labneh cheesecake bars?

ingredients needed to make labneh cheesecake bars with honey caramel sauce

For the crust: you need biscuit crumbs, melted butter and a hint of cinnamon powder.

You can use graham cracker crumbs or digestive biscuit crumbs (more common in the UK- I love these!). You can even use wafers or lotus crackers, anything you like really.

For the filling: labneh, sugar, milk, room temperature eggs, Greek yogurt (or sour cream), vanilla extract and a little flour. Flour helps make the cheesecake fluffy and light, but make sure it incorporates well into the batter and is lump free (you might want to sift it in).

How to make a honey caramel sauce to top labneh cheesecake with:

honey caramel sauce in a jar

The sauce is a revelation! I have a whole post on it here: It’s a caramel sauce made without any sugar, just honey that’s caramelized and cooks with butter and heavy cream.

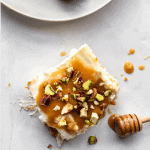
It pairs so nicely with the cheesecake bars, especially because the labneh is a little tangy so the added sweetness from the sauce really makes it cohesive.

I included instructions for the optional honey sauce in the recipe card below. Honey cheesecake is something everyone needs to try at least once. Delicious!

Process of making the cheesecake:

cheesecake crust in pan with cheesecake batter in a bowl on the side before being baked

You can make the cheesecake with a few simple steps.

First, you need to prepare the crust. To make your biscuits into crumbs, you can process them in a food processor until fine crumbs form. What I usually do though, so there’s less washing up is to just put the biscuits in a large ziploc bag, and smash them with a rolling pin. Cathartic! And easy.

The crust is pressed into a prepared pan (lightly greased) and baked at 350F (180C) for 8-10 minutes or until the crust starts to smell fragrant. Remove from the oven and let it cool a little while you make the batter.

Make the cheesecake batter: The key is to have all your ingredients at room temperature. The labneh, Greek yogurt, milk, and eggs should all be room temperature so they incorporate easily with each other.

The labneh is first creamed with the sugar until light and fluffy and sugar dissolves. Next, the milk is added then the eggs one at a time. Once the eggs are added, don’t beat too much so you don’t risk getting cracks in the cheesecake. Granted, it’s hard for cheesecake bars to crack, but don’t over mix just in case.

Next, the Greek yogurt is added (or sour cream), along with the vanilla and flour. Fold the batter a couple times with a spatula after everything is mixed up just to make sure you get any remaining flour patches.

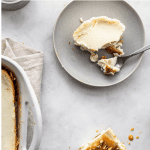
Pour the filling into the prepared crust and bake for 35-40 minutes. Once baked, let the cheesecake cool at room temperature for at least 30 minutes before it goes into the fridge for 4 hours or overnight to chill completely. Enjoy cold, plain or with toppings of your choice.

whole baked labneh cheesecake in pan

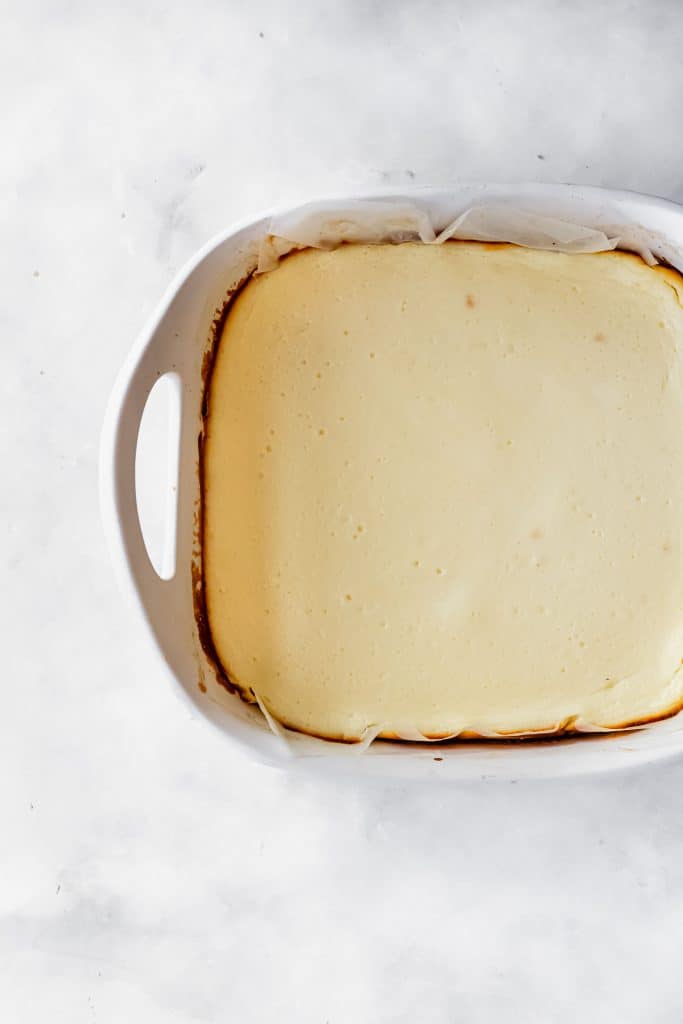
How do I know when my cheesecake is done baking?

The edges will be set and a little puffy but the very center will still be a little jiggly if you shake the pan. Not liquid, just set and maybe a little glossy still but with a good wiggle. Then you know your cheesecake is done because it will continue to set as it cools!

How to store leftover cheesecake:

Leftover cheesecake can be stored for up to 5 days in the fridge, or up to 1 month tightly covered in the freezer. Individual slices will thaw really quickly in the fridge!

whole baked pan of cheesecake bars with honey caramel in a jar on the side

If you like this recipe, you might like:

Lotus Biscoff Cheesecake

San Sebastian Cheesecake

Honey Caramel Sauce

Labneh Dip

Date Bars

Labneh Cheesecake Bars with Honey Caramel

Farah Abumaizar
A creamy, tangy cheesecake made easy in bar form using labneh and Greek yogurt. So creamy and delicious! Optionally served with a sugar free honey caramel sauce- what a flavor!
Print Recipe Pin Recipe
Prep Time 10 mins
Cook Time 35 mins
Course Dessert
Cuisine Middle Eastern
Servings 16 people
Calories 160 kcal

Ingredients
  

For the crust:

  • 1 cup graham cracker or digestive biscuit crumbs 120 g
  • 1/4 cup butter, melted 60 g
  • 1/4 tsp cinnamon powder

For the cheesecake:

  • 2 cups labneh, at room temperature 450 g
  • 3/4 cup white sugar 150 g
  • 6 tbsp milk, room temperature 90g
  • 2 eggs, room temperature
  • 1/2 cup Greek yogurt or sour cream 120 g
  • 1.5 tsp vanilla extract
  • 2 tbsp all purpose flour

For optional honey caramel sauce:

  • 1/4 cup butter 50 g
  • 1/2 cup and 2 tbsp honey 200 g
  • 1 cup heavy whipping cream 250 ml

Instructions
 

For the crust:

  • Heat oven to 350 F (180C). Combine crushed biscuits, melted butter, and cinnamon with a fork until crumbs are moistened evenly. Press along the bottom of a lightly greased and parchment paper lined 8 inch square pan.
  • Bake crust for 8 minutes and set aside to cool slightly while you prepare the filling. Reduce heat to 325F (165C).

For the cheesecake:

  • Using a mixer, combine the labneh with the sugar in a large bowl and mix on medium speed until well combined and fluffy.
  • Blend in the milk, then add the eggs one at a time, mixing briefly after each addition.
  • Mix in Greek yogurt, vanilla and flour until smooth.
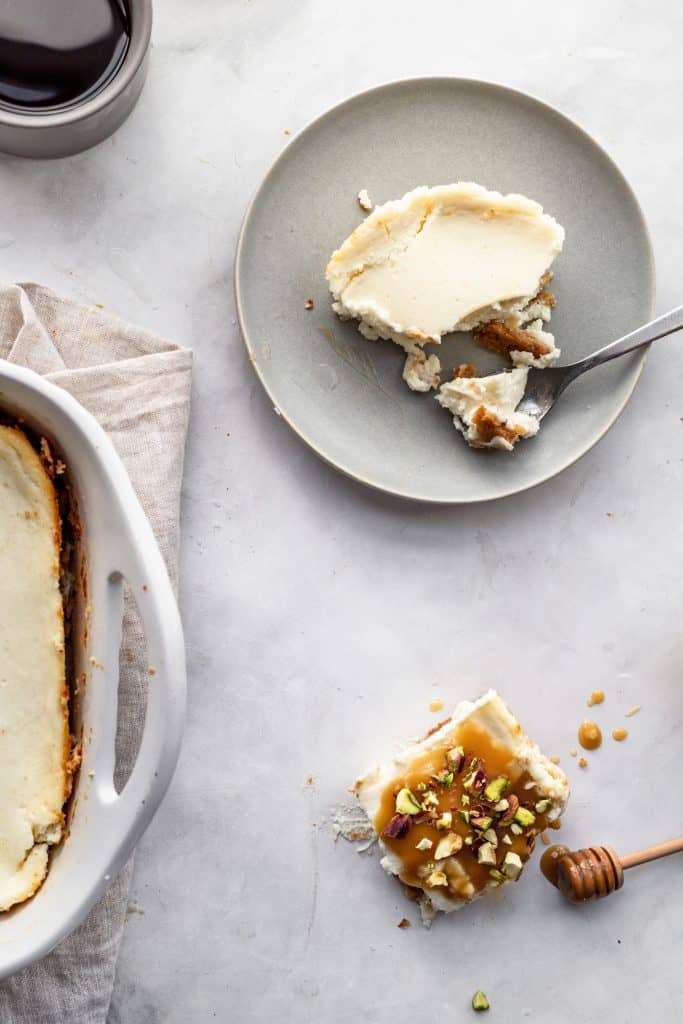
  • Pour filling onto crust and bake 38-40 min until edges are set and center jiggles slightly. Cool room temp for 30 min, then 4 hours or overnight in fridge. Enjoy plain, or topped with honey caramel sauce (recipe below) and chopped pistachios.

For honey caramel (optional topping)

  • Melt the butter and honey together in a small saucepan over medium heat. Stir until combined. Increase the heat slightly, and allow to simmer gently for 10 minutes or until slightly thickened and darkened in color.
  • Add the cream, whisk to combine, and allow to just come to a boil, then remove saucepan from the heat. Stir in the salt, and let stand for 5-10 minutes for the sauce to cool slightly, then store in fridge if not using right away.

Notes

Honey Caramel sauce adapted from Baking Mad.
Cheesecake recipe adapted from Lotus Biscoff Cheesecake
which is adapted from All Recipes.
Keyword cheesecake, dessert
 

Labneh Cheesecake by everylittlecrumb on Jumprope.

Did you make this? Tag @everylittlecrumb or hashtag #everylittlecrumb and I’ll share your images! Don’t forget to pin for later!

Dessert, Recipes

Reader Interactions

Leave a Reply Cancel reply

Your email address will not be published. Required fields are marked *

Recipe Rating


Primary Sidebar

Get more stuff

Subscribe to our mailing list and get interesting stuff and updates to your email inbox.

Thank you for subscribing.

Something went wrong.

we respect your privacy and take protecting it seriously

FeedFeed

Featured Recipes

Arabic Grills

Heaven Bars

Egyptian Goulash

Pink Hummus

Orange Blossom Cake

More

Footer

everylittlecrumb

Farah Abu Maizar | Food Lover
Just posted the recipe for the chicken and lamb sk Just posted the recipe for the chicken and lamb skewers on the blog! You’ll also find a recipe for Kafta skewers there- save this post or head to https://everylittlecrumb.com/arabic-grills/ linked in bio for all the recipes. Nothing like good old fashioned juicy skewers with a little bit of char to set the weekend mood 😍 And I know you’ll love this recipe!
.
.
.
.
.

#delish #shishtaouk #shishtaouk #skewers #bbqporn #chocolate #chickenrecipes #foodblog #instayum #yummy #winter #foodporn #foodtographyschool #foodphotography #grill #delish #foodfluffer #damnthatsdelish #kafta #kebab #hummus #grills #bbq #lebanesefood #middleeasternfood #lamb #redmeat #pitabread
Fluffy, soft and moist, this old fashioned orange Fluffy, soft and moist, this old fashioned orange cake is another @mrsclueless recipe that exceeded all my expectations. So yum! The only thing I did differently was work the orange zest into the sugar and add a tiny splash of orange blossom because I had a bottle just begging to be used. If you are living under a rock and not following @mrsclueless already, go now! Reposted her recipe below:

INGREDIENTS:
 
4 eggs, room temperature and separated (yolk from white)
1 1/2 cups sugar 300 g
1.5 tsp vanilla extract
1-2 tsp orange blossom water
zest of 2 oranges
1/2 cup vegetable or canola oil
1/2 cup room temperature butter 113 g
2.5 cups all purpose flour 312 g
2 tsp baking powder
1 cup fresh orange juice

INSTRUCTIONS:
 
Preheat oven to 350 F (180C) and prepare your cake pan by lightly greasing and lining with parchment paper or flouring. I used a 9 inch springform pan, you can also use a bundt cake.
Using your fingertips, work the orange zest into the sugar until the sugar has moistened and turned fragrant and changed into a pale yellow/orange color.
In the bowl of a mixer fitted with paddle or whisk attachment, mix the egg yolks, orange zest scented sugar, vanilla, and orange blossom water on medium high speed for 2-3 minutes or until pale yellow and fluffy.
Add the oil and the butter and mix until well combined.
Add the flour and baking powder and mix until just combined, then add the juice and mix until combined.

In a separate bowl (either with a handheld mixer, or transfer the cake batter to another bowl and thoroughly wash and dry the mixer bowl) use an electric whisk to whisk the egg whites on medium high speed for 2-4 minutes until they form peaks that hold their shape.
Fold the egg whites into the cake batter with a rubber spatula, I like to do this in three additions. Take care not to deflate the egg whites.
Pour batter into prepared cake pan and bake for 50-60 minutes or until skewer inserted in the center comes out clean. If the outside of the cake is browning too rapidly and the inside still isn't cook, cover loosely with foil for the remainder of the baking time. Start checking at 40 minutes, every oven is different.
Taco Tuesday 🌮! We drove a good 30 minutes to v Taco Tuesday 🌮! We drove a good 30 minutes to visit this tiny little Mexican joint in seihat called @cancun.sa . The best priced Mexican food I’ve ever encountered- nearly ever dish is under 20 riyals and it was all delicious! Small portions, which is good so you can try a bunch of stuff. Fave was the shrimp burrito and also loved the simple beef tacos, and cheesy quesadillas. Totally exceeded my expectations , I just wish it was closer to Khobar! Would you drive 30+ minutes to fulfill a 🌮 craving?
.
.
.
.
.

#foodblog #instayum #yummy #bakery #foodporn #foodtographyschool #foodphotography #slice #delish #foodfluffer #damnthatsdelish #nachos #tortilla #tortillachips #partyfood #chipsandsalsa #mexicanfood #gamenight #sheetpan #tacos #tacotuesday #shrimp
Magic bars. Addictive! And so easy to make- a dige Magic bars. Addictive! And so easy to make- a digestive biscuit crust topped with chocolate chips and butterscotch chips, walnuts or pecans, sweetened coconut and condensed milk and baked until golden brown and bubbly. I dare you to stop at one! This weeks recipe for @tamimimarkets is a keeper- they have the best range of chocolate chips!

Ingredients:

2 cups digestive biscuit crumbs (200g)
1/2 cup butter, melted (113g)
1 cup semi sweet chocolate chips (150g)
1 cup butterscotch chips (150g)
3/4 cup chopped walnuts or pecans (100g)
1 cup sweetened shredded coconut (signature select)
1/2-2/3 container sweetened condensed milk (400g container)

Method:
1. Preheat oven to 180C. Mix the biscuit crumbs and melted butter until well combined, then press into a parchment paper lined 9x13 inch pan.
2. Layer by scattering the chocolate chips on top of the biscuits, followed by the butterscotch chips, the walnuts, then the shredded coconut. Evenly drizzle the condensed milk on top.
3. Bake for 25-38 minutes or until edges are golden brown and the condensed milk is bubbling. Cool completely before slicing.
I know that the weekend is over, but you can keep I know that the weekend is over, but you can keep the party going with easy sheet pan nachos. For a recent game night, we actually made our nacho chips from scratch and it was so easy (and yum!), I’ll probably never buy store bought tortilla chips again. To make homemade tortilla chips:

Ingredients:
As many corn tortillas as you want, we used 12 small corn tortillas 
Some salt for sprinkling.

Method: 
-Heat the oven to 190C (375F). Cut the tortillas into wedges, each tortilla will give you six wedges. 
- Lay in a single layer on a baking sheet. Bake for 6-7 minutes until starting to turn golden brown, then sprinkle with salt and turn over for another 6-7 minutes until golden brown and crunchy.
- Make nachos by sprinkling the tortilla chips with shredded cheddar cheese, and adding optionally refried beans and cooked ground beef. Bake until cheese is melted then remove from oven and top with anything you like:
- We used diced tomatoes, diced avocados, jalapeños, sliced black olives and chopped coriander. Serve with sour cream and salsa on the side 😍🥳 
.
.
.
.
.

#cakephotos #layercake #chocolate #ganache #foodblog #instayum #yummy #bakery #foodporn #foodtographyschool #foodphotography #slice #delish #foodfluffer #damnthatsdelish #nachos #tortilla #tortillachips #partyfood #chipsandsalsa #mexicanfood #gamenight #sheetpan
We celebrated my husbands birthday with lots of tr We celebrated my husbands birthday with lots of treats, but this cake from home business @littlecakecompanyy really stood out! The talented young woman behind this home business made him a gorgeously decorated cake we devoured. Moist and fluffy chocolate cake layered with Oreo cheesecake filling. Dreamy! I loved the alternative to a regular buttercream filling and the cake itself is so soft and moist. Definitely check out her page fir her flavors and range- like the Nutella cake pops that my kids fought over lol. Swipe to see the inside, would definitely order a cake from her again! Save this to remind you for your next occasion 🎂🥳.
.
.
.
.
.

#chocolatecake #magnoliabakery #cakestagram #cakephotos #layercake #chocolate #ganache #foodblog #instayum #yummy #bakery #foodporn #foodtographyschool #foodphotography #slice #delish #foodfluffer #damnthatsdelish
I’m totally living the bbq life here. It’s bec I’m totally living the bbq life here. It’s become my mission to grill as many times as possible until it gets too hot to be outdoors. Lots of places in Khobar make it easy! We got these mini slider patties, potato buns, burger sauce and all the prepped and ready cut up veggies from @redmarblesa a newly opened premium butchery. Making hamburgers at home has never been this simple and convenient. I really like that it’s a one stop shot for your complete burger. Their burger sauce is really good too! Save this post for next time a burger craving hits!
.
.
.
.
.

#delish #shishtaouk #cakestagram #skewers #bbqporn #chocolate #bbqseason #foodblog #instayum #yummy #winter #foodporn #foodtographyschool #foodphotography #grill #delish #foodfluffer #damnthatsdelish #coleslaw #kebab #fries #grills #bbq #lebanesefood #middleeasternfood #lamb #sliders #burgers
Definitely one of my favorite ways to start the da Definitely one of my favorite ways to start the day. A cup of black coffee and a slice of cake 😍. Thank you @espresso_bh for always spoiling me with goodies and testing out your baked goods on me. I also have to shout out @azulmarblewll for their gorgeous marble trays. Wishing you all a happy Wednesday!
.
.
.
.
.

#chocolatecake #magnoliabakery #cakestagram #cakephotos #layercake #chocolate #ganache #foodblog #instayum #yummy #bakery #foodporn #foodtographyschool #foodphotography #slice #delish #foodfluffer #damnthatsdelish #espresso #blackcoffee
Load More... Follow on Instagram

Copyright © 2019 on the Seasoned Pro Theme