• Skip to primary navigation
  • Skip to main content
  • Skip to primary sidebar
  • Skip to footer

 logo

  • Recipes
    • Breakfast
    • Sides
    • Soup
    • Main Meals
    • Healthy
    • Dessert
    • Drinks
  • Eating Out
  • About Me
    • Privacy Policy
  • Resources
    • Must Have Kitchen Tools
  • Nav Social Menu

    • Email
    • Facebook
    • Instagram
    • Pinterest

Alton Brown Crepes

Jul 13, 2020 · 2 Comments

Jump to Recipe
crepes being spread with Nutella

Such an easy and approachable recipe for crepes, five minutes of effort and a handful of ingredients are blended together. Alton brown crepes make the perfect thin lacey crepes that have spot on flavor and texture!

It’s not often I have someones name in one of the recipes posted on my website, but Alton Brown absolutely deserves to be featured. I love this recipe!

Why is Alton Brown crepes recipe so good?

nutella crepes with more crepes in the background

I got this recipe from a highly rated food network recipe by the one and only Alton Brown. I love his recipes, because he’s a food scientist so he’s so good with the technicalities.

This recipe is so easy. You place all the ingredients together and mix them up. That’s the extent of it. Did I mention you only need 10 seconds of mixing?

It’s perfectly balanced. He gives the option of making a sweet crepe batter (always my choice) or savory crepe batter. I always go with the sweet option, and the only thing I forgo is adding any liquer to the batter.

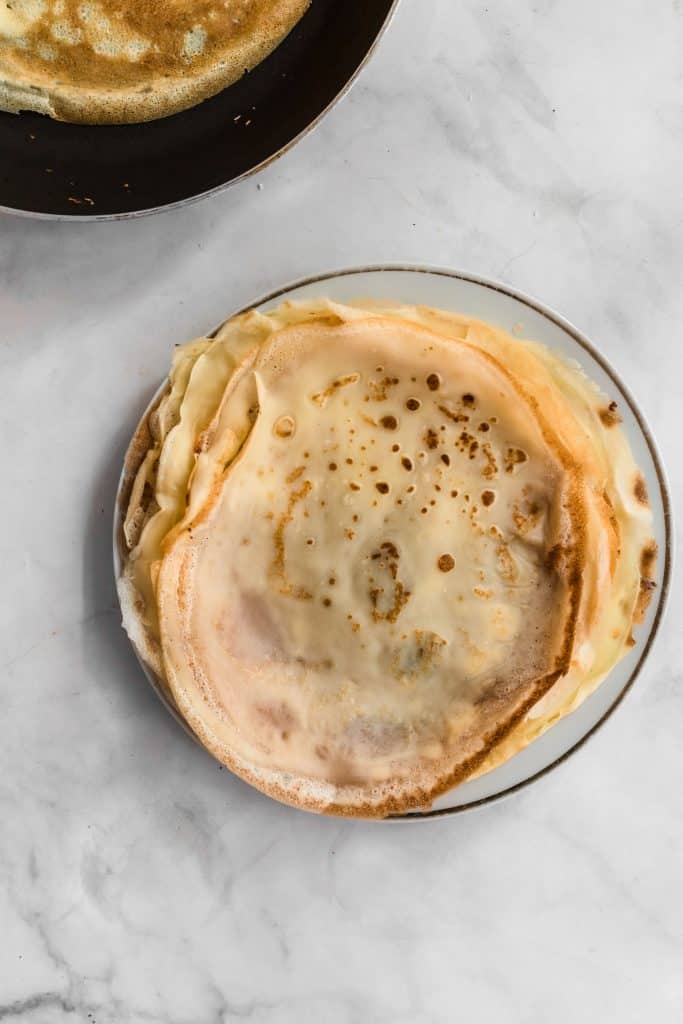
The crepes come out restaurant quality. Truly delicious. They are crisp on the edges, and more tender towards the center. They rival the best crepes I’ve had anywhere! And as good as pancakes are, crepes always have a wow factor to them.

They are infinitely customizable with the filling/topping of your choice.

What do you need to make crepes?

ingredients to make nutella crepes

The basic ingredients are:

Eggs, milk, water, flour, and melted butter. THAT’S IT!

For sweet crepes: (like the recipe card below) you add a little sugar and vanilla

For savory crepes: you add a pinch of salt, and 1/4 cup fresh herbs of your choice.

How to make easy crepes:

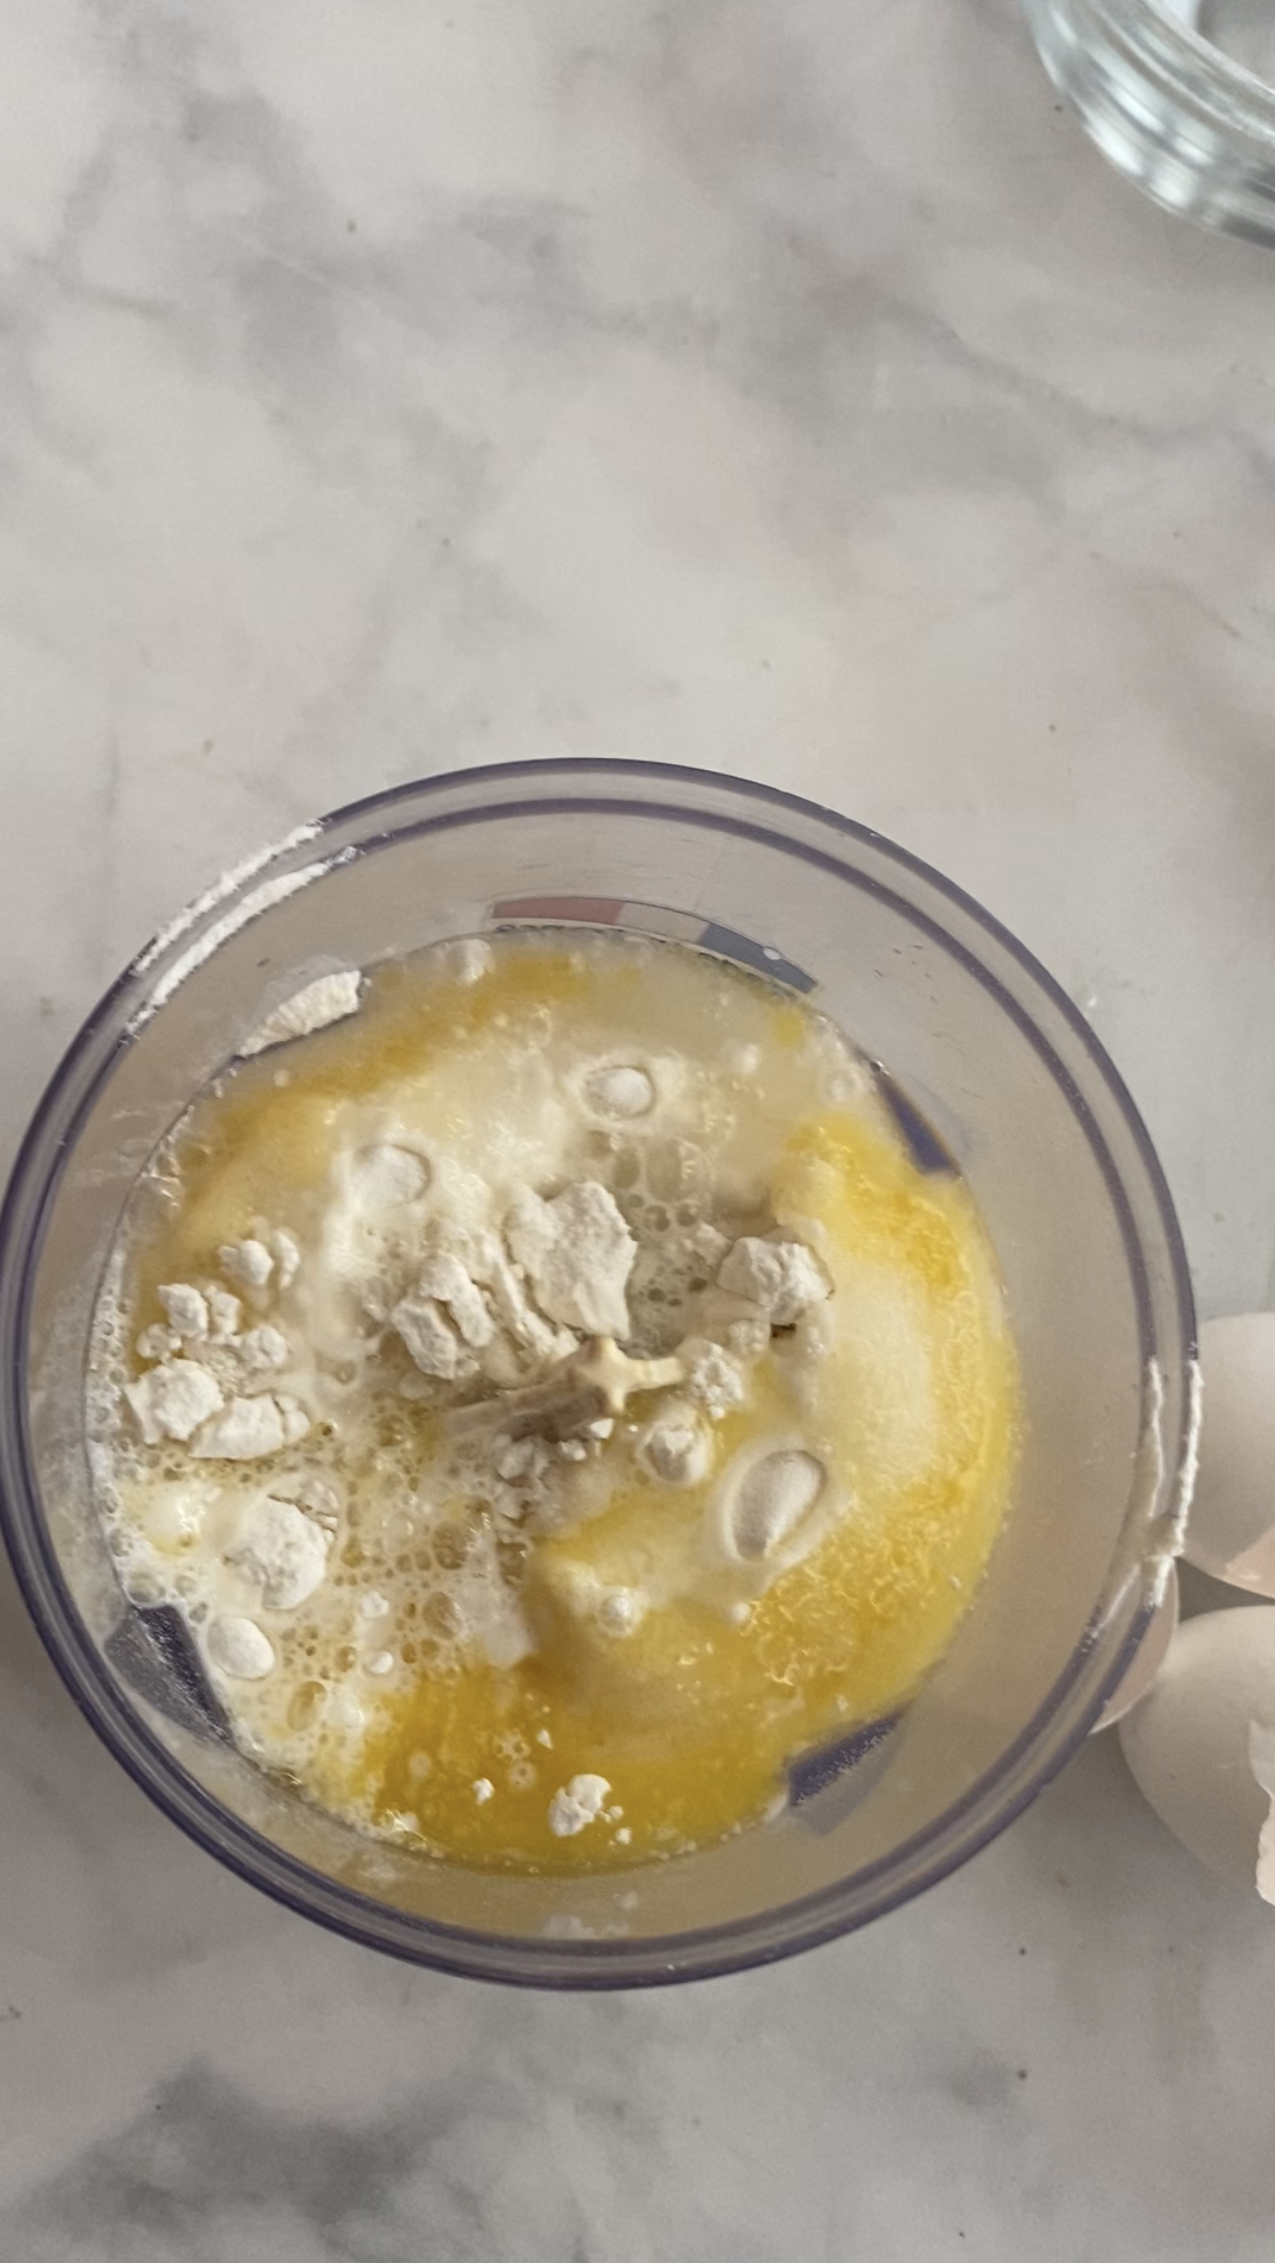
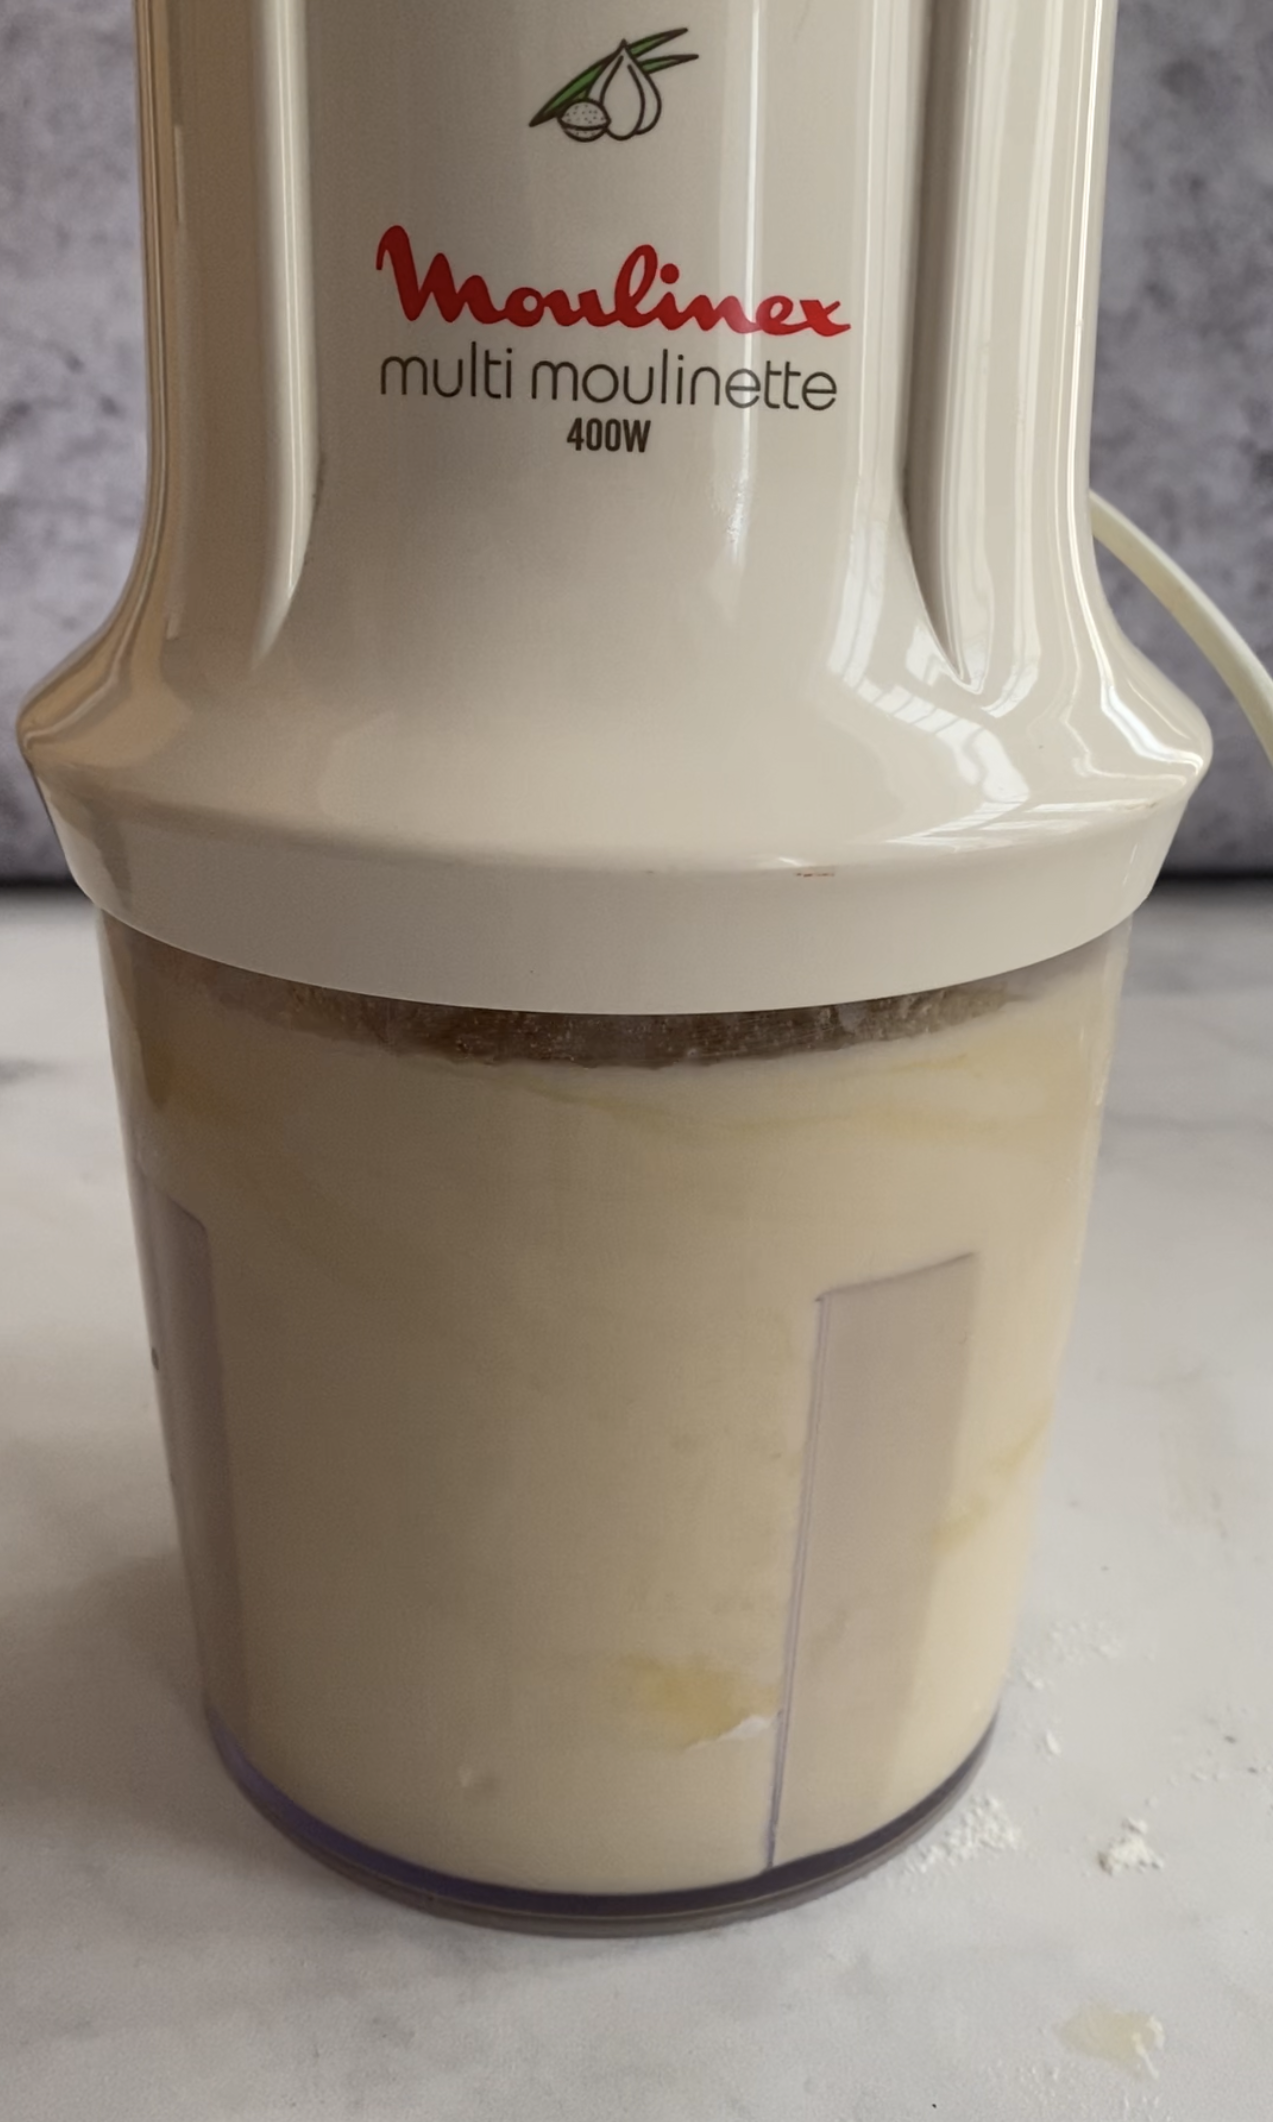
Combine all the ingredients in a blender, and pulse for around 10 seconds to combine.

crepes batter in the blender

Place the batter in the fridge for an 1, which allows the bubbles to subside so the crepes don’t tear during cooking. One of my favorite things about this recipe is that the batter can be made up to 48 hours in advance. I personally love making the batter the night before so it’s ready for an early breakfast the next day.

Make the crepes by melting some butter in a pan on medium heat, then adding around 2 tbsp of batter and swirling evenly until you get an even thin layer. Cook for around 30 seconds, then flip and cook for a further 10-15 seconds until both sides have cooked and set.

cooked crepes on a plate

Can I make the crepes without a blender?

Yes! Whisk vigorously. A blender will make your life easier because it’ll really help to combine the flour with the liquid ingredients, but it isn’t make or break.

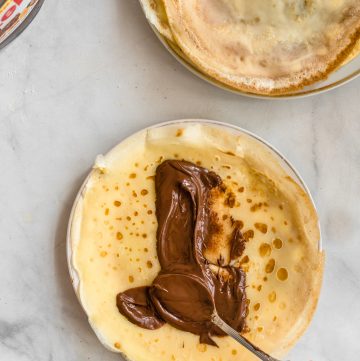
What to fill or top crepes with:

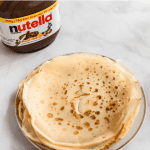
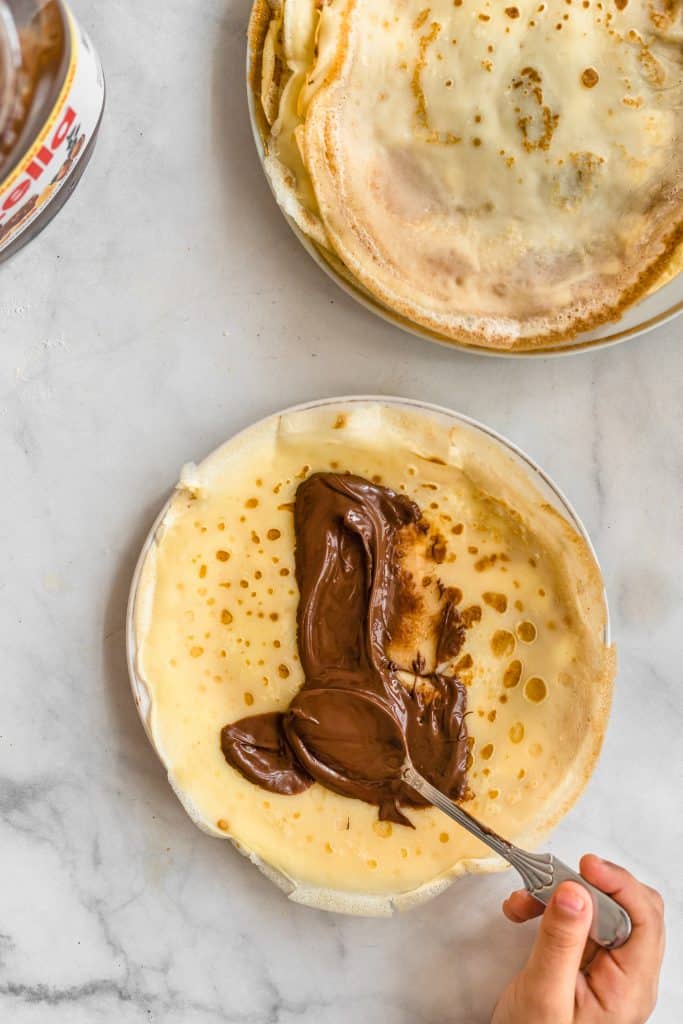
I’m always a Nutella crepe person myself. I just think that it’s the perfect crepe filling. These crepes I filled with a thick layer of nutella down the middle, and dusted with powdered sugar.

I also had some crepes with a squeeze of lemon juice and a sprinkling of white sugar, and those were delicious and light.

Another option is some jam, or just to drizzle the crepes with honey or maple syrup.

Salted caramel would be amazing too! The possibilities are really endless.

Go extra and serve these as dessert style crepes with vanilla ice cream on the side. Swoon.

cooked crepes on a plate with nutella on the background

Storing extra crepes:

Crepes will last in the fridge, tightly wrapped for a couple days, and in the freezer for a couple months.

Alton Brown Crepes

The easiest and most delicious crepe recipe made with a handful of ingredients in a blender.
5 from 1 vote
Print Pin Rate
Course: Breakfast
Cuisine: French
Keyword: crepes
Prep Time: 5 minutes
Cook Time: 2 minutes
Calories: 270kcal
Author: Farah Abumaizar

Ingredients

  • 2 eggs
  • 3/4 cup milk
  • 1/2 cup water
  • 1 cup flour 125 g
  • 3 tbsp melted butter 43g
  • 2.5 tbsp sugar
  • 1 tsp vanilla extract

Instructions

  • Place all the ingredients in a blender or food processor. Pulse for 10-15 seconds until well combined. Chill batter in fridge for one hour or up to 48 hours.
  • After chilling, heat a non stick pan over medium heat. Place a little butter in the pan and swirl around to coat. Pour around 2 tbsp (about 1 ounce) of batter in the pan and swirl to evenly coat the pan in a thin layer. Cook for 30 seconds or until edges dry up, and flip. Cook on the other side for 10-15 seconds until crepe has cooked through.
  • Keep going until all the batter is finished.
  • Enjoy filled or topped with your favorite toppings of choice, see post above for inspiration!

Notes

Recipe from Alton Brown.
Tried this recipe?Mention @everylittlecrumb or tag #everylittlecrumb!

Nutrition

Calories: 270kcal
1
Ingredients you need
2
Eggs, flour, sugar, and melted butter in a blender
3
Along with the milk and water
4
And vanilla!
5
Pulse around 10 seconds to combine
6
Then chill batter for one hour or overnight
7
When ready to cook, add some butter to a skillet on medium heat
8
Add a couple tbsp of batter and swirl to coat
9
Cook for around 30 seconds, then flip and cook for another 15
10
Spread generously with Nutella
11
And enjoy!
Check out my other content @everylittlecrumb on Jumprope.

If you liked this recipe, you might like:

Salted Caramel Apple Dutch Baby

Sour Milk Pancakes

Lemon Poppy Seed Pancakes

Sourdough French Toast

Breakfast, Recipes

Previous Post: « Eggplant Pomegranate Salad
Next Post: Cherry Tomato Pasta Sauce »

Reader Interactions

Comments

  1. Dixie Alexander says

    August 10, 2020 at 12:37 pm

    5 stars
    Where I live, in Canandaigua, NY, there is a delightful French restaurant called Simply Crepes. It’s incredible. I always go for the strawberry crepes. Thanks to you, I now have a great recipe to make them myself. Dixie

    Reply
    • Farah Abumaizar says

      August 10, 2020 at 10:34 pm

      I am so happy to hear that Dixie! Your comment put a big smile on my face so thank you so much! Will definitely need to try a strawberry version xx

      Reply

Leave a Reply Cancel reply

Your email address will not be published. Required fields are marked *

Recipe Rating


Primary Sidebar

Get more stuff

Subscribe to our mailing list and get interesting stuff and updates to your email inbox.

Thank you for subscribing.

Something went wrong.

we respect your privacy and take protecting it seriously

FeedFeed

Featured Recipes

Nana tea

Halal Guys Chicken and Rice

Aish El Saraya

Instant Pot Enchilada Soup

Death By Chocolate Zucchini Bread

More

Footer

everylittlecrumb

Farah Abu Maizar | Food Lover
Good morning! If there’s one thing we like doing Good morning! If there’s one thing we like doing, it’s experimenting with breakfast dishes 🍳.These beauties are froached eggs- poached eggs that are lightly fried and seasoned with breadcrumbs. Best of both worlds! Creamy poached eggs, runny yolk but a little crisp on the white part of the eggs. So good! Inspired by @sveverything , we used our sous vide machine for this but you can do this with regular poached eggs. Recipe can be found linked in bio or at https://everylittlecrumb.com/froached-eggs/ . Team runny yolk anyone? 
.
.
.
.
.
#eggs #poachedeggs #poachedegg #eggsontoast #beautifulcuisines #tasty #delish #foodphotography #foodstyling #foodstylingandphotography #cheeseontoast #foodblogger #foodie #breakfast #brunch #instayum #yum #brunch #tastingtable #f52community #food52 #yolkporn #friday
How I spend a lot of my weekends😂. Nothing like How I spend a lot of my weekends😂. Nothing like a big bowl of cookie dough to say weekend mode on! Are you like me and end up eating more dough than actual cookies? My foolproof recipe I use and post time and time again 👇🏼(and often double the batch so I can store some in the freezer!)

Ingredients:
1 stick butter, softened 113 g
3/4 cup tightly packed brown sugar (I like using 1/2 cup light brown and 1/4 cup dark brown, but you can use either or) 150 g total
1/4 cup white sugar 50 g
1 egg, room temperature
1 tsp vanilla extract
1 3/4 cup all purpose flour 220 g
3/4 tsp baking soda
1/4 tsp salt
1 cup semi-sweet chocolate chips or chunks
flaky salt for topping, optional

Instructions:
-In the bowl of a stand mixer fitted with a paddle attachment, or a handheld mixer, cream together butter, brown sugar, and white sugar for 5 minutes on medium speed until light and fluffy.
-Once five minutes is over, add in egg and vanilla and mix until combined.
In a separate bowl, mix flour, baking soda, and salt, and mix until combined. Add these dry ingredients to the butter mixture on low speed, and mix until just combined.
-Using a wooden spoon or spatula, mix in chocolate chips or chunks until just combined. Place bowl of dough in fridge for at least 30 minutes to chill.
-While dough is chilling, heat oven to 180 C (350F). Portion dough out into heaped 1 tbsp-2 tbsp sized dough pieces on parchment paper lined baking sheets. 
-Bake for 11-12 minutes or until golden brown on the edges but still soft in the center. Cool until cookies firm up, then enjoy, still warm.
.
.
.
.
.

#chocolatecake #cookiemonster #cakestagram #cakephotos #layercake #chocolate #weekendbaking #foodblog #instayum #yummy #bakery #foodporn #foodtographyschool #foodphotography #chocolatechips #delish #foodfluffer #damnthatsdelish #cookiedough #chocatechipcookies #bakes #bakestagram #doughbowl #chocolatechips #hersheys
Bbq salmon bowls with mango avocado salsa- unbelie Bbq salmon bowls with mango avocado salsa- unbelievable! And start to finish, you can be eating these in 15-20 minutes. Save this recipe for your next meal, you don’t want to miss out!

I’ve partnered with @kilosamak to produce a few recipes with their quality seafood- I’ve tried several of their items and genuinely loved them all! They deliver seafood straight to your door for you to enjoy and cook at home. Takes all the guesswork out of trying to choose and clean fish yourself, perfect solution for someone like me who loves seafood but isn’t so great at prepping it! Check out their Instagram page on how to order, or head to the link in my bio.

This salmon has a smoky slightly sweet rub, is baked in the oven for ultimate ease, and gets piled on to rice and topped with an easy, addictive, zingy mango and avocado salsa. Adapted from @pinchofyum , I’ll make this again and again!

Ingredients:
For the salmon:
2 fillets, about 250 g each 
Spice Rub:
2 tbsp brown sugar
1.5 tsp paprika 
1 tsp garlic powder
1 tsp onion powder, optional 
1/2 tsp chili powder
1/2 tsp salt 
2 tbsp olive oil 

Mango avocado salsa:
1 diced mangos 
1 diced avocado
1/4 cup finely diced coriander 
1/4 cup finely diced red onion 
1 inch spicy green chili pepper, finely chopped
1 tsp honey
Juice and zest of one lime
Salt to taste

Method:
- Make the salsa by mixing together all the salsa ingredients and placing bowl in fridge while you make the salmon.
- Heat oven to 240C, and line a baking sheet with parchment paper. 
-Mix together all the ingredients for the salmon rub, and rub thoroughly all over the salmon, both sides.
- Bake for 10-12 minutes until salmon is opaque and cooked all the way through.
-Assemble bowls with rice, flaked pieces of salmon,and plenty of mango avocado salsa. Enjoy 😍

Catch the steps in my story!
Have you tried this pasta yet? Save this for your Have you tried this pasta yet? Save this for your next weeknight meal! Saucy macarona iltaybeen, can’t get much more comforting.  Adapted from @jedir3waish , makes for an easy delicious main that’ll make your family including kids very happy! Can find a step by step linked bio, or at https://everylittlecrumb.com/macarona/ , or in my story!

INGREDIENTS:
 
2 tbsp olive oil, divided
big pinch of salt
3 heaped tbsp tomato paste, divided 2 oz or 70 g
1 pack elbow macaroni 14 oz or 400 g
1 onion, very finely diced
1 zucchini, finely diced
1 carrot, finely diced
4-5 garlic cloves, minced
250 g ground beef
1 tsp seven spices
1 tsp turmeric
1/2 tsp paprika powder
1/4 tsp basil
1/4 tsp cinnamon powder
1/4 tsp garlic powder
1/2 tsp black pepper
1 tsp salt
1 can crushed tomatoes 14.5oz (400g)

NSTRUCTIONS
 
Bring a large pot of water to boil, add 1 tbsp olive oil and the salt, one tbsp of tomato paste, then the pack of pasta. Cook until al dente, then drain the pasta, reserving the pasta water. Set cooked pasta aside.

In a large skillet, heat the remaining tbsp of olive oil. Once hot, add the diced onion, and cook for 4-5 minutes until softened. Add the diced zucchini and carrots, and garlic and cook for a further 4-5 minutes until softened slightly.

Add the ground beef, and cook, smushing with a wooden spoon to break up the meat. Keep cooking until the beef is browned and cooked through, then optionally, drain the fat.
Add in the salt, pepper, and all the spices. Cook for another minute or so. Add the remaining 2 tbsp of tomato paste, and stir.

Add the can of crushed tomatoes and stir to combine. Bring to a simmer, then add a big ladleful of the reserved pasta water and simmer for 2-3 minutes on low heat.

Add the pasta to the sauce (I don't always add all the pasta, maybe 3/4 of the cooked amount until the finished dish is as saucy as I like). Stir to coat, cook for another minute or so until the pasta is warmed through, then enjoy!
This gorgeous tiramisu was so kindly sent to me by This gorgeous tiramisu was so kindly sent to me by @cadysweets.sa on my birthday, and we enjoyed every light fluffy bite of it. Their old account got hacked so follow along and support their new account ! They have a bunch of cakes and sweets for every occasion, so make someone or yourself happy and order one for a treat🤩! Send this to the tiramisu lover in your life 🍰.
.
.
.
.
.

#chocolatecake #magnoliabakery #cakestagram #cakephotos #layercake #chocolate #ganache #foodblog #instayum #yummy #bakery #foodporn #foodtographyschool #foodphotography #slice #delish #foodfluffer #damnthatsdelish #tiramisu #birthdaytreat #dessertbae #dessertoftheday #scoop #foodstyling #foodstylingandphotography
Easiest at home crusty bread with a great open cru Easiest at home crusty bread with a great open crumb texture. It’s the no knead bread from @breadin5 and has yet to fail me. Check my story for the step by step, and swipe for a video reveal.

Ingredients for two small loaves:
1.5 cups lukewarm water 
1/2 tbsp any type of yeast
1/2 tbsp salt
3 1/4 cup plain flour (450g)

Method:
In a large bowl, stir together the water with the yeast and salt. Try to dissolve but it’s fine if you have clumps.
2. Add flour all at once and stir, just until no flour patches remain.
3. Cover loosely with a kitchen cloth and leave it to rest for 2 hours in a warm place until risen and bubbly.
After this rest you can:
- Use dough immediately if impatient, but it’s easier to work with if cold, so maybe pop in fridge briefly
- Or, their recommended method and the one I do, leave in the fridge loosely covered for 12 hours or overnight. 
Refrigerated dough lasts up to two weeks, and flavor depends over time!
4. The next day, the dough might look deflated. That’s fine! When ready to bake, divide dough in half (I got two 400g dough balls)- it might be easier to handle if you sprinkle the dough lightly with flour, and take the half you are going to bake out of the fridge. Let it rest on a parchment paper lined baking sheet 40-90 minutes. The longer the more interior bubbles you should have. Preheat oven to 235C (450F), and after rest, make a few deep slashes in the dough with a sharp knife.
5. Place in the middle rack of the oven, and on the bottom rack place a roasting pan that had about a cup of hot water in it. This will create steam which gives a crustier crust!
6. Bake for 30-35 minutes or until deep golden brown.
7. Let it cool completely before enjoying!
.
.

.
.
.

#damnthatsdelish #foodfluffer #thebakefeed #feedfeed #tastingtable #forthemaking #BHGfood #foodblogfeed #bakedfromscratch #bakinglove #f52grams #foodbloggerpro #bakersofinstagram #TOHfoodie #foodphotography #canonphotos #bread #instayummy #kitchn #huffposttaste #food #dough #foodie #nokneadbread #homemadebread #doughter
Good morning! With dine in still closed in Saudi, Good morning! With dine in still closed in Saudi, Friday pancakes are fast becoming a tradition. And honestly, I don’t think I’ve had better pancakes at any restaurant recently! The easiest, fluffiest diner style pancakes are a huge hit in our family, find the recipe below adapted from @allrecipes . I like to barely warm the oven (110C or so) and keep the finished pancakes in a pan in the oven until I’m done with all the batter so they stay warm and perfect 👌🏼.

Ingredients
3/4 cup milk 170g
1 tbsp white vinegar
1 cup flour 125g
2 tbsp sugar 25g
1 tsp baking powder
1/2 tsp baking soda
1/4 tsp salt
1 egg room temperature
1/2 tsp vanilla
2 tbsp butter, melted 28g

Instructions:
-In a large bowl, combine the milk and vinegar, and let aside to stand for 5 minutes until curdled. Whisk to combine.
-In a separate large bowl, mix together the flour, sugar, baking powder, baking soda and salt.
-Add an egg, the vanilla and the melted butter to the buttermilk and whisk to combine.
-Add the dry ingredients all at once to the wet, and whisk until flour patches disappear. A few lumps are fine, but don't over mix.
-Let the batter rest for 5-10 minutes while you heat a pan on the stove.
lightly grease the pan with nonstick spray or butter, and pour about 1/4 cup of batter on the pan. Cook for 2-3 minutes on each side or until golden brown. (Flip the first time once you see bubbles form and the edges of the pancake dry up).
-Enjoy with toppings of your choice!
.
.
.
.
.
#pancakes #pancakerecipe #blueberrypancakes #maplesyrup #breakfast #morningslikethese #fridaymorning #flatlay #foodfluffer #breakfastrecipes #breakfastfood #breakfastofchampions #pancakelover #food #foodtography #foodtographyschool #foodphotography #delish #foodphotos #weekendbreakfast #eatingathome #recipeoftheday #foodporn #foodflatlay #blueberries #trayoftheday
One of my photos from my shoot @tackle.baks . How One of my photos from my shoot @tackle.baks . How insane does this tom yum soup look? For those who haven’t tried this casual seafood spot yet, you really should! The food is great and priced very reasonably, and they have some menu items I’m obsessed with like their crispy fish burger, the salmon poke salad and the creamy truffle shrimp👌🏼. They currently have a delivery offer going for only 5SAR on HungerStation, so no time like the present! Have I tempted you with this photo of the tom yum soup? I’m hungry just writing this caption🤤.
.
.
.
.
.
#soup #tomyum #tomyumsoup #food #foodphotography #canonphotography #canon #seafood #seafoodlover #shrimp #delish #beautifulcuisines #foodtographyschool #foodtography #foodblogger #instayum #lonelyplanetfood #dametravelerfoodie #soupseason #restaurantphotography #khobar #tastemade #tastingtable #foodfluffer
Load More... Follow on Instagram

Copyright © 2019 on the Seasoned Pro Theme