

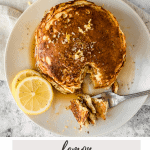


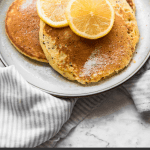


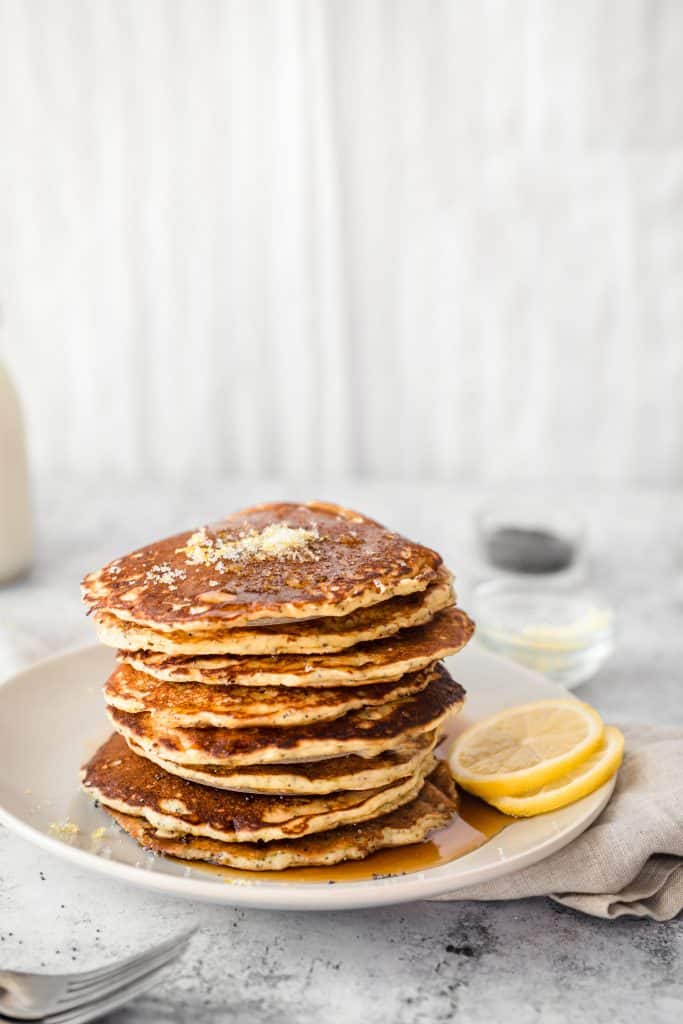
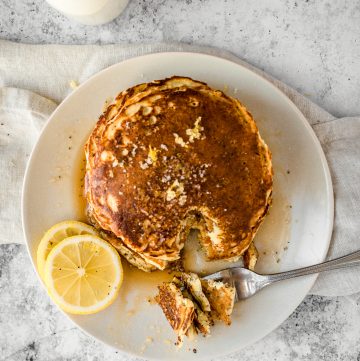
These lemon pancakes are tender, tangy and plenty delicious. Easy to make, great texture and perfect flavor, I guarantee these will become a favorite. Lemon buttermilk pancakes melt in your mouth and make for a really special breakfast.
Why make this lemon pancake recipe?
I’ve been making these pancakes for years and years. The recipe is adapted from Joy the Baker, one of my favorite sources for anything sweet- especially breakfast/brunch recipes.
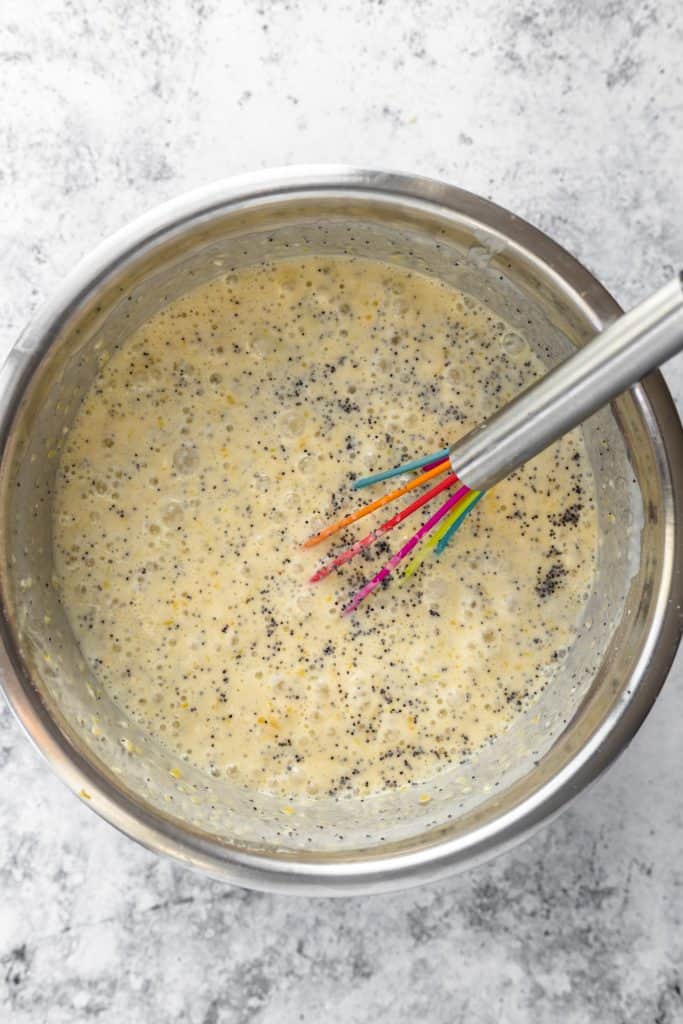
To make these even better, you can add in poppy seeds or chia seeds. You’ll get tender and light lemon buttermilk pancakes, with little crunchy bursts of poppy or chia seed. It’s a really delicious pairing!
Lemon buttermilk pancakes melt in your mouth. They are so soft and tender and are completely transformed from plain old pancakes.
There’s nothing difficult about this recipe. If you can make plain pancakes, you can make these pancakes.
There are so many different topping and mix-in options to always keep these fun!
Ingredients you need for this recipe:
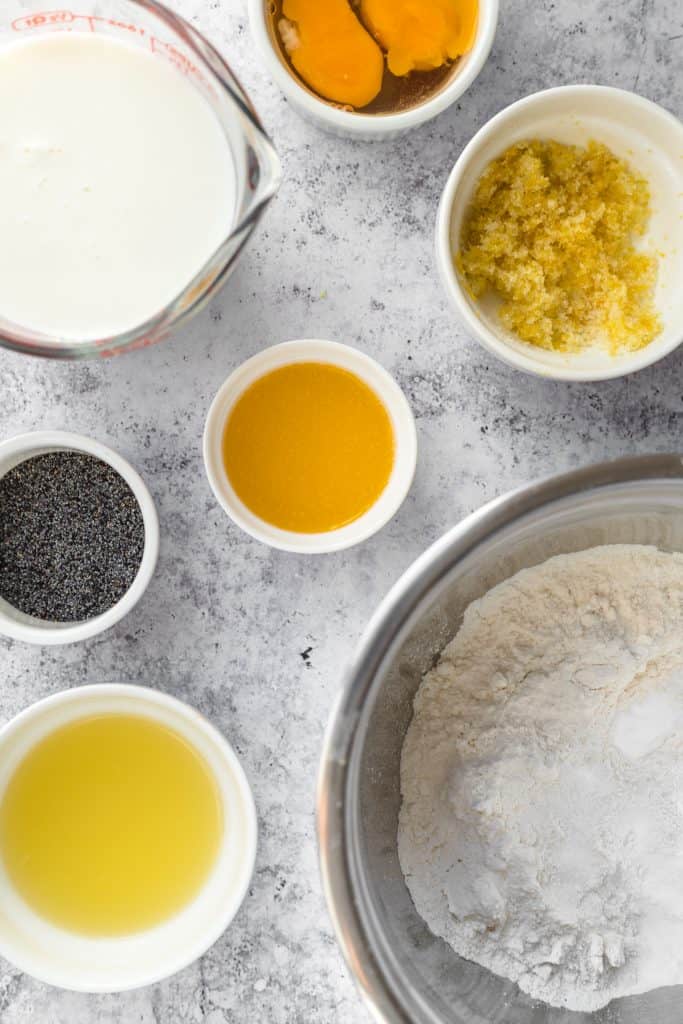
Granulated sugar and lemon zest: You’ll rub the lemon zest into the sugar, until the sugar is pale yellow and moist and fragrant. This is what gives you so much of the flavor in these lemon and sugar pancakes!
Flour: Regular all purpose flour
Baking powder and baking soda: A combination of both gives the perfect lift
Salt: Always helps to add a pinch of salt to anything sweet to balance the flavors
Buttermilk: To make lemon buttermilk pancakes you either need ready made buttermilk, or can make your own. I always recommend whole milk when baking or making pancakes!
To make your own buttermilk: for every 1 cup of buttermilk, measure 1 tablespoon of white vinegar or lemon juice (I usually use vinegar), then pour fresh milk over this to make up 1 cup of milk. It’s easier to use a larger measuring jug to avoid spilling.
If you’re making the 2 cups needed for the recipe in one go, add 2 tablespoon of vinegar at the base of a pyrex measuring cup, then pour enough to milk to top it up to 2 cups. Let mixture stand for 5 minutes, in which time the vinegar or lemon juice will have soured the milk and basically turned it into buttermilk- you’ll see that it clots or foams a little. Stir, and use in the recipe as directed.
Eggs: Preferably at room temperature
Vanilla extract: for flavor
Lemon juice: To give us more tangy lemon flavor in the pancakes
Butter: unsalted butter, and melt before using.
Optional but highly recommended: poppy seeds. Nothing like a lemon poppy seed combination, especially in the form of pancakes!
How to make these pancakes:
- Combine the dry ingredients in a bowl (flour, baking powder, baking soda, and salt)
- Combine the wet ingredients in a separate bowl (eggs, vanilla, buttermilk, melted butter and lemon juice.)
- Add the wet ingredients into the dry and stir until just mixed.
- Let the batter rest for 10 minutes, meanwhile heat griddle or frying pan on the stove. Grease with some butter or non stick cooking spray.
- When batter has rested, scoop out 1/4 cup of a batter at a time onto frying pan. Cook until bubbling on one side and golden brown on the other, then flip and cook for another 1 minute or so until golden brown on both sides.
Substitute for poppy seeds:
If you don’t have poppy seeds easily available (like in the Middle East), I’ve tested out substituting for chia seeds..the lemon chia seed pancakes were so good. I didn’t miss the poppy seeds at all!
Pancakes for a crowd
To be more efficient at making pancakes faster, without a griddle, this is my little tip. I always use two stove burners, two skillets, and work on cooking up two pancakes at once.
I’ll pour batter in one skillet, then immediately onto the other skillet on the other stove burner, flip the first pancake then the second and repeat! It makes all that flipping work go by much faster.
How to keep pancakes warm:
My favorite tip, also from Joy the Baker, is to heat the oven at a low temperature while you are cooking up the pancakes (90 C or 200 F). Place a large baking sheet in the oven. As soon as a pancake is cooked, slide it onto the baking sheet and leave it in the oven while you finish up all the batter.
This ensures the pancakes stay warm without steaming and becoming soggy (like they would if you just covered them with foil). The low oven temperature means they won’t over bake. I do this every time I make pancakes! That way I can serve all the pancakes at once after the batter is done cooking, and enjoy them warm once I’m off pancake flipping duty.
Storing leftover pancakes:
Pancakes will keep just fine in an airtight container, or tightly wrapped individually in the fridge for up to 5 days. To reheat them, gently microwave them. You can even pop them in a toaster for 20 seconds or so.
Pancakes also freeze really well. Place the pancakes on a baking sheet in a single layer and pop this baking sheet in the freezer for 30 minutes to an hour or until pancakes are frozen solid. This will keep them from sticking together when you put them in a freezer bag.
Place in freezer bag, seal tightly and label. When you want to eat them, you can pull as many as you need straight out of the bag.
To reheat, just microwave. Start at 15 seconds and then add 5 second intervals until warmed through. Not quite as perfect as fresh pancakes but pretty darn close.
What to serve lemon pancakes with?

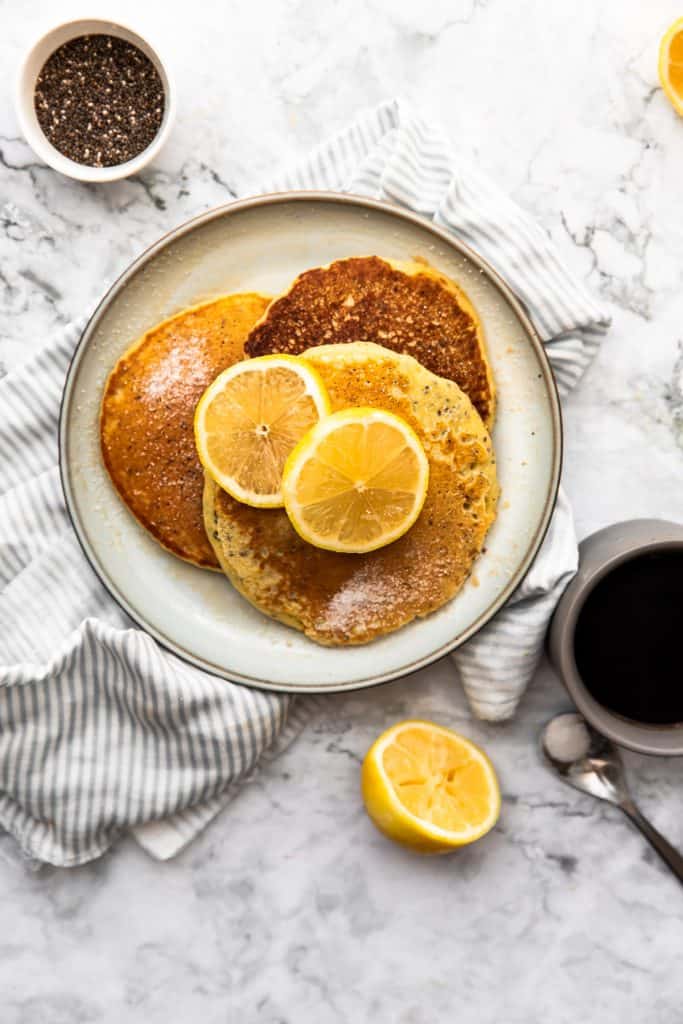
I love lemon and sugar pancakes, so to keep these simple you can just sprinkle some more sugar on top, or even add a squeeze of lemon juice before topping with sugar (or lemon zest infused sugar!)
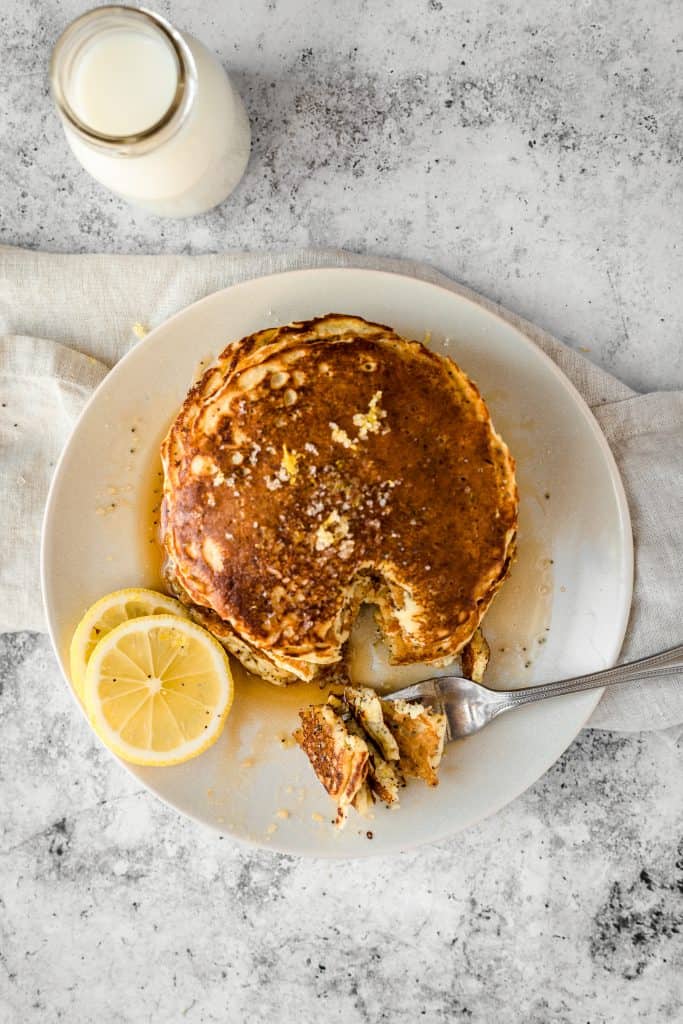
Of course, you can go the classic route and drizzle with pure maple syrup. If you want to make these extra special, warm the maple syrup before serving.
Blueberry lemon pancakes are a great combination, so try topping with fresh blueberries, and maybe a dollop of whipped cream. You could even scatter a few blueberries on top of the pancake batter cooking in the pan to make proper lemon blueberry pancakes.
You could also just add mixed fresh berries on top, strawberries, raspberries, blackberries all would be delicious.
You can top these pancakes with lemon curd for an extra citrusy breakfast.
Try using honey instead of maple syrup, it works really well too.
Tips and tricks for the best pancakes:

- Don’t over mix the batter- this will result in tough and chewy pancakes. Lumps are totally fine, you just need to mix enough that you don’t see dry pockets of flour.
- This recipe asks that you rest the pancake batter for 10 minutes. While this isn’t strictly necessary, what this enables is that the gluten that develops while mixing relaxed slightly, leading to more tender pancakes. Use this time to heat the skillet!
- Only flip the pancakes once, so you get an even golden brown color on both sides. Once the edges of the pancake start to dry up and bubbles have formed, you’re good to flip onto the opposite side.
- Use an actual measuring cup or ice cream scoop to portion out the pancakes to get even sized pancakes. You may need to grease in between portioning out pancake batter if the batter starts to stick.
Recipe FAQs:
This recipe is definitely best made as is, but if you are looking for another amazing pancake recipe using buttermilk but no lemon, head to my popular Sour Milk Pancakes.
Absolutely! For up to 2 months in a tightly sealed freezer bag. See “storing leftovers” above for detailed instructions.
I haven’t tried either modification! If you do try, please comment below and let me know what you did and how it worked out!
For more citrus recipes:


Lemon Pancakes
Ingredients
- 2 tablespoon granulated sugar
- 2 tablespoon fresh lemon zest
- 2 cups all purpose flour (250 g)
- 2 teaspoon baking powder
- 1 teaspoon baking soda
- 1 teaspoon salt
- 2 cups buttermilk* *see recipe notes for instructions on making your own
- 2 large eggs, room temperature
- 2 teaspoon vanilla extract
- 2 tablespoon fresh lemon juice
- 4 tablespoon unsalted butter, melted 56 grams, 1/2 a stick
- 2 tablespoon poppy seeds optional, see notes
- extra butter or pan spray for cooking
Instructions
- In a small bowl, combine the sugar and lemon zest, rubbing the zest in with your fingertips until the sugar is pale yellow and scented.
- In a large bowl, whisk together dry ingredients (flour, baking powder, baking soda and salt). Add the lemon sugar and whisk until combined.
- In a separate bowl, whisk together buttermilk, eggs, vanilla, lemon juice and melted butter. Pour this wet ingredient mixture into the dry ingredients, and stir until just combined, a lumpy batter is fine. Stir in poppy seeds or chia seeds if using.
- Let the batter rest for 10 minutes, meanwhile heat your griddle or frying pan on the stove. Grease with some butter or non stick cooking spray.
- When batter has rested, scoop out 1/4 cup of a batter at a time onto frying pan. Cook until edges are starting to dry up and batter is bubbling on one side and golden brown on the other, then flip and cook for another 1 minute or so until golden brown on both sides. See recipe notes on how to keep finished panakes warm until you are done cooking all the batter.
- Serve with pure maple syrup, or a squeeze of lemon juice and sprinkle of sugar and enjoy!
Michelle says
I love everything about these pancakes! Lemon and poppyseed is one of my all-time favourite flavour combos! And all in a pancake? Yes please!
Farah Abumaizar says
Great combination for sure!
Adrianne says
Lemon and Poppy seeds are one of my dream combinations, yum!! I love the flavours and textures and can’t wait for a weekend to try this recipe out. Cheers!
Farah Abumaizar says
I hope you love the recipe Adrianne!
Romina Degli Esposti says
These pancakes are beautiful and so fluffy! I absolutely love the crunch from the poppy seed.
Farah Abumaizar says
Thanks so much Romina !
Dannii says
I always forget home much I love anything sweet and lemon flavoured. I have to try these.
Farah Abumaizar says
Lemon flavored treats are the best!🍋😍
Anjali says
These pancakes turned out to be absolutely delicious! They were a nice way to change things up from our regular pancake breakfasts on the weekends – and my kids loved these too!
Farah Abumaizar says
So glad to hear that Anjali!